Table of Contents
Advertisement
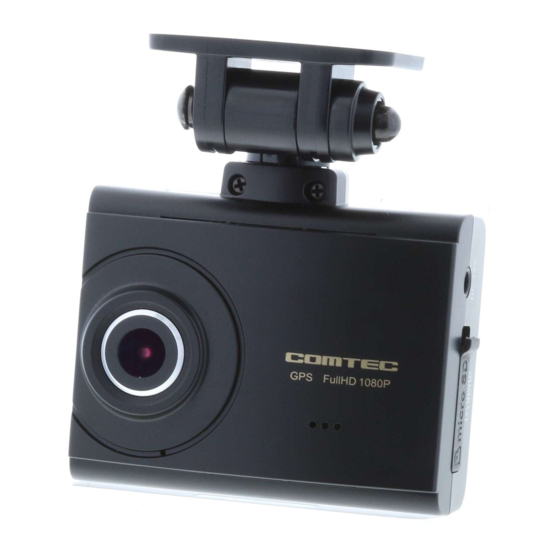
Drive recorder
ZDR-024CE
By default, the display on the LCD will disappear when the vehicle is driven at
a speed of 10 km/h after startup to avoid unsafe driving. (=> P 53)
Thank you for purchasing this product. This manual describes the installation
and operation procedures. Before use, please read this manual thoroughly for
proper use. After you have read this manual, please keep it in a place where
you will be able to refer to it at any time.
Note that the warranty is attached at the end of this manual. Enter necessary
items and please keep it safe.
Do not insert/remove the micro SDHC card while this product is under operation
(including during parking surveillance mode). Doing so may damage the card or the
* If the parking surveillance mode is active, inactivate the parking surveillance mode
by referring to page 59, and then remove the card.
Advice
When an accident occurs, be sure to remove and store the micro SDHC card
to avoid overwriting the recorded data.
Installation manual /
operation manual / warranty
Caution
-
Advertisement
Table of Contents

Summary of Contents for Comtec ZDR-024CE
- Page 1 Drive recorder Installation manual / ZDR-024CE operation manual / warranty By default, the display on the LCD will disappear when the vehicle is driven at a speed of 10 km/h after startup to avoid unsafe driving. (=> P 53) Thank you for purchasing this product. This manual describes the installation and operation procedures.
-
Page 2: Table Of Contents
Playing video footage with the Index …………………………… main unit ………………………… Warranty Statement Play video footage on a (please read) ………………… television ………………………… Playing video footage on a ZDR-024CE Warranty ……… personal computer ……………… Saving the recorded data to the personal computer ………………... -
Page 3: Introduction
Introduction Safety precautions Before using the device, be sure to read the "Safety precautions" for proper use. Follow the precautions and matters described in this manual to prevent harm and damage to persons using the device and others. The degree of harm and damage as a result of improper handling has been categorized into three groups: "Danger,"... - Page 4 Introduction Warning ! In case this product is damaged or fails, immediately stop using it, and return it to a breakdown of your car. Do not use this product nearby medical devices as it may affect proper function of those medical devices. Do not insert a pin or wire in pits or gaps of the product.
-
Page 5: Precautions For Use
Introduction Precautions for use Please note that this product does not guarantee to record all video footage. This product is aimed to be used as a reference material at the time of accidents. It does not guar- antee validity as a complete proof. This product is designed as a car-mount drive recorder. - Page 6 Introduction from the GPS satellites. A one year warranty is provided with this product from the date of purchase. (However, the warranty shall not apply to all consumables including the microSDHC cards and double-sided adhesive tape.) This product is dedicated for DC12V vehicles. Please contact your retailer for exchange, repair, or purchase of parts.
-
Page 7: For Your Knowledge
Introduction For your knowledge What is GPS? ‘Global Positioning System’ means a system to measure a current position on the ground by utilizing satellites of the Department of Defense of the United States. What is the ‘Michibiki’ quasi zenith satellite system (QZSS)? The "Quasi Zenith Satellites System"... - Page 8 Introduction Regarding the LCD ・ some pixels that don’t emit light or those that are constantly lit. Please understand that these are not regarded as faulty. Owing to its properties, the images of the LCD may appear darker as a whole when the ambient ・...
-
Page 9: When Using A Brand New Microsdhc Card
Introduction When using a brand new microSDHC card Whenever using a brand new microSDHC card and other microSDHC cards other than the one that comes included, you need to format the SD card When you want to take a microSDHC card out, push the card gently once, then take it out as it pops out a little. -
Page 10: Packing Content
Introduction Packing content ZDR-024CE main unit Accessories Double-sided adhesive tape Cigar plug cord Degreasing cleaner (About 4 m, 1A fuse contained) (1 pcs) (1 pcs) Hexagon wrench microSDHC card Operation Manual (8GB/1 pcs) (this document/1 pcs) (2.5 mm/1 pcs) *It is installed to the main unit by default. -
Page 11: Main Unit Section Names
Introduction Main unit section names Caution ! • A microSDHC card is a consumable accessory. Replacing it every 2-3 years is recommended. • A microSDHC card has a service life, such as the number of times it can have data written to it, owing to the properties of the card. -
Page 12: Installation Method
Installation method Carry out the installation while referring to the procedure below. Connect the cigar plug cord to the vehicle. (P 12) Install this product to the vehicle. (P 13 to P 17) Check the operation. (P 18) Check the video footage with Check the video footage with the LCD of the main unit. -
Page 13: Checking The Installation Position
Installation method Checking the installation position This product can be installed to the windshield or the dashboard. To conform drawing below and the precautions. necessary to place the hood within 25% of the bottom area of the recorded video footage. Therefore, we recommend installing the product to the upper area or the center of the windshield. -
Page 14: Installing The Main Unit
Installation method Installing the main unit * This manual explains the installation procedure using an installation to a windshield as an example. and then adjust the installation angle of the main unit. Tighten the screw with the attached hexagonal wrench after adjustment. ・... - Page 15 Installation method 2) Clean the mounting stay and windshield with the attached degreasing cleaner. After drying them, use double-sided adhesive tape to stick the mounting stay to the windshield. Advice • When sticking the stay, start sticking it from one side little by little in order to achieve proper adhesion with less air bubbles.
- Page 16 Installation method Caution • Install the product so as not to obstruct the functions of the vehicle (airbags, • ed adhesive tape because the sticking face may be damaged due to aging deterioration. If such a situation can be anticipated, install the product to the windshield of the back side of the rearview mirror.
- Page 17 Installation method When installing on the dashboard This product judges the up/down direction of the product automatically using the built-in G sensor to inverse the LCD display. Installing to a windshield Installing to a dashboard Advice The up/down direction of the screen is judged when the product is started up. Therefore, inverting the main unit does not cause the screen to be inversed while being active.
-
Page 18: Checking The Operation
Installation method Checking the operation 1. Checking the GPS reception 1) Turn the vehicle key switch on. Start up the main unit and then check that the GPS icon is displayed. * Receiving GPS sets the date and time in the main unit. Advice The GPS function of this product does not operate at places listed below, where a signal from satellites cannot be received. - Page 19 Installation method 3. Checking the recorded video footage Check the video footage recorded by the main unit.hexago(=> P 27 and 28) <<Check items>> • The video footage that was recorded from the time of Power ON to Power OFF should be properly recorded in the folder based on the present date and time in "Continuous Recording."...
-
Page 20: Shooting Video Footage
Shooting video footage Regarding recording of video footage This product has two ways of recording: "continuous recording" and "event recording." Vehicle status Engine ON Engine OFF Starts continuous recording Stop continuous recording Continuously recorded data Recorded content About 30 seconds About 30 seconds About 30 seconds About 30 seconds... - Page 21 Shooting video footage Regarding event recording • when the switch is operated, and "parking surveillance impact recording data" to record • By default, when the maximum data capacity is reached, the oldest video footage is deleted in chronological order, and then new video footage is continued to be recorded. •...
- Page 22 Shooting video footage Regarding recording area • By default, 80% of the entire microSDHC card is set as the continuous re- cording area and 20% of it is set as the event recording (impact recording/ manual recording) area. • The ratio of the data saving capacity for event recording can be selected from [10% / 20% / 30%].(=>...
- Page 23 Shooting video footage Regarding the saving destination folder name started to be recorded and the type of the recorded data into the folder of each item. ● Folder configuration Save all recorded data SD card NORMAL Only save impact recording data within event recording data GSENSOR Only save manual recording data within event recording data MANUAL...
-
Page 24: Turning The Power On
Shooting video footage Turning the power ON Set the vehicle key switch to ACC or ON. Dong♪ dong♪ ENGINE START STOP Recording in process (Green LED is lit) Advice microSD card check function This product checks the microSDHC card when starting up, and can prevent a shooting miss by indicating an error on the LCD when the card is damaged. -
Page 25: Lcd Display
Shooting video footage LCD display Recording screen ① ② ③ ④ ⑤ ⑥ ⑦ Icon Display content Displays the settings for the recording size. (=> P 47) Displays the recording type REC: Continuous recording / REC G: Impact recording REC M: Manual recording REC T1: Time lapse 1 frame / REC T3: Time lapse 3 frames Displays the settings for the image correction function. -
Page 26: Adjust The Sound Volume Of The Main Unit
Shooting video footage • The volume for the checking sound, announcing sound, and sound when recorded video footage is played can be selected from eleven different vol- ume levels [OFF/1 to 10]. • The sound effect for the occurrence of an error is generated even when the volume is set to OFF. -
Page 27: Watching Video Footage
Watching video footage Playing video footage with the main unit Press and hold [Menu / Return] and display the main menu. Menu / Return Select [Play] by pressing [Up] or [Down], and then press [OK]. Down Select the video footage type by pressing [Up] or [Down], and then press [OK]. •... - Page 28 Watching video footage [Up] or [Down], and then press [OK] to start playing the video footage. Down Press [Menu/Return] Exiting from the setting screen returns to the recording screen.
-
Page 29: Playback Screen
Watching video footage Playback screen Displays the operation status Displays playback number and total Displays the recording size played number for video footage * Displays the number Displays the recording type of images inside the play folder Not displayed: Continuously recorded data Impact recording data Manual recording data Parking surveillance... -
Page 30: Play Video Footage On A Television
Watching video footage Play video footage on a television Connecting this product to a television or a navigation device equipped with a video input terminal using a separately sold optional AV cable can display the LCD display of the main unit on a television or navigation device. * This product outputs video footage using the NTSC system. -
Page 31: Playing Video Footage On A Personal Computer
Watching video footage Playing video footage on a personal computer The video footage recorded by this product can be watched together with in- formation such as vehicle acceleration by installing dedicated viewer software which can be downloaded from our website. In addition, since the recorded Advice ・... - Page 32 Watching video footage Using the viewer software 1) Download the dedicated viewer software from our website (http://www. e-comtec.co.jp/). Download PCVIEWER.zip (downloaded file) PCVIEWER.zip PCVIEWER folder (Downloaded file) (File created after deployment) 3) Insert the microSDHC card removed from the main unit into the personal computer...
- Page 33 Watching video footage 4) Double-click the viewer software in the folder opened in 2). 5) Click the [Load] button and then [Open folder]. Advice Clicking [Open file] allows you to select desired video footage to play, and can be Load button 6) Select “SDHC.”...
- Page 34 Watching video footage video footage. ■ ㉕ ㉖㉗ ① ② ⑲ ⑳ ㉑ ㉒ ㉓ ㉔ ③ ⑮ ⑦ ⑧ ⑨ ⑩ ⑪ ⑫ ⑬ ⑭ ④ ⑯ ⑤ ⑱ ⑥ ⑰ Advice of this product when the viewer software is started up (only when connected to the the screen and the procedure shown on our website.
- Page 35 Watching video footage (15) Displays the currently playing position of the video footage Adjusts the volume and sound playing speed of the viewer ・ Double-clicking displays the video footage in full screen (16) software mode, and double-clicking again returns to the normal display Displays the range of the maximum acceleration display.
-
Page 36: Saving The Recorded Data To The Personal Computer
Watching video footage Saving the recorded data to the personal computer Pressing the [Video] or [Still image] button in the viewer software enables saving the recorded data as a video or still image. Saving the recorded data as a video Check box 2) Press the [Video] button in the viewer software. - Page 37 Watching video footage Saving the recorded data as still images 1) Press the [Still image] button in the view- er software. Still image button 2) After the output screen is displayed, press [Save]. Moving the slide bar enables adjusting the brightness of the image to be saved. ・...
-
Page 38: Regarding Map Display
Watching video footage Regarding map display The travel speed and Google maps are displayed when there is GPS infor- ・ mation present. In addition, Google maps is not displayed when there is no Internet connection. The map displays the running path and the locations where an impact, man- ・... -
Page 39: Using The Driving Support Function
Using the driving support function Regarding the driving support function ・ This product has a built-in driving support function that supports safe and comfortable driving. ・ Make sure you perform calibration (correction) (=> P 42, 43) when using this function. ・... - Page 40 Using the driving support function When your car is stopped and it detected that a leading vehicle starts moving, it will make an indication on Your car is A leading vehicle has “Ding-dong; in a stop state started moving Check the leading vehicle” Operates when it judges that your car is stopped.
- Page 41 Using the driving support function Drive support function ・ "G (acceleration/deceleration)" has been exceeded, such as when there is sudden acceleration and deceleration, etc. ・ Announcements will vary depending on the driving circumstances. Driving circumstances Content Sudden acceleration Sudden deceleration Abrupt steering Example) A case of sudden braking...
-
Page 42: Performing Calibration
Using the driving support function Performing calibration Make sure to perform a calibration when using the driving support function. There are cases where the driving support function does not function properly. Perform the calibration at a safe location where it does not become an ob- ・... - Page 43 Using the driving support function Adjust the angle of the main unit (=> P 14). Make upward and down- Adjust so that the horizontal lines of the road fit within the two traverse lines. Adjust so that the hood fits within 25% of the bottom area of the video footage.
-
Page 44: Setting
Setting Setting method The settings of this product can be changed from the main menu of the main unit. The entire microSDHC card contents will be reformatted when the [Automatic re- cording], [Recording size], [Frame rate], [Image quality], [Event recording area] set- tings are changed. -
Page 45: List Of Settings
Setting List of settings List of picture/sound recording settings Item Settings content Default settings Notes Automatic recording Recommended / Fine / Longer Recommended Full HD (1920×1080)/HD (1280×720)/ Recording size Your microSDHC card SD (640×360) (1280x720) will be reformatted 9.1 fps / 19.1 fps / 29.1 fps / Frame rate 19.1 fps Time lapse 1 frame /Time lapse 3 frames... - Page 46 Setting List of parking surveillance settings Item Settings content Default settings Notes Parking surveillance mode OFF / ON Parking surveillance record- Impact quick recording / Continuous-impact Continuous / ing methods recording / Time lapse recording Impact recording Night vision OFF / ON Parking surveillance impact High-sensitivity / Medium sensitivity Medium sensitivity...
-
Page 47: Picture/Sound Recording Settings
Setting Picture/sound recording settings Automatic recording settings *By changing the settings, the microSDHC card will be reformatted. • The [Recording size], [Frame rate] and [Image quality] settings can be changed quickly and easily. • Settings can be selected from [Recommended / Fine / Longer]. * When having changed the settings individually, it will show [User settings]. - Page 48 Setting Frame rate settings *By changing the settings, the microSDHC card will be reformatted • Frame rate of video footage to record can be selected from [9.1 fps / 19.1 fps / 29.1 fps / time lapse 1 frame / time lapse 3 frames]. [9.1 fps / 19.1 fps / 29.1 fps] ..
- Page 49 Setting Image correction settings • This product is installed with High Dynamic Range (HDR) as an image correction function. • By turning the HDR function on, you can record video data by correcting overexposure and underexposure. [OFF] Recording the video data as it is, without image correction. •...
- Page 50 Setting Event recording area settings **By changing the settings, the microSDHC card will be reformatted • As for event recording (impact recording, manual recording and parking surveillance impact recording), you can select the ratio of data storage from [10% / 20% / 30%] (=> P 22) •...
-
Page 51: Function Settings
Setting Function settings G sensor settings • Sensitivity to detect an impact can be selected from [OFF / 0.1G (sensitive) to 1.0G (insensitive)] for front-back / left-right/ top-bottom respectively. • It does not record when detecting an impact with the [OFF] setting. •... - Page 52 Setting Emergency recording stop settings • The emergency recording stop function refers to a function that automatically stops recording about 30 seconds after detecting a strong impact of an accident, for example, in order to prevent overwriting of critical data. It stops recording when an impact goes beyond any of the set values for front-back / left-right / top-bottom.
- Page 53 Setting LCD brightness settings • The brightness of video images can be selected from [Bright/Stan- dard/Dark]. • By default, it is set to [Standard]. Screen display settings • Display settings for the LCD can be selected from [OFF/Speed- linked/ON (continuous)/Clock (small)/Clock (large)]. •...
- Page 54 Setting • As for detection and notifications of green traffic signals ahead of your car while stopped, you can select from [OFF/Alarm/Voice]. • By default, it is set to [OFF]. You cannot select [Voice] when [Language] has been set to a language other than [Japanese].
- Page 55 Setting Password settings • By setting a password, you can strengthen privacy protection and security by making it impossible for any other persons to see your recorded data. • After setting a password, the menu screen will not be displayed unless the password is input at the settings menu.
- Page 56 Setting SD card formatting (internal data deletion) • Deletes and initializes the internal data of the microSDHC card (Settings data of the main unit will be retained in spite of formatting). • Whenever using a brand new microSDHC card and other microSDHC cards other than the one included, you need to format the SD card.
-
Page 57: Language Settings
Setting Language settings For this product, you can switch a display language of the settings screen ■ Examples of languages used in the settings screen [Japanese] [English] [Chinese] • Switching is only applicable for the display languages found in settings screen. -
Page 58: Using Parking Surveillance Mode (Optional)
Using parking surveillance mode (optional) Regarding parking surveillance mode • Using the HDROP-09 "Parking Surveillance / Direct Wiring Cord," which is an optional item sold separately, it allows a power source to be supplied after the vehicle key switch is turned off, and enables recording. •... -
Page 59: Regarding Parking Surveillance Mode Operation
Using parking surveillance mode (optional) Regarding parking surveillance mode operation Changing to parking surveillance mode • After connecting the HDROP-09 "Parking Surveillance/ Direct Wiring Cord," change the [Parking surveillance mode] setting to something other than OFF. When the vehicle key switch is turned OFF, it will change to parking surveillance mode. - Page 60 Using parking surveillance mode (optional) One time parking surveillance mode function • When the parking surveillance mode setting is OFF, parking surveillance mode can be turned on temporarily by pressing and holding the OK button. • From the point when the OK button is pressed and held, parking surveillance •...
-
Page 61: Various Settings For Parking Surveillance Mode
Using parking surveillance mode (optional) Various settings for parking surveillance mode Parking surveillance mode setting • • By default, it is set to [OFF]. Parking surveillance recording method setting [Impact quick recording / Continuous-impact recording / Time lapse recording]. [Impact quick recording] ..It starts up when an impact is detected and records video footage. Parking surveillance mode can be in operation for a long period of time as it stops (sleeps) at normal times, and thus power consumption is restricted. - Page 62 Using parking surveillance mode (optional) Night vision setting • Turning this setting ON will allow comparably clearer video footage to be recorded during parking at night time where there are not many lights. However, in circumstanc- • • By default, it is set to [OFF]. Impact sensitivity setting •...
- Page 63 Using parking surveillance mode (optional) Questions about parking surveillance mode Q. Will the product always record video during parking surveillance mode? the set time for "Parking surveillance recording time" has elapsed, or when the vehicle bat- tery voltage is below the "Parking surveillance recording stop voltage" set value, then park- ing surveillance mode will end, regardless of if parking surveillance mode has been set.
-
Page 64: Appendix
Appendix Listed are frequently asked questions. Please read the following details. Symptoms Points to check Reference page P 12 LED lamps are not lighting up. P 11,12 terminals Does not receive GPS satellite. P 15 How can the recorded footage be P 56 delete. -
Page 65: Led Lamp Check List
Appendix LED lamp check list This is a check list for the LED lamps when the main unit is in operation LED lamp display Main unit operation Details Lights up in green Recording in process Recording in process Flashes in green Recording in process Impact recording in process or manual recording in process •... -
Page 66: Reference For Recording Time
Appendix Reference for recording time Reference for recording time based on microSDHC card capacity size setting, and the image quality setting, etc. Refer to the following table. * Supported microSDHC cards:4GB to 32GB (class 10 or above is recommended) * microSDHC card included with the main unit: 8GB (class 10) microSDHC card capacity Recording Frame... - Page 67 Appendix Recording time when time lapse recording is set • In cases where the parking surveillance mode setting is set for [Time lapse recording], the recording time will vary depending on the details of recording size, frame rate, and image quality settings. •...
-
Page 68: List Of Announcements/Alarms
Appendix List of announcements/alarms Chinese] or [English], it will switch to alarms. See the following table for alarm sounds that correspond to each announcement and the announcement details. Conditions When set to Japanese Chinese or English When At the start of normal recording Dong, dong an event At the start of impact recording... - Page 69 Appendix Power supply voltage DC12 V Maximum current consumption 400 mA or less Operating environment temperature range -10℃ to 60℃ Camera Imaging device 1/2.7 model CMOS sensor Total number of pixels 2 megapixels Valid number of pixels Maximum 2 megapixels Lens angle of view Horizontal 118 degrees, vertical 59 degrees (diagonal 150 degrees) F value F2.2...
-
Page 70: Index
Index Automatic recording......47 Manual recording ........21 Mirror image settings ......49 Calibration ..........42 Camera brightness settings ....49 Night vision ...........62 Continuous recording ......20 One time parking surveillance mode Daylight saving time ......57 function ..........60 Direct wiring cord for parking Overexposure ........49 surveillance ........58 Overwrite prevention settings ....50 Drive support function......41... -
Page 71: Warranty Statement (Please Read)
ZDR-024CE Warranty Warranty period One year from the day of purchase Target parts Main unit * Excluding other accessories Warranty Statement (please read) 1. Warranty contents (7) Damage or failure which has occurred as a result of using In cases where defects occur by using the main unit in ways that follow the... -
Page 72: Zdr-024Ce Warranty
ZDR-024CE Warranty Copying is prohibited This document guarantees repairs under warranty, free of charge, based on the conditions mentioned in the warranty statement (refer to the reverse side). In the case a failure occurs upon normal condition of use, show this document to the retailer where the product was purchased and request for a repair. - Page 73 List of abbreviations The abbreviations displayed on the setting screen of this product are as shown in the table below. DISPLAY TEXT ORIGINAL Main menu Main menu Pic/sd rc sets Picture/sound recording settings Func settings Function settings Prkng srv sets Parking surveillance settings Play Play...
- Page 74 List of abbreviations DISPLAY TEXT ORIGINAL Cam brightns Camera brightness Bright Bright Standard Standard Dark Dark Mirror image Mirror image Normal image Normal image Mirror image Mirror image Snd recording Sound recording Evnt rec area Event recording area Ovrwrt prohib Overwriting prohibited Evnt rec'ing Event recording...
- Page 75 List of abbreviations DISPLAY TEXT ORIGINAL Alarm Alarm Calibration Calibration Prec v st ntf Alarm Alarm Fr trf lt ntf Alarm Alarm Drive support Drive support Alarm Alarm Vh spd alarm Vehicle speed alarm 30km/h~2.0G 30km/h~2.0G Pwd setting Password setting SD card fmting SD card formatting Rst to fac stg...
- Page 76 List of abbreviations DISPLAY TEXT ORIGINAL Recording time Rec time 30 minutes ~ Always ON 30 minutes ~ Always ON Rec stop volt Recording stop voltages 11.9V ~ 12.2V 11.9V ~ 12.2V 1 minutes 1 minutes 3 minutes 3 minutes Get-on cnl Get-on cancel 1 minutes...
Need help?
Do you have a question about the ZDR-024CE and is the answer not in the manual?
Questions and answers
How do I change the language to english
To change the language to English on the Comtec ZDR-024CE:
1. Go to the settings screen.
2. Find the language settings option.
3. Select [English] from the available language options ([Japanese], [English], [Chinese]).
Note: Only display languages in the settings screen can be changed. Voice announcements remain as alarm sounds.
This answer is automatically generated