Table of Contents
Advertisement
Available languages
Available languages
Quick Links
Imp. par/by : Ribimex S.A. –56 Route de Paris – FR-77340 Pontault-Combault
Imp. da : Ribimex Italia s.r.l. –Via Igna, 18 – IT-36010 Carrè (Vi)
[v-2018-02-28]
FR
Manuel d'instructions et d'utilisation
EN
User and maintenance manual
IT
Manuale di istruzioni e di manutenzione
Réf. / Art. Nr. : PRPVC751/43F / 510941
Réf. / Art. Nr. : PRPVC1101/65F / 510976
P
S
OMPE
UBMERSIBLE
S
P
UBMERSIBLE
UMP
P
S
SA
OMPA
OMMER
Page 1 / 34
Advertisement
Table of Contents

Related Manuals for Ribimex Ribiland Series


Summary of Contents for Ribimex Ribiland Series
- Page 1 Réf. / Art. Nr. : PRPVC751/43F / 510941 Réf. / Art. Nr. : PRPVC1101/65F / 510976 Imp. par/by : Ribimex S.A. –56 Route de Paris – FR-77340 Pontault-Combault Imp. da : Ribimex Italia s.r.l. –Via Igna, 18 – IT-36010 Carrè (Vi) [v-2018-02-28] Page 1 / 34...
- Page 2 AVERTISSEMENT : Lire et assimiler ce manuel avant d’assembler ou d’utiliser ce produit. Une utilisation incorrecte du produit pourrait causer de graves blessures et des dommages. Conserver ce manuel pour pouvoir le consulter ultérieurement. WARNING: Carefully read this instruction manual before operating this appliance. Incorrect operation may cause injury and/or damages.
-
Page 3: Consignes De Sécurité
FR - Traduction de la notice originale I. Nomenclature III. Consignes de sécurité V. Utilisation II. Caractéristiques techniques IV. Mise en route VI. Entretien et Entreposage I. NOMENCLATURE Voir Fig.1 II. CARACTERISTIQUES Voir tableau 1 III. CONSIGNES DE SÉCURITÉ Avant d’utiliser ce produit, veuillez lire et assimiler l’ensemble des consignes de sécurité. Il convient de toujours suivre les consignes de sécurité... - Page 4 travail et d'une manière plus sûre, s'il est uniquement utilisé pour l'usage auquel il a été destiné. 7. Utiliser le produit approprié Ne pas forcer des produits ou accessoires légers à effectuer des travaux normalement réalisés avec des produits plus lourds. 8.
- Page 5 d'illustrer d'une manière exhaustive toutes les conditions et les situations qui peuvent se produire. L’utilisateur et/ou l’opérateur doivent utiliser le produit avec bon sens et prudence notamment en ce qui concerne ce qui n’est pas indiqué dans ce manuel. 3.2- Consignes importantes sur l'utilisation de la pompe électrique 1.
-
Page 6: Mise En Route
3.4- Instructions de sécurité relatives aux applications de pompe Les conditions suivantes doivent être respectées lors de l'utilisation de la pompe à eau : 1. La pompe doit être installée et utilisée en conformité avec les lois nationales / locales. 2. - Page 7 4.1.2- Vérifier le moteur 1. Premièrement, vérifiez sur la plaque signalétique que le modèle, la puissance (HP ou kW), la tension, phase et fréquence, répondent à vos exigences. 2. Vérifiez que le câble du moteur est bien attaché et en bon état. 3.
- Page 8 le constructeur du moteur (soit <30 m). 2. Si la distance de l'alimentation est loin, il est recommandé d'utiliser un câble avec une section plus grande. La résistance d'isolement de l'enroulement du stator doit être de plus de 5mega-Ohm. 3. Il est recommandé d’abord de suspendre la pompe et de la fixer solidement, puis d’installer un protecteur de fuite à...
- Page 9 quelques secondes pour vérifier que la pompe démarre, fonctionne et que le moteur tourne dans la bonne direction. 9. Note : - vous pouvez utiliser des clips en plastique ou en caoutchouc pour accrocher le cordon d'alimentation au tuyau de refoulement à intervalles réguliers de 3 mètres (10pieds). - Veiller à...
- Page 10 7. Pour cela, ajuster le câble à la longueur désirée. Attention, pour assécher des locaux (utilisation en vide cave par exemple) il sera nécessaire de placer la pompe en dessous du niveau du sol. 4.7.2- Utilisation avec flotteur bloqué (Fig.3) 1.
-
Page 11: Entretien Et Entreposage
La pompe submersible doit obligatoirement être immergée avant la mise en route. Installer la pompe dans l'eau, puis laisser lui le temps d'évacuer l'air par la purge (bulles d'air) et seulement après, vous pouvez la brancher. En fonctionnement automatique, le temps de remplissage avant la mise en route par le flotteur suffit à... - Page 12 6.3- Pannes et solutions possibles Panne Principale raison Solution possible Démarrage difficile 1. Courant trop faible 1. Utiliser un courant entre 0,9 et 2. Turbine bloquée 1,1 fois la tension assignée. 3. Perte de puissance 2. Libérer et nettoyer la turbine 3.
-
Page 13: Parts List
EN - Original instructions I. Parts List III. Safety instructions V. Operation II. Characteristics IV. Getting Started VI. Maintenance and Storage I. PARTS LIST See Fig.1 II. CHARACTERISTICS See table 1 III. SAFETY INSTRUCTIONS Before using this product, read and understand all safety instructions. Always follow the safety instructions to minimize risk of damage to property, and to minimize any risk of damages and injuries to persons and animals. - Page 14 8. Dress properly When installing, do not wear loose clothing or jewellery; they can be caught in moving parts. Wear protecting hair covering to contain long hair. 9. Use protective equipment When installing, wear protective equipment appropriate to working conditions and work environment Wear protective helmet, safety goggles, ear mufflers, face or dust mask, rubber gloves and non-skid footwear to reduce the risk of personal injury during products use or manipulation.
- Page 15 3.2- Special warnings when using the pump 1. Become familiar with the controls and the proper use of the equipment. 2. The use of this product by unsupervised children is forbidden. 3. This appliance can be used by children aged from 8 years and above and persons with reduced physical, sensory or mental capabilities or lack of experience and knowledge if they have been given supervision or instruction concerning use of the appliance in a safe way and understand the hazards involved.
-
Page 16: Getting Started
6. The manufacturer declines all responsibility in the event of accident or damage due to negligence or failure to observe the instructions described in this book or in conditions that differ from those indicated on the rating plate. It also declines all responsibility for damage caused by improper use of the water pump. - Page 17 NOTE: it is strictly forbidden to use power cable as hanging rope. The submerged depth of the pump cannot exceed more than 15 meters and the distance from bottom should be over 50cm. It is recommended to install a dirt-stopping grid around the pump to prevent foreign materials, such as water weeds, block the filter net, and influence the pump normal operation.
- Page 18 6. Caution: It is the installer's responsibility to perform the connections in compliance with the regulation in force in the country of installation. 4.5- Pump/motor installation 1. If the pump is installed in an enclosed area with emission of noxious fumes, the installation must be carried out in compliance with local and/or national laws by qualified personnel so as to avoid danger.
- Page 19 4.7- Floating switch 4.7.1- Active float switch (Fig.2) 1. The pump must be in a vertical position: ensure that it is stable during operation. 2. Ensure that the float switch can move freely. 3. The suction holes must never be obstructed. It is therefore preferable that the pump should never be placed directly on the ground or on the bottom of the well, pond or vessel.
-
Page 20: Operation
V. OPERATION 5.1- Intended use 1. This submersible pump can be used for domestic, industrial or farming applications, for pumping clear water with particles in suspension that are less than 0.2mm in diameter. 2. The pump is fully submersible: the immersion depth must not exceed 15m (refer to characteristics table). -
Page 21: Maintenance And Storage
VI. MAINTENANCE AND STORAGE Before any intervention on product, ensure that product is disconnected from its power source. 6.1- Maintenance 1. The pump does not require specific cleansing. 2. However, if you remove pump for storage, rinse out the pump with clean water, including the suction circuit. - Page 22 6.4- Storage Clean the pump. Pump must be stored in a dry, ventilated location. Always lock up product and keep out of reach of children. Disposal 6.5- - Do not dispose the product with household garbage. Do not throw into the environment. - Dispose of the product in a collection centre for waste of electrical and electronic equipment, or a waste drop-off centre;...
-
Page 23: Elenco Componenti
– Traduzione delle istruzioni originali I. Elenco componenti III. Istruzioni di sicurezza V. Funzionamento II. Caratteristiche IV. Per iniziare VI. Pulizia e Conservazione I. ELENCO COMPONENTI Ved. Fig.1 II. CARATTERISTICHE Ved. Tabella 1 III. ISTRUZIONI DI SICUREZZA Prima di utilizzare questo prodotto, leggere tutte le istruzioni di sicurezza e assicurarsi di averle comprese. - Page 24 Durante l’impianto, non indossare abiti ampi o gioielli (possono impigliarsi nelle parti in movimento). Se si hanno i capelli lunghi, indossare un casco. 9. Usare indumenti di sicurezza. Durante l’impianto, indossare indumenti adeguati dei fattori circostanti dall’area di lavoro. Usare casco, occhiali di sicurezza, protezione uditiva, maschera antipolvere, guanti e scarpe di protezione per ridurre il rischio di ferite in occasione dell'utilizzo o l'uso del prodotto.
- Page 25 devono utilizzare l'attrezzo con buon senso e prudenza in particolare riguardo ciò che non è indicato in questo manuale. 3.2- Istruzioni di sicurezza per la pompa 1. Imparare a conoscere i controlli e l'uso appropriato della pompa. 2. L'utilizzo di questo prodotto è vietato ai bambini ed adolescenti senza sorveglianza. 3.
-
Page 26: Per Iniziare
3.4- Avvertenze di sicurezza relative all’applicazioni della pompa Le seguenti condizioni devono essere rispettate quando si utilizza la pompa : 1. La pompa deve essere installata e utilizzata in conformità alla legislazione nazionale / locale. 2. La pompa deve essere utilizzata per i pozzi di piccoli diametri. È ampiamente usata in aree di basso livello d'acqua, di alte altezze di scarico e lunghe distanze ad attingere acqua. - Page 27 La resistenza isolata dovrebbe essere di 20 mega-ohm a più basso che è per il motore, ma non per il cavo. 4. Scrivere in un foglio, il modello del motore, potenza (HP o kW) di tensione, il codice, la data e il numero di serie, per riferimento futuro.
- Page 28 4. Fissare il cavo di alimentazione al tubo di mandata in modo che non possa essere ruotato. Consentire l'espansione del tubo di mandata lasciando un di spazio tra i morsetti. 5. Nell'effettuare i collegamenti, assicurarsi che ci sia un impianto di terra efficiente. 6.
- Page 29 - che il cavo di alimentazione e il tubo di scarico siano disposti in modo da non creare un incidente; - che le valvole (se installate) siano aperte. 2. Controllare tutte le rondelle del tubo di scarico per determinare non ci siano perdite d’acqua e che non si bagni nessun componente elettrico.
-
Page 30: Funzionamento
Attenzione! Per prosciugare locali (ad esempio, ulilizzazione idrovora per cantina) e necessario posizionare la pompa sotto il livello del suolo V. FUNZIONAMENTO 5.1- Uso destinato: 1. Questa pompa sommersa può essere utilizzata ad uso domestico, industriale o agricolo, per aspirare acque chiaea con particelle in sospensione inferiori a 0,2mm. -
Page 31: Pulizia E Conservazione
VI. PULIZIA E CONSERVAZIONE Prima di qualsiasi intervento, accertarsi che il prodotto sia scollegato dall'alimentazione di rete 6.1- Pulizia 1. La pompa non richiede una manutenzione particolare. 2. Quando si rimuove la pompa, procedere al risciacquo con acqua chiara. compreso il circuito di aspirazione. - Page 32 5. Surriscaldamento della pompa 6.4- Conservazione Pulire la pompa. Conservare in un luogo asciutto e ventilato, sotto chiave o fuori dalla portata dei bambini 6.5- Smaltimento - In fine di vita, non gettare il prodotto con i rifiuti domestici o nell'ambiente naturale. - Portare il prodotto ad un centro per il trattamento dei rifiuti o ad un centro di colletta degli scarti delle attrezzature elettriche ed elettroniche, o informatevi al vostro comune.
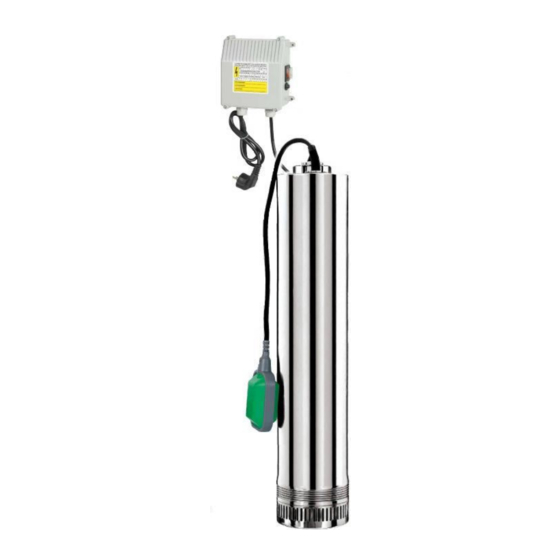
- Page 33 Figures / Figures / Figure Fig.2 Fig.3 Fig.1 Fig.2a Fig.3a Fig.2b Fig.3b FR –Fig.1– Nomenclature EN –Fig.1– Parts list IT –Fig.1- Elenco componenti 1. Câble d’alimentation 1. Power cord with plug 1. Cavo elettrico con spina 2. Câble électrique boitier-pompe 2.Control box to pump cable 2.
- Page 34 Fig.4 Fig.5 FR –Fig.4– Exemple d’installation EN –Fig.4– Set up example IT –Fig.4– Esempio di installazione 1. Alimentation principale 1- Main power 1. Spina elettrica 2. Boîtier de contrôle 2- control box 2. Scatola di controllo 3. Tuyau de refoulement 3- Discharge pipe 3.
Need help?
Do you have a question about the Ribiland Series and is the answer not in the manual?
Questions and answers