Download Print this page

Advertisement

Quick Links

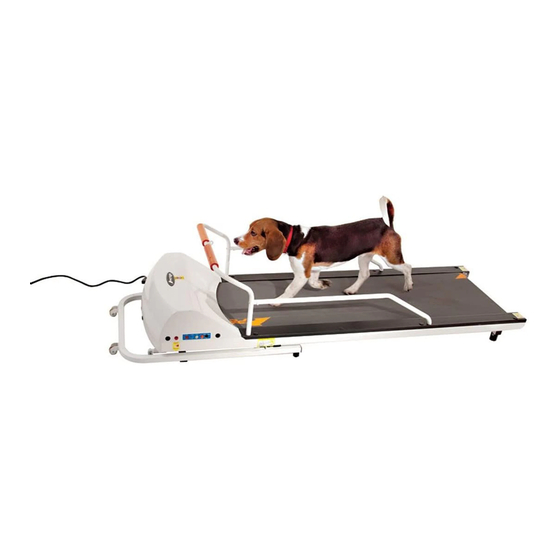
Treadmill User Manual
This Manual is applicable to the following models
Specification
Horse Power
Input Voltage
Max Input Current
Dog Length Limit
Dog Weight Limit
Running Speed
Foldable Function
Incline Function
Remote Control
Safety Device
Model Size
Net Weight
Safety Standard
Warranty
Read this User Manual thoroughly before using treadmill to ensure its proper set-up and operation.
MODEL
PR700
HP
V
A
18"
In
Lb
44 lbs
MPH
No
No
21 x 44 x 15
In
(W) (L) (H)
lbs
63
Notice
PR710F
PR720F
1 HP
115 V AC
10 A (max)
28"
88 lbs
132 lbs
0.6 - 7.5 MPH
Yes
Yes
No
Yes
Emergency Switch/Safety Locker (Foldable model only)
21 x 62 x 16.25
21 x 72 x 16
(W) (L) (H)
(W) (L) (H)
83
CE Certification
1 year
PR725
1.25 HP
48"
35"
176 lbs
0.6 – 10 MPH
No
No
Yes
21 x 87 x 48
(W) (L) (H)
99
137
PR730
1.5 HP
65"
265 lbs
No
Yes
No
33 x 99 x 54
(W) (L) (H)
273

Advertisement

loading
Need help?

Need help?

Do you have a question about the Petrun PR700 and is the answer not in the manual?

Questions and answers

Subscribe to Our Youtube Channel

Summary of Contents for Gopet Petrun PR700

  • Page 1 Treadmill User Manual This Manual is applicable to the following models Specification MODEL PR700 PR710F PR720F PR725 PR730 Horse Power 1 HP 1.25 HP 1.5 HP Input Voltage 115 V AC Max Input Current 10 A (max) 18” 28” 48” 65”...
  • Page 2: Assembly Procedures

    ASSEMBLY PROCEDURES WARNING  Your GoPet Petrun Treadmill is NOT DESIGNED for use by humans of any size or age. It is specifically designed for four legged animals within the weight and length criteria listed above for each particular model.
  • Page 3 PR 725 NOTE – Front and rear gates have been discontinued for improved safety (Step 1) Use L-wrench (5mm), screw (M8x40L) and washer (M8x1.6T) to fasten the Left & Right Fences (Step 2) Use L-wrench (5mm), screw(M8x15L) and washer (M8x1.6T) to fasten the harness support on the top of both sides of the fence.
  • Page 4 (Step 3) (Step 4) Use Phillips screw (M4x8L) to fasten the Control Plug in the control cable connector. Console on the end board (NOTE: insert the 6 Pin Connector first!). Make sure all the pipes are attached completely after assembly. ◆...
  • Page 5: Warranty

    Daily storage and Maintenance ◆ Unplug your treadmill when not in use ◆ Do not use or store your treadmill outdoors, in a bathroom or high humidity environment. Avoid direct sunlight and keep away from direct sources of heat or other electrical equipment. ◆...
  • Page 6: Accessory Parts

    ACCESSORY PARTS PR700 / PR710F / PR720F Q’ty Accessory Parts Name Front Rail Left & Right Rails 1 ea Power Cable Screw M6x18L (short) Screw M6x35L (long) L-Wrench_4mm T-Wrench_5mm Remote Controller PR725 Q’ty Q’ty Accessory Parts Name Accessory Parts Name Left Fence –...
  • Page 7 PR730 Q’ty Accessory Parts Names Front rail(no gate included) Rear rail(no gate included) Side Fence Pipe Control Console Power Cable Screw M6x40L Screw M8x40L Screw M8x25L Screw M4x8L L-Wrench_4mm *Please make sure the quantity of accessory parts is correct L-Wrench_5mm before assembly.
  • Page 8 Remote control instruction manual Remote control button key illustration Name Definition Red LED Light Infrared signal light. Will stop unit in any situation, and go back to set [ RESET ] up mode Time: count up/down 00-99 Min. LCD Window Speed: up/down 00.0-99.9 Km/H (Imperial system unit will not show) IR transmitter...
  • Page 9 Process of remote control operation Push the [ STOP ] key and hold for Normal Mode 3 - 6 sec., when a long beep sounds W / O Time Setting push the [ START ] key to re-start [ SPD ] [ STOP ] [ START ] Speed Seting...
  • Page 10 Remote Controller Reset Procedure (STEP 1) Remote Controller Side A. Take the batteries out of the remote controller and then replace them. B. Push and hold Mode button and then push SPD UP button, the screen will display as pictured, C.
  • Page 11 Control console instruction manual - for PR730 only Control console button key illustration Name Definition LED Window Speed: up/down 01.0-16.0Km/H (Imperial system unit will not show) LED Window Time: count up/down 00:00–99:59 Min.(Imperial system unit will not show) Green LED Light Working light Red LED Light Stop light...
  • Page 12 Process of control console operation - for PR730 only Normal Mode W / O Time Setting [ Speed Up / Dow n ] [ STOP ] [ START ] Speen setting Stop Function (1.0 - 16.0 km.) Stop automatically when time is reached 99 Min..
  • Page 13 Time Setting Mode Time Up / Down [ Speed Up / Dow n ] [ STOP ] Time Setting [ START ] Speen setting Stop Function (1.0 - 16.0 km.) (00.00 - 99.00 Min.) Stop automatically when time is reached 00.00 Min..
  • Page 14 Running belt adjustment guide *The running belt needs to be adjusted once the running belt is loosened or cannot be kept in the right position (move to the right or left side). 1. Turn the power switch on. 2. Increase the speed to 4 Km/Hr, and keep it working for 2-3 minutes, then start to adjust. If the running belt moves to left side If the running belt moves to right If the running belt is loose,...
  • Page 15 Unfolding – for PR710F/PR720F only (Step 1) (Step 2) Pull out the lock pin from A and put into Pull down from the back side of PetRun. It will drop Position B to the flat level slowly. Moving – for PR710F/PR720F only (Step 1) (Step 2) Place PetRun on level area , and switch...
  • Page 16 Incline – for PR725 & PR730 only (Step 1) Pull out the incline lever and lift up to adjust incline PR725 PR730 (Step 2) Adjust the height by pulling out the adjust lever, and releasing the lever at the required position. (Stepless) PR725 PR730...

This manual is also suitable for:

Petrun pr720fPetrun pr710fPetrun pr725Petrun pr730