Table of Contents
Advertisement
Advertisement
Table of Contents

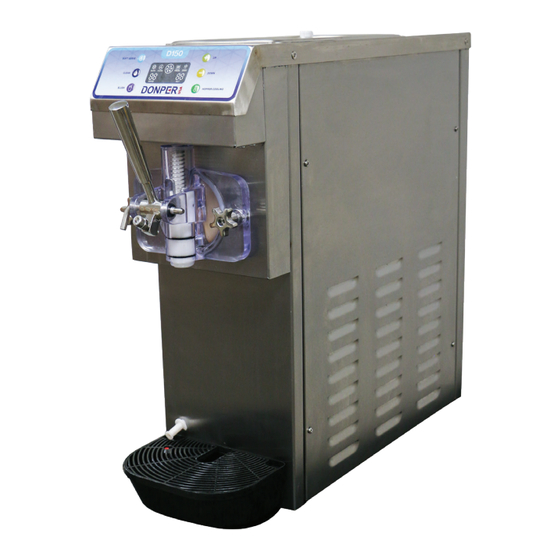
Summary of Contents for DONPER D150
- Page 1 User Manual D150...
-
Page 2: Table Of Contents
Table Of Contents Preface Parameters Precautions Setup Setting Up Operating the Machine Soft Serve Mode Slush Mode Hopper Cooling Adjusting the Settings Firmness Setting Soft Serve and Hopper Settings Slush Settings Cleaning Machine Sterilization... -
Page 3: Preface
Preface Thanks for selecting the Donper USA D150 Soft Serve Machine. The pur- pose of this manual is to provide you with the product specifications and our recommendations for effective and normal operation of this machine in order to ensure and guarantee it’s service life. - Page 4 Parts D Dispensing Valve Handle Feed Rear Bea Gaske Face Plate Auger/Beater...
- Page 5 Diagram Hopper Lid d Tube Hopper Freezing Cylinder ater...
-
Page 6: Parameters
Parameters In Table 1.1 below, you will find the specs of the D150. Model Size (inch) Voltage Power Net Weight Refrigerant D150 27.5 x 8.5 x 26.5 115v 500w 90 lbs R134a Table 1.1 27.5... -
Page 7: Precautions
It is recommended that the environmental temperature shall not exceed 32˚C. When lifting the D150, be sure to slide your hands under- neath the machine so that the base of the machine is resting on top of your hands. -
Page 8: Setup
Make sure that the Main Power Switch on the machine is in the off position. Connect the power cord into the wall outlet, and switch the main power switch, which is located on the back of the D150, into the on position. Main Power Switch... -
Page 9: Operating The Machine
Operating the Machine Operating the D150 is all done through the control board. On the control board there are 6 buttons, each of which has its own function. Pressing and holding different combinations of the buttons unlocks different set- tings which the user can adjust to fit their needs. -
Page 10: Slush Mode
With the machine in Soft Serve Mode, the screen will now display the percentage of total hardness that the soft serve is currently at on the left, and the preset Hardness setting of "01" on the right. Note: Now is a good time to press the Hopper Cooling button to pre-chill the mix inside of the hopper. -
Page 11: Hopper Cooling
Press the "SLUSH" button to enter into the slush mode. The current temperature of the freezing cyclinder will display on the left side of the screen, and the preset Target Temperature is displayed on the right. The mix will begin freezing inside of the freezing cylinder un- til the temperature of the freezing cylinder (displayed on the LEFT) reaches the preset Target Temperature (displayed on the RIGHT) plus 5 minutes. - Page 12 Adjustabl Adjustable Code Setting Name Ice Cream Mode Firmness Setting Temperature of hopper cooling in ice-cream mode Return difference of temp of hopper cooling Time delay between drive motor & compressor Restarting time of compressor in ice-cream mode Time delay between fan motor and drive motor Slush Mode Restarting time of compressor in slush mode Temperature of freezing cylinder in slush mode...
- Page 13 le Settings Settings Range Default Unit 1 to 10 Class (-9) to 9 °C 0 to 9 °C 5 to 60 Second 5 to 15 Minute 0 to 60 Second 0 to 5 Minute (-1) to (-9) (-5) °C 0 to 9 °C 0 to 60 Second...
-
Page 14: Adjusting The Settings
Adjusting the Settings To access the SETTINGS and make adjustments to them each setting, you will first need to access standby mode. To do so, simply make sure your machine is plugged into its main source of power. Locate the Main Power switch on the back of the machine and switch it into the ON position. - Page 15 P2 - Return Difference of Temperature of Hopper Cooling Press “SET” button to enter the P2 setting, press “UP” or “DOWN” to adjust the temperature from -9°C to 9°C, press “SET” button again to save the data and enter into the P3 setting. P3 - Time Delay between Drive Motor &...
-
Page 16: Slush Settings
SLUSH SETTINGS To access and make adjustments to settings P6 - PA, you must be in "Slush Mode". Press the “SLUSH” button to enter into the slush mode. Press and Hold the “UP” and “DOWN” buttons simultaneously for 5 seconds, and “SET”... - Page 17 P7 - Freezing Cylinder Target Temperature Press “SET” button to enter the P4 setting, press “UP” or “DOWN” to adjust the temperature from -9 to 9 minutes, press “SET” but- ton again to save the data and enter into the P8 setting. P8 - Return Temperature for Freezing Cylinder This temperature setting is the delta of P7, Freeze Cylinder Tem- perature Setting, from which the Temperature of the Freezing...
- Page 18 P9 - Extend Time for Compressor This setting represents the number of seconds in which the compressor will continue to run once the Freeze Cylinder Target Temperature has been reached, which is set in the PA setting. For example, if your P7 setting is set to -5°C and this setting is set for 30, as the compressor is running and cooling the freezing cylinder, when the Freezing Cylinder Temp reaches the target temperature of -5°C, instead of the compressor shutting off, it will continue running for 30 seconds, which is represented by the 30 in this...
-
Page 19: Cleaning Machine
Continue with steps 3 & 4 until the water that in being dis- pensed from the machine begins to come back fairly clear. Once the water that is being dispensed from the D150 is fair- ly clear coming out of the machine, drain all of the water from the D150 completely and then press the "CLEAN"... -
Page 20: Sterilization
Using a warm wet cloth, wipe down the freezing cylinders and the hopper to remove any residual residue. 10. Once all parts are clean, assemble the faceplate and mount it back on to the front of the D150. STERILIZATION Reassemble the machine back into its original state. Plug machine into power source and power machine back on. - Page 21 Wipe down the surface of the machine housing using a wet cloth. Clean the dust inside of the machine regularly. The condenser should be cleaned mainly by sweeping away the dust on the surface of the cooling fan to ensure good refrigeration from the machine.
- Page 23 Customer Notes About Machine...
- Page 24 If you have any questions, please feel free to contact us toll free at (844) 366-7371 24610 Kingsland Blvd Katy, Texas 77494 www.donperusa.com...
Need help?
Do you have a question about the D150 and is the answer not in the manual?
Questions and answers