JAMO C 80 Series Owner's Manual
Hide thumbs
Also See for C 80 Series:
- Brochure & specs (8 pages) ,
- Brochure (9 pages) ,
- Brochure (19 pages)
Table of Contents
Advertisement
Advertisement
Table of Contents

Related Manuals for JAMO C 80 Series


Summary of Contents for JAMO C 80 Series
- Page 1 OWNER´S MANUAL Jamo C 80...
-
Page 2: Table Of Contents
C 803 / C 805 / C807 / C809 .......................10 C 80 CEN ............................11 C 80 SUR ............................12 C 80 SUB ............................14 Connecting the subwoofer ......................15 Speaker level input terminals ....................16 Subwoofer adjustment options ....................17 Cleaning ............................19 Specifi cations ..........................20 Jamo consumer warranty ......................21... -
Page 3: Introduction
Introduction Welcome to the exclusive circle of Jamo C 80 owners! This manual will give you a quick overview of how to set up your speakers in your room. For more in-depth information about the technologies used please refer to the C 80 technical descrip- tion and www.Jamo.com. -
Page 4: General Tips For Setting Up Speakers
General tips for setting up speakers Stereo triangle You can use the stereo triangle as a good rule of thumb when placing your speak- ers. This means the distance between the speakers should be the same as the dis- tance from your listening position to both speakers; in other words an equilateral triangle. - Page 5 Toe-in To achieve optimal sound, try experimenting with ‘toeing in’ the speakers towards the listening position. This achieves two things: Fine-tuning of the tweeter level, which is more sensitive to refl ections than mid- range and bass output, treble is more directive than midrange and bass frequencies.
-
Page 6: Connecting
Connecting The C 803, C 805, C 807 and C 809 speakers comes prepared for bi-wiring. Please note the following three possible setups. Single-wiring For single-wire connections, the terminal jumpers should be attached as shown in the illustration. AMPLIFIER Bi-wiring If you’d like to use a bi-wiring arrangement, make sure you remove both the termi- nal jumpers before you connect up your loudspeaker cables like so…... -
Page 7: Spikes
Spikes After the initial placement of the C 80 fl oorstanders, you might consider using the supplied spikes instead of the built-in rubber feet. To fi x them on, we recommend that you gently lay the speaker on one side and screw in all four spikes together. Before you do this, however, be sure to place a couple of thick towels or similar underneath the side of the speaker. -
Page 8: C 803 / C 805 / C807 / C809
C 803 / C 805 / C 807 / C 809 Placement For an optimal listening experience, we recommend you place these speakers a minimum of 2m/6ft from each other, a minimum of 0.5m/1.5ft from the back wall and at least 1m/3ft from any side walls. -
Page 9: C 80 Cen
C 80 CEN Placement For an optimal listening experience, we recommend you place the C 80 CEN close to your screen, either just above or just below it. The speaker is magnetically shield- ed so it can be placed close to a normal CRT-type TV. Make sure the C 80 CEN stand/cradle is as stable as possible to ensure the optimal sound from the C 80 CEN. -
Page 10: C 80 Sur
C 80 SUR Placement The C 80 SUR are best placed at a 20 degree angle from the listening position and at a height of approximately 2m/6ft. Connecting Amplifi er... - Page 11 6.1 and 7.1 setup If you want to have a 6.1 surround setup, we recommend using an additional C 80 SUR (left) speaker. Place it right between the two side walls just behind your listen- ing area, to achieve optimal sound. In a 7.1 setup, use a pair of C 80 SUR and place them 1/4 of the full room width from each sidewall.
-
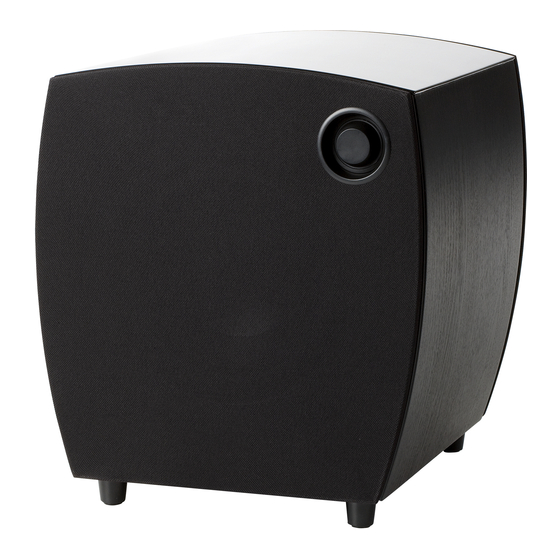
Page 12: C 80 Sub
C 80 SUB If you go to www.Jamo.com or look at the CD-rom which came with the product, you can fi nd a couple of useful subwoofer test signals. These will help you to set up your subwoofer so it delivers the maximum performance. Burn the test signals onto a CD and put them in your CD/DVD player. -
Page 13: Connecting The Subwoofer
Finding the right place for your subwoofer Irrespective of the location you choose for the subwoofer, it is essential to have as linear a frequency response as possible. There should, in other words, be as few dips and peaks in the response as possible. When evaluating the best location for the subwoofer, listen to some music or test tones from your favourite listening position, then try to move the subwoofer around the room to fi... -
Page 14: Speaker Level Input Terminals
Speaker level input terminals If you don’t have a subwoofer out, you can connect the amplifi er’s speaker output directly to the speaker-level input terminals on the C 80 SUB. Remember to connect both the left and right speaker outputs from the amplifi er to the left and right input if you have just the one subwoofer connected. -
Page 15: Subwoofer Adjustment Options
Sit in the listening area and ask your helper to turn the phase control while you’re playing back bass-heavy music or the test frequency fi les found at www.Jamo.com or on the CD-rom which came with the product. Turn the control back and forth to determine the position where the overall bass level sounds the loudest;... - Page 16 Cut-off frequency If the C 80 SUB is connected via an unfi ltered output signal, such as a line pre-out or speaker output, it is necessary to adjust the cut-off frequency on the subwoofer to match the bass response of your speakers. If it is connected via a fi ltered output signal, such as a LFE or ‘subwoofer out’...
-
Page 17: Cleaning
Boundary Gain Compensation. As with phase adjustment, we recommend you play music or the test frequency fi les from www.Jamo.com and have a friend turn the Variable Boundary Gain Compensation control, while you sit in the listening area. Then simply adjust it so that when the bass hits the lowest frequencies, there aren’t any detectable... -
Page 18: Specifi Cations
Specifi cations Name ....................C 809 Name ....................C 80 CEN System ................3 way bassrefl ex System ................2 way bassrefl ex Woofer (In / mm) ..............2 x 7 / 180 Woofer (In / mm) ...............2 x 6 /155 Midrange (In / mm) ............... 7 / 180 Midrange (In / mm) ................... -
Page 19: Jamo Consumer Warranty
Heed all warnings. prior agreement of your dealer. If the product is STILL UNDER WARRANTY, Jamo will pay freight costs back and forth between the dealer and the Follow all instructions. Jamo authorised service centre. Any other freight must be paid for by the customer. - Page 20 www.jamo.com...
Need help?
Do you have a question about the C 80 Series and is the answer not in the manual?
Questions and answers