Advertisement
Quick Links
Advertisement

Summary of Contents for J/Fit Mini Elliptical
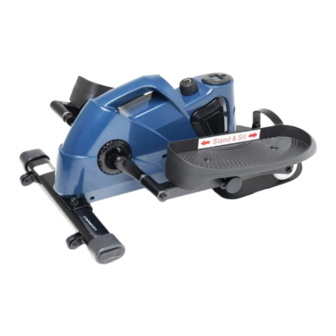
- Page 1 Under desk or Stand-up mini elliptical Assembly Chart U.S.Patent Pending No:15/014,761...
- Page 2 Important Safety Information Please keep this manual in a safe place for reference. It is important to read this entire manual before assembling and using the equipment. Safe and efficient use can only be achieved if the equipment is assembled, maintained and used properly. It is your responsibility to ensure that all users of the equipment are informed of all warnings and precautions.
- Page 3 As you proceed and use your mini elliptical you will become very comfortable with getting on and off and will also over time improve your balance.
- Page 4 Please note the most screws are already in place and will have to be unscrewed, then re-attached with adjoining components. NAME DESCRIPTION NAME DESRIPTION Main body Flat washer Ø20*ø10.5*1.5 base plate Foot tube screw M8*15 handle Ø25*1.5*100 Flat washer Ø16*ø8.5*1.5 Pedal L 385*140*72 screw...
- Page 5 Step 1: Remove all the accessories in the carton, assemble the foot tube (3) to the main body (1) with flat washer (15) and nut M8 (16). These screws are already in place on the unit. Remove screws from the bar with enclosed wrench and connect to the unit by re-screwing them together.
- Page 6 Step 2: Assemble the base plate (2) to the main body with flat washer (14) and screw M6X15 (13). The screws are in place attached underneath the unit. Please remove screws from unit and re-attach the base plate to the main body as shown. Step 3: To attach the plate handle run the screw M10X15 (8) through the hole in the handle (4) and the hole in the base plate (2).Tighten it with flat washer (9) and nut M10 (10).
- Page 7 Step 4: Align the hole of the pedal (5-1, 5-2) to the pedal bracket. Use flat washer (12), screw M8X15 (11) to tighten the pedal. The screws are located in the arm, please unscrew washer and screw from the arm and re-attach pedals to the arm with these screws.
- Page 8 Step 5: There are three holes in the pedal bracket; you can adjust the pedals to three different heights. The 1 hole (top hole) allows the pedal to lie flat for stand up elliptical mode. The second and third hole is used for sit down mode. You can select the height adjustment that feels the most comfortable for your height or strength.
- Page 9 Middle height: Only fit for sit use. Sit mode you will be facing the direction where both plate handle AND roller bar will be in front of you Highest height:Only fit for sit use. Sit mode is where both plate handle AND roller bar will be in front of you For Stand up Mode Place knob in the top hole which will make the pedal almost completely flat.
- Page 10 How to Change the Battery of Monitor (Fig. 1) (Fig. 1-1)
- Page 11 Step 1 : Turn over the pedal so you have access to the screws ( #1) Step 2 : Remove the 4 screws illustrated by #2 Step 3 : Lift the monitor out, leave it connected (No need to unplug but if necessary be sure to plug back in before closing up the machine) (#3) (Fig.
- Page 12 (Fig. 3) Step 8 : Replace the 4 screws back in original position. (#10) Step 9 : Flip pedal back over to original position to operate machine.
-
Page 13: Exercise Instructions
EXERCISE INSTRUCTIONS Using your mini elliptical will provide you with several benefits; it will improve your physical fitness, tone muscle and in conjunction with calorie controlled diet, help you lose weight. The Warm up Phase. Do a quick warm up on the bike before stretching. Warm up at a slow pace to prepare muscles for stretching. -
Page 14: Key Functions
This stage should last for a minimum of 12 minutes though most people start at about 15-20minutes Series Monitor SPECIFICATIONS: TIME……………............00:00-99:59 MIN SPEED…………………………………..0.0-99.9 MPH DISTANCE………………………….…….0.00-999.9 MILES CALORIES (CAL)…………….…………………...0-9999KCAL KEY FUNCTIONS: MODE: This key lets you to select and lock on to a particular Function you prefer. - Page 15 Dual purpose handle: Your j/fit mini elliptical comes with a dual handle .The handle should be stored in the forward position. Laying flat down with the handle facing forward towards the unit.
- Page 16 To use the handle for moving the mini elliptical from place to place, usage to storage, or to turn the elliptical around to switch from standing to sitting, simply flip handle straight up. The most unique function for this handle is its use for rolling chairs. Simply place the handle flat on floor with handle facing away from the unit.
- Page 17 Please remember to always keep handle on forward position while using and storing elliptical. For stand up mode be sure to place the knob (6) in the top hole and line it up with the adjacent hole and secure with the knob.
- Page 18 For sit down mode you will face towards the plate handle (you can lock your chair into the handle so your chair does not move) and the roller bar is also in FRONT of you. You can rotate the monitor clockwise for easy reading in this mode.
Need help?
Do you have a question about the Mini Elliptical and is the answer not in the manual?
Questions and answers