Advertisement
Advertisement
Table of Contents

Subscribe to Our Youtube Channel
Related Manuals for 5D TACTICAL Router JigPro

Summary of Contents for 5D TACTICAL Router JigPro
- Page 1 INSTRUCTIONS V1.2...
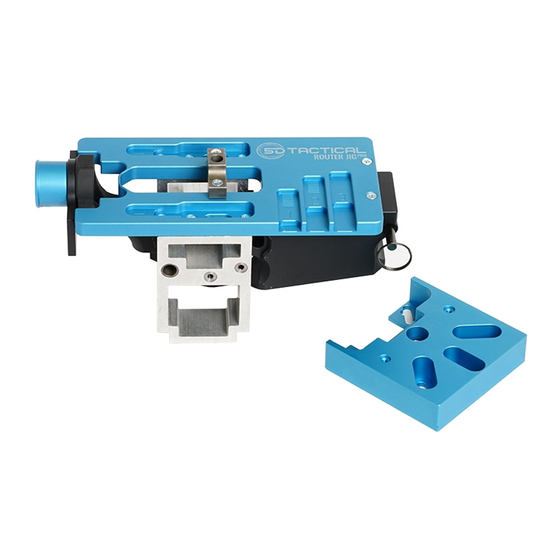
- Page 2 1. Router A..Guide Plate J ..AR-15/AR-9 2. Drill Takedown Adapter B. .. Router Adapter 3. 5D Tactical ReadyMILL™ K ..308/AR-10 C. .. (4) Router Adapter 4. 3/8” Drill Bit Takedown Adapter Screws 5. 21/64” Drill Bit L ..
- Page 3 ASSEMBLY Thank you for your Router Jig Pro purchase. At 5D Tactical, we understand you have chosen to spend your hard earned money with us, and because of that, we strive for 100% customer satisfaction. Your Router Jig Pro carries a LIFETIME WARRANTY against manufacturer’s defects.
- Page 4 1-11 While grasping Guide Plate, tighten Clamp Jig Assembly securely in (4) Jig screws, securing Buffer Plate a vise as shown by the notches provided in the Side Plates. DO NOT and Takedown Adapter. CLAMP JIG BY OUTSIDE OF SIDE Orient Side Plates, observing Left PLATES.
- Page 5 and apply moderate downward pressure Uninstall the Drill Guide by removing the (2) Jig Screws. when starting the router. • While milling, move the router smoothly and in a clockwise manner as shown in the image. Keep the Router Adapter flat against the Guide Plate at all times.
- Page 6 Set end mill depth to the first hash Complete the first pass of milling, mark using Depth Gauge #1. Set allowing the Guide Pins to trace depth by holding the base of Router Adapter the entire area of the Guide Cavities. against the edge of the Guide Plate.
- Page 7 PART 4: MILLING STEP 2 Remove #1 (Short) Guide Pins and install #2 (Medium) Guide Pins. Do not overtighten. Set end mill depth to the first hash mark using Depth Gauge #2. 508-834-4223 5DTACTICAL.COM...
- Page 8 Complete the first milling pass allowing the Guide Pins to follow the #2 Guide Cavities. Set end mill depth to the second hash mark. Mill the second pass following the same method and process. Continue milling, adjusting depth by 1 hash mark until you have milled to the bottom of Depth Gauge #2.
- Page 9 Place router on Guide Plate, with the end mill centered within the drill hole. The Guide Pins should be positioned inside the #3 Guide Holes on both sides. Gently mill in a clockwise manner until the trigger slot is formed. PART 5: MILLING STEP 3 Remove #2 (Medium) Guide Pins SECTION 6: FINAL DRILLING...
- Page 10 NOTE: If your drill bits are not long enough to penetrate both walls, flip jig over and repeat process. Receivers with spray-on coatings such as Cerakote and Duracoat should be drilled from both sides for maximum finish quality. APPENDIX A – ROUTER ADAPTER INSTALLATION NOTE: Your ReadyMILL™...
- Page 11 A1-3 Orient the Router Adapter with ROUTER INSTALL READYMILL the bearing facing toward the MODEL METHOD MODEL router, and the notch away from the power Bosch PR10E ..... 2 ....A cord. Pass the large diameter portion of the Bosch PR20EV ...
- Page 12 5DTACTICAL.COM 508-834-4223 508-834-4223 5DTACTICAL.COM...
Need help?
Do you have a question about the Router JigPro and is the answer not in the manual?
Questions and answers