
Related Manuals for Lumatek ZEUS 600W

Summary of Contents for Lumatek ZEUS 600W
- Page 1 MANUAL ENGLISH - FRENCH - ITALIAN - SPANISH - GERMAN - CZECH YEAR Plug & Play WARRANTY CONTROL TECHNOLOGY...
-
Page 2: Table Of Contents
LUMATEK ZEUS 600W LED MANUAL ENGLISH TABLE OF CONTENTS 1. Introduction 2. Product Description 3. Product information and specifications General product information Technical Specifications Fixture Dimensions Spectrum Graph Light distribution curve Environment Legal 4. Safety recommendations and warnings 5. Contents 6. -
Page 3: Introduction
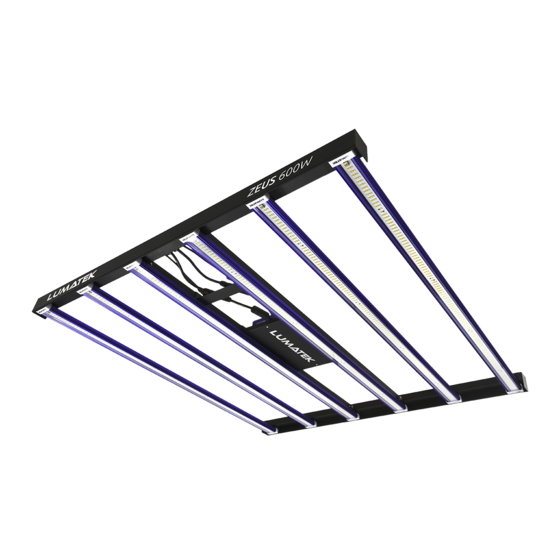
2. PRODUCT DESCRIPTION The Lumatek Zeus 600W LED is an electronic horticultural LED fixture using a linear array design with six LED light bars. The Zeus is a high performance full-cycle top lighting solution for commercial horticulture cultivation, with the power and flexibility to scale from vegetative growth to higher light intensities in bloom. -
Page 4: Fixture Dimensions
3.3 Fixture Dimensions 1181.2mm 3.4 Spectrum Graph Full Spectrum wavelength (nm) -
Page 5: Light Distribution Curve
3.5 Light distribution curve Unit: cd C0/180 , 117.3 C30/210 , 117.6 C60/240 , 115.9 C90/270 , 114.2 3.6 Environment The LED fixture is intended to be used in climate-controlled grow rooms, indoor farms and greenhouses. The product may be used in damp environments but may not be used in wet environments or outdoors. The product will operate in ambient temperatures from -20ºC to 40ºC but will function at optimal level between 20ºC to 30ºC. - Page 6 • Always disconnect the LED fixture from mains before performing any maintenance. • Always allow for a cool down period of at least 20-30 minutes before touching the LED light bars. Touching the LED bars when the fixture is lit or immediately after may result in burns! •...
-
Page 7: Assemble The Frame
6.1 Assemble the frame Connect Frame A and B to the support frame by pressing button on frame connector and inserting into support frame socket and lock. Connect Frame B to support frame end near support plate. Note the direction when installing; the driver tray is on top when the fixture is hung. Press button on the frame push-click connector to connect and ensure button pops up in hole socket to lock. -
Page 8: Connect The Led Light Bars
6.3 Connect the LED light bars Ensure the driver is secured and flip the fixture over Then insert the other end; align the round hole so the driver is now underneath. Insert the end on Frame B with the light bar’s magnetic end of the light bar with the hook into the square and insert male pin into female socket. -
Page 9: Connecting The Manual Dimmer Control
6.7 Connecting fixtures in series for external control For detailed instructions please refer to the Lumatek Control Panel manual. Position and hang each fixture appropriately. Connect the signal wire T-junction component to the fixture 1 dimmer wire. -
Page 10: Connecting The Led Fixture To The Mains
If the product shows any defects within this period and that defect is not due to user error or improper use Lumatek Ltd shall, at its discretion, either replace or repair the product using suitable new or reconditioned products or parts. - Page 11 MANUAL ZEUS 600W LED DE LUMATEK ESPANÕL TABLA DE CONTENIDO 1. Introducción 2. Descripción del producto 3. Información del producto y especificaciones Información general del producto Technical Specifications Dimensiones del accesorio Especificaciones técnicas Curva de distribución de luz Medio Ambiente Legal 4.
-
Page 12: Introducción
Zeus; por favor lea este manual detenidamente antes de intentar u operar cualquier sistema de la serie Zeus de Lumatek. Si usted no se siente cómodo con la instalación de sistemas de iluminación de alto rendimiento, por favor busque los servicios de un profesional de instalación calificado. -
Page 13: Dimensiones Del Accesorio
3.3 Dimensiones del accesorio 1181.2mm 3.4 Espectros Espectro Completo longitud de onda (nm) -
Page 14: Curva De Distribución De Luz
3.5 Curva de distribución de luz Unit: cd C0/180 , 117.3 C30/210 , 117.6 C60/240 , 115.9 C90/270 , 114.2 3.6 Medio ambiente El dispositivo LED está diseñado para ser utilizado en salas de cultivo con clima controlado, granjas interiores e invernaderos. -
Page 15: Instalación
• Siempre desconecte el dispositivo de la red eléctrica antes de realizar cualquier mantenimiento. • Siempre permita un período de enfriamiento de al menos 20-30 minutos antes de tocar las barras de luz LED. ¡El tocar las barras LED cuando el dispositivo está encendido o inmediatamente después puede provocar quemaduras! •... -
Page 16: Ensamblar El Marco
6.1 Ensamblar el marco Conecte el Marco A y B al marco de soporte presionando el botón en el conector del marco e insertándolo en el zócalo y bloqueo del marco de soporte. Conecte el Marco B al extremo del marco de soporte cerca de la placa de soporte. -
Page 17: Conecte Las Barras De Luz Led
6.3 Conecte las barras de luz LED Asegúrese que el controlador esté asegurado y inserte el otro extremo; alinee el orificio redondo en el voltee el dispositivo para que el controlador esté Marco B con el extremo magnético de la barra de luz e debajo. -
Page 18: Conexión Del Control De Atenuación Manual
6.7 Conexión de luminarias en serie para control externo Para obtener instrucciones detalladas, por favor consulte el manual del panel de control de Lumatek. Coloque y cuelgue cada accesorio adecuadamente. Conecte el componente de la unión en T del cable de señal al cable del atenuador del dispositivo 1. -
Page 19: Conexión De La Luminaria Led A La Red Eléctrica
(3) años a partir de la fecha original de compra. Si el producto muestra algún defecto dentro de este período y el defecto no se debe a un error del usuario o uso indebido, Lumatek deberá, a su discre- ción, reemplazar o reparar el producto con productos o piezas nuevas o reacondicionadas. - Page 20 LUMATEK ZEUS 600W GEBRAUCHSANWEISUNG DEUTSCH IHALTSVERZEICHNISS 1. Einführung 2. Produktbeschreibung 3. Produktinformationen und Spezifikationen Allgemeine Produktinformationen Technical Specifications Vorrichtungsmaße Technische Spezifikationen Light distribution curve Lichtverteilungskurve Rechtliches 4. Sicherheitsempfehlungen und Warnungen 5. Contents 6. Instalation Montieren Sie den Rahmen Schließen Sie den Treiber an Schließen Sie die LED-Lichtleisten an...
- Page 21 1. EINLEITUNG Vielen Dank, dass Sie sich für die lineare Multi-Light Bar LED-Lampe Lumatek Zeus 600W entschieden haben. Dieses Handbuch beschreibt die Installation und Verwendung des Zeus Pro-Geräts; bitte lesen Sie sich dieses Handbuch sorgfältig durch, bevor Sie versuchen, ein System der Lumatek Zeus-Serie zu installieren oder zu betreiben.
- Page 22 3.3 Vorrichtungsmaße 1181.2mm 3.4 Spektren Vollspektrum Wellenlänge (nm)
- Page 23 3.5 Lichtverteilungskurve Unit: cd C0/180 , 117.3 C30/210 , 117.6 C60/240 , 115.9 C90/270 , 114.2 3.6 Umgebung Die LED-Leuchte ist für den Einsatz in klimatisierten Anbaugebieten, Hallenbetrieben und Gewächshäusern vorgesehen. Das Produkt kann in feuchten Umgebungen verwendet werden, darf aber nicht in nassen Umge- bungen oder im Freien verwendet werden.
- Page 24 • Kondensierende Feuchtigkeit, starker Nebel oder Sprühregen; • Umgebungstemperaturen außerhalb des angegebenen Bereichs; • Staub und Verunreinigungen; • Direktes Sonnenlicht während des Gebrauchs oder HID-Licht, das den Treiber erhitzen kann. Trennen Sie das LED-Gerät immer vom Stromnetz, bevor Sie Wartungsarbeiten durchführen. Halten Sie immer eine Abkühlzeit von mindestens 20-30 Minuten ein, bevor Sie die LED-Lichtleisten berühren.
- Page 25 6.1 Montage des Rahmens Verbinden Sie die Rahmen A und B mit dem Stützrahmen, indem Sie den Knopf am Rahmenverbinder drücken und in die Buchse und das Schloss des Stützrahmens einsetzen Verbinden Sie den Rahmen B mit dem Ende des Stützrahmens in der Nähe der Stützplatte.
- Page 26 6.3 Die LED-Lichtbalken anschließen Vergewissern Sie sich, dass der Treiber befestigt ist, Dann das andere Ende einsetzen; das runde Loch und drehen Sie die Vorrichtung um, so dass sich am Rahmen B mit dem magnetischen Ende des der Treiber nun darunter befindet. Stecken Sie das Lichtbalkens ausrichten und den Stift in die Buchse Ende des Lichtbalkens mit dem Haken in das stecken Vergewissern Sie sich, dass die Magnet-...
- Page 27 Geräten zur externen Steuerung an. 6.7 Reihenschaltung von Leuchten zur externen Steuerung Detaillierte Anweisungen finden Sie im Handbuch des Lumatek Control Panels. Positionieren und hängen Sie jedes Gerät entsprechend. Verbinden Sie die T-Verbindungskomponente der Signalleitung mit der Dimmerleitung der Leuchte 1. Schließen Sie das Kabel des Reglerausgangssignals an den T-Stück-Eingang von Leuchte 1 an.
- Page 28 Kaufdatum frei von Material- und Verarbeitungsfehlern sind. Wenn das Produkt innerhalb dieser Frist Mängel aufweist und dieser Fehler nicht auf einen Benutzerfehler oder eine unsachgemäße Verwendung zurückzuführen ist, wird Lumatek Ltd. nach eigenem Ermessen das Produkt entweder ersetzen oder mit geeigneten neuen oder überholten Produkten oder Teilen reparieren. Falls Lumatek Ltd. beschließt, das gesamte Produkt zu ersetzen, gilt diese beschränkte Garantie für das Ersatzprodukt für die verbleibende...
- Page 29 MANUALE LUMATEK ZEUS 600W LED ITALIANO SOMMARIO 1. Introduzione 2. Descrizione del prodotto 3. Informazioni sul prodotto e specifiche Informazioni generali sul prodotto Specifiche tecniche Dimensioni apparecchio Grafico dello spettro Curva di distribuzione della luce Ambiente Legale 4. Consigli di sicurezza e avvertenze 5.
-
Page 30: Introduzione
2. DESCRIZIONE PRODOTTO Il Lumatek Zeus 600W LED è un apparecchio elettronico a LED per l’orticultura che utilizza un design a configu- razione lineare con sei barre luminose a LED. Zeus è una soluzione di illuminazione superiore ad altissime prestazioni a ciclo completo per l’orticoltura commerciale, con la potenza e la flessibilità... -
Page 31: Dimensioni Apparecchio
3.3 Dimensioni apparecchio 1181.2mm 3.4 Spettri Spettro completo lunghezza d'onda (nm) -
Page 32: Curva Di Distribuzione Della Luce
3.5 Curva di distribuzione della luce Unit: cd C0/180 , 117.3 C30/210 , 117.6 C60/240 , 115.9 C90/270 , 114.2 3.6 Ambiente L'apparecchio a LED è destinato all’utilizzo in ambienti di crescita a clima controllato, fattorie e serre indoor. Il prodotto può... -
Page 33: Contenuto
• Scollegare sempre l'apparecchio LED dalla rete prima di eseguire la manutenzione. • Consentire sempre un periodo di raffreddamento di almeno 20-30 minuti prima di toccare le barre luminose a LED. Toccando le barre LED quando l'apparecchio è acceso o immediatamente dopo può provocare ustioni! •... -
Page 34: Montare Il Telaio
6.1 Montare il telaio Collegare il telaio A e B al telaio di supporto premendo il pulsante sul connettore del telaio e inserendo nella cavità del telaio di supporto e serrare. Collegare il telaio B all’estremità del telaio di supporto accanto alla piastra di supporto. -
Page 35: Collegare Le Barre Luminose A Led
6.3 Collegare la barra luminosa a LED Assicurarsi che il driver sia stabile e capovolgere l'altra estremità; allineare il foro rotondo del telaio B l’apparecchio in modo che il driver si trovi in con l’estremità magnetico della barra luminosa e posizione inferiore. - Page 36 6.7 Collegare apparecchi in serie per il controllo esterno Per istruzioni dettagliate fare riferimento al manuale Pannello di controllo Lumatek. Posizionare e appendere ogni apparecchio in modo appropriato. Collegare il componente con raccordo a T del cavo di segnale al cavo del regolatore di intensità luminosa dell’apparecchio 1.
-
Page 37: Conservazione E Smaltimento
Lumatek Ltd procede, a sua discrezione, a sostituire o a riparare il prodotto utilizzan- do opportuni prodotti nuovi o prodotti o parti rigenerati. Nel caso in cui Lumatek Ltd decida di sostituire l'intero prodotto, questa garanzia limitata si applicherà al prodotto di sostituzione per il periodo rimanente della copertura, vale a dire tre (3) anni dalla data di acquisto del prodotto originale. -
Page 38: Instalation
MANUEL LUMATEK ZEUS 600W LED FRANÇAIS TABLE DES MATIÈRES 1. Introduction 2. Description du produit 3. Informations sur le produit et spécifications Informations générales sur le produit Spécifications techniques Dimensions de la lampe Graphique de spectre Courbe de distribution de la lumière Environnement Légal... -
Page 39: Introduction
2. DESCRIPTION DU PRODUIT The Lumatek Zeus 600W LED is an electronic horticultural LED fixture using a linear array design with six LED light bars. The Zeus is a high performance full-cycle top lighting solution for commercial horticulture cultivation, with the power and flexibility to scale from vegetative growth to higher light intensities in bloom. -
Page 40: Dimensions De La Lampe
3.3 Dimensions de la lampe 1181.2mm 3.4 Spectre Spectre complet longueur d'onde (nm) -
Page 41: Environnement
3.5 Courbe de distribution lumineuse Unit: cd C0/180 , 117.3 C30/210 , 117.6 C60/240 , 115.9 C90/270 , 114.2 3.6 Environnement La lampe LED doit être utilisée dans un lieu de culture à climat contrôlé, des fermes intérieures et dans des serres. - Page 42 • Déconnectez toujours la lampe LED de l'alimentation avant d'effectuer quelconque maintenance. • Laissez toujours refroidir la lampe LED pendant une période d'au moins 20-30 minutes avant de toucher les barres lumineuses LED. Toucher les barres lumineuses lorsque celles-ci sont chaudes peut engendrer de sévères brûlures ! •...
- Page 43 6.1 Assemblage et installation de la lampe Connectez les supports A et B au châssis principal en appuyant sur le bouton du connecteur de châssis et en les insérant dans l'embout et le verrou du châssis. Connectez le support B au bout du châssis principal à...
-
Page 44: Connecter Les Barres Lumineuses Led
6.3 Connectez les barres lumineuses LED Assurez-vous que le transformateur soit bien l'autre bout; alignez le trou rond du support B avec sécurisé et retournez la lampe afin que celui-ci se le bout magnétique de la lampe et insérez le pin trouve en dessous. - Page 45 6.7 Connexion des lampes en série pour un contrôle externe Pour des instructions détaillées, référez-vous au manuel du Panneau de contrôle Lumatek. Positionnez et accrochez chaque lampe de façon appropriée. Connectez le câble de signal en T au câble du variateur de la lampe 1.
-
Page 46: Inspection, Maintenance Et Réparation
à une erreur de l'utilisateur ou une mauvaise utilisation, Lumatek Ltd se doit de remplacer ou réparer le produit en utilisant des composants ou produits neufs ou reconditionnés adaptés. Dans le cas où Lumatek Ltd décide de remplacer totalement le produit, cette garantie limitée se doit d'être appliquée au produit de... - Page 47 LUMATEK ZEUS 600W LED MANUÁL ČEŠTINA OBSAH 1. Introduction 2. Úvod 3. Informace o produktu a specifikace Obecné informace o produktu Technické specifikace Technické specifikace Spektrální graf Křivka rozložení světla životní prostředí Právní 4. Bezpečnostní doporučení a varování 5. Obsah 6.
- Page 48 1. ÚVOD Děkujeme, že jste si zakoupili lineární svítidlo LED Lumatek Zeus 600W s více světlami. Tato příručka popisuje, jak nainstalovat a používat zařízení Zeus; prosím pečlivě si přečtěte tuto příručku před instalací nebo provo- zováním jakéhokoli systému řady Lumatek Zeus. Pokud s instalací vysoce výkonných osvětlovacích systémů...
- Page 49 3.3 Rozměry světla 1181.2mm 3.4 Spektra Celé spectrum vlnová délka (nm)
- Page 50 3.5 Křivka distribuce světla Unit: cd C0/180 , 117.3 C30/210 , 117.6 C60/240 , 115.9 C90/270 , 114.2 3.6 Prostředí LED svítidlo je určeno k použití v klimaticky řízených pěstitěbných místnostech, vnitřních farmách a sklenících. Produkt může být používán ve vlhkém prostředí, ale nesmí být používán v mokrém prostředí nebo venku. Produkt bude fungovat v okolních teplotách od -20°C do 40°C, ale bude fungovat na optimální...
- Page 51 • Déconnectez toujours la lampe LED de l'alimentation avant d'effectuer quelconque maintenance. • Laissez toujours refroidir la lampe LED pendant une période d'au moins 20-30 minutes avant de toucher les barres lumineuses LED. Toucher les barres lumineuses lorsque celles-ci sont chaudes peut engendrer de sévères brûlures ! •...
- Page 52 6.1 Montáž a instalace svítidla Připojte rám A a B k nosnému rámu stisknutím tlačítka na konektoru rámu a zasunutím do patice a zámku. Připojte rám B k nosnému rámu poblíž nosné desky. Při instalaci si všimněte směru; při zavěšení svítidla je přihrádka na řidič nahoře. Stisknutím tlačítka na konektoru rámu připojte a ujistěte se, že tlačítko zaskočí...
- Page 53 6.3 Připojte LED světelné lišty Ujistěte se, že je ovladač zajištěn, a otočte svítidlo Poté vložte druhý konec; zarovnejte kulatý otvor tak, takže je ovládač nyní pod ním. Vložte konec na rámu B s magnetickým koncem světelné lišty a světelné lišty s háčkem do čtvercového otvoru v zasuňte konektor samce do zásuvky Ujistěte se, že rámu A.
- Page 54 6.7 Propojení světel do série pro externí ovládání Podrobné pokyny naleznete v příručce k ovládacímu panelu Lumatek. Každé zařízení umístěte a vhodně zavěste. Připojte komponent T-připojení signálního drátu k vodiči stmívače 1. Připojte výstupní signální vodič kontroléru do vstupu 1 T-spojení...
- Page 55 10. ZÁRUKA Lumatek Ltd zaručuje po dobu tří (3) let od původního data nákupu, že mechanické a elektronické součásti jejich produktu jsou bez vad materiálu a zpracování, pokud jsou používány za normálních provozních podmínek. Pokud produkt vykazuje v této lhůtě nějaké závady a tato závada není způsobena chybou uživatele nebo nesprávným používáním, společnost Lumatek Ltd dle svého uvážení...
Need help?
Do you have a question about the ZEUS 600W and is the answer not in the manual?
Questions and answers