Table of Contents
Advertisement
TM
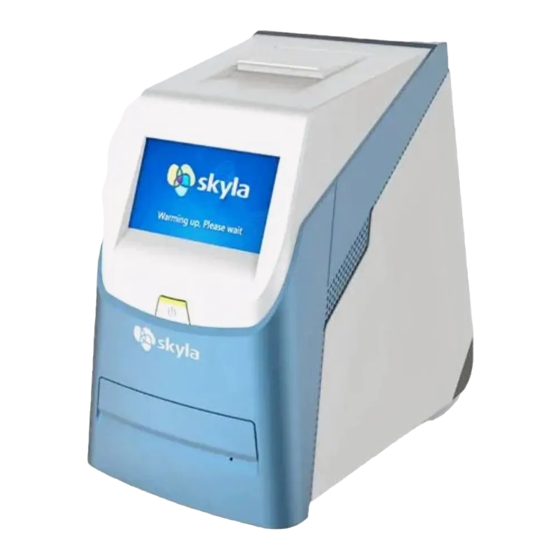
skyla
For In-Vitro Diagnostic Use Only
Technical support and customer service information:
Tel: +886-3-611-8511
Fax: +886-3-579-5393
E-mail: support@skyla.com
Website: www.skyla.com
Manual Text, Rev. 1B
PN: 7B25000005HB
LITE-ON
No. 8, Dusing Road, Hsinchu Science Park
Hsinchu, Taiwan, R.O.C.
MT Promedt Consulting
GmbH
Altenhofstr. 80
D-66386 St. Ingbert
Germany
Clinical Chemistry Analyzer
HB1
Operator's Manual
Technology
Corp. H.S.P.B.
Advertisement
Table of Contents

Summary of Contents for Skyla HB1
- Page 1 Clinical Chemistry Analyzer Operator’s Manual For In-Vitro Diagnostic Use Only Technical support and customer service information: Tel: +886-3-611-8511 Fax: +886-3-579-5393 E-mail: support@skyla.com Website: www.skyla.com Manual Text, Rev. 1B PN: 7B25000005HB Technology LITE-ON Corp. H.S.P.B. No. 8, Dusing Road, Hsinchu Science Park Hsinchu, Taiwan, R.O.C.
-
Page 2: Table Of Contents
Table of Content SECTION 1: GENERAL INFORMATION .......... 1-1 1.1 Overview ..................1-1 1.2 Universal Precautions ..............1-1 1.3 Introduction ................. 1-2 1.4 Technical Support ............... 1-3 1.5 Consumables and Supplies ............1-3 1.6 Understand the Symbols.............. 1-3 SECTION 2: SETUP AND QUICK START ......... 2-1 2.1 Pre-installation Check .............. - Page 3 3.9.1 Selecting an External Control ........3-19 3.9.2 Using a skyla Reagent Disc for the Quality Control Test ............. 3-19 3.9.3 Performing a Quality Control Test......3-19 3.9.4 Quality Control Test Results ........3-20 SECTION 4: REVIEW OF HISTORICAL DATA & OPERATION INFORMATION ...............
- Page 4 5.2.7 Password Change ............. 5-11 5.2.8 System Default ............5-12 5.2.9 Operator Control ............5-12 5.2.10 Operator List............5-13 5.2.11 Operator Creation ............ 5-13 5.2.12 RS232 Baud Rate Setting ......... 5-14 5.2.13 Demo Mode ............. 5-14 5.2.14 QC Report ............... 5-15 5.2.15 Buzzer ..............
-
Page 5: Section 1: General Information
Section 1: General Information 1.1 Overview The skyla Clinical Chemistry Analyzer, together with its exclusive HB1 reagent disc series, offers a quick, easy accurate method measure various biochemical markers in whole blood, plasma, or serum. CAUTION : 1. If the skyla... -
Page 6: Introduction
1.3 Introduction The skyla Clinical Chemistry Analyzer provides clinical testing laboratories of medical facilities and clinics with an in-vitro clinical chemistry diagnostic tool that is compact, portable, and reports rapid results. The portable design of the clinical chemistry analyzer utilizes... -
Page 7: Technical Support
Tel: +886- 3- 6118511 authorized distributors. Fax: +886- 3- 5795393 E-mail: support@skyla.com 1.6 Understand the Symbols The definitions of symbols found on the skyla Clinical Chemistry Analyzer and its peripherals are as follows: In Vitro Diagnostic Medical Equipment Caution Biohazard. Please strictly adhere to laboratory practices when handling blood and body fluid samples;... - Page 8 with caution. Please refer to the biological medical waste disposal regulations of the locality. Do not reuse EC authorized representative Date of manufacture Manufacturer Temperature limits (2-8°C) Use by date Serial number Lot number Consult instructions for use Direct current RJ45 LAN network connection IOIOI RS232 serial port...
-
Page 9: Section 2: Setup And Quick Start
Clinical chemistry analyzer Power adapter & power 2.1 Pre-installation Check supply cord Remove the skyla Clinical Chemistry Analyzer One roll of thermal printer from the shipping box. Place the analyzer on a clean paper surface off the floor. Do not expose the analyzer to ... - Page 10 (optional) 3. After the successful setup, fill in the warranty card Technology and mail it to LITE-ON Corp. H.S.P.B. support@skyla.com or email to for receiving periodic mail or email regarding software upgrades and skyla Clinical Chemistry Analyzer product information.
-
Page 11: Specifications And Installation Characteristics
2.2 Specifications and Installation Characteristics Dimensions: Height: 300 mm Width: 223 mm Depth: 285mm Weight: Analyzer: 5.5 kg (12.1 pounds) Ambient Operating Temperature: Indoor 10 - 32C (50 - 89.6F) Operating Humidity: <95% relative humidity (non-condensing) Device Storage/Transportation Temperature: <65C(149 F) Device Storage/Transportation Humidity: <90% relative humidity (non-condensing) -
Page 12: Installation And Setup
2.3 Installation and Setup This section provides important information for the installation and setup of the skyla Clinical Chemistry Analyzer. Exterior function diagram Built-in thermal printer Touchscreen LCD Power button Disc drawer RJ45 network port USB port Power socket RS232 port... - Page 13 If you choose to use an externally connected printer interfaced external printer instead of the built-in thermal printer, please plug the models. Please contact your external printer into the skyla Clinical Chemistry skyla authorized technical Analyzer’s USB port and switch the system settings to support personnel for the an external printer.
-
Page 14: Touchscreen Interface
Connecting an External Barcode Scanner If you purchase an external barcode scanner (CIPHER 1500H) for patient ID scanning, please connect it to the USB port on the clinical chemistry analyzer’s rear panel. The clinical chemistry analyzer’s operating system will automatically detect and launch the scanner when it’s connected. - Page 15 Input the password or patient ID using the keypad on Backspace touchscreen (up to 12 digits). To change typed information, please use the Back backspace or delete key on the touch screen move the cursor on screen backwards in order to Confirm (Next step) delete a typed character.
-
Page 16: Power-On And Initialization
yellow frame means that the selected English keyboard value is currently being updated. means to show the numerical keypad for Space manual key-in when using an external barcode scanner. Uppercase /Lowercase Provides an on-line help explanation. / Number ... - Page 17 Initialization: Initialization The first time the clinical The first time the clinical chemistry analyzer is turned chemistry analyzer is turned on, once the warm up and system self-test are complete, on, you will be prompted to the language menu in the operator interface will appear set the “Language”, on screen.
- Page 18 After completing the date and time setting, the all analytes units setting menu will appear on screen. Select and press “OK” to complete setting. The system processing will take about 10 seconds, and it will automatic be directed to the system homepage. Home Menu Home Menu: When the “START”...
-
Page 19: Maintenance And Cleaning
“YES” to confirm power-off. 2.6 Maintenance and cleaning LITE-ON suggests Clinical skyla Chemistry Analyzer should be cleaned routinely at least once per week. Use a clean cloth dampened with cleaning solution (ex. 10% commercial bleach solution) to wipe the exterior surface of the analyzer. - Page 20 3. Use a dry cotton swab to wipe the same area. 4. Close the disc drawer. The disc drawer will automatically close in 15 seconds. If the cleaning procedure is not yet finished, please press the “START” icon again to open the drawer.
-
Page 21: Section 3: Sample Analysis
Section 3: Sample Analysis 3.1 Functions of Reagent Disc Reagent disc All the chemical reactions that take place in the skyla Clinical Chemistry Analyzer are completed inside a circular and transparent plastic reagent disc. A series of automated liquid handling and reaction procedures on... -
Page 22: Sample Preparation
3.2 Sample Preparation Sample Conditions: The compatible sample types for the skyla Clinical Use serum or lithium- Chemistry Analyzer include: serum, lithium-heparinized heparinized whole-blood or whole blood or plasma. - Page 23 Conduct testing within 60 The amount of sample required for one panel test is minutes after collecting a 200 µL. whole-blood sample. Once the whole-blood sample is collected, testing Use the provided must be conducted within 60 minutes (at room micropipette to obtain a temperature) order...
-
Page 24: Preparation Before Testing
(at room temperature). Follow local regulations The blood sample must be at or standard operating least half the volume of the procedures for the blood collection tube. disposal of reagent discs and the clinical Use the serum clot activator chemistry analyzer that blood collection tube (Gold (Serum) - Page 25 After removal, use the other hand to hold the reagent disc by the edge. Release the fingers that grip the regent disc, unwrap and discard the tissue paper. Inspect the reagent disc for any damage or abnormality. Do Not Use Any Damaged Reagent ...
-
Page 26: Dispensing The Sample
3.4 Dispensing the Sample Step 2: Dispensing the Use the provided micropipette to dispense 200 μL of the Sample sample into the sample chamber through the sample port Use the provided of the reagent disc. micropipette and a new tip ... - Page 27 early entry of the sample Hold the reagent disc by its edges and keep it level; into the sample gently place it into the analyzer’s disc drawer. measurement area, which Close the analyzer’s disc drawer and begin the may affect the metering of analysis.
-
Page 28: Performing A Test
3.5 Performing a Test Step 3: Performing a Test When the skyla Clinical Chemistry Analyzer is turned Press the START icon on on and the touchscreen displays the function options, it the touch screen to open is ready to perform the test sequence. - Page 29 When the Operator Control setting is ON, the Note: system will require the operator to enter the Operator 1. The system will ID before the test starts. automatically perform the test sequence when the drawer contains a reagent disc and is closed. 2.
-
Page 30: Test Results
The system will commence automatic test procedures after the patient code is entered. Warning: A reagent disc cannot be reused if a test has been canceled. When the analysis is completed, the system will store the analysis results and display them on the touchscreen. To cancel a test in progress, simply press the CANCEL icon on the touchscreen. -
Page 31: Reviewing The Test Results
Notes: Dispose of used reagent discs according to laboratory regulations and local To analyze another sample, insert a new reagent disc legislation. sample and repeat the above steps. Press “OK” without inserting any disc and the touch screen will return to the main menu. -
Page 32: Symbols Used In Test Reports
Table 1: Test report generated when the QC Report Symbols used in test reports: function is not used (#): Calculated value ( ):Result is higher ↑ than referance range. ( ):Result is lower ↓ than referance range. ... - Page 33 mg/dL” will be shown. (I): Icterus interference (+): Indicates the degree of lipemia (LIP), hemolysis effect is outside the (HEM), and icterus (ICT) of the sample. The more permissible range by 10% plus symbols (+) are shown, the more severe this or more.
- Page 34 Explanations of NA results : 1) N.A. for certain calculated values: for example, if TP or ALB is out of dynamic range, or one of them is N.A., the result of GLOB# will show N.A.. 2) Assay equation and FW version does not match. Please upgrade system firmware.
-
Page 35: Symbols Used In Internal Qc Reports
Table 2: Test report generated when the QC Report Symbols used in test reports: function is activated SCORE: Indicates the numerical value of sample lipemia (LIP), hemolysis (HEM), and icterus (ICT). min:Indicates the minimum acceptable value 3.7.2 Symbols Used in internal QC Reports ... - Page 36 QC6: This QC item indicates the degree of sample hemolysis. Normal score range is 90 or over. QC7: This QC item indicates temperature control stability of the instrument. Normal score is within the range 90–110. L340nm: This QC item indicates the linear stability of the equipment’s first optical channel.
-
Page 37: Custom Reports
Chemistry QC: This QC item indicates the activity quality of the chemical reagents. Normal score range is 90 or over. Chemistry QC Acceptable Minimum: 90 SCORE: Shows the numerical value of interference of lipemia (LIP), hemolysis (HEM), and icterus (ICT) of the sample, based on a proprietary calculation method. -
Page 38: Performing Quality Control
3.9 Performing Quality Control Quality control tests should be performed on a regular Performing Quality basis in order to ensure the reliability of the skyla Control: Clinical Chemistry Analyzer. Quality control can be Perform a quality control regularly performed using commercially available test on a regular basis. -
Page 39: Selecting An External Control
3.9.1 Selecting an External Control Select a commercially available control that covers all test markers of the reagent discs selected for the control test and the concentrations thereof. 3.9.2 Using a skyla Reagent Disc for the Quality Control Test Any skyla... -
Page 40: Quality Control Test Results
Control function in the Quality control test results are stored in the system Settings on the skyla database. You can search for, review, and print past Clinical Chemistry control test results using the RECALL function (see Analyzer to ensure the Section 4.1.3 Searching for System Quality Control... -
Page 41: Section 4: Review Of Historical Data & Operation
Section 4: Review of Historical Data & report information stored Operation Information in the clinical chemistry analyzer. When the Home screen appears on the skyla Clinical Chemistry Analyzer, click “HELP” to display the quick Recall historical guide or click “RECALL” to browse historical report information information stored in the clinical chemistry analyzer. - Page 42 Enter the administrator password. The administrator can search test records by “Date” or “Patient ID”, or press the “Controls” icon to search quality control test records. To search for results by “Date”: Press the “Date” icon to access the date and time input panel.
- Page 43 Use the up and down arrows to select the desired report. Press the USB icon to export and save the selected data to USB. Press the print icon when the report is displayed on screen to print the report. To search for results by “Patient ID”: ...
-
Page 44: Browsing Test Results (Browse)
Select a patient ID to display the test reports for the patient on screen. Press the USB icon to export and save the selected data to USB. Press the print icon when the report is displayed on screen to print the report. 4.1.2 Browsing Test Results (Browse) ... -
Page 45: Searching For System Quality Control Test Records
Results may be printed immediately after system quality control is complete. The RECALL function can also be used to search and print historical data. Please contact skyla authorized technical support personnel or distributors for consultations on detailed information regarding quality... -
Page 46: Help Information
Select the “HELP” icon to refer to the quick guide of the skyla Clinical Chemistry Analyzer. The important operational information is as follows: Prepare the sample in a tube. Remove the foil strip from the disc for releasing the sample diluent. - Page 47 Sealed reagent discs should be stored at temperatures of 2~8°C. Use the Administrator Settings to customize Clinical Chemistry Analyzer functions for skyla different needs. Execute quality control processes periodically to ensure test reliability of the clinical chemistry analyzer.
-
Page 48: Section 5: System Settings
Version, Printer, Brightness, eGFR value calculation function, Control, Custom Report and Administrator Settings options. 5.1.1 System Version Version contains the system version and system installation date of the skyla Clinical Chemistry Analyzer. Under Setting, press the "Version" icon to access the Note: version information. -
Page 49: Screen Brightness Adjustment
clinical chemical analyzer uses Simplified skyla MDRD formula to calculate the eGFR value. The formula is as follows: eGFR = 186 * Scr-1.154 * Age-0.203 * 0.742 (if female) * 1.212 (if African) -
Page 50: Control (Performing Quality Control)
5.1.5 Control (Performing Quality Control) In the Setting screen, press the “Control” icon to enable assay controls. Note: Assay control test results will be permanently The Control function of the retained by the system in a separate database from the clinical chemistry analyzer sample test results. -
Page 51: Administrator Settings
Next, press the “OK” icon to confirm the selection. 5.2 Administrator Settings The skyla Clinical Chemistry Analyzer provides the user with a variety of customization functions to Administrator settings optimize the system operations. On the Home screen, press the “SETTINGS”... - Page 52 Automatic Printing, Save Log to USB, Export & Import Password Database, and Error Log. System Default Operator Control In the Home screen, press “SETTINGS” to browse the system settings. Next, press the “Administrator Operator List Settings” icon to browse the administrator settings ...
-
Page 53: Screen Calibration
Note: Pressing the Home icon at any time will return to the home page (top level). Administrator Settings menu page 2 Administrator Settings menu page 3 5.2.1 Screen Calibration If the touchscreen is responding incorrectly or poorly to selections, use Screen Calibration to adjust it. The screen calibration procedures are as follows: ... -
Page 54: Date & Time
5.2.2 Date & Time Please adjust the system to the local time before testing. Under Administrator Settings, select “Date & Time”. When the Date & Time menu appears, select the edit box (Date, Month, Year, Hour, Minute, Format) and use the up and down arrow keys to... - Page 55 The procedure for changing the reference range of an analyte is as follows: Use the up and down arrow keys to increase or decrease the reference range shown. Select “OK” to save the changes. To cancel the changes and return to the old settings, please press the Return icon.
-
Page 56: Marker Unit
5.2.4 Marker Unit The system also allows the administrator to select the unit for each analyte. Before testing, the output unit for each analyte can be selected from the menu. Under Administrator Settings (see page 5-5), select the “Marker Unit” icon. ... -
Page 57: Backup Records
5.2.6 System Upgrade The authorized technical support department will Note: periodically inform the updated system version. The Please contact skyla authorized technical support current system version of the chemistry analyzer can be personnel or distributors for checked through the Version function. Please contact the... -
Page 58: Password Change
The System Upgrade procedures are as follows: Go online (URL: www.skyla.com ) and download the system upgrade software. Copy the system upgrade software or system parameter file to the USB drive, Note:... -
Page 59: System Default
“Confirmation” boxes, the password will no longer be required by the system. 5.2.8 System Default The skyla Clinical Chemistry Analyzer comes loaded with default starting values, ref. ranges and units. The above settings can be customized by the administrator if necessary. -
Page 60: Operator List
On the selection screen of Administrator Settings (Page 2), click the “Operator Control” icon. After setting Operator Control “ON”, click “OK” to complete the setting change. When the Operator Control setting is ON, before the clinical chemical analyzer proceeds to START, the system will require the operator to enter the Operator ID before the test starts, and the Operator ID will be stored in the system database. -
Page 61: Rs232 Baud Rate Setting
Select the baud rate required for connecting to an external instrument or device then select “OK” to save the changed settings. 5.2.13 Demo Mode The skyla Clinical Chemistry Analyzer has a built-in demo mode that provides a complete simulated testing environment for education and training. The built-in demo mode includes a set of known test results and is stored under the patient ID "demo"... -
Page 62: Qc Report
To print the QC results, please set QC Result Report to “ON” then select “OK” to save the changed settings. 5.2.15 Buzzer The skyla Clinical Chemistry Analyzer has a built-in buzzer function that can alert users that the test has been completed, or an error occurred. The administrator can decide whether to enable this function based on the need under the use environment. -
Page 63: Hospital Name
5.2.16 Hospital Name If the administrator turns on this feature in the Hospital Name menu, the header will appear when the test report is printed out. In the Options screen of the administrator’s dedicated system function Administrator Settings (page 2), click the icon “Hospital Name.”... -
Page 64: Language
“OK” to select according to the need, and the system can automatically switch. 5.2.19 Automatic Printing If you turn on the automatic printing option, after the completion of tests, the skyla Clinical Chemistry Analyzer will automatically print the test report. 5.2.20 Save Log to USB... -
Page 65: 22 Export Databse & Import Databse
Insert the USB drive (with FAT 16/32 format) into the USB port at the back of the chemistry analyzer, wait for seconds for device recognize it, then select “Yes” to output data. 5.2.21 & 22 Export Databse & Import Databse This is merely for technical service during the replacement of device malfunction. -
Page 66: Section 6: Troubleshooting & Error Handling
Section 6: Troubleshooting & Error Troubleshooting: Handling ■ Power and Function ■ Settings and Reports Operation of the skyla Clinical Chemistry Analyzer is ■ Data Export simple and almost fully automated. When a user error occurs during operation, the system automatically ■... - Page 67 S: The skyla Clinical Chemistry Analyzer performs automatic system calibrations to maintain high system precision. Thus, when the Analyzer detects a faulty reagent disc, it automatically cancels the test and displays an operational error message. Please insert a new reagent disc to resume operations.
-
Page 68: Error Messages & Handling
6.2 Error Messages & Handling Content of error messages: ■ Booting up The skyla Clinical Chemistry Analyzer can display ■ Printing built-in error messages and recommendations to aid ■ Abnormal drawer operation users during operation. - Page 69 Stage Error Message Error Handling Booting up Password Error Please enter the correct password. Device Abnormal Please reboot the anaylzer. If the error code cannot be resolved, please (Error Code1~20, 30, 51~56) contact the authorized technical support department. Date & Time Error Please enter the correct date and time.
- Page 70 Stage Error Message Error Handling Assay Parameter Version Please contact the authorized Mismatch (Error Code 108) technical support department to get the latest version of firmware or assay parameter. Used Disc Please remove the used reagent disc and insert a new reagent disc. (Error Code 201) Insufficient Sample The sample volume is insufficient.
- Page 71 (Error Code 402) technical support department. If the information and troubleshooting steps provided by the system do not resolve your issue, please record the error message and call a skyla authorized technical support technician or authorized distributor. skyla contact information is as follows:...
- Page 72 Appendix I: RS232 Communication Protocol Specifications Table of Contents 1. INTRODUCTION ................. A-2 2. COMMUNICATION PROTOCOL AND MESSAGE FORMAT ... A-3 2.1 COMMUNICATION PROCEDURES ..........A-3 2.2 MESSAGE BODY FORMAT DEFINITION ........A-4...
-
Page 73: Introduction
1. INTRODUCTION This RS232 Communication Protocol Specification describes the communication format & protocol information for data exchanges between the skyla Clinical Chemistry Analyzer and external computer (e.g., PC) through the RS232 interface. The baud rate of RS232 data transmissions can be set to 4800, 9600, 19200, 38400, 57600 and 115200 bps and the configuration is N-8-1. -
Page 74: Communication Protocol And Message Format
Command (One Byte) Description Connect command. This is a command for creating 0x01 connections. This command will only be sent out via the HB1 Clinical Chemistry Analyzer side. Close command. This is a command for closing connections. 0x04 This command will only be sent out via the HB1 Clinical Chemistry Analyzer side. -
Page 75: Message Body Format Definition
Clinical Chemistry Analyzer sends the Close Command to external computer. (5) The external computer must respond with the acknowledge command. The skyla Clinical Chemistry Analyzer waits one second for the external computer to respond with the acknowledge command. If the external computer does not respond with the... - Page 76 X X X X X X X X X X X X X X X Byte 16 to 45: Panel Name. E.g. General Biochemistry Panel, Metabolic Panel, Basic Biochemistry Panel, or Liver Panel. (3) Hospital Name 1 2 3 4 5 6 7 8 9 H o s p i t a l N a m e X X X X X X X X X X X X X X X...
- Page 77 (5) Date & Time 1 2 3 4 5 6 7 8 9 Y Y Y Y - M M - D D H H : M M : S S (6) Sample Type 1 2 3 4 5 6 7 8 9 S a m p l e T y p e X X X X X X X...
- Page 78 (9) Gender 1 2 3 4 5 6 7 8 9 G e n d e r X X X X X X X Byte 16 to 22: There are three types of Gender; Male, Female or Unknown. (10) Age 1 2 3 4 5 6 7 8 9 A g e X X X X X X X...
- Page 79 (13) Quality control 1 to Quality control 7 (QC1 to QC7) 1 2 3 4 5 6 7 8 9 Q C 1 X X X X X X X X X X X Byte 16 to 18: Quality control 1 (QC1) value. Byte 21 to 28: Quality control 1 (QC1) standard range.
- Page 80 Byte 16 to 18: Quality control 5 (QC5) value. Byte 21 to 28: Quality control 5 (QC5) standard range. 1 2 3 4 5 6 7 8 9 Q C 6 X X X X X X X X X X X Byte 16 to 18: Quality control 6 (QC6) value.
- Page 81 Byte 16 to 18: Wavelength 450nm value. Byte 21 to 28: Wavelength 450nm standard range. 1 2 3 4 5 6 7 8 9 L 5 1 0 n m X X X X X X X X X X X Byte 16 to 18: Wavelength 510nm value.
- Page 82 Byte 16 to 18: Wavelength 940nm value. Byte 21 to 28: Wavelength 940nm standard range. (15) System quality control (System QC) 1 2 3 4 5 6 7 8 9 S y s t e m X X X X X X X X X X X Byte 16 to 18: System quality control (System QC) value.
- Page 83 L I P X X X H E M X X X I C T X X X Byte 5 to 7: LIP indication value. Byte 15 to 17: HEM indication value. Byte 25 to 27: ICT indication value. (18) Total test result item number 1 2 3 4 5 6 7 8 9 T o t a l N u m b e r...
- Page 84 > (0x3E) - The analysis result is greater than the upper limit of the dynamic range. Byte 14 to 20: Normally filled with the analysis result. If Byte 13 is <, it is below the lower limit of dynamic range. If Byte 13 is >, it is above the upper limit of dynamic range.
- Page 85 Appendix II: Backup Records Data Export Specifications The skyla Clinical Chemistry Analyzer provides export of analysis results to a USB drive connected port. file named DumpToUSB_yyyymmddhhmmss.csv. (i.e., DumpToUSB_20121107152039.csv) Sample export is listed below, with each field separated by a comma.
- Page 86 Gender: There are three types of Gender: Male, Female Male or Unknown. 40 Year Age. Quality control 1(QC1) value. min.90 Quality control 1(QC1) standard range. Quality control 2(QC2) value. min.90 Quality control 2(QC2) standard range. Quality control 3(QC3) value. min.90 Quality control 3(QC3) standard range.
- Page 87 Wavelength 650nm value. 90-110 Wavelength 650nm standard range. Wavelength 940nm value. 90-110 Wavelength 940nm standard range. System quality control (System QC) value. System quality control (System QC) minimum acceptable min.90 value. Chemistry quality control (Chemistry QC) value. Chemistry quality control (Chemistry QC) minimum min.90 acceptable value.
Need help?
Do you have a question about the HB1 and is the answer not in the manual?
Questions and answers