Table of Contents
Advertisement
Quick Links
A Division of VT TSS (UK) Limited
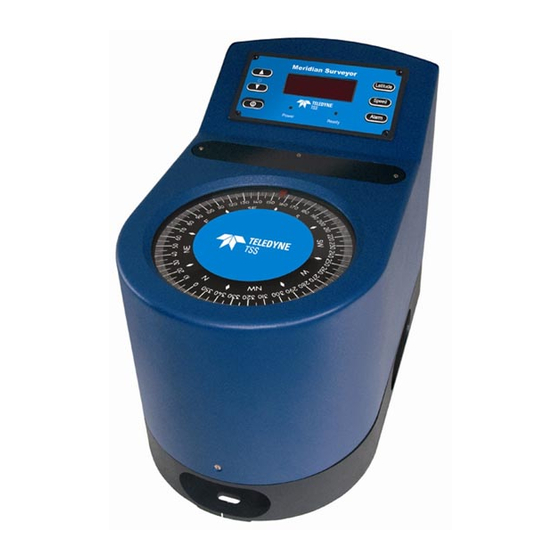
Meridian Gyrocompass
System Manual
VT TSS (SG Brown Division) Ltd
1 Garnett Close
Greycaine Industrial Estate
Watford
Hertfordshire WD24 7JZ UK
Telephone +44 (0)1923 470800
The information in this Manual is subject to
Facsimile +44 (0)1923 470838
change without notice and does not represent
a commitment on the part of SG Brown
Abcdef
Document P/N 060070
Issue 3.7
© SG Brown March 2004
Advertisement
Table of Contents

Summary of Contents for SG Brown Meridian
- Page 1 Telephone +44 (0)1923 470800 The information in this Manual is subject to Facsimile +44 (0)1923 470838 change without notice and does not represent a commitment on the part of SG Brown Abcdef Document P/N 060070 Issue 3.7 © SG Brown March 2004...
- Page 3 Note that the gyro rotor continues to spin for approximately five minutes after you power-off the system. To avoid potential damage to the Meridian Gyrocompass, always allow a period of five minutes after power-off for the gyro rotor to come to rest before you attempt to move the gyrocompass.
- Page 4 Meridian Gyrocompass CAUTION You will void the warranty if you make any modifications to this equipment without prior permission from SG Brown. DO NOT modify this equipment in any way without obtaining permission from SG Brown. CAUTION You will void the warranty if you operate the gyrocompass outside the environmental conditions detailed in Chapter 4 and in BS EN 60945.
-
Page 5: Table Of Contents
Contents CONTENTS 1 INTRODUCTION 1–1 1.1 System Description 1–3 1.1.1 Gyrocompass 1–3 1.1.2 Remote Control Unit 1–4 1.1.3 Auxiliary Inputs 1–4 1.1.4 Heading Outputs 1–5 1.2 Principle of Operation 1–5 2 INSTALLATION 2–1 2.1 Unpacking and Inspection 2–2 2.2 Physical and Electrical Installation 2–3 2.2.1 Selecting a location 2–3... - Page 6 Meridian Gyrocompass 4.1.10 Standards 4–3 4.2 Data Formats 4–4 4.2.1 IEC 61162 Serial Data Formats – General information 4–5 4.2.2 Inputs 4–6 4.2.2.1 IEC 61162 input signals 4–6 4.2.2.2 Pulsed input 4–10 4.2.3 Outputs 4–11 4.2.3.1 IEC 61162 output signals 4–11...
- Page 7 Contents TABLE OF AMENDMENTS Old Issue New Issue Date Details 11 May 2000 New release. 2.0A 12 Dec 2000 Corrected identification of Azimuth Bias potentiometer and other details. Include DIP switch default settings. 2.0A 2.0B 1 Mar 2001 Modify power connection details. 2.0B 2.0C 23 Apr 2001...
- Page 8 Meridian Gyrocompass © SGBrown Issue 3.7 DPN 060070 Page 6 of 6...
-
Page 9: Introduction
A short settling time Operation from a 24V DC electrical supply This Manual is an important part of the Meridian Gyrocompass. It describes the System and contains full installation and operating instructions. You should retain the Manual with the System for use by personnel who will install and operate it. - Page 10 Meridian Gyrocompass You should read sections 3 and 4 before you use the System: Section 3 describes how to operate the Meridian Gyrocompass. Section 4 includes the System specifications and descriptions of the data formats. You should read sections 5 if you suspect a fault on the System: Section 5 describes how to use the internal 60-way test connector and explains how to con- duct simple adjustments with the gyrocompass housing removed.
-
Page 11: System Description
System. Since the Meridian Gyrocompass is an ideal source of heading information for use by other systems on board, such as radars and satellite communication antennas, the accu- racy of its heading measurements will have a wide impact throughout the vessel. -
Page 12: Remote Control Unit
Seperate LED indicators show Power On and Compass Ready conditions Refer to Section 3 for instructions to operate the Meridian Gyrocompass. 1.1.3 Auxiliary Inputs Auxiliary inputs may be used for the Meridian Gyrocompass to apply latitude and speed cor- rections. © SG Brown Issue 3.7... -
Page 13: Heading Outputs
In the absence of external influences, a free-spinning gyroscope will try to maintain a fixed orientation in space. The Meridian Gyrocompass exploits this property and uses gravity con- trol and earth rotation to align the gyroscope spin axis with the meridian, i.e. the true north direction. - Page 14 Meridian Gyrocompass © SG Brown Issue 3.7 DPN 060070 Chapter 1 Page 6 of 6...
-
Page 15: Installation
2.3 Alignment Page 12 The care that you take as you align the Meridian Gyrocompass with the fore-aft datum on the vessel will have a direct influence upon its accuracy. DPN 060070 Issue 3.7 ©... -
Page 16: Unpacking And Inspection
Note that the gyro rotor continues to spin for approximately five minutes after you power-off the system. To avoid potential damage to the Meridian Gyrocompass, always allow a period of five minutes after power-off for the gyro rotor to come to rest before you attempt to move the gyrocompass. -
Page 17: Selecting A Location
HYSICAL AND LECTRICAL NSTALLATION 2.2.1 Selecting a location There are certain guidelines that you should follow to install the Meridian Gyrocompass suc- cessfully: CAUTION During operation, the gyrocompass must remain level to within ±45°. If it experiences tilt greater than 45° in any direction, it will ‘topple’. Safety routines in the gyro software will then power-off the gyro rotor and show alarm conditions on the RCU. -
Page 18: Gyrocompass Installation
Meridian Gyrocompass 2.2.2 Gyrocompass installation You must align the Meridian Gyrocompass so that its fore-aft axis is parallel to the fore- aft datum on the vessel. Any misalignment between the gyrocompass housing and the vessel will have a direct effect on the accuracy of heading measurements delivered by the system. - Page 19 5. Connect a 24V electrical supply (acceptable range 18V to 36V DC) to the Meridian Gyro- compass at J1, the three-pin power inlet on the Gland Plate. Figure 2–1 shows the Gland Plate.
- Page 20 Meridian Gyrocompass accept cables up to 18mm diameter, while all other glands accept cables up to 14mm diam- eter. Refer to Figure 2–3, and Tables 2–3 and 2–4 for cable connection details. 8. To maintain EMC compliance, connect all the wire braiding on the cables to the grounding posts on the inside surface of the Gland Plate as shown in Figure 2–2.
- Page 21 TB1/15 (+) TB1/16 (0V) RCU 24V in TB1/17 (+) TB1/18 (–) RCU On/Off TB1/19 (N/C) TB1/20 (ON) RCU Communications RS422 TB1/21 (S+) TB1/22 (S-) Spare – TB1/23 TB1/24 DPN 060070 Issue 3.7 © SG Brown Chapter 2 Page 7 of 16...
- Page 22 Meridian Gyrocompass Table 2–4: Output signals Signal description Signal type Distribution Board connector Channel 2 IEC 61162 RS232 (all data) TB2/1 TB2/2 (0V) Channel 1 IEC 61162 RS232 (all data) TB2/3 TB2/4 (0V Channel 2 IEC 61162 RS422 (all data)
-
Page 23: External Remote Control Unit
2 – Installation 2.2.3 External Remote Control Unit The standard Meridian Gyrocompass has the Remote Control Unit (RCU) mounted integrally and available for immediate operation. There may be applications where you prefer to install the RCU at some distance from the gyrocompass unit. -
Page 24: Set The Gyrocompass Dip Switches
Meridian Gyrocompass 2.2.4 Set the Gyrocompass DIP Switches 1 There is a removable panel on top of the gyrocompass that allows access to the two inter- nal DIP switches (shown in Figure 2–4) without the need to remove the main gyrocompass cover. - Page 25 Notes: 1. If you set All Data Output Sentence, the update rate will default to 1Hz. 2. For full IEC 61162 compliance, a checksum must be transmitted. DPN 060070 Issue 3.7 © SG Brown Chapter 2 Page 11 of 16...
-
Page 26: Alignment
Because measurements from the Meridian Gyrocompass are available for use by diverse sys- tems around the vessel, any misalignment between the gyrocompass and the fore-aft datum might have a significant impact in many other areas of application. -
Page 27: Installation Drawings
2 – Installation 2.5 I NSTALLATION RAWINGS Figure 2–5: Gyrocompass installation – Sheet 1 DPN 060070 Issue 3.7 © SG Brown Chapter 2 Page 13 of 16... - Page 28 Meridian Gyrocompass Figure 2–6: Gyrocompass installation – Sheet 2 © SG Brown Issue 3.7 DPN 060070 Chapter 2 Page 14 of 16...
- Page 29 2 – Installation Figure 2–7: RCU installation – Table mount DPN 060070 Issue 3.7 © SG Brown Chapter 2 Page 15 of 16...
- Page 30 Meridian Gyrocompass Figure 2–8: RCU installation – Flush mount © SG Brown Issue 3.7 DPN 060070 Chapter 2 Page 16 of 16...
-
Page 31: Operating Instructions
Refer to Section 4 for an explanation of the data formats relevant to the System. 3.1 Control Features Page 2 The RCU provides all the controls you will need to operate the Meridian Gyrocompass. It also includes a four-character display panel that shows the heading indication and any alarm mes- sages and error codes. -
Page 32: Control Features
SGPS This is indicated throughtout the manual as, for example, Power lamp (red) Indicates that the Meridian Gyrocompass is switched on when 24V DC nominal power is connected. Ready lamp Indicates that the Meridian Gyrocompass has settled and a True Heading is available. -
Page 33: Initial Power-On
NITIAL OWER The Meridian Gyrocompass starting cycle is fully automatic after power is applied. For correct operation Latitude and Speed correction must be applied. 1. Check that there is a nominal 24V DC electrical supply available to the gyrocompass. The acceptable supply range is 18V to 36V DC. -
Page 34: Operating Procedure
8. Wait for the gyrocompass to settle. This will occur automatically and will take upwards of 24 minutes depending on initial heading offset and sea conditions. The Meridian Gyro- compass signifies its settled condition by illuminating the green ‘Ready’ lamp. -
Page 35: Dg Operating Mode
Follow the instructions in sub-section 3.3.1 to set the latitude correction to the Directional Gyro (DG) mode. In this mode you can use the Meridian Gyrocompass as a direction indicat- ing instrument all the way up to the poles. If the gyrocompass has settled on north immediately prior to entering the DG mode, it will continue to provide a useful indication of the northerly direction for a period, but will not continue to seek north. -
Page 36: Loss Of Speed Log
If a valid input signal has not been established within a period of 30 minutes the audible alarm will be enabled. 3.4.3 Gyrocompass system warnings and failures The Meridian Gyrocompass has a built-in system that monitors operation of the gyrocompass. The functions that this system checks are split into two categories. Warning conditions Failure conditions A failure condition warning will result in the Gyroscope power supply being disabled. - Page 37 If necessary contact SG Brown or an approved local service agent for assistance. Failure Conditions If the Meridian Gyrocompass detects a failure condition, it will use six methods to alert you: The display shows <Message> + FAIL The audible alarm will sound.
-
Page 38: Operating Considerations
To power-off the Meridian Gyrocompass, press the ‘Power’ button. The heading display will go blank and the front panel lamps will switch off. The gyro rotor will take approximately five min- utes to come to rest. -
Page 39: Operating Considerations For High Speed Craft
The use of accelerometer damping by the Meridian Gyrocompass is of prime importance in the reduction of a particularly serious form of ballistic error called inter cardinal rolling error. - Page 40 The DG mode can be selected manually from the control panel. The Meridian Gyrocompass complies with all requirements of IMO Resolution A.821(19), Performance Standards for Gyrocompasses for High-Speed Craft.
-
Page 41: Technical Data
3A at power on, 1.2A continuous (The power sup- ply capacity should exceed 200W) CAUTION The Meridian Gyrocompass should be supplied with power from an SELV source as defined in IEC/EN 60950. The power supply source should be switched and protected by a suitable circuit breaker. -
Page 42: Signal Inputs
Meridian Gyrocompass 4.1.5 Signal Inputs Latitude IEC 61162 message string via RS232 or RS422 from GPS Speed Pulse or contact closure at 100, 200 or 400 per nautical mile from speed log. IEC 61162 message string at 4800 baud via RS232 or RS422 from GPS or speed log 4.1.6 Signal outputs... -
Page 43: Listener Load Requirement
The gyrocompass has a talker drive capability of 150mA to ground. Derived from 26C31 line drivers. 4.1.10 Standards The Meridian Gyrocompass is designed to meet the requirements of the following: IMO Resolution A.424 (XI), Performance Standards for Gyrocompasses IMO Resolution A.821 (19), Performance Standards for Gyrocompasses for High Speed... -
Page 44: Data Formats
Latitude information using serial IEC 61162 GNS, RMC, GLL or GGA sentences. If more than one of these formats is available, the Meridian Gyrocompass makes its selection in the stated preference order. Refer to Figures 4-3, 4-4, 4-5 and 4-6 respectively for a description of these formats. -
Page 45: Iec 61162 Serial Data Formats - General Information
4 – Technical Data 4.2.1 IEC 61162 Serial Data Formats – General information The Meridian Gyrocompass accepts and transmits asynchronous serial data using 8 data bits, one stop bit and no parity through RS232 and RS422 transmit-only lines. The data bits occur in each packet with the least significant bit first. -
Page 46: Inputs
GPS Interface (see Table 2-3 for connection details) The Meridian Gyrocompass can accept speed, latitude, date and time inputs at the GPS inter- face in IEC 61162 format using GNS, RMC, GLL, GGA, VTG, VHW and ZDA sentences. - Page 47 Figure 4–5: IEC 61162 GLL input sentence structure $??GLL,XXXX.XX,X,?????.??,?,??????.??,X,X[CRLF] Figure 4–6: IEC 61162 GGA input sentence structure $??GGA,??????.??,XXXX.XX,X,?????.??,?,X,??,?.?,?.?,?,?.?,?,?.?,????[CRLF] Figure 4–7: IEC 61162 DTM input sentence structure $??DTM,???,?,?.?,?,?.?,?,?.?,???*hh[CRLF] DPN 060070 Issue 3.7 © SG Brown Chapter 4 Page 7 of 16...
- Page 48 Meridian Gyrocompass Figure 4–8: IEC 61162 VBW input sentence structure $??VBW,?.?,?.?,?,X.X,?.?,X,?.?,?,?.?,?*hh[CRLF] Figure 4–9: IEC 61162 VTG input sentence structure $??VTG,?.?,?,?.?,?,X.X,X,XX.X,X,X[CRLF] Figure 4–10: IEC 61162 VHW input sentence structure © SG Brown Issue 3.7 DPN 060070 Chapter 4 Page 8 of 16...
- Page 49 Figure 4–11: IEC 61162 ZDA input sentence structure $??ZDA,XXXXXX.XX,XX,XX,XXXX,??,??[CRLF] Log Interface (see Table 2-3 for connection details) The Meridian Gyrocompass can accept speed inputs at the Log interface in IEC 61162 format using VBW, VTG and VHW sentences only. Figure 4–12: IEC 61162 VBW input sentence structure $??VBW,?.?,?.?,?,X.X,?.?,X,?.?,?,?.?,?*hh[CRLF]...
-
Page 50: Pulsed Input
Figure 4–14: IEC 61162 VHW input sentence structure 4.2.2.2 Pulsed input The Meridian Gyrocompass can accept a speed input as a series of pulses or contact closures occurring at a frequency of 100, 200 or 400 per nautical mile as selected by a DIP switch. The gyrocompass determines the vessel speed by reference against the microprocessor timing cir- cuits. -
Page 51: Outputs
4.2.3 Outputs 4.2.3.1 IEC 61162 output signals The Meridian Gyrocompass can output serial data through RS232 and RS422 transmit-only serial lines using the IEC 61162-1:2000(E) format. The output of each channel can be set inde- pendently, using DIP switches, to contain either: 1. - Page 52 Meridian Gyrocompass In the following descriptions of output sentences, the gyrocompass sets the contents of fields marked XXX and leaves unchanged the fields marked ??? Figure 4–15: IEC 61162 HDT output sentence structure Figure 4–16: IEC 61162 ROT output sentence structure Figure 4–17: IEC 61162 VBW output sentence structure...
- Page 53 In manual mode, the magnetic course fields are empty. Figure 4–19: IEC 61162 GNS output sentence structure $HEGNS,??????.??,????.??,?,?????.??,?,????,??,?.?,?.?, ?.?,?.?,?.?*?? [CRLF] Figure 4–20: IEC 61162 RMC output sentence structure DPN 060070 Issue 3.7 © SG Brown Chapter 4 Page 13 of 16...
- Page 54 Meridian Gyrocompass Figure 4–21: IEC 61162 GLL output sentence structure Note In GPS mode, only the talker identifier is changed In manual mode, the longtitude and UTC fields are empty Figure 4–22: IEC 61162 GGA output sentence structure Figure 4–23: IEC 61162 DTM output sentence structure $HEDTM,???,?,?.?,?,?.?,?,?.?,???*hh[CRLF]...
-
Page 55: Iec 61162 Sentence With Checksum
The checksum consists of an asterisk followed by the checksum calculated by exclusive OR- ing the eight data bits of each valid character preceding the asterisk, but excluding the ‘$’ sym- bol, in the sentence. The Meridian Gyrocompass transmits the absolute value of the checksum in ASCII characters representing the value in HEX. -
Page 56: Synchro Output
JP30 on PCB929066. The factory default setting is 10V 400Hz. The resolver sine and cosine outputs must be electrically isolated from each other. Contact the SG Brown Service Department for technical advice if necessary. Electrical loading specification: Not less than 5k between any two S lines. -
Page 57: Maintenance
The following sub-sections explain some very basic procedures that you may attempt if you suspect the system has developed a fault. If you are in any doubt, contact SG Brown for advice and technical assistance before you begin any maintenance work on the system. - Page 58 Meridian Gyrocompass 5.1 B UILT QUIPMENT In Subsection 3.4.3 there are a list of two warning codes and five failure codes delivered by the built-in test equipment if it detects a fault in the gyrocompass. In these conditions, the four- character display will show <Message>...
-
Page 59: Azimuth Drift Adjustment
5.1.2 Azimuth Bias Adjustment You may use the following procedure to eliminate small angles of heading error from the Meridian Gyrocompass . Measure and, if necessary, adjust for azimuth drift as described in sub-section 5.1.1 above before you adjust the azimuth bias. -
Page 60: Test Connector
Release and remove the securing screws and lift off the panel to see the two DIP switches and the test connector. A test box (SG Brown part number 929220) is avail- able to facilitate connection to the 60-way test connector. -
Page 61: Diagnostic Output Sentence
AC supply (19kHz, 480Hz and 400Hz) OK flag (+5V DC logic) 400_REF_HI Reference supply 12V RMS 400Hz AZ_MOTOR_HI Drive to azimuth follow-up DC servo motor TILT_MOTOR_HI Drive to tilt follow-up DC servo motor DPN 060070 Issue 3.7 © SG Brown Chapter 5 Page 5 of 12... - Page 62 BPR 113 (main) and BPR 114 (RCU). This sentence may usefully be monitored when communicating with SG Brown for technical assist- ance. The sentence string may be read using "Microsoft Terminal" or similar ASCII reader.
- Page 63 5 – Maintenance Figure 5–1: System Block Diagram Display Driver Signals Switch I/Ps DPN 060070 Issue 3.7 © SG Brown Chapter 5 Page 7 of 12...
- Page 64 Meridian Gyrocompass Figure 5–2: Gimbal Assembly Functional Diagram © SG Brown Issue 3.7 DPN 060070 Chapter 5 Page 8 of 12...
- Page 65 400Hz Ref 8V.Sin H RESOLVER Rate of Turn RoT +/- 10V STATOR 8V.Cos H Sin H 400Hz Ref Heading Outputs 11.8V Synchro Cos H 8V Resolver 400Hz Ref DPN 060070 Issue 3.7 © SG Brown Chapter 5 Page 9 of 12...
- Page 66 Meridian Gyrocompass Figure 5–4: Digital Control Board/Remote Control Board Block Diagram DISTRIBUTION BOARD DIGITAL CONTROL BOARD ANALOGUE System Fail CONTROL BOARD System Ready Stepper O/P ω ° = earth rotation (15 /hr) 3 x RS232 IEC 61162 V = speed (knots x 6080 ft/hr) 9 x RS422 IEC 61162 R = earth radius (20.9 x 10...
- Page 67 5 – Maintenance Table 5–3: Spares list for Meridian Gyrocompass 929060 SG Brown P/N Description 929033 Gimbal assembly 929066 Control Board Analogue 929083 Control Board Digital 929049 Control Board Remote 929045 Display Board 929074 DC/DC Power Supply 856000 Filter #1...
- Page 68 Meridian Gyrocompass © SG Brown Issue 3.7 DPN 060070 Chapter 5 Page 12 of 12...
-
Page 69: A Operating Theory
24-hour period. This apparent deviation occurs because, although the spin axis actually remains fixed in space, the earth rotates relative to it. DPN 060070 Issue 3.7 © SG Brown Appendix A Page 1 of 8... -
Page 70: North-Seeking Gyroscope
To an observer at the equator: With an initial spin axis alignment level and parallel to a meridian (so that it points in a true north-south direction), there would be no observable effect on the gyroscope during the 24-hour period. - Page 71 The direction of this precession is such that, should alignment occur, the gyroscope spin direction will be the same as the direction of applied torque. DPN 060070 Issue 3.7 © SG Brown Appendix A Page 3 of 8...
- Page 72 In this example, the spin axis of the gyroscope aligns with the local meridian so that its north end points north. In the balanced condition shown, the weight suspended from the gyroscope bearings has no effect on operation and the gyroscope will maintain its alignment with the meridian.
-
Page 73: Gyrocompass Corrections
For a given gyroscope, the ratio between the major and minor axes of this error ellipse is constant. The size of the ellipse depends on the initial displacement of the gyro axis away from the meridian and the horizontal plane. -
Page 74: Speed Error
A.2.3 Speed Error Figure A–3 shows that the north end of a meridian-aligned free spinning gyro will appear to rise as it moves northwards from the equator. This upward tilt is independent of the earth’s rotation. If left uncorrected, this effect would interfere with the north-seeking properties of the gyrocompass because the compass would be unable to determine whether the tilt came from a misalignment or from the northward motion. -
Page 75: Summary
A gyrocompass becomes progressively less effective as a north seeking instrument at higher latitudes. Note that the Meridian Gyrocompass can be used successfully in high lat- itudes with the DG mode selected. In this mode, the gyrocompass acts as a directional gyro. - Page 76 Meridian Gyrocompass © SG Brown Issue 3.7 DPN 060070 Appendix A Page 8 of 8...
-
Page 77: B Certification
B – Certification B CERTIFICATION On the following pages are the Certificates of Type Approval documentation obtained for the Meridian Gyrocompass. DPN 060070 Issue 3.7 © SG Brown Appendix B Page 1 of 4... - Page 78 Meridian Gyrocompass Figure B–1: Certificate of Type Approval © SG Brown Issue 3.7 DPN 060070 Appendix B Page 2 of 4...
- Page 79 B – Certification Figure B–2: Certificate of Type Approval - Schedule 1 DPN 060070 Issue 3.7 © SG Brown Appendix B Page 3 of 4...
- Page 80 Meridian Gyrocompass Figure B–3: Conditions of Issue © SG Brown Issue 3.7 DPN 060070 Appendix B Page 4 of 4...
- Page 81 Speed log failure 3–6 Gyroscopic inertia A–1 Test connector 5–4 Installation Toppling 2–3 Alignment 2–4, 2–12 Cable types 2–4 Choosing a location 2–3 Connections to Distribution Board 2–7 DPN 060070 © SG Brown Issue 3.7 Index Page 1 of 2...
- Page 82 Meridian Gyrocompass Issue 3.7 © SG Brown DPN 060070 Index Page 2 of 2...
Need help?
Do you have a question about the Meridian and is the answer not in the manual?
Questions and answers