Advertisement
Table of Contents
- 1 Technical Specifications
- 2 Signal Tones
- 3 Switch on the Device
- 4 Turn off the Device
- 5 Menu System
- 6 Adjust the Volume
- 7 Adjust Sensitivity
- 8 Changing the Battery
- 9 Troubleshooting
- 10 Low Battery
- 11 Reset to Factory Settings
- 12 Default Settings
- 13 Set Sensitivity
- 14 Installation Recommendations
- 15 Warranty
- Download this manual
Advertisement
Table of Contents

Summary of Contents for Carp Sounder XRS ACC
- Page 1 Operating instructions XRS ACC radio system CS ROC XRS ACC Catsounder XRS ACC Campsecure Receiver XRS ACC...
- Page 2 Carpsounder XRS ACC system Congratulations! Choosing a wireless bite alarm from Carp-Sounder has made you choose one of the most reliable and robust devices on the market. The units are 100% waterproof and have a long range, depending on the model, from approx. 150 m + to 450 m +.
- Page 3 ROC XRS bite alarm Digital Wireless Bite Alarm Catsounder XRS bite alarm Digital wireless bite alarm for modern catfishing Campsecure alarm system Infrared alarm system to secure the fishing spot XRS ACC Receiver Digital radio receiver with ACC radio control...
-
Page 4: Technical Specifications
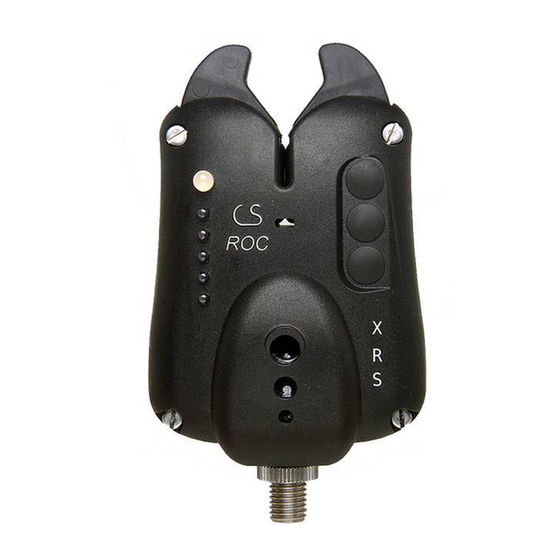
● Sensitivity adjustable ● Operation with 9 V block battery (incl.) ● Integrated radio transmitter module ● Transmission of the LED color to the receiver XRS ACC ● Pitch transmission to the receiver XRS ACC ● ACC function can be activated ●... - Page 5 ROC XRS ACC Bite alarm: Controls Buttons ( + ) ( - )
-
Page 6: Signal Tones
The LED of the bite alarm lights up in the preset color for approx. 16 seconds. The lightbar indicates a backward movement. The bottom LED of the light bar flashes red. The XRS ACC Receiver signals a double tone and a blinking LED for 20 seconds. -
Page 7: Switch On The Device
ROC XRS ACC Bite alarm: Switch on the device: Hold the button (M) for approx. 3 seconds. The device will now turn on and perform a battery level measurement. On the light bar, the state of charge of the batteries is displayed. -
Page 8: Menu System
ROC XRS ACC Bite alarm: Menu System: The ROC XRS menu system allows you to make a variety of settings with just 3 buttons and the lightbar. Press the (M) button to change the setting menus. The selected menu is indicated by the flashing of the associated LED. -
Page 9: Adjust The Volume
ROC XRS ACC Bite alarm: Adjust the volume: After switching on the device, the volume can be adjus- ted using the (+) and (-) buttons. The light bar and a test tone show the set volume. Adjust pitch: After switching on the device, press the (M) button once. - Page 10 ROC XRS ACC Bite alarm: Set LED color: After switching on the device, press the (M) button 3 times. You are now in the settings menu for the LED color. The third LED will now light for 5 seconds. The ad- justment of the LED color can now be done in 4 x 8 steps with the keys (+) and (-).
- Page 11 ROC XRS ACC Bite alarm: ACC function / Nightlight: The ACC function allows the display of a pulsating light on the receiver, which indicates the quality of the radio connection. The night light function switches on the LED on the bite indicator permanently dimmed.
- Page 12 = = = = CODE Adjustment can be made with the (+) and (-) buttons. The CODES of bite alarm and receiver must be set the same to establish a radio connection. See instructions XRS ACC Receiver chapter ‚Set radio coding‘.
-
Page 13: Changing The Battery
ROC XRS ACC Bite alarm: Changing the battery: Open your bite alarm by loosening the four screws in the corners of the case. Replace the battery inside with a new one and close the housing again. Required batteries: 1 x 9 V block - 6LR61... - Page 14 ● Operation with 2 standard AAA batteries (incl.) ● Integrated radio transmitter module ● Transmission of the LED color to the receiver XRS ACC ● Pitch transmission to the receiver XRS ACC ● Radio coding at the touch of a button ●...
- Page 15 Catsounder XRS ACC Bite alarm: Controls: Buttons: ( - ) ( + )
-
Page 16: Low Battery
The biteis displayed 1:1 by the XRS ACC receiver. Vibration (Fast Take): Vibrations are indicated by brief sounds corresponding to the movement of the rods. The XRS ACC receiver signals a double tone and a blinking LED for 20 seconds. Inclination (Slow Take):... - Page 17 Hold the button (M) for approx. 3 seconds. The device will now turn off. Turning Off will be indicated on the XRS ACC receiver with a double beep. Adjust the volume: When switched on, the volume can be adjusted using the...
- Page 18 Catsounder XRS ACC Bite alarm: Setting the sensitivity of vibration: Press the button (M) once. The LED now flashes blue once and then displays the color of the set sensitivity level. Settings only start after the blue LED stops flashing.
- Page 19 Catsounder XRS ACC Bite alarm: Setting the sensitivity of inclination: Press the button (M) twice (wait between the two button presses the blue flashing LED, only after the second press flash). The LED now flashes blue twice and then displays the color of the set sensitivity level.
- Page 20 Catsounder XRS ACC Bite alarm: Adjust pitch:: Press the button (M) 3 times. (wait between the two key presses the blue flashing LED, only after the flashing the next push) The LED now flashes 3 times blue. Now you can adjust the pitch in 8 steps with the (-) and (+) buttons.
- Page 21 8x 4 times from red -> yellow -> green -> blue ❶❷❸❹ As soon as the desired LED on your XRS ACC receiver flashes and sounds, press the (-) button on the bite alarm directly to save the setting to the desired LED.
-
Page 22: Reset To Factory Settings
• Pitch ❼ • Sensitivity vibration ❾ • Sensitivity inclination ❾ Caution: When reset, the catsounder switches completely to the factory setting; if the XRS ACC radio coding has been changed, it must be set again (see radio coding XRS ACC). - Page 23 Catsounder XRS ACC Bite alarm: Changing the battery: Open your Cat sounder by loosening the two screws on the back of the case. Replace the batteries with new ones and close the housing again. Required batteries: 2x LR03 1.5V AAA Attention: When not in use remove batteries from the bite alarm.
- Page 24 ● Operation with 3 standard AA batteries (incl.) ● Integrated radio transmitter module ● Transmission of the LED color to the receiver ● Radio coding at the touch of a button ● Compatible with XRS ACC Receiver and CS Receiver...
- Page 25 Campsecure transmitter: Controls: Buttons: ( 1 ) ( 2 )
- Page 26 Campsecure transmitter: Switch on the device: Hold the button (1) for about 3 seconds. The device will now turn on and perform a self-test. By flashing the LED 3 times, the battery charge status is displayed. Green > 80 % ï❸ð...
-
Page 27: Set Sensitivity
Campsecure transmitter: Set sensitivity: Press the button (1) to adjust the sensitivity. The LED now flashes once in the color of the set sensitivity level. Sensitive ❶ ❷ ❸ Insensitive There are a total of 3 levels adjustable of which the most sensitive is indicated by a green LED. - Page 28 Campsecure transmitter: Select radio system: Open your Campsecure transmitter by loosening the four screws of the housing. On the back of the board is a DIP switch for radio system selection. Switch position XRS: The switch position XRS selects the XRS radio system. Long key press on key (2) carries out the radio coding.
- Page 29 Campsecure transmitter: Radio coding XRS: Switch on your XRS receiver and your Campsecure transmitter. At Campsecure, press and hold the button (2). The LED color changes 8x 4 times from red -> yellow -> green -> blue ❶❷❸❹ As soon as the desired LED on your XRS receiver flashes and sounds, release the button (2) to save the setting to the desired LED.
- Page 30 Campsecure transmitter: Set LED color (ONE only): This function is only available if the system ONE is set in Campsecure. See point Select radio system. Turn on your Campsecure transmitter. At Campsecure, press and hold the button (2). The LED color changes in the following order: ❶❷❸❹❺❻❼❽...
-
Page 31: Installation Recommendations
Campsecure transmitter: Installation recommendations: Point the Campsecure Sender to the object or area to be monitored. Fix the transmitter with the rod (Bankstick, Stormrod) firmly and wobble-free in the ground. The installation height should be approx. 1m. Go through the monitoring area and make sure that you have positioned the transmitter correctly. - Page 32 Campsecure transmitter: Reset to factory settings:: Turn on your Campsecure transmitter and keep the button (1) pressed for about 8 seconds. A flashing LED indicates the successful reset. Default settings: • LED color: red ❶ • Radio XRS: Code 2 LED 1 ❷❶...
- Page 33 Campsecure transmitter: Changing the battery: Open your Campsecure transmitter by loosening the four screws of the housing. Replace the batteries with new ones and close the housing again. Required batteries: 3x LR6 1.5V AA Troubleshooting: No function:: Batteries empty, defective or inserted incorrectly. Device sends no or false alarms: Heavy fog or heavy rain can cause false alarms.
- Page 34 Receiver XRS ACC: Technical specifications: ● Compact housing (100 x 60 x 28 mm) ● 100% waterproof ● Digital menu guide ● Digital volume adjustment ● Volume control through sound disc ● ACC light ● ESF mode (energy saving function) ●...
- Page 35 Receiver XRS ACC: Controls:...
- Page 36 Receiver XRS ACC: Switch on the device: Hold the button (M) for approx. 2 seconds. The device will now turn on. By lighting up the LEDs, the state of charge of the batte- ries is displayed. Battery full Battery OK...
- Page 37 Receiver XRS ACC: ACC light function:: To turn on the ACC light, press the (M) button once. If bite indicators are already registered in the ACC, the respective LED is displayed in green. If no device has yet been registered but the ACC light is activated, the first LED flashes in greenï❶ð...
- Page 38 Receiver XRS ACC: Vibrating alert: To switch on the vibration alarm, press the button (M) 3 times. The 3rd LED now flashes either in green ï❸ð, if the vibration alarm is already switched on, or if it is switched off the LED flashes red ï❸ð. With the key (-) the vibration alarm is switched off and switched on with the key (+).
- Page 39 Receiver XRS ACC: Changing the battery: Open your receiver by loosening the four screws in the corners of the case. Replace the batteries with new ones and close the housing again. Required batteries: 3x LR6 1.5V AA Attention: Commercially available accumulators have only 1.2 V.
- Page 40 EU conformity: SIMPLIFIED EU DECLARATION OF CONFORMITY Hereby Carpsounder Braunfels e. K. declares that the radio equipment type CS radio system in all its devices complies with Directive 2014/53/EU. The full text of the EU Declaration of Conformity is available at the following Internet address: www.carp-sounder.de/ce/ Frequency bands and maximum transmission power: Frequency...
- Page 41 Disposal: This device does not belong in the household waste. For proper disposal, please contact the public collection points in your community. For details of the location of such a collection point and about any existing quantity restrictions per day / month / year and about any costs incurred in collection, please refer to the information of the respective municipality.
-
Page 42: Warranty
Warranty: 1. You get 3 years warranty on this device from the date of purchase. Please keep invoice / proof as proof of purchase. In case of warranty, please contact our service. 2. The provision of a replacement device during the repair period is not included in the warranty. - Page 44 Carpsounder Braunfels e. K. Josef-Lücker-Weg 6-8 35619 Braunfels Germany Tel.: +49 (0) 64 42 - 51 52 Fax: +49 (0) 64 42 - 3 14 31 E-Mail: info@carp-sounder.de...
Need help?
Do you have a question about the XRS ACC and is the answer not in the manual?
Questions and answers