Table of Contents
Advertisement
Advertisement
Table of Contents

Related Manuals for UPair 2 Ultrasonic 3D+4K


Summary of Contents for UPair 2 Ultrasonic 3D+4K
-
Page 2: Table Of Contents
Operating Aircraft............................12 Smart Return Home Button ........................13 Camera ................................13 Camera Profile ............................13 Camera SD Card Interface........................14 Gimbal ................................15 Gimbal Profile............................15 UPAIR APP Main Screen..........................15 Connecting To A Mobile Device....................... 16 Camera Interface ............................16... - Page 3 Basic Setting.............................. 18 Camera Interface Setting.......................... 19 Flight Route Planning..........................19 Follow Me Mode ............................20 Calibrating The Compass ......................... 21 Point Of Interest ............................21 Smart Battery Information......................... 22 Precautions..............................22 Fly Safe..............................22 Pre-flight Checklist ............................ 23 Flying Reminder ............................23 Basic Flight ..............................
-
Page 4: Product Profile
You can control the camera's pitch by using the UPAIR App on the mobile device, and the low-latency HD digital images transmission component is designed to transmit long-distance real-time images. -
Page 5: Aircraft
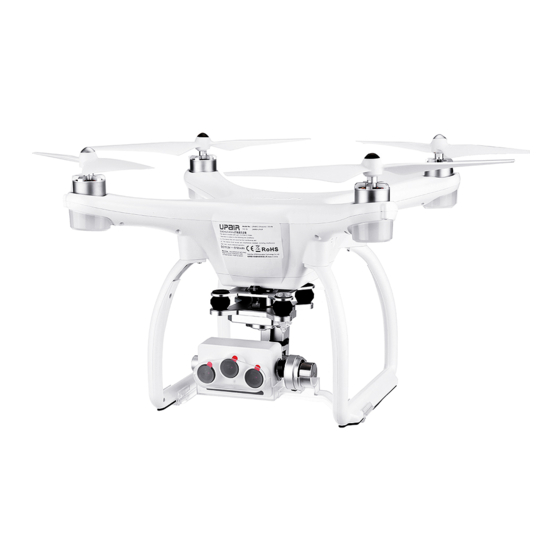
This chapter will describe the composition of the aircraft,as well as features. Aircraft Profile The main components of the UPAIR 4k/3D Drone are the flight controller,the image transmission system, the positioning and navigation system, the visual positioning system, the power system, and the battery. -
Page 6: Parameters
GPS/GLONASS Auto Return Home(RTH) The UPAIR 4K/3D aircraft features the Auto Return Home (RTH) function.When the controller loses communication with the aircraft or the aircraft is at low power, the aircraft will automatically initiate the Auto Return Home (RTH) function and fly back to its home point with automatic landing. There are three available ways of returning: One-key RTH, Low-voltage RTH, Unsafe RTH. -
Page 7: Flight Data
By pushing the one-key RTH joggle switch on the controller backwards or starting it manually through the UPAIR APP to trigger the one-key return, the aircraft will go back to you. If you want to regain control during RTH, they can do so by just switching the mode. -
Page 8: Propellers
Please manually tighten the propellers, and tighten them firmly; otherwise, an accident may happen. Since the blade is thin, be careful not to get hurt * Please use the original UPAIR propellers, the propellers must correspond to the exact aircraft model. -
Page 9: Introduction
15.2V, and has a memory function. The battery uses a new high-voltage board battery cell and uses a power core management system to provide abundant power for the aircraft. The smart battery must be charged by UPAIR official charger. Parameters... -
Page 10: Remote Controller
Please do not attach and detach the battery when the battery is turned on. * Charge the Intelligent aircraft's battery only with the original UPAIR charger, other chargers may cause damage to the UPAIR Drone, such damage will not be covered by the UPAIR after-sale service. -
Page 11: Remote Controller And Real Time Fpv
Compliance version: 4K/3D controller meets FCC standards at the same time. Control mode: The controller defaults to the US hand according to the control habits (see the “Manipulating the aircraft” section below). Remote Controller And Real-Time FPV Battery Voltage 11.1V Controller operating frequency... - Page 12 2. Function Buttons (1) Power on/off: By pressing it, you will hear a voice prompt. Operations Detailed Steps Power-on Operation Press the button once to display the remaining battery power level, and it will go off after 2 seconds; if you press it again and hold for 3 seconds before the LED indicator goes off, it will be powered on, and all LED indicators will be on.
-
Page 13: Charging The Remote Controller
Recording simultaneously to cancel Emergency Stop, and the voice prompt will disappear. Charging The Remote Controller Use only the original UPAIR charger. The charger with dual heads is available for charging the aircraft's battery and the RC battery. Charge the RC battery by connecting the RC battery with the charger in the corresponding plug. -
Page 14: Smart Return Home Button
Push up the stick on the left to make the aircraft ascend. Push down the stick on the left to make the aircraft descend. Push the stick on the left leftward to make aircraft rotate counter-clockwise.Push the stick on the left rightward to make the aircraft rotate clockwise. -
Page 15: Camera
Image Shooting Mode Single-picture Mode Lens Micro Distortion MN34120, 16-megapixel Main Image Sensor Digital signal processor Hisilicon 1/2.3• Camera SD Interface The UPAIR 2 4K/3D Drone supports Micro SD Card (64G at most). As the Camera is required to quickly... -
Page 16: Gimbal
UPAIR APP Main Screen This part introduces the UPAIR APP which is specially designed for UPAIR Drone Camera. You can control the 4K gimbal and camera by clicking the APP, including controlling the Picture and Video... -
Page 17: Connecting To A Mobile Device
suggested to install the APP on a tablet device or a large-screen mobile phone in order to achieve the best visual experience. Connecting To A Mobile Device IOS System: Your mobile phone is connected with the remote control by with an USB cable. A Prompt Box will pop up in your phone, you shall click TRUST (otherwise, the connection fails) and then enter Phone Settings ->... - Page 18 [1] Connection status [2] H:N/A (1) When GPS is not positioned, it will display the altitude; (2) When GPS is positioned, it will display the distance from the home point. [3] D:N/A Distance from Home • Distance from Mobile Phone. [4] GPS Signal Icon:shows the current strength of the GPS signal.
-
Page 19: Basic Setting
[15] H.S: Horizontal Velocity [16] V.S: Vertical Velocity [17] V.C: Remote Control Voltage Basic Setting Click to enter the Setting interface; Basic Settings, Camera Settings and Remote Control Settings on the left side, and detailed parameters settings on the right side. Item Default Limits... -
Page 20: Camera Interface Setting
Camera Interface Setting Item Default Limit Video Settings 4K/30fps 4k/30fps 2.7k/30fps 2k/30fps Photo Settings 16M(4640 × 3480) 12M(4000 × 3000) 8M (3264 × 2448) Flight Route Planning On the Camera Screen, click “Position Hold” button to activate the Flight Route Planning. Enter the page, zoom in the map, the first task point is the default location of the aircraft. - Page 21 When you make enough task points, you can click the Settings button at the bottom of the list to set the corresponding task point. In the middle of the screen, a Settings menu will show with the following items: 1. No. of task point, 2. Stay time after reaching the task point, 3. Action after reaching the task point, 4. flight altitude after reaching the task point.
-
Page 22: Follow Me Mode
3. When the map is scaled, the coordinates of the latitude and longitude of the point of the mission will not change. 4. After starting the flight route planning, the Execute button will change into a Stop button. Upon confirmation, remove all points on the map and the line, exit this function and go back to the camera screen. -
Page 23: Point Of Interest
Notes: *It is recommended to use the compass calibration as less as possible if the aircraft work properly. *When calibrating halfway, it would be better not to exit too soon.*Failure in calibrating will cause drone to become locked, think twice before doing it. Point Of Interest The Upgrade of Flight Route Planning: During a flight task, the head of the aircraft will always point at the set Point of Interest. -
Page 24: Precautions
Precautions This part introduces the Flight Environment Requirements, Pre-flight Checklist and Flying Reminder. Before use, please read this manual carefully and operate the drone in accordance with the following instructions. Fly Safe 1、 Fly in open area,avoid the controller being affected by base stations、 Subway station, High-way station, airport, high voltage line,and so on, to avoid crashing;... -
Page 25: Flying Reminder
Flying Reminder The UAV flight is restricted by many countries, before take-off, please understand and comply with the relevant laws and regulations.Please make sure the drone lands smoothly. When close to the ground, ensure that the aircraft hovers, ensure the ground level, let the aircraft descend to the ground slowly. 1. -
Page 26: Frequently Asked Question(Faq
Frequently Asked Question (FAQ) This part offers the basic solutions of problems that may occur during the normal use of the aircraft. 1. Why does the remote control emit beeping sounds? It means the remote control is out of power, please fully charge the remote-control battery before use. -
Page 27: A Thank-You Letter
A Thank-you Letter Thank you very much for your order of the UPAIR 2 4K drone. Please follow the manual to use this product properly.This product and The Intellectual Property Right of the Manual Belong to UPAIR, without the authorization from UPAIR, no organization or individual is permitted to reprint, copy or distribute any contents of this manual in any forms.If you have any questions or problems when using this product,...
Need help?
Do you have a question about the 2 Ultrasonic 3D+4K and is the answer not in the manual?
Questions and answers