
Summary of Contents for EEPC NC2 Series
- Page 1 INSTRUCTION MANUAL Aluminium radiator with special ceramic core NC2 - EEPC READ THESE INSTRUCTIONS CAREFULLY BEFORE USING THIS DEVICE FOR THE FIRST TIME. ATTENTION: to avoid overheating, do not cover the appliance.
-
Page 3: Table Of Contents
CONTENTS EEPC APP ....................4 PACK CONTENTS ..................5 SAFETY ADVICE ..................6-7 I / SPECIFICATIONS ..................8 II / HOW TO INSTALL THE DEVICE ............... 9 WALL-MOUNTED USE ................... 9 STAND USE ................10 III / DESCRIPTION ..................10 1 / Panel controls ................... 10 2 / LCD display ................ -
Page 4: Eepc App
EEPC App Control your EEPC radiators whenever and wherever you are. With the new EEPC App, the operation of your radiators becomes child’s play! Get the App here:... -
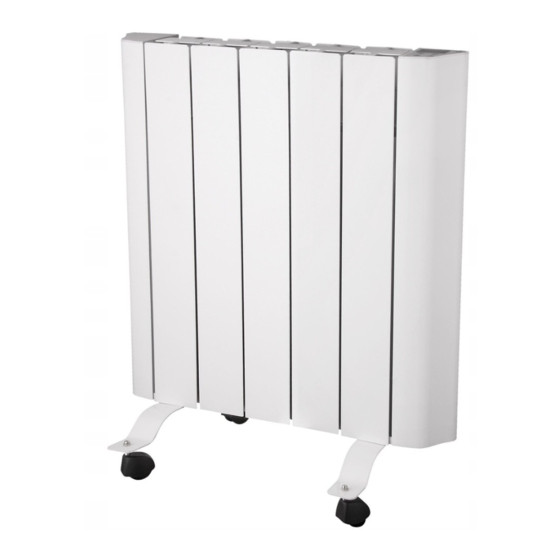
Page 5: Pack Contents
BOX CONTENTS: • Aluminium Radiator • Wall mount • Floor stand with wheels • Screws and wall plugs • Instruction manual International registered models, concept and trademark (CDR 2850180, i-depot 068637, 1277238, ..) -
Page 6: Safety Advice
SAFETY ADVICE READ THIS NOTICE CAREFULLY BEFORE OPERATING THE APPLIANCE. • This appliance can be used by children aged from 8 years and above and persons with reduced physical, sensory or mental capabilities or lack of experience and knowledge if they have been given supervision or instruction con- cerning use of the appliance in a safe way and understand the hazards involved. - Page 7 • The power cable should never be in contact with hot parts of the device. • CAUTION: to prevent overheating, do not cover the heater. • Never immerse the appliance in water or other liquids. • Keep the appliance at a minimum distance of one metre from flammable objects such as curtains, textiles, etc.
-
Page 8: I / Specifications
I / SPECIFICATIONS • Digital LCD display • Temperature control by digital display • Clock • Weekly schedule • 2 modes: ○ Manual ○ Automatic with weekly preset - 24h programmer, custom setting. - 9 different daily presets • Frost protection function (maintains a temperature of 7°C) Number of Model Power... -
Page 9: How To Install The Device
II / HOW TO INSTALL THE DEVICE ≥300mm WALL-MOUNTED USE ≥300mm ≥300mm Make sure that the the correct distance (indicated on the right) from walls and objects is respected. ≥100mm... -
Page 10: Stand Use
b. Disassemble the hanging sheathing: twist the knob clockwise, then take down the sheathing , refer to below picture. Hanging sheathing Knob III / DESCRIPTION 1 / Panel controls - on / off - time, day and temperature settings - mode selection and programs - increase the selected criteria - Decrease the selected criteria... -
Page 11: Lcd Display
2 / LCD display - hour - day - program number - programmed temperature - comfort mode - economic mode - frost mode - sleep mode - locking radiator - heating on - select program - timer - 24 hour display - time scale - wifi... -
Page 12: Operating Instructions
IV / OPERATING INSTRUCTIONS Turning on the radiator 1. Plug in and turn on the radiator using the switch on the underside of the appliance, where the power cable enters the radiator. 2. Next to the display panel: briefly press button until the on/off icon disappears from under the clock part of the display. -
Page 13: Timer Mode
1. Press and hold button until the on/off icon disappears from under the clock part of the display. 2. Fr will appear in the middle of the display. 3. Use buttons to select the desired temperature. Timer Mode Timer Mode is convenient if you want to control your energy usage or program the radiator to shut itself off after a certain time (programmable in increments of 30 minutes). -
Page 14: Program Mode
Program Mode 1. Briefly press button : the middle panel of the display will start flashing slowly. 2. Use buttons to cycle through the available modes: Fr (Free Operating Mode), P1-P9 (Program Mode for one of the preset programs P1- P9), AU (Weekly Program Schedule Mode), FO (Open Window Mode). -
Page 15: Fine-Tuning P1-P9
Fine-tuning P1-P9 For each hour of the day (0-24) in a program (P1-P9), you can modify the heating mode: Comfort, Eco or Frost Watch. To fine-tune one of P1-P9, proceed as follows: 1. Activate the program you wish to fine-tune (see ‘Program Mode’ above). 2. -
Page 16: The 9 Preset Programs
THE 9 PRESET PROGRAMS... -
Page 17: Open Window Function
V / OPEN WINDOW FUNCTION: Your radiator has an Open Window function. If you open a window widely in the space where the radiator is located, a sensor will detect the sharp drop in temperature. The radiator switches out automatically and the symbol “FO”, flickers on your screen. The radiator is re-ignited automatically after 10 minutes. -
Page 18: Maintenance
...). Also excluded from the warranty are any adverse consequences arising from the use of non-original accessories or spare parts or from the removal or modification of the appliance. FOR MORE INFORMATION: www.eepc.international... -
Page 24: Your Notes
Home is where the Heart is YOUR NOTES ..........................................................................................................................................................................................................................................................................................................................................................................................................................................International registered models, concept and trademark (CDR 2850180, i-depot 068637, 1277238, ..)
Need help?
Do you have a question about the NC2 Series and is the answer not in the manual?
Questions and answers
Cannot work out the diagram showing wall mount
The wall mount diagram for the EEPC NC2 Series shows the required clearances around the radiator for safe installation:
- At least 300 mm (millimeters) from the top
- At least 300 mm from each side
- At least 100 mm from the bottom
The radiator is to be wall-mounted using a hanging sheathing. To install it:
1. Disassemble the hanging sheathing by twisting the knob clockwise and removing the sheathing.
2. Mount the radiator on the wall, ensuring the specified clearances are maintained.
This answer is automatically generated
Can’t download on my iphone 14 not sure why