Table of Contents
Advertisement
Pro, Solo
INSTRUCTION MANUAL
INSTRUCTION MANUAL
Pro
Solo
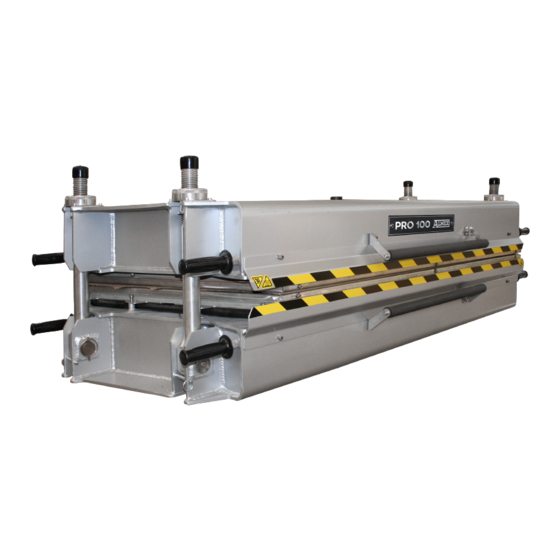
CONVEYOR BELT VULCANIZER
This manual was prepared to present the correct methods and procedures of operating and
maintaining your ALMEX VULCANIZER.
At the time of writing this manual, the instructions were up to date. However, some of the
information or appearance of the component parts may vary slightly from the vulcanizer
delivered to you.
Read this manual carefully before operating your vulcanizer.
SHAW-ALMEX INDUSTRIES LIMITED
P.O. Box 430
Parry Sound, Ontario, Canada P2A 2X4
Phone:
705-746-5884 or toll-free 800-461-4351
Fax:
705-746-9484
E-Mail:
sail@almex.com
Web:
www.almex.com
SHAW-ALMEX INDUSTRIES LIMITED
Page 1
49908-042 March 2012
Advertisement
Table of Contents

Related Manuals for Almex Pro

Summary of Contents for Almex Pro
- Page 1 CONVEYOR BELT VULCANIZER This manual was prepared to present the correct methods and procedures of operating and maintaining your ALMEX VULCANIZER. At the time of writing this manual, the instructions were up to date. However, some of the information or appearance of the component parts may vary slightly from the vulcanizer delivered to you.
-
Page 2: Table Of Contents
3.4. Safe Handling ......................... 6 ASSEMBLY ............................7 4.1. Unpacking ........................7 4.2. Pro and Solo Features ....................7 4.3. Functional Diagram ......................7 4.4. Basic Assembly and Splice Preparation ................ 8 4.5. Assembling Presses Side by Side on a Splice ............... 8 4.6. -
Page 3: Record Of Purchase
Ancillary Items 2 x 1/4 NPT Cooling Tee, 2 x Stem Thermometer Optional Items Spare Parts Operating Instructions 49908-042 Supplements Service Bulletins Warranty Card Drawings Parts Diagrams PRO Series or SOLO Series / AC3 SHAW-ALMEX INDUSTRIES LIMITED 49908-042 March 2012... -
Page 4: Declaration Of Conformity
DECLARATION OF CONFORMITY Shaw-Almex Industries Limited, P.O. Box 430, Parry Sound, Ontario, Canada, declare that the machinery: Product: Vulcanizer Pro / Solo Model: Year of Certification: 2000 has been manufactured using the following transposed harmonized European Standards: EN 60204-1 Safety... -
Page 5: Safety
Pro, Solo INSTRUCTION MANUAL Page 5 SAFETY Your vulcanizer has been designed to provide safe, efficient, trouble-free service for many years. Component design and material selection have been carefully considered to ensure operator safety and our manufacturing procedures provide a consistent, high-quality product. -
Page 6: Electrical Hazard
The Pro 60 press operates up to 60 psi (420 kPa), the Pro 100 and Solo operate up to 100 psi (700 kPa). There is a safety pressure valve built into the air control assembly that must be used. -
Page 7: Assembly
• On Pro models the air pressure control is attached to the frame with a unique fastening pad, and the air hose is inside the frame. The control can be removed from the frame and there is sufficient air hose to hold the control in a convenient location when pressurizing the frame. -
Page 8: Basic Assembly And Splice Preparation
4.5. Assembling Presses Side by Side on a Splice All Pro and Solo presses can be positioned side by side Cover Plate with their platens touching in order to make a larger platen area. -
Page 9: Operation
5.1. Pressurizing with Air The air control on Pro models is attached to the frame with an industrial type of fastening pad. Remove the air control from the frame and pull out sufficient hose to pressurize away from the end of the frame. The air control on Solo models is separate and must be connected to the fitting on the bottom frame. -
Page 10: Cooling The Vulcanizer
Tip: The standard cooling hoses and fittings on the Pro and Solo vulcanizer are of the highest quality and have been selected for their durability and their ability to cool the platens quickly with a minimal amount of water. The passages in the hoses and fittings may become restricted if there is any solid matter in the cooling water, and this will affect the cooling rate. -
Page 11: Maintenance
Install the fitting to new pressure bag and tighten the hose clamp. Position the new pressure bag onto the frame. On PRO models, Air Control pull the air control at the same time to be sure the bag hose is moving properly through the frame. -
Page 12: Replacing The Temperature Sensor (Rtd Sensor)
Pro, Solo INSTRUCTION MANUAL Page 12 • On small presses, lift the platen and carefully remove platen adapter from the grommet. Remove the platen and wires. • On larger presses there is a label showing how the platen must be rotated before it can be removed. To remove the platen in this case, the platen cover must be removed and the adapter bolts removed from the platen. -
Page 13: Troubleshooting
On Pro models, remove air control assembly from frame and pull hose all the way out to make sure there are no kinks. On Pro and Solo models, remove bag hose from air control assembly. Using no more than 5 psi (0.35 kg/cm... -
Page 14: Service
The service department may be reached at the above numbers. 8.3. Guarantee Your ALMEX equipment is guaranteed against defective parts, material and workmanship for a period of twelve months from the date of purchase. See WARRANTY CARD for complete details. SHAW-ALMEX INDUSTRIES LIMITED...
Need help?
Do you have a question about the Pro and is the answer not in the manual?
Questions and answers
What is code e333 mean