Table of Contents
Advertisement
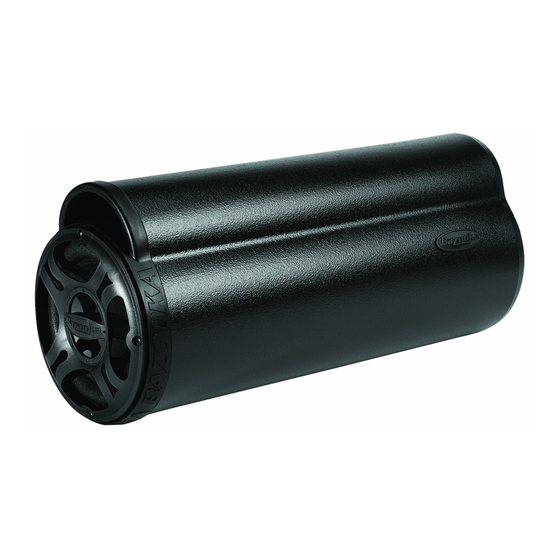
How to install the FAST-9999 with the FAST-BTAH
The FAST-9999 universal harness uses the patented Posi-Tap connector from Posi-Products for making
FAST secure connections to your OEM wire harness.
Disconnect negative battery clamp from battery.
For easiest installation remove the radio and disconnect
the harness from the back of the radio.
Make sure the end with the 6 pin Molex connectors is
toward the radio. Run the BTAH harness behind radio,
dash and along the edge of the vehicle until you get
to the place you have decided to mount the tube.
Posi-Tap
Patent # 5,228,875 5,695369 5,868,589 6,692,313 Jap 2881414, Aus 708700, Tia 103534, Can 2204826
TM
Mex 200626 Korea 477279, China Z197105562.9 & others pending
Remove the top cap. Place the wire
that is going to be tapped. In the
grove of the cap as far down as it
will go.
Make sure not to cross thread the
cap when screwing it back in place.
Red
(+) 12V Power. Turns on when ignition/accessory is on.
Blue/White
Turns on remote accessories (amplifiers, etc.).
If there is no Remote Amplifier wire, you can often use the
power antenna wire.
White
(+) Left Front Speaker
White/Black
(-) Left Front Speaker
Gray
(+) Right Front Speaker
Gray/Black
(-) Right Front Speaker
Connect the Posi-Tap connectors to the corresponding
wires of your radio harness. Consult your car or radio
manufacturer's manual to get the correct color codes
for your vehicle.
Plug the FAST-9999 harness into
the FAST-BTAH. Mount grounding
ring and plug the 14 pin connector
into the BASS TUBE. For more information
on placement and mounting, consult
your amplified tube instruction manual.
FAST-9999
Ground to
chassis of
vehicle
Continue to thread until the cap
is tight and the wire is pierced.
Make sure to attach all 6 of the
FAST-9999 harness wires to
your OEM harness.
14 pin connector
to the BAZOOKA
Advertisement
Table of Contents

Summary of Contents for Fast Bazooka BT6014
- Page 1 How to install the FAST-9999 with the FAST-BTAH The FAST-9999 universal harness uses the patented Posi-Tap connector from Posi-Products for making FAST secure connections to your OEM wire harness. (+) 12V Power. Turns on when ignition/accessory is on. Blue/White Turns on remote accessories (amplifiers, etc.).
- Page 4 CONTENTS...
- Page 5 HELPFUL HINTS—BEFORE YOU BEGIN Please take time to read through this manual and plan out your installation before you begin!
-
Page 6: Truck Installation
VEHICLE PLACEMENT RECOMMENDATIONS TRUCK INSTALLATION HATCHBACK INSTALLATION SEDAN INSTALLATION... - Page 7 BOAT PLACEMENT RECOMMENDATIONS BOW RIDER/SKI BOAT SPORT YACHT...
-
Page 8: Mounting The Bazooka
MOUNTING THE BAZOOKA Figure 1 Figure 2 Figure 3... - Page 9 Figure 4 Figure 5...
-
Page 17: Input Signal Connections
AMPLIFIED MODELS: (BTA6100, BTA8100, BTA10100, BTA6200, BTA8200, BTA10100, MBTA8100, MBTA10100, MBTA8200, MBTA10200) SHOULD I USE HIGH OR LOW LEVEL INPUTS? INPUT SIGNAL CONNECTIONS High-Level Inputs:... - Page 18 Low-Level Inputs: POWER WIRE (All Models) GROUND WIRE (All Models)
-
Page 19: Remote Turn On Options
REMOTE TURN ON OPTIONS OPTION ONE: ® When you are using this option with all amplified Bass Tubes models: OPTION TWO: When you are using this option with all BTA100 AND MBTA100:... - Page 20 ADJUSTING THE CROSSOVER A200 ONLY PHASE SWITCH (All A100 MODELS ONLY) SETTING THE LEVEL (ALL A200 MODELS ONLY) LED POWER INDICATOR WHITE GREEN OPTIONS (All A100 MODELS Remote Bass Control (RBCM-EL):...
- Page 21 All A200 MODELS Remote Bass Control and Crossover (RBCM-RS): PASSIVE MODELS (BT6014/6018, BT8014/8018, BT1014/1018, MBT8014, MBT1014 ONLY) (BT6024DVC/6028DVC, BT8024DVC/8028DVC, BT1024DVC/1028DVC)
-
Page 22: Troubleshooting
TROUBLESHOOTING Am I In Phase? Do You Have A Phase Problem? Phase Cancellation... -
Page 23: Practice Safe Listening
PHASE CORRECTING PROCEDURE INCREASE IS GOOD DECREASE IS BAD PRACTICE SAFE LISTENING... - Page 24 LIMITED WARRANTY (UNITED STATES) Southern Audio Services, Inc., In the event the product is not as warranted, SAS’ sole obligation shall be to repair or replace the defective product at SAS’ option: SAS limits its obligation under any implied warranties under state laws to a period not to exceed the limited warranty period.
- Page 25 PLEASE RETURN THIS PORTION IMMEDIATELY...
Need help?
Do you have a question about the Bazooka BT6014 and is the answer not in the manual?
Questions and answers