Table of Contents
Advertisement
Quick Links
Advertisement
Table of Contents

Related Manuals for BIOSURFIT Spinit Series

Summary of Contents for BIOSURFIT Spinit Series
- Page 1 User Manual spinit® S40 spinit® E40 English...
-
Page 2: Table Of Contents
TABLE OF CONTENTS Safety Information, Precautions and Limitations ……………………………………………………………………………………… spinit® system ………………………………………………………………………………………………………………………………………….. Introduction …………………………………………………………………………………………………………………………………………….. About this User Manual …………………………………………………………………………………………………………………. Examining the package contents ……………………………………………………………………………………………………. Instrument System Description ………………………………………………………………………………………………………………… Description of the spinit® instrument …………………………………………………………………………………………….. Description of the spinit® discs ………………………………………………………………………………………………………. How the spinit®... - Page 3 TABLE OF CONTENTS Quality Control …………………………………………………………………………………………………………………………………………. Why Control testing ……………………………………………………………………………………………………………………….. Choosing control solutions………………………………………………………………………………………………………………. Handling and testing control solutions.…..………………………………………………………………………………………. Frequency of control testing ………………………………………………………………………………………………………….. Testing Procedure …………………………………………………………………………………………………………………………………….. Operating Precautions ……………………………………………………………………………………………………………………. Preparing for sample analysis …………………………………………………………………………………………………………. Using the operator ID function ……………………………………………………………………………………………………….. Using the patient ID function …………………………………………………………………………………………………………..
-
Page 4: Safety Information, Precautions And Limitations
Safety Information, Precautions and Limitations WARNING: For safe and proper use, read all operating instructions in this User Manual before using the spinit® instrument. Please read all the following precautions and limitations carefully: • Please read and carefully follow the test specific information given in the Instructions for use of all spinit®... -
Page 5: Spinit® System
spinit® system Intended Use spinit® is an in vitro diagnostic use only, point of care system, consisting of an instrument and discs targeting specific treatment monitoring conditions. The system is used by healthcare professionals in a variety of different healthcare settings, and exclusively with spinit® discs and recommended control solutions. -
Page 6: Introduction
INTRODUCTION About this User Manual This User Manual will guide you through installation, operation and maintenance of your spinit® instrument. The User Manual also explains how the instrument works, describes the quality assur- ance system and assists you in troubleshooting. For analyzing patient samples or control solutions, please also read the test specific information given in the Instructions for use found in the spinit®... -
Page 7: Instrument System Description
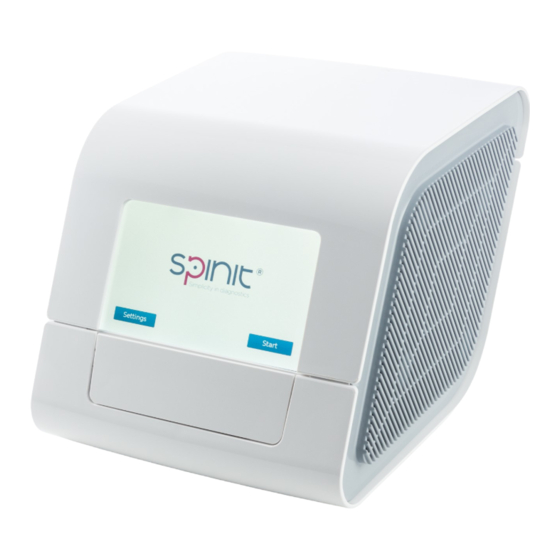
INSTRUMENT SYSTEM DESCRIPTION Description of the spinit® instrument Figure 1 Figure 1 shows the main exterior parts of the spinit® instrument. Power ON button Connection to power supply; Two (2) USB port- Options for external printer, barcode reader, export of patient and control record to USB pen and SW upgrade;... - Page 8 Figure 2 Figure 2 illustrates a spinit® HbA1c* disc and a spinit® strip with their functional parts: Test disc: spinit® strip: 1. Sample well 5. Sampling area (collection chamber) 2. Internal Quality Control 6. Handling area 3. Blister with buffer or reagent 7.
-
Page 9: How The Spinit® Instrument Works
How the spinit® instrument works The spinit® instrument is a stand-alone, small benchtop in vitro medical device intended to deliver a diagnostic platform designed for the Point-Of-Care Testing market. The spinit® system is based on a proprietary technology integrating a single platform for point of care diagnostics. -
Page 10: Internal Process Control
Internal process control The instrument self-test A self-test is performed during start-up of the instrument to ensure that the instrument is oper- ating according to established specifications. The self-test validates: • Hardware and software integrity The fail-safe mechanisms The spinit® instrument is designed to be maintenance free by the user and it performs multiple functional and operational tests to guarantee proper performance. -
Page 11: Getting Started
Installing your instrument Place the spinit® instrument on a dry, clean, vibration-free and horizontal surface. Only use parts approved by biosurfit. The use of non-approved parts may result in malfunction of the instrument and may render the warranty null and void. -
Page 12: How To Turn On The Instrument
Figure 5 How to turn ON the instrument Turn on the Instrument by pressing the ON button (Figure 4) on the back of the device. An automatic start-up procedure will be initiated (Figure 5). Please wait until stabilization period is complete. -
Page 13: Sound Signals
Figure 6 Text message Touch buttons Tray with a ready to use disc Sound signals A short beep indicates completion of an analysis. spinit® User Manual Getting started... -
Page 14: Configuration
CONFIGURATION The spinit® menus The major instrument configuration options are available through the Settings or Advanced settings menu. Start Menu Figure 7 On the main menu the user may directly start a test or move into other options through Settings menu. - Page 15 The spinit® menus Language Setting Figure 10 English is the default language, other languages are available and may be selected in first panel of spinit® settings. Select the menu Languages, click on the preferred language and this will be set for all menus and instructions.
- Page 16 The spinit® menus Change Password Figure 14 The spinit® Settings menu is protected by a password owned by the system manager. The default factory password is 0000. To change the password, on the Advanced Settings menu press the button Change Password, type a new password and click Next. Erase Data Figure 15 By selecting the menu Erase Data, the system owner must confirm his intention to erase all data.
- Page 17 The spinit® menus Network Settings Figure 17 By selecting the menu Network Settings, the system owner can view and configure the IP Address. HL7 Configuration Figure 18 The spinit® uses the HL7 standard protocol to send information to the LIS/HIS. The connectivity settings can be defined in the HL7 Config menu.
- Page 18 The spinit® menus Assay Options The spinit® system allows the user to define assay options for each spinit® test. Figure 19 On Advanced Settings menu, the user shall press the button Assay Options and choose the desired test. Figure 20 The default factory units for spinit®...
-
Page 19: Quality Control
* available on spinit® S40 and E40 For spinit® BC testing: biosurfit recommends using specific quality controls with the spinit® instrument and provides the established reference ranges for the spinit® system upon request. Refer to your local supplier for specific information on the type of quality control reagents that can be used with spinit® BC. -
Page 20: Frequency Of Control Testing
Frequency of control testing Testing of quality controls should be performed as per the established laboratory program. biosurfit also recommends testing controls: • When installing the spinit® instrument for the first time; • With each new shipment of spinit® test discs;... -
Page 21: Testing Procedure
TESTING PROCEDURE Operating Precautions When operating the Instrument • Use your fingertips to operate the touch screen. Do not use pens or other objects that may scratch or damage the screen. • The tray opens and closes automatically. Do not try to open or close the tray manually. •... - Page 22 Prepare for Testing Allow 5 minutes for the disc to reach operating temperature (if ap- plicable) (15°-30°C) before use. Press Start button and follow on-screen instructions; Read barcode from the pouch label. Open the foil pouch, remove the Disc and place it on a flat surface with label facing up.
- Page 23 Sample collection • The control material to be used are specific for each spinit® test. • The method used for sample collection is also specific to each test. • Once the sample has been loaded onto the disc, analysis must start immediately. •...
- Page 24 spinit® BC testing: 5. Detach a single capillary tube from the pack by handling the tube holder; 6. Collect the second drop of blood by touching the tip of the tube to the sample in a horizontal position; Capillary action will automatically draw the sample to the fill line and stop.
-
Page 25: Using The Operator Id Function
Using the operator ID function Entering operator ID If enabled, the operator’s identification (ID) is required before processing a spinit® Test (see ID Settings, page 12). Both letters and numbers can be entered. The operator ID will be displayed with the result and stored along with the other specific data for this run (see Patient and control results records, page 21). - Page 26 Each spinit® disc contains multiple integrated quality control verification steps to ensure reliability of the tests. If the user chooses to perform additional Quality Control checks, biosurfit recom- mends: For spinit® CRP and HbA1c testing spinit® control kits are available for routine quality control testing. These control kits contain con- trol materials with established acceptable ranges for spinit®...
- Page 27 Export results to USB Past results can be transferred to a standard USB pen drive through the Data menu on the Ad- vanced Settings panel. Additionally, system owner can define if data can be exported directly through the Data menu on the spinit® settings panel. For that, the system owner shall select Yes on the Allow export without password button on Advanced Settings.
-
Page 28: Info Codes And Troubleshooting
INFO CODES AND TROUBLESHOOTING Information codes that might appear during use of the spinit® instrument refer to specific infor- mation messages. The code numbers, the possible causes and actions to take are listed below. Service Information Before contacting technical support, please gather the following information: •... - Page 29 Information Codes for spinit® E40 and S40: INFO SOURCE CAUSE SOLUTION CODE spinit® instrument did not Collect a new sample and repeat the test, using a new test disc as per reach the correct rotation Instructions for use If the problem persists, please contact your local Instrument for signal acquisition.
- Page 30 Information Codes for spinit® E40 and S40 (cont.): INFO SOURCE CAUSE SOLUTION CODE • spinit® instrument was Shutdown the device and unplug it from the power supply for 10 unable to complete assay seconds. • Instrument due to unstable motor rota- Restart the device and repeat a new test, using a new test disc as (hardware) tion/behavior or measure-...
- Page 31 Additional Information Codes for spinit® S40: INFO SOURCE CAUSE SOLUTION CODE Instrument General failure of the spinit® Collect a new sample and repeat the test, using a new spinit® BC disc 1000 BC disc. as per IFU. If the problem persists, please contact your local supplier. Disc spinit®...
-
Page 32: Maintenance And Warranty
Cleaning the exterior biosurfit recommends the use of a cloth soaked with ethanol solution 70 % (v/v) in H2O to clean the external surface of the instrument. The touchscreen should be cleaned with a dry cloth. The instrument must be switched off and unplugged before cleaning. -
Page 33: Technical Specifications
TECHNICAL SPECIFICATIONS Instrument specifications The spinit® instrument is a CE certified IVD medical equipment and conforms to the following di- rectives and standards: European Union In Vitro Medical Instruments 98/79/EC, Directive 2011/65/EU, EN/IEC 61010-2-101:2002, and EMC IVD Instrument Standard EN 61326-2-6:2013. For in vitro diagnostic use. - Page 34 The spinit® instrument includes a 4-wire touchscreen with VGA resolution. The device has a micro- processor for controlling all the assay steps and data processing for quantitative determination of blood parameters. The design, development and manufacturing of the spinit® instrument is in accordance with bio- surfit Quality Management System (ISO 13485 certified company).
-
Page 35: Symbols
SYMBOLS The following symbols are used in the product labelling and instructions for the spinit® system. Symbol Explanation CE marking of conformity to directive 98/79/EC on in vitro diagnostic medical devices Manufacturer´s name and address In vitro diagnostic medical device Serial Number Product Reference number Consult Instructions for use... - Page 36 Rua 25 de Abril nº66, 2050-317 Azambuja, Portugal ISO13485 certified company...
Need help?
Do you have a question about the Spinit Series and is the answer not in the manual?
Questions and answers