Table of Contents
Advertisement
Quick Links
Advertisement
Table of Contents

Related Manuals for AirSelfie AIR PRIX


Summary of Contents for AirSelfie AIR PRIX
- Page 1 AIR PIX USER MANUAL...
- Page 3 Congratulations on choosing a better way to take selfie photos and video with your new AIR PIX from AirSelfie. This manual will help you get the most out of your AirSelfie experience. We recommend that you read through it in its entirety before taking your AIR PIX on its first flight.
-
Page 4: Table Of Contents
Index Component Overview App Download Charging Powering Up Pairing AIR PIX & Smartphone Calibration App User Interface Flying Your AIR PIX Flight Modes Manual Flight Mode Auto-Fly Mode... - Page 5 Index 360˚ Auto-Fly Mode App-Free Auto-Fly Mode App-Free Gesture Control Mode Auto-Safe Landing Gallery In-App Image Editing Social Media Sharing General Information General Information: Helpful Hints & Warranty Disposal FCC Compliance...
-
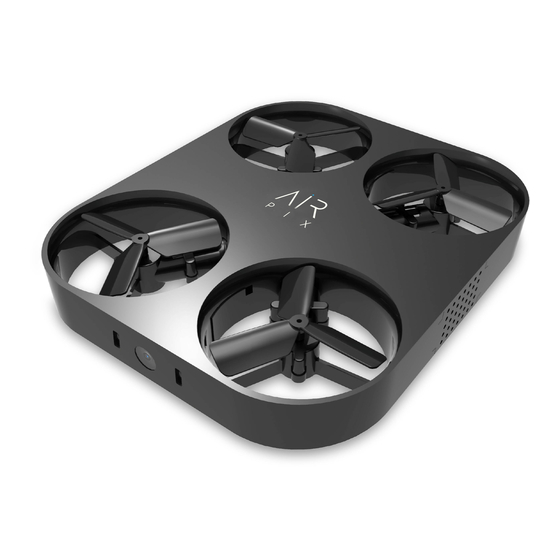
Page 6: Component Overview
Component Overview FRONT VIEW Camera Charging Micro Indicator SD Card Light Function Indicator Visual Light Sensor... - Page 7 Component Overview REAR VIEW Micro SD Card USB Port Power...
-
Page 8: App Download
AirSelfie App Download The universal AirSelfie App features “One-Touch” intuitive simplicity and works with all AirSelfie aerial cameras except for AirSelfie2. iOS users can find it on The App Store and Android users can download it from Google Play for free. - Page 9 AirSelfie App Instant Sharing Image Editing Suite Control-Camera Screen...
-
Page 10: Charging
Charging & Data Transfer Your AIR PIX comes with a partial charge, so you are good to fly right out of the box. The average flight time of a full charge is 6+ minutes. It’s easy to recharge the aerial camera’s battery when necessary using the USB-C cable that came with your AIR PIX. -
Page 11: Powering Up
Powering Up To turn your AIR PIX on press and hold the Power Button on the side of the device next to the USB port down for a second or two. The blue Function Indicator Light will flash rapidly when your AIR PIX is powered up. -
Page 12: Pairing Air Pix & Smartphone
Pairing AIR PIX & Smartphone Your AIR PIX connects to your smartphone through a 2.4GHz wi-fi connection. Press Select Press Press SELECT AN AIR PIX CONNECT Open Settings AIRSELFIE from the menu... - Page 13 Airpix-XXXX has been Wi-Fi connected Each AIR PIX has its own ID When completed return to the AirSelfie app. Airpix-XXXX The rapidly flashing blue Function Indicator Light will now be glowing solid. Airpix-XXXX iPhone iOS screens shown. Android will...
-
Page 14: Calibration
Calibration On some devices you will need to Calibrate during the initial connection. Press With the device When calibration CALIBRATE horizontal press is confirmed CALIBRATE press DONE Note: On occasion it may be necessary to recalibrate your AIR PIX to ensure the most stable flight possible. -
Page 15: App User Interface
App User Interface The AirSelfie app has 3 main areas that can be accessed by pressing the icons on the bottom of the screen on the Home and Gallery pages or the Back Arrow in the upper left corner of the Control-Camera screen. -
Page 16: Flying Your Air Pix
Flying Your AIR PIX Indoor Flight Recommendations: • It is highly recommended that you take your first AIR PIX flight indoors. • Your AIR PIX uses visual positioning technology for optimal-optical hovering performance. For maximum stability, it is advised to fly the device over flat and multi-colored surfaces. -
Page 17: Flight Modes
Flight Modes Camera Screen There are 4 ways to fly your AIR PIX. In the AirSelfie app go to the Camera screen and scroll left or right along the bottom to line up the mode you would like to fly in with the gold arrow. -
Page 18: Manual Flight Mode
Manual Flight Mode Back to Home The Manual flight mode’s main screen is called the Control-Camera Flight Status & Ready to fly Video Timer Screen because this where you can control the flight movements and take pictures or video with your AIR PIX. - Page 19 Manual Flight Mode LAUNCHING IN MANUAL MODE Ready to fly Ready to fly Hold AIR PIX in your outstretched arm flat on your palm with the logo up and the camera facing you. Hold your phone horizontally flat in your other hand. This is important because your phone’s gyroscope controls flight direction.
- Page 20 Manual Flight Mode PILOTING IN MANUAL MODE DIRECTION: AIR PIX uses the gyroscope in your phone for flight direction. Keeping your thumb on the joystick tilt your phone in the direction you want your it to fly: Tip up for backward Dip down for forward Tilt left to go left Tilt right to go right...
- Page 21 Manual Flight Mode ELEVATION: Slowly move your thumb on the Joystick either up or down to make AIR PIX fly either up or down. ROTATION: Slowly move your thumb on the Joystick to the right to direct AIR PIX to rotate clock-wise move your thumb left to make it rotate counter-clockwise.
-
Page 22: Auto-Fly Mode
Auto-Fly Mode Your AIR PIX can take photos and videos of you while you stay completely immersed in your activities Ready to fly in the Auto-Fly mode. Just follow these simple steps: Scroll and select the “AUTO-FLY” mode Select either the Indoor or Outdoor setting. Choose whether you would like to take continuous video or photos. - Page 23 Auto-Fly Mode With the power on, place the AIR PIX on your open palm keeping it flat and parallel to the ground with the logo up and the camera pointing at your face. AIR PIX is ready to fly when the “Pause” symbol in the gold circle in the middle of the screen changes to a “Play”...
- Page 24 Auto-Fly Mode Your AIR PIX will fly a few feet in front of you taking either continuous video or the number of selfie photos you selected. In Video Mode the blue Function Indicator Light will turn off while the video is being shot and turn on when shooting is completed.
-
Page 25: Auto-Fly Mode
360˚Auto-Fly Mode AIR PIX can also take photos or video of every thing around you in 360˚ Auto-Fly mode. Just Ready to fly follow these simple steps: Scroll and select the “360” mode Select either the Indoor or Outdoor setting. Choose whether you would like to take continuous video or photos. -
Page 26: App-Free Auto-Fly Mode
App-Free Auto-Fly Mode Launch, fly and take HD selfies without even being connected to your smartphone. Taking great selfies has never been easier - here’s how: Turn on AIR PIX by pressing the power button. When the blue light begins to blink rapidly triple click the power button. Just like in the Auto-Fly mode, place the AIR PIX on your open palm keeping it flat and parallel to the ground with the logo up and the camera pointing at your face. - Page 27 App-Free Auto-Fly Mode Your AIR PIX will fly a few feet in front of you, and automatically find you and take a selfie photo. The blue Function Indicator Light will flash rapidly and then pause before blinking once indicating that a photo has been taken.
-
Page 28: App-Free Gesture Control Mode
App-Free Gesture Control Mode In App-Free Gesture Control Mode you can launch, fly and take selfie photos or video with your AIR PIX using a few simple gestures and movements without being connected to your smartphone. It’s easy, give it a try: Turn on AIR PIX by pressing the power button. - Page 29 App-Free Gesture Control Mode AIR PIX will fly a few feet away and hover. In Gesture Mode AIR PIX uses Capture Me facial recognition to always maintain a consistent height and distance away from you. As you move closer it will move away. As you move away it will move with you.
- Page 30 App-Free Gesture Control Mode Zoom Out Position your hands near your shoulders with palms facing AIR PIX. The device will fly away from you as you wave your hands away from your body.
- Page 31 App-Free Gesture Control Mode Zoom In Position your hands away from your side with palms facing AIR PIX. The device will fly towards you as you wave your hands towards your body.
- Page 32 App-Free Gesture Control Mode Take a Photo Shoot a Video Simply raise your right arm palm Simply raise your left arm palm facing the facing the device and make a fist. device and make a fist. AIR PIX will start to AIR PIX will take a photo.
- Page 33 App-Free Gesture Control Mode Landing Position hands close to shoulders with palms facing the device. Lower your hands forward and toward the ground. AIR PIX will move closer to you. When AIR PIX is close to you it will start to land. The blue Function Indicator Light will flash rapidly when your AIR PIX is starting to land.
-
Page 34: Auto-Safe Landing
Auto-Safe Landing Auto-Safe Landing function automatically lands AIR PIX gently and safely if device is low on battery or in case of loss of control. EMERGENCY STOP To manually and instantly turn AIR PIX off in mid-flight simply grab the device with your hand (be careful to avoid the propellers) and flip it upside down. -
Page 35: Gallery
Gallery The AirSelfie app stores all of the photos and video selfies you take in an easy to manage Gallery. You can get to the Gallery by pressing the Gallery button in the lower right corner of the Home Screen or by pressing the Last Shot Preview image in the lower right corner of the Control-Camera Screen. - Page 36 Gallery In the Gallery you can move your best photos and video into a FAVORITES folder for easier access. Click the Select/Select all button in the upper right of the screen. Select the image you would like to make a favorite by clicking the white circle in the upper right of the image - it turns gold.
-
Page 37: In-App Image Editing
In-App Image Editing Gallery The AirSelfie app includes a complete image editing suite with multiple editing functions that you can use to customize your images. To get to the editing suite either click the Last Shot Preview Image on the Control-Capture Screen or click the image you want to edit in either the ALL or the FAVORITES galleries. - Page 38 In-App Image Editing The In-App Image Editing Suite offers endless creativity through 11 different editing functions. Let your imagination go wild: Scroll left or right and click the icon of the editing function you wish to use. Revert or Repeat the function. Save the image to the folder it came from.
- Page 39 In-App Image Editing Each editing function is filled with actions that will alter your image in many different ways using very intuitive tools. The FILTER function shown here is a good example. Scroll left or right and click the preview image of the effect you would like to apply.
-
Page 40: Social Media Sharing
Social Media Sharing Once your image is exactly the way you want it you can easily and instantly share it to your favorite social media platform. Simply select the image you want to share from the Gallery Screen or Image Selection Screen and click the Share icon. - Page 41 Social Media Sharing Today’s Date and Time Clicking the Share icon automatically pulls up your phone’s Sharing Screen. Simply select which social media platform you want to share to or if you want to send the image as a Message or Mail. Add text to your post or message then click Next and your image or video will be instantly shared.
-
Page 42: General Information
General Information SAFETY PRECAUTIONS AND MAINTENANCE This product is designed for recreational and leisure purposes. The pilot must always maintain direct visual contact with the product and monitor its trajectory. This product must be used in accordance with the civil aviation regulations in your country. - Page 43 General Information Starting and flying the AIR PIX is strictly forbidden near high voltage poles, railway tracks, roads, swimming pools or open water. Only operate under good visibility and calm weather conditions. Irreversable damage may be caused if sand or dust gets into the product. Should this occur, your product may not function as intended.
- Page 44 General Information All elements in the box must be removed by a competent adult. To be used under the direct supervision of an adult. Do not use in other areas than private grounds. Do NOT open or modify the product or change any components. BATTERIES This product includes a rechargeable 550 mAh battery.
- Page 45 Put the product in a plastic bag or container until you can dispose of it safely. If you accidentally get electrolyte on your skin, wash thoroughly under running water and consult a doctor. AirSelfie will not be liable if the product is subject to alterations or tampering.
- Page 46 Do not return to retailer. Return to AirSelfie. During contractual warranty period, any defective product should be returned in its original packaging to the AirSelfie after-sales service. After inspection pf the product, AirSelfie will, at its sole dis- cretion, either repair or replace the defective part or product, excluding any other indemnification or any nature.
- Page 47 AirSelfie; defects caused by any reason other than a defect in material or workmanship; the gradual power loss of the AirSelfie rechargeable battery over time which does not constitute as a defect in material or workmanship.
- Page 48 - Class II equipment. Declaration of Conformity AirSelfie hereby declares that the radio equipment type AirSelfie aerial camera is in compliance with Directive 2014/53/EU. The full text of the EU declaration of conformity is available at the following internet address: www.airselfiecamera.com...
-
Page 49: Disposal
The explanations and specifications in this guide are given for informational purposes only and may be modified without prior notice. However, AirSelfie shall not be held respon- sible for any consequences arising from any errors or omissions in the guide, nor for any damage or accidental loss of data resulting directly or indirectly from the use of the infor- mation herein. -
Page 50: Fcc Compliance
FCC Compliance Statement Maintain a safe distance of at least 20cm between yourself and the product while the product is in operation, Note that this is the minimum safe distance for operation. This device complies with Part 15 of the FCC Rules. Its operation is subject to the following two conditions: 1. - Page 51 FCC Compliance Statement If this product does cause harmful interference to radio or television reception, which can be determined by turning the equipment off and on, the user is encour- aged to try to correct the interference by one or more of the following measures: •...
- Page 52 If you have any questions about the information in this user manual please email an AirSelfie customer experience professional at: support@airselfiecamera.com...
Need help?
Do you have a question about the AIR PRIX and is the answer not in the manual?
Questions and answers