Advertisement
Quick Links
Regulatory Compliance
Pre-Installation Guidelines
1. Read all safety notes and mounting guidelines before installing
the product. Verify that all parts listed under "In the Box" are
present and complete.
2. Inspect the product for damage. DO NOT install the product if
there is any damage. Contact the authorized retailer where you
purchased it to initiate a warranty claim if there is damage.
3. Verify that all power supply and/or charging systems comply to
the specified voltage limits for the light.
4. Turn off the vehicle and disconnect the battery.
To properly install this light you should have a good understanding of automotive electrical procedures and
systems, and proficiency in the installation of tail lights. If you do not, please seek professional assistance.
J.W. Speaker Corporation • Germantown, WI U.S.A. • www.jwspeaker.com • speaker@jwspeaker.com • 262.251.6660
Rev: 05/19/2016
PRE-INSTALLATION INFORMATION
Estimated Time
Tools Needed
In the Box
A
Input Voltage
Operating Voltage
INSTRUCTIONS BEGIN ON THE NEXT PAGE
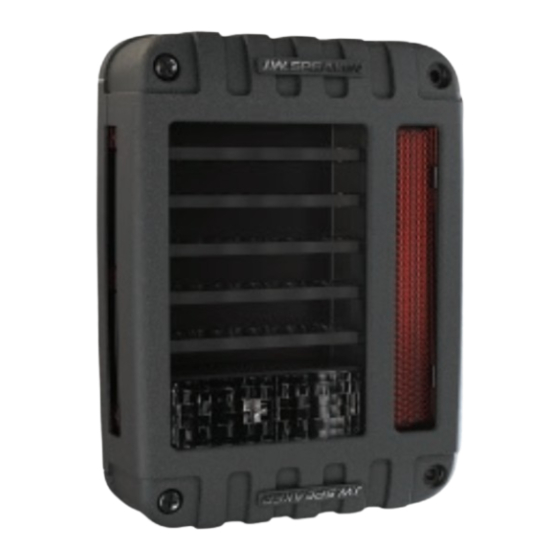
Model 279 J Series
LED Jeep Tail Light Instruction Sheet
30 minutes
Phillips Screwdriver
Pliers OR Adjustable Wrench
(x2) Model 279 J Series Tail Lights
B
A. (x2) Resistor Mounting Brackets
B. (x4) Tinnerman S-Clips
C
C. (x4) #4-40x0.312" Screws
D. (x4) #4-40 Lock Nuts
Single lights come with half of the above parts
D
12-24V DC
10-32V DC
PRODUCT WARRANTY:
If you have issues with a J.W. Speaker
product, please contact the authorized
retailer where you purchased it.
Page 1
6544230b
Advertisement

Related Manuals for J.W. Speaker J Series

Summary of Contents for J.W. Speaker J Series
-
Page 1: Product Warranty
If you do not, please seek professional assistance. INSTRUCTIONS BEGIN ON THE NEXT PAGE Page 1 J.W. Speaker Corporation • Germantown, WI U.S.A. • www.jwspeaker.com • speaker@jwspeaker.com • 262.251.6660 Rev: 05/19/2016 6544230b... -
Page 2: Installation Instructions
The rounded edge should be on the same tighten both screws with a Phillips screwdriver. side as the resistor. Leave about 1 inch of space between clips. Page 2 J.W. Speaker Corporation • Germantown, WI U.S.A. • www.jwspeaker.com • speaker@jwspeaker.com • 262.251.6660 Rev: 05/19/2016 6544230b... - Page 3 NOTE: The placement of the interior sheet metal frame may differ on fender cavity between sides of the vehicle and between model years. Page 3 J.W. Speaker Corporation • Germantown, WI U.S.A. • www.jwspeaker.com • speaker@jwspeaker.com • 262.251.6660 Rev: 05/19/2016 6544230b...
Need help?
Do you have a question about the J Series and is the answer not in the manual?
Questions and answers