Table of Contents
Advertisement
Advertisement
Table of Contents

Summary of Contents for E-one clinic
- Page 1 U s e r M a n u a l...
- Page 2 TABLE OF CONTENTS PACKAGE CONTENTS PRECAUTIONS FOR USE GLOSSARY INFORMATION PROVIDED BY TOUCH SCREEN HAIR REMOVAL WITH THE CHANGING THE CARTRIDGE RETURNING USED CARTRIDGES SOFTWARE OPTIONS PROHIBITED HANDLINGS USING THE ACCESSORIES MAINTENANCE MARKINGS ERROR MESSAGES STANDARDS SHOWROOM WARRANTY CONDITIONS...
- Page 3 Dear client, You have just purchased an and I thank you for your cus- tom. Habits change and is evidence of this. You can now safely have access to a hair removal technology that uses pro- fessional quality pulsed light in the comfort of your home. I have personally ensured that the utmost attention be paid to the implementation of each ;...
- Page 4 1 Base and applicator. optical Spray with filter included - See details on pages 12-13. See details on page 43. consumable cartridge and its optical filter (included in the applicator of your pencil of work and sharpener. working gel. safety glasses. See details on page 42.
- Page 5 See details on page 42. See details of page 43. H a i r r e m o v a l f o l l o w - u p Clinic U s e r M a n u a l CAUTION:...
- Page 7 USAGE PRE FOR YOUR SECURITY Before using your please read the following information carefully: • Voltage: 100 -240 V. • Nominal frequency: 50-60 Hz. • Maximum power consumption: 240 VA. • Make sure that the voltage corresponds to that of your installation. Any improper connection may cause permanent damage not covered by warranty.
- Page 8 CAUTIONS • When using the device, make sure to place it on a flat surface, in a place where the potential of a fall can be avoided. • E-Swin SAS disclaims any responsibility for any damage resulting from improper use of the device or use other than described in this manual. •...
- Page 9 However, the melanin structure of this hair retains characteristics that render light technologies ineffective for hair removal. • On very dark skin or black skin (please refer to our website www.e-swin.com, “Clinic” section). • On an injured, burned, or infected skin.
- Page 10 CAUTIONS • If you have a skin condition (eczema, inflammation, acne...). Cautions regarding UV: Artificial UV in a beauty parlour: you should take care about when using also using artificial UV radiation. Regarding high pressure UV dispensed by high powered machines, it is advisable to wait a few days before or after such a session before starting treatment with Natural UV: when exposed to sunlight after a treatment session with the , it is...
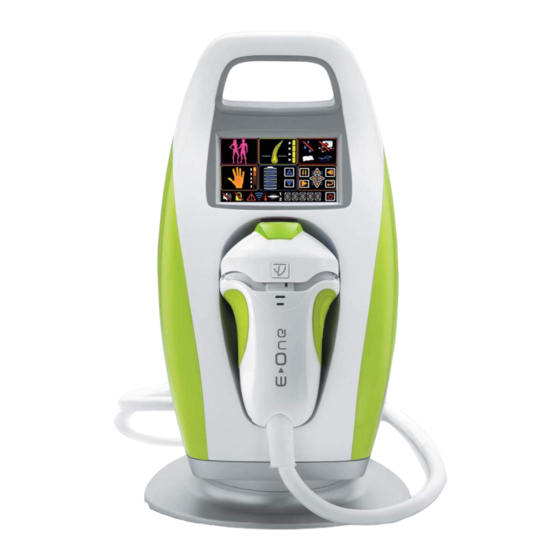
- Page 11 GLOS THE BASE Colour touch screen Applicator Applicator support area...
- Page 12 SARY THE APPLICATOR Tip of optical Mobile head guide Mobile head locking Start Lower button casing Flash availability vents Upper casing...
- Page 13 INFORMATION PROVID ON / OFF OF THE DEVICE THE BASE OF THE On / off switch. Access version, the AREAS OF SAFETY ICONS Take care not to splash the device with water, use near water or immerse in water. Projection of water on any part of the device is strictly prohibited.
- Page 14 ED BY TOUCH SCREEN__ BROWSING AREA EQUIPPED WITH A TOUCH SCREEN These buttons enables you to move from one character to screen is monochrome (without any color) another (22), and to increase or decrease the digits of each character. Go back to the previous menu. This icon enables you to modify any selection made previously.
- Page 16 REMOVING HAIR WITH BEFORE EACH USE VERIFICATION • Check the power cord (must not be pinched or crushed, wire must not be bare). • Check the cable connecting the base to the applicator (no visible impairment). • Check the external optical parts of >...
- Page 17 ______ • Removing the cartridge with filter (video available on your personal customer page). > Once the mobile head is removed, the cartridge with filter is then visible in the applicator (2). > Remove the cartridge from the applicator: press fir- mly on the filter support (3) and pull (4).
- Page 18 HAIR REMOVAL WITH T STEP 1 STEP 2 CHOOSING THE BEST TIME TO USE THE PREPARE YOUR SKIN If your previous hair removal method was: • Your skin should be clean, dry and free of any cosmetic product. - Razor: You can use the immediately.
- Page 19 ______ STEP 3 STARTING AND SETTING UP YOUR REMINDERS: The definitions of the icons are indicated on pages 14 and 15. Optic Your is already equipped with an cartridge. Therefore you do not need to enter any activation code to run your device.
- Page 20 HAIR REMOVAL WITH T • Setting up your hair removal session. Simply give some information to each blinking icon to set up your hair removal session. You do not need to press on the validation icon to select each one of them (14). All the settings must have been pressed to be able to use .
- Page 21 ______ - ADJUST THE DESIRED INTENSITY LEVEL: (screen G) The arrows located next to the intensity level icon (9), enable you to increase or to decrease the intensity of the issued flash. Click on one of the two blue arrows, until it gradually reaches the desired intensity level.
- Page 22 HAIR REMOVAL WITH CASE STUDIES “I’m a man, I have white skin, I wish to remove the hair from my armpits”. My selections will be as follows: . Man. . Fair skin (1 colour). . The thickest hair (4 thickness). .
- Page 23 ______ SPECIAL CASE OF THE RC and rc Multi DEVICE These devices operate with an activation card, credited with 3000 flashes. This card is specific to the cartridge with which it has been ordered. - Use the activation card of your cartridge.
- Page 24 HAIR REMOVAL WITH STEP 4 MARK OUT THE AREA TO BE FLASHED • Mark out the area to be flashed with the help of the by tracing parallel white lines on the large areas. • If necessary, use the guide plate to cover a rather large area that should not be flashed (tattoos...).
- Page 25 ______ PRECAUTIONS TO BE TAKEN DURING THE SESSION • You must wear your safety glasses at all times. If other people are around you while you are using they should also wear the safety glasses IMPORTANT: Do not flash the periocular area (located under the safety glasses protecting your eyes, eyebrows, eyelashes...).
- Page 26 HAIR REMOVAL WITH ISSUING A FLASH - To be able to flash, the glass tip of the applicator (optical guide) must be applied onto the skin. Then pressure should be exerted so as to “push down” the head of the applicator, creating a pressure on the skin. - The flash can then be triggered, by pressing the button located on the side of the applicator.
- Page 27 ______ STEP 5 ENDING THE SESSION • Press key 1. • Once the fan located inside the applicator is off (after 10 minutes or so), the power cord can be unplugged. The other fans, located inside the base of the will only stop once the device is unplugged.
- Page 29 __CHANGING THE This step must be performed with utmost caution. Any improper handling can result in permanent damage to the applicator and to the in a more general way. The warranty does not cover improper handling. We therefore recommend you to be very attentive to the procedure to follow. Apart from the classic procedure, only our technical department is authorised to ask you to change the cartridge (refer to page 40 of this instruction manual).
- Page 30 CARTRIDGE STEP 3 • Turn off the device. • Unplug the power cord from the device. STEP 4 EXTRACTING THE CARTRIDGE (The video is available on your personal client page). • Take the applicator and press simultaneously on the 2 loc- king tabs of the mobile head (23), and remove it.
- Page 31 _CHANGING THE STEP 5 INSERTING A NEW CARTRIDGE (Video available on your personal client page) • Take the new cartridge and check the direction for inserting this new cartridge. • Align the cartridge with the applicator with the help of the red dots (28). NOTE: The cartridges are not symmetrical, so they must be inserted in a specific way, and certainly not any other...
- Page 32 CARTRIDGE - The red dots are aligned (28) - You have not twisted the electrodes (33) If you have twisted the electrodes, do not insert your cartridge in your as it may cause serious damage to your device. You will need to send us back the damaged cartridge and order another one.
- Page 33 __CHANGING THE STEP 8 SPECIAL CASE OF THE RC and RC MULTI There is no need to enter any code when you change the cartridge. • When the number of flashes expires: - You must order an cartridge (delivered with its activation card). - You must send send us back your used cartridge and your old activation card (this is free of charge thanks to return vou- cher available in the package containing your new cartridge and its activation card).
- Page 34 CARTRIDGE If the codes are correct, the current menu will be displayed again as well as the number of flash credit. If the codes are wrong, an error message will be displayed (error message no. 11 or 12 depending on the scenario;...
- Page 35 RETURNING THE USED To preserve the environment, we recommend that you use the packaging of the cartridge to send us back the used cartridge. STEP 1 STEP 2 RECEIVING THE NEW CARTRIDGE AND UNPACKING KEEPING THE ELEMENTS AT THE TIME YOU RECEIVE YOUR NEW CARTRIDGE.
- Page 36 CARTRIDGE (FRANCE ONLY) STEP 3 HOW TO PACK THE USED CARTRIDGE • Collect the used cartridge and place it inside the transparent plastic case (image 39), then close it with the help of its plastic cover (image 40). • Stick each of the 2 sealing stickers on either side of the case, so that each sticker covers the joint between the case and its cover (image 41).
- Page 37 SOFTWARE SOFTWARE OPTIONS • PIN code It is possible to secure your by entering a PIN code. As long as a specific PIN code has not been entered, a red bar will appear on the lock icon (16). This means that the device is not locked; there is no code to enter. By default, the PIN code is 0000.
- Page 38 OPTIONS • Modifying an existing PIN code, while a former code already exists, is possible but only when is already running, i.e. the PIN you want to change has already been entered at start-up. You must therefore click once on the lock icon (16) and enter the current code once, then validate it (validation icon 14).
- Page 40 PROHIBITED LIST OF SOME ACTIONS THAT ARE PROHIBITED WHEN USING YOUR (non exhaustive) These actions are prohibited because they endanger you or may damage your device in an irreversible way. Do not to block the venti- Do not cover or block the lation grid located on the ventilation grid located upper part by covering the...
- Page 41 HANDLING Never attempt to disas- semble the applicator. Once the cartridge is exposed, only touch the plas- tic parts and definitely not the metal parts, the lamp, the electrodes, the tube or the reflector. Do not attempt to open your device: all interventions must be carried out by people duly authorised by the manufacturer.
- Page 42 USING THE It is used to mark out the area to be treated. The pencil work They must be worn by all those present at the time of the flash. must be completed before applying the They enable you to mark out NOTE: Only this pencil can be used to mark out the areas to the areas that must never be...
- Page 43 ACCESSORIES It is used to clean and maintain: These self-adhesive are used to cover the small areas • the optical parts of the mobile head of the applicator: that must not be flashed (e.g. moles). They must be placed after - External optical parts: spray directly and wipe with a dry shaving and before applying the gel.
- Page 44 MAINTE Check that your is unplugged when you are undertaking its maintenance. If you intervene after using , you must wait for the fan of the device to come to a complete stop before unplugging the base. This enables, among other things, the optical parts to cool down properly. NOTE: Unlike the fans located inside the applicator, the ones located inside the base of only stops when the device is...
- Page 45 NANCE BASE CABLE TO APPLICATOR STORAGE This cable must always stay clean without any visible • Store your and its accessories in its box. impairment. You must never bend it strongly or get it stuck. If in doubt about the cable’s condition, you must stop using •...
- Page 46 MARK Reference of the hair removal device Access, SC, RC and RC Multi). Numéro de série Unique serial number of your …………………… E-SWIN Year of manufacture of your device and address of the manufacturer. 5, rue de la Noue 78113 Adainville - FRANCE 2014 Medical device satisfying the requirements of the European Directive 93/42, certified by an independent body.
- Page 47 INGS USING THE DEVICE Recycling and treatment: Instructions for treatment of used products: the WEEE (Waste of Electrical and Electronic Equipment) Directive 2020/96/CE has been implemented to ensure that the products are recycled by using the best available techniques for treatment, recovery and recycling, and thus to contribute to the protection of the environment and human health.
- Page 48 ERROR MESSAGES In addition to its own number (see table below), each error message is notified by the blinking of the warning icon (17). Screen Display Meaning What to do? Contact our technical department. Visit your No flash detected. customer page at www.e-swin.com and click on “Contact Us and After Sales Service”.
- Page 49 STANDARDS CERTIFICATIONS PRECAUTIONS FOR USE E-SWIN SAS, the company that is the exclusive Never let either the base or the applicator come manufacturer of the device has been awarded into contact with water. Never open the base or an ISO 9001 and ISO 13485 certification. the applicator as you could be exposed to high voltage.
- Page 50 SHOWROOM PARIS - FRANCE devices and their accessories are also available in our showroom. 34, rue Brunel 75017 Paris - FRANCE +33 1 45 74 22 22...
- Page 51 WARRANTY CONDITIONS Your product is guaranteed for personal home use for a period of two years. Any connection error, handling error, any use other than for hair removal treatment and in a general way, any other use outside the conditions described in this manual will void the warranty.
- Page 52 5, rue de la Noue 78113 Adainville FRANCE w ww . e-sw in .c o m 0499 2 0 1 3...
Need help?
Do you have a question about the clinic and is the answer not in the manual?
Questions and answers