
Subscribe to Our Youtube Channel
Related Manuals for Louisville AA2210


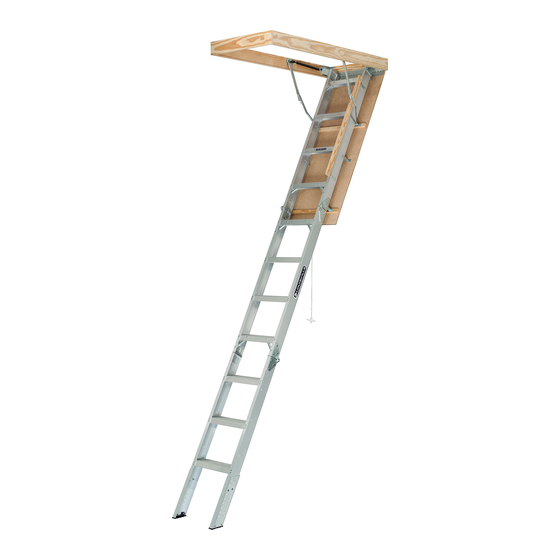
Summary of Contents for Louisville AA2210
- Page 1 ATTIC LADDER INSTALLATION INSTRUCTIONS INSTRUCCIONES DE INSTALACIÓN DE LA ESCALERA DE ÁTICO English / Inglés: Page 1 / Página 1 | Español / Spanish: Página 12 / Page 12 MODELS/MODELOS: AA2210 | AA2510 | AA3010 | WA2210...
-
Page 2: Materials Required
WOOD SERIES ITEM Pull cord 36” Deck screw 2 1/2” Before you start installing your new Louisville Ceiling Mounted Folding Attic Ladder, you must read and understand the following: Lag screw 3” Plastic Shoe 1. For residential use only. Not for use in a commercial or industrial setting. - Page 3 MODEL OPENING RANGE “A” SPACE “B” CLEARANCE “C” be adjusted after ladder is completely installed. Be sure the knot is large enough to not slip AA2210 22 1/2” x 54” 7’ 8” – 10’ 3” 67” 74” through the hole.
- Page 4 STEP 1: PRELIMINARY INSTALLATION INSTRUCTIONS STEP 1: PRELIMINARY INSTALLATION INSTRUCTIONS A. Attach temporary supports “A” and “B” with 2 ½” deck screws as shown in Figure 4. A. Attach temporary supports “A” and “B” with 2 ½” deck screws as shown in Figure 4. Support “A”...
-
Page 5: Ceiling Height
STEP 1: PRELIMINARY STEP 1: PRELIMINARY INSTALLATION INSTRUCTIONS A. Attach temporary supports “A” and “B” with 2 ½” deck screws as shown in Figure 4. INSTALLATION INSTRUCTIONS Support “A” should be located at the end where the door hinge of the ladder will go. The A. - Page 6 FIGURE 19 For customer service, call Louisville Ladder at 1–800–666–2811 or e–mail info@louisvilleladder.com...
- Page 7 Figure 18. Antes de empezar la instalación de su nueva escalera de ático plegable para montaje en el techo Louisville, debe leer y entender lo siguiente: 1. Solo para uso residencial, no para uso de establecimientos comerciales o industriales.
- Page 8 “A” RANGO DE “B” DISTANCIA “C” ESPACIO MODELO APROXIMADA ALTURA DEL TECHO DE APERTURA PARA DESPLIEGUE Pija hexagonal 3” AA2210 22 1/2” x 54” 7’ 8” – 10’ 3” 67” 74” Base aluminio (montadas en escalera) AA2510 25 1/2” x 54”...
- Page 9 PASO 1: INSTRUCCIONES DE INSTALACIÓN PRELIMINARES E. La persona que este abajo, tendrá que levantar la escalera de ático hacia la abertura del techo y deberá ser asistido por la persona en el ático, asegurando la escalera sobre los soportes temporales (Figura 6) A.
- Page 10 PASO 2: INSTALACION PERMANENTE B. Mida la distancia desde la sección media al suelo a lo largo de la escalera, para las longitudes A y B (Figura 11). Registre A. La escalera viene con agujeros pre–perforados para instalación permanente, los agujeros para la los resultados en el espacio provisto en la Tabla 2.
- Page 11 Para instalar los bordes mantenga libres 3/8” desde la puerta en la zona de la visagra y 1/8” en los D. Presione las secciónes para asegurar que los brazos plegadizos estén completamente extendidos. otros 3 lados. Para servicio al cliente, llame a Louisville Ladder al 1–800–666–2811 o por correo electrónico info@louisvilleladder.com...
- Page 12 1–(800)–666–2811 (U.S. & CANADA) Continúa en la página siguiente... 1–(502)–636–2811 | FAX: 1–(800)–274–4566 www.LouisvilleLadder.com FIGURA 19 WA / AA Attic Ladder Installation Instructions (Eng / Spanish) 2017 v1 [F7964 REV 4] Aug 2017 | © 2017 Louisville Ladder, Inc. All rights reserved.
Need help?
Do you have a question about the AA2210 and is the answer not in the manual?
Questions and answers