Table of Contents
Advertisement
Quick Links
Advertisement
Table of Contents

Summary of Contents for TCS AZC41000-0010
- Page 1 Product information transponder reader AZC41000-0010...
-
Page 3: Table Of Contents
-System ................................8 Install the front door station ............................9 Connecting the lines ..............................9 Example circuit 1: TCS:BUS with VBVS05 ......................... 10 Example circuit 2: installation with multiple transponder readers ................10 Example circuit 3: TCS:BUS with BVS20-SG ......................11 Door opener in mixed installation .......................... -
Page 4: Scope Of Delivery
Scope of delivery 1 x transponder reader 1 x infrared remote control 1 x win:clip -key 1 x screwdriver foil for info tags, empty product information key list Introduction Notes on this product information This product information refers exclusively to qualified electricians. The product information contains important notes on intended use, installation and initial operation. -
Page 5: Safety Instructions
In combination with the power supply and control unit BVS20-SG, it can be used as a stand-alone system. The transponder reader can be combined with all TCS:BUS audio and video kits. It can be integrated into large bus installations with up to 64 external units. -
Page 6: Short Description
• Programming of MIFARE Classic® compatible transponder – up to 10 per master transponder – up to 50 per infrared remote control – up to 250 TCS:BUS installations possible using configo • Visual and acoustic notification when reading the key • Visual and acoustic error indication •... -
Page 7: Device Overview
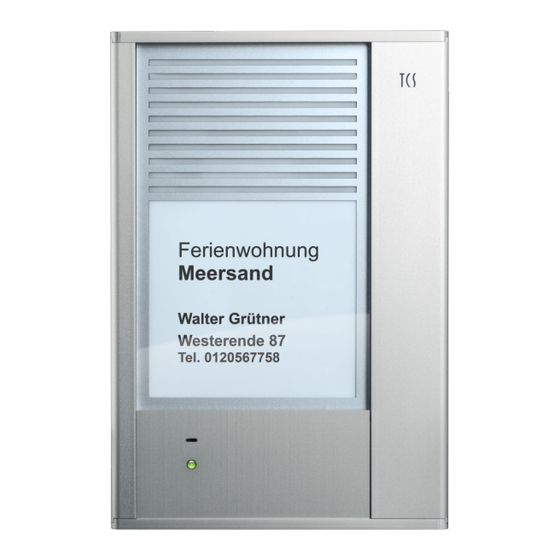
Device overview Fig. 1: AZC41000, nameplate partially visible attachment hole 1, 2 flush panel cable gland LED (green / red / orange) DIP-switch opening for win:clip -key sabotage contact nameplate glass attachment hole 3 IR receiver print card connection terminal... -
Page 8: Tecnical Data
Tecnical data +24 V ± 8 % (power supply and control unit) supply voltage 18 bis 28 V (for stand-alone mode) input current in resting position 3-wire operation: I(a) = 0,1 mA, I(P) = 17 mA maximum input current I(Pmax) = 40 mA degree of protection IP44 acceptable ambient temperature... -
Page 9: Install The Front Door Station
Close the housing ► Connect the plug of the name plate illumination (see instal- lation). ► Push the enclosed win:clip key into the small opening within the loudspeaker cover. ► Press the key into the opening until stop and keep it in this position. -
Page 10: Example Circuit 1: Tcs:bus With Vbvs05
Example circuit 1: TCS:BUS with VBVS05 door opener light Fig. 4: example circuit 1 Example circuit 2: installation with multiple transponder readers door opener door opener door opener Fig. 5: example circuit, door opener with separate power supply... -
Page 11: Example Circuit 3: Tcs:bus With Bvs20-Sg
The transponder reader is factory set for systems with loop resistance of ≤ 20 Ohm and operation on the TCS:BUS (3-wire technique). The adjustment is made at a DIP switch which is secured with a plastic plate. See device overview, p. 7. -
Page 12: Activate Infrared Remote Control
Adjust length of lines in systems (long lines) switch 2 Requirement: Front-door stations and power supply and control units connected to the system, must be lines suitable for systems with a loop resistance of up to 60 Ohm. long ≤ 60 Ohm) normal (Z ≤... -
Page 13: Configuration
1 to 4 00000000 (16 bit) Master code Serial number of the device Master transponder code 00000000 (no master transponder) TCS:BUS connected Sabotage contact activated ON (= 1) control function in case of sabotage Configuration Possible configurations Function... -
Page 14: Initial Commissioning
Initial commissioning with infrared remote control see page 15 with configuration software configo analog see page 15 with user program access control (PCiACC) see manual PCitACC with service device TCSK no programming possible Legend Acknowledgement tones tone symbol meaning • Infrared remote control confirms pressing the button with a short acknowledgement tone short button acknowledgement tone. -
Page 15: Notices
Notices • For programming you need the 6-digit serial number of the transponder reader. • A transponder contains a unique number that can be assigned to one or more transponder readers. This number is stored in the transponder reader. • A transponder (or master transponder) can be allocated to several devices. •... - Page 16 Initiate programming Power supply and con- trol unit: put tran- sponder reader in pro- gramming mode ► Shortly press RUN/PROG Button, LED Switch ON and OFF blinks. You now have 5 min. to pro- the programming gram. mode of the system ►...
- Page 17 Train transponder Initiate program- If not yet done ming Enter command ► * 0 # SpNr # … SpNr = memory location 0 to 49 Present transponder ► Hold the transponder in front the de- vice a positive acknowledgement tone sounds, LED lights green for 3 s, Transponder is trained LED blinks green again.
- Page 18 Delete a transponder Initiate program- If not yet done ming Enter command ► * 3 # SpNr # … SpNr = memory location 0 to 49 a positive acknowledgement tone sounds, delete occupied memory LED lights green for 3 s, LED blinks green again.
- Page 19 Set switching time for R-terminal Initiate program- If not yet done ming Enter command ► * 8 # SpNr # … SpNr = memory location 0 to 49 value = switching time adjustable in 1 s-steps, 0 to 255 s 0 = deactivated, no response (WE = 3 s) a positive acknowledgement tone sounds,...
- Page 20 Define a transponder as master transponder Initiate program- If not yet done ming Enter command ► * 97 # 8 seconds It must not pass more than 8 s until presenting the transponder! Present transponder ► Shortly hold any transponder in front of the nameplate glass.
- Page 21 Loading factory settings • The master code is reset to the factory setting. • The master transponder is deleted. • The trained transponders stay active. Initiate program- If not yet done ming Enter command * 99 # Mastercode # Mastercode # …...
- Page 22 End programming Initiate program- If not yet done ming Enter command ► * 9 # LED OFF. or wait …no programming for 2 min.: a positive acknowledgement tone sounds, LED lights green for 3 s, LED is OFF again. The front-door station is still ready for programming for the next 5 min. The programming must not be initiated again.
-
Page 23: Programming With Master Transponder
Programming with master transponder • The transponder (cards or keys) must be positioned max. 30 mm from the nameplate glass in front of the transponder reader. • If the instruction sequence is interrupted for 8 seconds, the whole instruction sequence is dismissed and a negative acknowledgement tone sounds. - Page 24 Train transponder Initiate program- If not yet done ming all memory address emp- The transponder number is written in the next available memory address. SpNr = memory address 00 bis 09 Present transponder ► Shortly hold the transponder in front of the nameplate glass.
- Page 25 Delete all transponders Initiate program- If not yet done ming shortly present master ► Hold the master transponder in front of transponder 3 x times the nameplate glass 3 times in a row. ► Placing the transponder in front of the reader each time, must take max 3 s, else the device ends the pro- gramming mode.
-
Page 26: Label Info Sign
► Use a laser printer to print the inscription templates on a laser film. The laser film can be ordered directly from TCS, see p. ► Cut out the info sign on the dotted lines. ► Alternatively, you can label the info signs (included in delivery) with a waterproof pen. -
Page 27: Infrared Remote Control Change Batteries
Infrared remote control change batteries For the infrared remote control, 1 button cell CR2025 (DC 3.0 V) is necessary. ► Remove battery cover on the back of the infrared remote control. ► Observe the polarity of the battery and the marking “+/-” in the battery compartment. ►... -
Page 28: Warranty
Service Please send your questions and inquiries to TCS HOTLINE 04194 9881-188. Headquarters TCS TürControlSysteme AG, Geschwister-Scholl-Str. 7, 39307 Genthin | Germany FON: Fax +49(0)3933 8799/-10 +49(0)3933 8799-11 www.tcsag.de Subject to technical changes. TCS Hotline Deutschland time of printing: 11/2018 Tel.: 04194 9881-188 FAX: 04194 988-189 Mail: hotline@tcsag.de...
Need help?
Do you have a question about the AZC41000-0010 and is the answer not in the manual?
Questions and answers