Advertisement
Available languages
Available languages
Advertisement

Summary of Contents for Trace Acoustic TA400
-
Page 2: Table Of Contents
ENGLISH ........... 14 ESPAÑOL ..........32 FRANÇAIS ..........50 DEUTSCH ..........70 ITALIANO ..........89 PORTUGUÊS ......... 108 日本語 ............ 126... - Page 3 Intended to alert the user to the presence of uninsulated “dangerous voltage” within the product’s Intended to alert the user to the presence of uninsulated “dangerous voltage” within the product’s Intended to alert the user to the presence of uninsulated “dangerous voltage” within the product’s Intended to alert the user to the presence of uninsulated “dangerous voltage”...
- Page 4 Destinado a alertar o usuário da presença de “voltagem perigosa” não isolada dentro do receptáculo do produto que pode ser de magnitude suficiente para constituir um risco de choque elétrico a pessoas. Destinado a alertar o usuário da presença de instruções importantes de operação e manutenção (conserto) na literatura que acompanha o produto.
- Page 5 IMPORTANT SAFETY INSTRUCTIONS WARNING: When using electrical products, basic cautions should always be followed, including the following: Read these instructions. Keep these instructions. Heed all warnings. Follow all instructions. Do not use this apparatus near water. Clean only with a dry cloth. Do not block any of the ventilation openings.
- Page 6 INSTRUCCIONES IMPORTANTES PARA SU SEGURIDAD CUIDADO: Cuando use productos electrónicos, debe tomar precauciones básicas, incluyendo las siguientes: Lea estas instrucciones. Guarde estas instrucciones. Haga caso de todos los consejos. Siga todas las instrucciones. No usar este aparato cerca del agua. Limpiar solamente con una tela seca.
- Page 7 INSTRUCTIONS IMPORTANTES DE SECURITE ATTENTION: L’utilisation de tout appareil électrique doit être soumise aux precautions d’usage incluant: Lire ces instructions. Gardez ce manuel pour de futures références. Prétez attention aux messages de précautions de ce manuel. Suivez ces instructions. N’utilisez pas cette unité proche de plans d’eau. N’utilisez qu’un tissu sec pour le nettoyage de votre unité.
- Page 8 WICHTIGE SICHERHEITSHINWEISE ACHTUNG: Beim Einsatz von Elektrogeräten müssen u.a. grundlegende Vorsichtsmaßnahmen befolgt werden: Lesen Sie sich diese Anweisungen durch. Bewahren Sie diese Anweisungen auf. Beachten Sie alle Warnungen. Befolgen Sie alle Anweisungen. Setzen Sie dieses Gerät nicht in der Nähe von Wasser ein. Reinigen Sie es nur mit einem trockenen Tuch.
- Page 9 IMPORTANTI NORME DI SICUREZZA: ATTENZIONE: Durante uso di apparecchiature elettriche vanno osservate alcune precauzioni basilari, tra cui le seguenti: Leggete queste istruzioni. Conservate le istruzioni. Rispettate tutte le avvertenze. Seguite le istruzioni. Non usate questo prodotto vicino all’acqua. Pulite esclusivamente con un panno asciutto. Non ostruite le fessure di ventilazione.
- Page 10 INSTRUÇÕES IMPORTANTES DE SEGURANÇA ADVERTÊNCIA: Ao usar eletrodomésticos, precauções básicas devem sempre ser seguidas, incluindo as seguintes: Leia estas instruções. Mantenha estas instruções. Preste atenção a todas as advertências. Siga todas as instruções. Não use este aparelho perto d’água. Limpe somente com um pano seco. Não obstrua nenhuma das aberturas de ventilação.
- Page 11 重要安全事项 警告 : 操作电器产品时,请务必遵守基本安全注意事项,包括 : 阅读说明书。 妥善保管说明书。 注意所有安全警告。 按照要求和指示操作。 请勿在靠近水(或其它液体)的地方使用本机。 本机只能用干燥布料擦拭。 请勿遮盖任何通散热口。确实依照本说明书安装本机。 请勿将本机安装在任何热源附近,例如电暖器、蓄热器件、火炉或其他发热电器(包括功率放大器) 。 请勿破坏两脚型插头或接地型插头的安全装置。两脚型插头有两个不同宽度的插头片,一个窄,另一个宽一点。接地型插头有两个相 同的插头片和一个接地插脚。两脚型插头中宽的插头片和接地型插头接地插脚起着保障安全的作用。如果所附带的插头规格与您的插 座不匹配,请让电工更换插座以保证安全。 请勿踩踏或挤压电源线,尤其是插头、插座、设备电源输入接口或者电源线和机身连接处。 本机只可以使用制造商指定的零件 / 配件。 本机只可以使用与本机搭售或由制造商指定的机柜、支架、三角架、托架或桌子。使用机柜时,请小心移动已安装设备的机柜,以避 免机会推翻造成身体伤害。 在雷雨天或长期不使用的情况下,请拔掉电源插头。 所有检查与维修都必须由指定的专业维修人员进行。如本机的任何形式的损伤都须检修,例如电源线或插头受损,有液体或物体落入 机身内,曾暴露于雨天或潮湿的地方,不能正常运作,或曾掉落后损坏等。 不得拔出接地插脚。请写信索取免费手册《 Shock Hazard and Grounding》 。使用前,请仔细检查确认所使用的电源电压是否匹配设备 上标注的额定电压。 如果本机装在机柜中 , 其后部也应给予相应的支撑固定。 Note for UK only: If the colors of the wires in the mains lead of this unit do not correspond with the terminals in your plug‚ proceed as follows: a) The wire that is colored green and yellow must be connected to the terminal that is marked by the letter E‚...
- Page 12 TÄRKEÄT TURVALLISUUSOHJEET VAARA: Käytettäessä sähkölaitteita tulee aina huomioida mm. seuraavat turvallisuusohjeet: Lue nämä ohjeet. Säilytä nämä ohjeet. Huomioi kaikki varoitukset. Noudata kaikkia ohjeita. Älä käytä laitetta veden lähellä. Puhdista vain kuivalla kankaalla. Älä tuki mitään tuuletusaukkoja. Asenna valmistajan ohjeiden mukaisesti. Älä...
- Page 13 VIKTIGA SÄKERHETSINSTRUKTIONER VARNING: När du använder elektriska produkter ska grundläggande försiktighetsåtgärder iakttas, inklusive följande: Läs dessa instruktioner. Behåll dessa instruktioner. Iakttag alla varningar. Följ alla instruktioner. Använd inte apparaten i närheten av vatten. Rengör endast med en torr trasa. Blockera inte ventilationsöppningarna. Installera i enlighet med tillverkarens instruktioner. Installera inte i närheten av värmekällor som radiatorer, varmluftsventiler, spisar eller andra apparater (inklusive förstärkare) som ger ifrån sig värme.
-
Page 14: English
This Trace Acoustic range is the latest evolution of a line of products that were always known for their sophisticated features, high quality construction, reliability and use of state of the art technology. Many of the original ideas have become industry standards and are included within this range, however, around these are even more features to inspire musicians and create the music that they want to hear. - Page 15 This section is for people who are either too excited or too impatient to read the whole manual before using their new Trace Acoustic. Please at least read this first section thoroughly and return to the rest of the manual later, lest you don’t get the full potential out of your new amplifier.
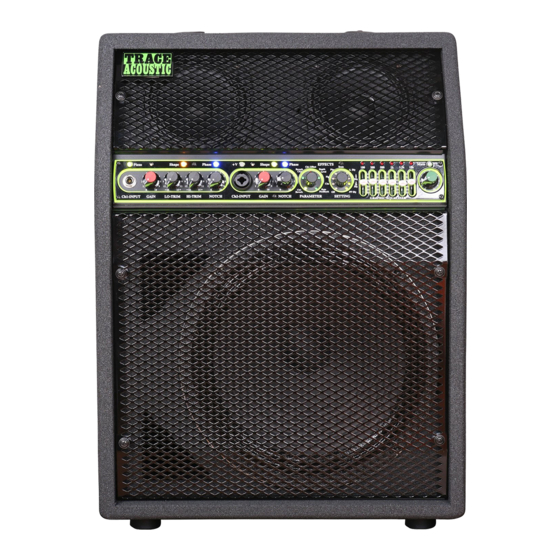
- Page 16 This operating guide covers the features of all the contemporary Trace Acoustic range of amplifiers. Where a specific model is shown in brackets, e.g. (TA400), then this applies only to that product. The feature being explained is shown in ‘quotation’ marks, the type of control is shown after. If there are any terms you do not fully understand then please refer to the Glossary of Terms at the back of this manual.
- Page 17 However, if a stereo/dual output guitar is used with a TRS lead, then the ‘tip’ signal will be routed through Channel 1 and the ‘ring’ signal will be automatically routed to Channel 2 (and Channel 3 on TA400), therefore keeping the two signals separated and enabling the user to process them separately by using the controls on the other channel(s) as well.
- Page 18 ➢ Of course the user may also wish to use extreme, high GAIN, settings, where the compression is on most of the time. This is when compression becomes more of an effect. This may be useful for solos and for adding sustain. However, some of the natural acoustic qualities will be altered due to the extreme limiting of the dynamic range.
- Page 19 Points 10 to 21 are for TA400’s only, skip to point 22 for other models. TA400’s have an additional instrument channel that can be used in several ways explained below:- (10) ‘STEREO’ SWITCH AND LED (11) ‘CH1/CH2’ SWITCH (12) ‘CH1/CH2’ STATUS LED These two switches set how Channel 1 and Channel 2 are routed and the LED’s show the status.
- Page 20 These are for Channel 2 and work in the same way as those on Channel 1. For more information on these, please refer to points 8 and 9 earlier in this manual. End of TA400 only section. Ch2 (TA100/200/300) or Ch3 (TA400) This is a channel for use with a microphone or low impedance instrument.
- Page 21 Never have this switched on if a normal mono type ¼” jack plug is inserted into this INPUT. The times when this should be used are:- ➢ If a condenser type microphone is used in the XLR part of the socket. In this case +48V phantom power will be applied to pins 2 and 3 of the XLR.
- Page 22 Simply set the PARAMETER encoder to either of the ‘Reverb’ settings (clockwise from bottom, the first two green LEDs) and then adjust SETTING to change the reverb level for that specific channel. The level is shown by the green LEDs around the SETTING control knob. You will find that in this mode the PARAMETER encoder will not allow selection of any other parameters.
- Page 23 For more information on these, please refer to points 29 and 30 earlier in this manual. The main difference on the TA400’s is that they have two DSP EFFECTS sections included, so that different effects can be applied to different channels and then recalled as they are switched.
- Page 24 With the controls all set at their mid ‘detent’ position, no change is made to the signal. Moving a slider up will progressively increase, or ‘boost’, the frequencies centred around the frequency marked above the slider. Moving a slider down will progressively decrease, or ‘cut’, the frequencies. Due to the flexibility and massive cut and boost available, it is important to know how to get the best from the circuit.
- Page 25 The front panel LEDs will always show the actual setting. USING THE AFC-6 ACOUSTIC FOOT CONTROLLER WITH TA400 The AFC-6 enables the user to control the following: ➢ CHANNEL In normal mode this switches between Channel 1 and Channel 2 with LED red.
- Page 26 In the PRE (OUT) position, the unprocessed, dry signal from the instrument and microphone channels are sent separately as shown. On TA400’s Channel 1 and 2 are mixed and Channel 3 is separate. In the POST (IN) position, the processed, effected LEFT and RIGHT signals are sent. This is after the preamps, compressors, effects and EQ, but before the MASTER control.
- Page 27 Before applying mains power please ensure that it is the correct voltage. HELP If you experience problems with your Trace Acoustic unit please check the following before contacting an authorized Trace Elliot dealer, distributor or service centre. SYMPTOM...
- Page 28 GLOSSARY OF TERMS active With regard to a musical instrument, one that has some kind of on- board preamp, usually easily determined by it having a battery inside. adaptive attack & release The attack and release times automatically adjust, i.e. ‘adapt’, to the transients and frequencies of the audio signal.
- Page 29 sensitivity With regard to the input of an amplifier, the level of input signal required to achieve full signal swing. signal to noise ratio The difference between the wanted sound/audio and the background noise. sleeve The normal ground connection on a TS or TRS jack plug. soft-knee Compression that is applied gradually with an increasing ratio after exceeding the threshold.
-
Page 32: Español
Español AMPLIFICACIÓN TRACE ACOUSTIC Felicidades por la compra de un amplificador Trace Acoustic . Nuestra experiencia en diseño y calidad de fabricación asegurará su confianza en el mismo para satisfacer el sonido profesional sólido que se merece, tanto en el estudio de grabación como en el escenario o en casa. - Page 33 Esta sección es para las personas que están muy ansiosas o impacientes como para leer el manual por completo antes de usar su nuevo Trace Acoustic . Por favor lea, al menos esta sección y vuelva al resto del manual más tarde, o de lo contrario no podrá sacarle el máximo partido a su nuevo amplificador.
- Page 34 Esta guía de operaciones cubre todas las características de todos los modelos de amplificadores Trace Acoustic. Dónde lea un modelo específico en paréntesis, ej. (TA400), entonces refiere solamente a ese modelo. La funciones que se definan aparecerán entre ‘comillas’, el tipo de control se enseña después. Si hubiera algún término que no entienda totalmente vea el glosario en la parte trasera del manual...
- Page 35 ‘punta’ será ruteada a través del Canal 1 y la señal de ‘anillo’ será ruteada automáticamente al Canal 2 (y al Canal 3 en el TA400), por tanto manteniendo las dos señales separadas y permitiendo al usuario procesarlas separadamente usando también los controles en el otro canal(es).
- Page 36 De este modo solo compresión ligera es aplicada en los picos más altos de sonido y el rango dinámico natural completo es preservado. Esto también asegura un nivel de señal adecuado siendo enviado a través del resto del amplificador para un buen ratio de ruido de señal. ➢...
- Page 37 El uso cuidadoso del EQ ayudará aún más (vea la sección de ECUALIZADOR GRÁFICO). Las Anotaciones con números del 10 al 21 son para el TA400 solamente, vaya a la nota número 22 para otros modelos.
- Page 38 Cualquier configuración que sea usada, increíbles efectos estéreos psicoacústicos pueden ser logrados en este modo estéreo al experimentar con previos y efectos diferentes en cada canal! Ch2 (TA400 solamente) Este es el Canal 2, el canal adicional en TA400 para un sonido alternativo, un instrumento adicional o para uso estéreo.
- Page 39 Si experimentas una situación dónde no hay señal de uso de conector XLR entonces por favor refiera a la sección de Ayuda de abajo. La entrada jack ¼” es una entrada de escenario para usar con un instrumento activo. Este es un conector tipo TRS lo que significa que tiene conexiones separadas para la ‘punta’ y ‘anillo’ del jack.
- Page 40 (30) SELECTOR PUSH Y ENCODER ROTATORIO ‘SETTING’ Estos son para controlar efectos DSP internos para los dos canales tal cual se muestra alrededor del encoder PARAMETER. Diferentes niveles de reverb pueden ser aplicados a cada canal, y el canal(es) de instrumento pueden también tener uno de los 8 diferentes efectos de modulation o delay (retardo) añadidos, tal cual se muestra alrededor del encoder SETTING.
- Page 41 Para más información sobre esto, por favor refiera a los apartados 29 y 30 más arriba en este manual. La diferencia principal en el TA400 es que ellos tienes dos secciones de EFECTOS DSP incluidos, así que efectos diferentes pueden ser aplicados a diferentes canales y luego reutilizados al ser encendidos.
- Page 42 TA100 / TA200 / TA300 todos tienen 6 Bandas de EQ (100Hz, 200Hz, 500Hz, 1kHz, 3.5kHz, 10kHz) Los modelos TA400 tienen 8 Bandas de EQ (80Hz, 160Hz, 320Hz, 640Hz, 1.3kHz, 2.6kHz, 5kHz, 10kHz) Esto se puede usar para más control de tono, para ecualizar el amplificador y contrarrestar las características sonoras de la habitación y también para controlar la retroalimentación.
- Page 43 (38) CONTROL ROTATORIO ‘MASTER’ Este ajusta el nivel de señal enviado a los conectores de Salida de Previo PREAMP OUT y los estados de salida de potencia. Debería ser ajustado a “0” cuando se encienda el amplificador y luego subirlo al volumen deseado.
- Page 44 En la posición PRE (OUT) o Salida, las señales secas, no procesadas del instrumento y canales de micrófono son enviadas separadamente tal cual se muestra. En el Canal 1 y 2 del TA400 las señales son mezcladas y en el Canal 3 la señal es separada.
- Page 45 Alternativamente, si todo el proceso interno es requerido entonces la entrada POST (IN) IZQ y DCHA debería de ser utilizada. Si duda seleccione este ya que el sonido será básicamente el mismo así como el sonido que sale de los altavoces. (43) CONECTORES XLR SALIDAS DI BALANCEADAS ‘BALANCED DI OUTPUTS’...
- Page 46 AYUDA Si experimenta problemas con su unidad Trace Acoustic por favor compruebe lo siguiente antes de contactar a un distribuidor Trace Acoustic, o servicio técnico. COMPROBANDO CON DIFICULTADES La unidad no enciende: Es el cable de corriente IEC europeo conectado correctamente? Prueba con un cable de corriente IEC diferente.
- Page 47 Una señal que no ha sido procesada , por ej:ningún EQ o efectos han sido aplicados. Procesador de Señal Digital, en este caso usado para producir efectos de sonido. Equalizador. Circuito para modificar la respuesta de frecuencia de una señal de audio. Oscilación que ocurre entre un amplificador y un instrumento o retroalimentación micrófono.
- Page 48 Logo referenced in Directive 2002/96/EC Annex IV (OJ(L)37/38,13.02.03 and defined in EN 50419: 2005 The bar is the symbol for marking of new waste and is applied only to equipment manufactured after 13 August 2005...
-
Page 50: Français
Français DISPOSITIF D’AMPLIFICATION ACOUSTIQUE TRACE Félicitations pour l’achat d’un amplificateur acoustique Trace. Nos connaissances en design et qualité de fabrication garantissent la fiabilité de ce produit qui permet de fournir le son professionnel et solide que vous méritez, dans un studio, sur une scène, dans une salle de répétition ou à votre domicile. La gamme de dispositifs acoustiques Trace est la dernière évolution d’une ligne de produits toujours connus pour des caractéristiques sophistiquées, une fabrication de qualité, une fiabilité... - Page 51 DEMARRAGE RAPIDE Cette partie est destinée aux utilisateurs trop excités ou trop impatients pour lire tout le manuel avant d’utiliser leur nouveau dispositif acoustique Trace. Veuillez au moins lire cette première partie attentivement et vous référer à l’autre partie du manuel plus tard, sinon vous n’aurez pas toutes les qualités nécessaires pour utiliser votre nouvel amplificateur.
- Page 52 TA100, TA200 et TA300 ont deux canaux, une partie EFFETS, un ÉGALISATEUR GRAPHIQUE à 6 bandes et une commande MAÎTRE, alors que le préamplificateur TA400 a trois canaux, deux parties EFFETS, un ÉGALISATEUR GRAPHIQUE à 8 bandes et une commande MAÎTRE.
- Page 53 Canal 1 et le signal 'd'anneau' sera automatiquement dirigé sur le Canal 2 (et le Canal 3 pour le TA400), en maintenant ainsi les deux signaux séparés et en permettant à l'utilisateur de les traiter séparément en se servant également des commandes du/des autres canaux.
- Page 54 Comme déjà indiqué, le compresseur intégré est présent pour bloquer toute distorsion indésirable, cepen- dant il peut aussi être un outil extrêmement utile pour contrôler la gamme dynamique ainsi qu'indiqué ci-après:- ➢ Si l'utilisateur recherche un son naturel, avec un minimum de compression, il devra alors ajuster le réglage de GAIN de telle façon que la majeure partie du temps où...
- Page 55 à des parasites difficiles à contrôler. Utilisez prudemment l’EG en vous appuyant sur l’aide supplémentaire (consultez la partie EGALISATEUR GRAPHIQUE). Les points 10 à 21 ne concernent que le TA400, sautez au point 22 pour les autres modèles. Le TA400 dispose d’un canal à instrument supplémentaire à utiliser de plusieurs façons expliquées ci-dessous :- (10) VOYANT LED ET INTERRUPTEUR ‘STEREO’...
- Page 56 à ce mode stéréo en essayant différents réglages sur les effets et le préamplificateur sur chaque canal ! Ca. 2 (TA400 uniquement) C’est le Canal 2, l’autre canal du TA400 pour obtenir un son alternatif, un instrument supplémentaire ou pour une utilisation stéréo. (13) CONNECTEUR FEMELLE ‘INPUT’ ¼”...
- Page 57 Ce canal s’utilise avec un microphone ou un instrument à faible impédance. Il a moins de commandes et d’effets que le Canal 1, et peut, par conséquent, être considéré comme un canal plus parfait avec moins d’élaboration. (22) CONNECTEUR FEMELLE ‘ENTRÉE’ COMBINAISON XLR / ¼” C’est un connecteur à...
- Page 58 (26) VOYANT LED & INTERRUPTEUR ‘SHAPE’ Il permet d’accéder au circuit ‘Mid Pre-Shape’ de ce canal. Veuillez consulter le point 5 précédemment cité dans ce manuel pour plus d’informations sur ce sujet. Sur ce canal, c’est une fonction préréglée. Par conséquent, la pédale ne peut pas le commander. Le voyant LED est vert lorsqu’il est allumé.
- Page 59 ➢ Off (Aucun effet, disponibilité de différents niveaux de retard) ➢ Chs (Chorus stéréo – Effet de modulation) ➢ Flg (Flanger stéréo – Effet de modulation) ➢ Phr (Modulateur de phase – Effet de modulation) ➢ Trem (Trémolo – Effet de modulation) ➢...
- Page 60 Veuillez consulter les points 29 et 30 précédemment cités dans ce manuel pour plus d’informations sur ce sujet. La principale différence du TA400 est la présence de deux sections EFFETS PSN inclus, afin d’appliquer différents effets sur les différents canaux et de les rappeler lorsqu’ils sont activés.
- Page 61 les fréquences autour de la fréquence indiquée au-dessus de la commande à glissière. Déplacer une commande à glissière vers le bas diminuera progressivement, ou ‘coupera’ les fréquences. En raison de la flexibilité et de la coupure et la stimulation massives disponibles, vous devez savoir comment profiter au maximum du circuit.
- Page 62 Les voyants LED du panneau avant indiqueront toujours le réglage en cours. UTILISER LE PÉDALIER ACOUSTIQUE AFC-6 AVEC TA400 L’AFC-6 permet à l’utilisateur de commander les fonctions suivantes : ➢...
- Page 63 Dans la position PRE (OUT), les signaux bruts non traités des canaux de l’instrument et du microphone sont transmis séparément comme indiqué. Sur le TA400, le Canal 1 et le Canal 2 sont mélangés et le Canal 3 est séparé.
- Page 64 (44) INTERRUPTEUR ‘EARTH LIFT’ Appuyer sur cet interrupteur débranchera la connexion terre/masse de la broche 1 de la sortie ID de la prise XLR. Il est habituellement sur la position ‘sortie’, cependant, lorsque vous branchez une/des prise(s) ID à un autre appareil, il peut y avoir un ronflement dans certains cas à...
- Page 65 AIDE En cas de problèmes avec votre dispositif acoustique Trace, veuillez consulter le tableau suivant avant de contacter un détaillant, concessionnaire ou centre de services qualifié Trace Elliot. SYMPTÔMES CONTRÔLES L’appareil ne s'allume pas : Le cordon d’alimentation IEC est-il bien branché ? Essayez un autre cordon d’alimentation IEC.
- Page 66 actif S’applique à un instrument de musique qui a une sorte de préamplificateur intégré, habituellement facile à déterminer car il est pourvu d’une batterie intégrée. attaque & relâchement Les temps d’attaque et de relâchement se règlent automatiquement, adaptatifs c.-à-d 'adaptatifs', par rapport aux phases et fréquences du signal audio.
- Page 67 piézo Capteur piézoélectrique. Dispositif souvent utilisé pour les lecteurs d’instrument de musique. Si vous l’utilisez passivement, sans préamplificateur, il a une impédance de sortie très élevée. alimentation fantôme Méthode pour alimenter un dispositif audio depuis un autre appareil via un câble audio. Fournit habituellement une tension de +48V pour alimenter des microphones électrostatiques.
-
Page 70: Deutsch
Schalten. Diese Funktionen sind auch mit dem mitgelieferten Fußschalter bequem fußschaltbar. Achtung: Bitte diese Anleitung durchsehen und alle darin enthaltenen Sicherheits- und Warnhinweise lesen. Es ist für Ihre Sicherheit und die Sicherheit Ihres Trace Acoustic äußerst wichtig, diese Warnhinweise zu beachten. - Page 71 Dieser Abschnitt ist für diejenigen gedacht, die entweder zu aufgeregt oder zu ungeduldig sind, die gesamte Anleitung zu lesen, bevor sie ihren neuen Trace Acoustic benutzen. Bitte zumindest den ersten Abschnitt sorgfältig und die restliche Anleitung später lesen, ansonsten kann das vollständige Potential aus dem neuen Verstärker nicht herausgeholt werden.
- Page 72 Diese Bedienungsanleitung erfasst die Funktionen aller aktuellen Trace Acoustic Verstärker. Wenn ein bestimmtes Modell in Klammern, z.B. (TA400) angezeigt wird, gilt das nur für dieses Produkt. Die beschriebene Funktion wird in ‘Anführungszeichen’ und danach der entsprechende Regler angezeigt.
- Page 73 Wenn jedoch mit einem TRS Kabel ein Stereo/Doppelausgang verwendet wird, wird das ‘Tip’ Signal durch Kanal 1 und das ‘Ring’ Signal automatisch zu Kanal 2 (und Kanal 3 am TA400) geleitet, somit bleiben die zwei Signale geteilt und ermöglichen dem Benutzer auch die separate Verarbeitung mit den Reglern für die anderen Kanal/Kanäle.
- Page 74 ➢ Wenn der Benutzer einen natürlichen Klang mit minimaler Kompression will, sollte der GAIN Regler so eingestellt sein, dass die LED die meiste Zeit beim Spielen grün leuchtet und nur wenn die lautesten Noten angeschlagen werden, sollte die LED gelegentlich orangefarben leuchten. Deshalb wird am lautesten Punkt nur eine leichte Kompression verwendet und der natürliche volle Dynamikbereich bleibt erhalten.
- Page 75 Näherung des Verstärkers zu einer schwer zu regelnden Rückkopplung führt. Eine sorgfälti- ge Benutzung des EQs wird weiterhelfen (siehe Abschnitt GRAFIK- EQUALIZER). Punkte 10 bis 21 sind nur für TA400’s, für andere Modelle auf Punkt 22 gehen. TA400’s haben einen zusätzlichen Instrumentenkanal, der auf mehrere Arten benutzt werden kann, wie unten beschrieben:- (10) ‘STEREO’...
- Page 76 Erstaunliche psychoakustische Effekte können mit jeder Konfiguration im Stereomodus erzielt werden, wenn mit unterschiedlichen Vorstufen- und Effekteinstellungen an jedem Kanal experimentiert wird! Ch2 (nur TA400) Dies ist Kanal 2, der zusätzliche Kanal am TA400 für einen alternativen Klang, ein zusätzliches Instrument oder für Stereoanwendung. (13) ‘INPUT’ ¼” BUCHSE Zum Anschließen eines 1/4”...
- Page 77 (22) ‘EINGANG’ KOMBINATION XLR / ¼” BUCHSE Das ist ein Anschluss mit Doppelfunktion, der XLR oder XLR oder ¼” Klinkenstecker akzeptiert. Der XLR Eingang ist eine symmetrische Eingangsstufe mit sehr niedriger Impedanz, wie ein Mischpult, mit viel zusätzlichem Gain. Zum Verwenden für Vokalmikrofone oder Mikrofone, die an oder neben Ins- trumenten eingesetzt werden.
- Page 78 (26) ‘SHAPE’ SCHALTER & LED Schaltet auf diesem Kanal in die ‘Mittlere Pre-Shape’ Schaltung. Für weitere Informationen bitte unter Punkt 5 in dieser Anleitung nachschlagen. Auf diesem Kanal handelt es sich um eine voreingestellte Funktion, die daher nicht fußschaltbar ist. Die LED leuchtet grün, wenn sie eingeschalten ist.
- Page 79 ➢ Off (Kein Effekt, nur verschiedene Hallstärken verfügbar) ➢ Chs (Stereo Chorus – Modulationseffekt) ➢ Flg (Stereo Flanger – Modulationseffekt) ➢ Phr (Phaser – Modulationseffekt) ➢ Trem (Tremolo – Modulationseffekt) ➢ A. Dly (Analoge Verzögerungssimulation) ➢ ¼ Dly (¼ Note Mono Digitalverzögerung) ➢...
- Page 80 Für weitere Informationen bitte unter den Punkten 29 und 30 in dieser Anleitung nach- schlagen. Der hauptsächliche Unterschied an den TA400 besteht darin, dass sie zwei Abschnitte für DSP EFFEKTE haben, so dass auf verschiedenen Kanälen unterschiedliche Effekte verwendet und beim Schalten abge- rufen werden können.
- Page 81 ➢ Nicht alle Frequenzbänder verstärken oder begrenzen. Es hat die gleichen Auswirkungen wie das Erhöhen oder Verringern des Gesamtlautstärkepegels, ohne dass die Klangcharakteristik beeinträchtigt wird. ➢ Tiefe Frequenzen (80Hz / 100Hz) nicht übermäßig verstärken, weil sonst die akustische Rückkopplung s chwieriger zu regeln ist. ➢...
- Page 82 Fußschalter wird weiterhin die Funktionen ein- und ausschalten, wenn er eingesetzt wird. Die LEDs an der Frontplatte zeigen immer die aktuelle Einstellung an. DEN AFC-6 AKUSTISCHEN FUSSCHALTER MIT TA400 VERWENDEN Mit AFC-6 kann der Benutzer Folgendes regeln: ➢ CHANNEL Im Normalmodus, zwischen Kanal 1 und Kanal 2 mit roter LED.
- Page 83 Er bestimmt, welche Signale an die BALANCED DI OUTPUTS gesendet werden. In der PRE (OUT) Position werden die unverarbeiteten, trockenen Signale vom Instrument und den Mikrofonkanälen separat, wie angezeigt, gesendet. Die Kanäle 1 und 2 am TA400 werden gemischt und Kanal 3 ist getrennt.
- Page 84 Einheit übereinstimmt, wird durch eine Markierung an der Rückplatte angezeigt. Vor dem Einschalten bitte sicherstellen, dass die Spannung korrekt ist. HILFE Wenn Sie mit dem Trace Acoustic Probleme haben, überprüfen Sie bitte Folgendes, bevor Sie einen auto- risierten Trace Elliot Händler, Vertriebshändler oder das Servicezentrum kontaktieren. SYMPTOM PRÜFEN...
- Page 85 GLOSSAR DER BEGRIFFE Aktiv Bezieht sich auf ein Musikinstrument, eines mit einer Art Bordverstärker, normalerweise einfach durch das Vorhandensein einer Batterie bestimmt. Adaptives Attack- & Release Die Attack- und Releasezeiten gleichen sich automatisch an, d.h. 'anpassen' an Übergänge und Frequenzen des Audiosignals. Attack Bezieht sich auf Kompressoren;...
- Page 86 Passiv Bezieht sich auf ein Musikinstrument, eines ohne Bordvorstufe, normalerweise leicht bestimmbar, weil keine Batterie vorhanden ist. Piezo Piezoelektrischer Sensor. Ein Gerät, das oft als Tonabnehmer für Musikinstrumente benutzt wird. Für die passive Anwendung ohne Vorstufe haben sie eine sehr hohe Ausgangsimpedanz. Phantomstrom Zum Einschalten eines Audiogeräts von einem anderen mit einem Audiokabel.
-
Page 89: Italiano
La gamma Trace Acoustic rappresenta l'ultima evoluzione di una linea di prodotti noti per le loro funzioni sofisticate, la costruzione di alta qualità, l'affidabilità dell'utilizzo e la modernità della tecnologia. Molte delle idee originali sono diventate standard industriali, incluse in questa gamma, anche se non mancano altre funzioni più... - Page 90 Questa sezione è per coloro che sono troppo contenti o troppo impazienti per leggere l'intero manuale prima di utilizzare il loro nuovo Trace Acoustic. Si prega di leggere almeno la prima sezione con attenzione e poi tornare al resto del manuale successivamente, in modo da non rischiare di perdere tutto il potenziale del nuovissimo amplificatore.
- Page 91 Questa guida al funzionamento tratta tutte le funzioni della gamma di amplificatori Trace Acoustic attualmente esistente. Se il numero di un modello viene riportato tra parentesi, ad esempio (TA400), quanto riportato si applica solo a quello specifico prodotto. La funzione di cui si parla viene mostrata tra virgolette e il tipo di controllo viene riportato dopo. Se ci sono termini incomprensibili, fare riferimento al Glossario dei termini per la spiegazione, nella parte posteriore di questo manuale.
- Page 92 Channel 1 mentre il segnale ring sarà automaticamente indirizzato a Channel 2 (e a Channel 3 nel modello TA400). In questo modo, i due segnali rimangono distinti e all’utente è consentito elaborarli separatamente utilizzando i comandi dei canali.
- Page 93 compressione, viene preservato il campo dinamico naturale. Questo consente anche l’invio di un livello di segnale adeguato attraverso il resto dell’amplificatore per un buon rapporto segnale rumore. ➢ Tuttavia, se l’utente vuole che le note e il mix prodotti dallo strumento siano più pronunciati ed evidenti, deve alzare il GAIN in modo che il LED arancione si accenda più...
- Page 94 L’attento uso dell’EQ sarà un ulteriore supporto (vedere la sezione relativa all’EQUALIZZATORE GRAFICO). I punti da 10 a 21 sono relativi esclusivamente al modello TA400. Per gli altri modelli andare direttamente al punto 22.
- Page 95 Ch2 (solo TA400) Channel 2, il canale aggiuntivo sul modello TA400 per un suono alternativo, uno strumento aggiuntivo o per un uso stereo. (13) PRESA JACK DA ¼” ‘INPUT’ Per la connessione al cavo jack da 1/4” da uno strumento.
- Page 96 Dispone di un contatto interruttore interno per commutare automaticamente da XLR a jack da ¼”, di con- seguenza, utilizzare un microfono XLR di buona qualità, in cui la schermatura sia connessa al pin 1. Se utilizzando la presa XLR non c’è segnale, fare riferimento alla sezione Guida riportata di seguito. L’input jack da ¼”...
- Page 97 (27) CONTROLLO ROTATIVO ‘NOTCH’ (28) INTERRUTTORE E LED ‘PHASE’ Funzionano allo stesso modo di quelli preposti per Channel 1. Per ulteriori informazioni, fare riferimento al punto 8 e 9 di questo manuale. EFFETTI (TUTTI I MODELLI) (29) INTERRUTTORE PUSH E ENCODER ROTATIVO ‘PARAMETER’ (30) INTERRUTTORE PUSH E ENCODER ROTATIVO ‘SETTING’...
- Page 98 Se si desidera tornare alle originali impostazioni di fabbrica, premere semplicemente l’encoder SETTING all’accensione. EFFETTI A E EFFETTI B (SOLO TA400) (31) INTERRUTTORE PUSH E ENCODER ROTATIVO ‘PARAMETER’ (32) INTERRUTTORE PUSH E ENCODER ROTATIVO ‘SETTING’...
- Page 99 Per ulteriori informazioni, fare riferimento al punto 29 e 30 di questo manuale. La differenza principale sul modello TA400 è che ci sono due sezioni DSP EFFECTS incluse, in modo che i diversi effetti possano essere applicati a canali diversi e richiamati quando vengono fatti funzionare gli interruttori.
- Page 100 (36) LED DI SISTEMA PER L’INDIVIDUAZIONE DELLA FREQUENZA Sopra ciascuno slider è presente un LED rosso per l’FLR (Feedback Location System). Si tratta di un modo molto rapido di determinare dove è presente il problema con le frequenze e il perché dell’eventuale feedback.
- Page 101 I LED del pannello frontale mostrano sempre l’impostazione reale corrente. UTILIZZO DEL CONTROLLER ACUSTICO A PEDALE AFC-6 CON IL MODELLO TA400 L’AFC-6 consente all’utente di controllare: ➢...
- Page 102 Determina quali segnali vengono inviati al BALANCED DI OUTPUTS. In posizione PRE (OUT), il segnale netto (dry) e non elaborato da strumenti e microfono viene inviato separatamente, come mostrato. Per il modello TA400 Channel 1 e 2 sono mescolati e Channel 3 è separato.
- Page 103 Prima di collegare all’alimentazione, assicurarsi che il voltaggio sia corretto. GUIDA In caso di problemi con l’unità Trace Acoustic, controllare quanto riportato di seguito prima di contattare un rappresentante Trace Elliot, un distributore o un centro di riparazioni. SINTOMO CONTROLLO L'unità...
- Page 104 GLOSSARIO DEI TERMINI attivo Per uno strumento musicale, si tratta di uno che dispone di un certo preamplificatore incorporato, di solito facilmente determinato dalla presenza di una batteria al suo interno. attacco adattativo e rilascio I tempi di attacco e rilascio si regolano automaticamente, cioè "si adattano"...
- Page 105 phantom power Un metodo di alimentare un dispositivo audio da un altro mediante un cavo audio. In genere, fa riferimento a un +48V per alimentare i micro- foni condenser. release Il tempo necessario per un compressore per interrompere la com- pressione dopo che il segnale è...
-
Page 108: Português
PORTUGUÊS AMPLIFICAÇÃO ACÚSTICA TRACE Parabéns pela compra de um amplificador Acústico Trace. Nossa experiência em projeto e qualidade de fabricação assegurará que você poderá contar com este produto para ter o som profissional sólido que você merece, tanto no estúdio, no palco, lugar de ensaio ou em casa. Este Acústico Trace é... - Page 109 INÍCIO RÁPIDO Esta seção é para as pessoas que ou são entusiasmados ou demais impacientea para ler o manual inteiro antes de usar seu novo Acústico Trace. Por favor, ao menos leia esta primeira seção completamente e retorne ao resto do manual mais tarde, para que você não tenha o potencial pleno fora do seu novo amplificador.
- Page 110 Este guia de operação abrange as características de toda a gama contemporânea dos amplificadores acústicos Trace. Onde um modelo específico é mostrado entre parênteses, por exemplo (TA400), então isto se aplica somente a esse produto. A característica explicada é mostrada entre aspas, o tipo de controlo é mostrado depois. Se há qualquer termo que você...
- Page 111 Canal 1 e o sinal ‘ring’ será automaticamente conduzido ao Canal 2 (e ao Canal 3 no TA400), mantendo desta forma os dois sinais separados e permitindo ao usuário processá-los separa- damente usando também os controles no(s) outro(s) canal(is).
- Page 112 ➢ Entretanto, se o usuário deseja dar ao instrumento uma presença e uma clareza maiores na combinação, pela ativação posterior do GANHO para que o LED laranja acenda mais frequentemente, o nível de sinal será levado acima do limite o que significa que uma maior compressão está sendo aplicada e o intervalo dinâmico está...
- Page 113 Uso cuidadoso do EQ mais adiante ajudará (ver seção EQUALIZADOR GRÁFICO). Os pontos 10 até 21 são somente para TA400’s, salte para o ponto 22 para os outros modelos. TA400’s tem um canal adicional de instrumento que pode ser usado de várias maneiras explicadas embaixo:- (10) ‘STEREO’...
- Page 114 Ch2 (TA400 somente) Este é o Canal 2, o canal adicional do TA400’s para um som alternativo, um instrumento adicional ou para uso estéreo. (13) CONECTOR DE ‘INPUT’ JACK ¼” Este e para ligar a Tomada 1/4” a partir de um instrumento.
- Page 115 Se experimentar uma situação onde não há nenhum sinal ao usar a tomada XLR então, por favor, consulte a seção de Ajuda embaixo. A entrada da tomad ¼” é uma entrada de palco para uso com um instrumento activo. Isto é uma tomada de tipoTRS que quer dizer que tem conexões separadas para a “ponta” e “anel” da Tomada.
- Page 116 EFEITOS (TODOS OS MODELOS) (29) ‘PARAMETER’ CODIFICADOR ROTATÓRIO E INTERRUPTOR DE EMPURRAR (30) ‘SETTING’ CODIFICADOR ROTATÓRIO E INTERRUPTOR DE EMPURRAR Estes são para controlar efeitos interno DSP para os dois canais como mostrado ao redor do codificador de PARAMETER. Níveis diferentes de reverb podem ser aplicados a cada canal, e os canais de instrumento também podem ter um de 8 modulações diferentes ou efeitos de atraso adicionados, como mostrado ao redor do codificador de SETTING.
- Page 117 Se deseja voltar à configuração padrão de fábrica então simplesmente pressione o codificador SETTING ao alimentar. EFEITOS A E EFEITOS B (TA400 SOMENTE) (31) ‘PARAMETER’ CODIFICADOR ROTATÓRIO E INTERRUPTOR DE EMPURRAR (32) ‘SETTING’ CODIFICADOR ROTATÓRIO E INTERRUPTOR DE EMPURRAR Estes são para controlar os efeitos internos de DSP para o Canal 1 e Canal 3.
- Page 118 A diferença principal no TA400’s é que têm duas seções de EFEITOS DE DSP incluídas, de modo que efeitos diferentes possam ser aplicados a canais diferentes e então chamados a medida que são trocados. ➢ O canal 1 é direccionado através de EFFECTS A.
- Page 119 Isto é uma maneira muito rápida de determinar onde os problemas de freqüências que podem causar retorno estão. Basicamente os LEDs serão acendidos de acordo com o que é a freqüência dominante. Quando o retorno ocorre será mostrado por um dos LEDs que acende mesmo quando nada mais está sendo tocado.
- Page 120 Os LEDs do painel frontal sempre mostrarão a configuração actual. USAR O PEDAL CONTROLADOR ACÚSTICO AFC-6 COM TA400 O AFC-6 capacita o operador a controlar o seguinte: ➢...
- Page 121 Na posição PRE (OUT) o sinal não processado, seco do instrumento e canais de microfone são enviados separadamente como mostrado. No Canal 1 e 2 do TA400 estão misturados e Canal 3 está separado. Na posição POST (IN) os sinais ESQUERDO e DIREITO processados são enviados. Isto é depois dos pré-amplificadores, compressores, efeitos e EQ, mas antes do controlo MASTER.
- Page 122 AJUDA Se experimenta problemas com sua unidade de Acústico Trace, por favor, verifique o seguinte antes de contatar um negociante autorizado da Trace Elliot, distribuidor ou centro de serviço. SINTOMA VERIFICAR A unidade não liga: Os cabos principais IEC estão corretamente ligados? Tente um cabo principal IEC diferente.
- Page 123 Retorno A oscilação que ocorre entre um amplificador e instrumento ou microfone. Também, um controlo para a quantia de ecos que são ouvidos num efeito de atraso. Transistor de Efeito de Campo. Um tipo de transistor que pode ser configurado para ser usado como um interruptor muito silencioso para sinais de áudio.
-
Page 126: 日本語
日本語 TRACE ACOUSTICアンプ Trace Acoustic (トレース ・ アコースティック) アンプをお買い上げいただきありがとうございます。 設計、 生産品質に関する当社の経験から、 この製品により、 スタジオ、 ステージ、 リハーサルルーム、 あるいは自宅でも、 安定したプロのサウンドを出力できることを保証致します。 この Trace Acoustic製品は、 洗練された機能、 高品質構造、 信頼性、 および最新技術の採用で知ら れる一連の製品のうち最新の発展型です。 ただし、 元のアイデアの多くが業界標準になり、 本製品 に含まれ、 それらをもとに生まれた機能も少なくなく、 ミュージシャンが聞きたいと望む音楽をつく るインスピレーションを与えています。 いたるところに高品質のパーツが使用されています。 従来の Trace Elliot ベースアンプになら い、 GAIN、 MASTER のコントロールは、 プロフェッショナルらしい 「デテント」 を持つパーツを使用し... - Page 127 このセクションは、 新しい Trace Acousticを使う前にマニュアル全体を早く読みたい人のためのも のです。 少なく ともこのセクションは読み通し、 新しいアンプを最大限に活用できるように、 後でマ ニュアルのほかの部分もお読みください。 (1) Trace Acousticの梱包を解いた後、 背面の POWER スイッチが ‘0’ (オフ) 位置かどうかチェック し、 電源コードを主電源ソケッ トに接続して、 AC 電源電圧を本体に供給します。 (2) NOTCH、 MASTER コントロールを最小、 反時計回りにフルに回します。 GAIN とすべての EQ コ ントロール、 LO-TRIM、 HI-TRIM、 GRAPHIC EQUALIZER を半分の位置にします。 これは EQ コント...
- Page 128 フロントパネルは2種類あります。 外観はよく似ていて、 機能の多くは共通です。 基本的に、 TA100 、 TA200、 TA300 のフロントパネルは2チャンネル、 EFFECTS セクション、 6 バンド GRAPHIC EQUALIZER、 MASTER コントロール、 TA400 プリアンプは3チャンネル、 EFFECTS セクション2、 8 バ ンド GRAPHIC EQUALIZER、 MASTER コントロールの構成です。 内蔵コンプレッサ 非常に重要な新機能です。 すべてのチャンネルにスタジオ品質の 「 コンプレッサ 」 が内蔵されてい ます。 これらは、 ‘ 適合アタック&リリース時間 ’の‘ソフトニー’コンプレッサであり、 アコースティ ック...
- Page 129 TRS タイプのソケッ トです。 すなわち、 ジャックの ‘ティップ’ と ‘リング’ の接続が別々になっていま す。 標準 ‘モノ’ タイプのジャックリードを使用する場合、 これは単に信号を 「チャンネル1」 の他の部 分に送るだけです。 ただし、 TRS リードでステレオ/デュアル出力のギターを使用する場合、 ‘ティ ップ’ 信号は 「チャンネ ル 1」 に、 ‘リング’ 信号は自動的に 「チャンネル 2」 (および TA400では 「チャンネル3」 ) にルーティン グされて、 2つの信号が別々に維持されるので、 他のチャンネルのコントロールからでも個別に処 理できます。 他のチャンネルに接続すると、 「 チャンネル1」 のリング信号は自動的に無効になります。...
- Page 130 ションが増え、 「 ダイナミックレンジ 」 がより緻密にコントロールされます。 具体的な GAIN 設定はユ ーザ次第です。 プレイヤーは普通、 十分なコンプレッションがあれば、 ミックスで聞き取るための物 理的な労力が少なくなるため、 音がスムーズになり、 実際パートによっては演奏しやすくなると感じ るようです。 ➢ もちろん、 ほとんどの時間にコンプレッションがオンになる極端に高い GAIN 設定にすることも できます。 このコンプレッションは単なるエフェク トではなくなります。 ソロやサステインを加えると きに便利かもしれません。 ただし、 ダイナミックレンジが極端に制限されるため、 自然なアコーステ ィックのクオリティはいく らか変わってしまいます。 いろいろなコンプレッションを試し、 用途に最適なものを聞き、 感じることをおすすめします。 使用 しないほうがよいと思われる場合は、 GAIN を低く 、 MASTER を高く設定します。 (5) SHAPE スイッチ...
- Page 131 えることができます。 また、 他のキーやコード位置でフィードバック問題がある場合は、 演奏中にこ れを繰り返すことができます。 これらの機能は、 フィードバックの制御に役立ち、 他の場合よりもパフォーマンスボリュームを大き くすることができますが、 ボリュームやアンプとの近接により、 フィードバック制御が困難になるポ イントがあります。 EQ の使い方に慣れることも役立ちます ( 「グラフィ ッ クイコライザ」 セクション参 照)。 項目 10 ~ 21 は TA400専用です。 他のモデルについては22 項からお読みください。 TA400 にある機器チャンネルは、 次に示すように使用できます: (10) STEREO スイッチ & (11) CH1/CH2 スイッチ (12) CH1/CH2LED これら2つのスイッチは...
- Page 132 (20) NOTCH ロータリーコン トロール (21) PHASE スイッチ & これらはチャンネル2用で、 チャンネル1のものと同じように機能します。 詳しくはこのマニュアルの8、 9項をご覧ください。 TA400 専用セクション終わり。 Ch2 ( TA100/200/300 ) または Ch3 ( TA400 ) マイクや低インピーダンスの機器に使用するチャンネルです。 コントロールやエフェク トはチャン ネル1よりも少ないので、 処理の少ないピュアなチャンネルと考えることができます。 (22) INPUT XLR / ¼” コンビネーション ジャッ クソケッ ト オス XLR または ¼” ジャックプラグをつなぐ両用コネクタです。...
- Page 133 (詳しくは 「ブロック図」 をご覧ください) (23) +V スイッチ & 赤色 このスイッチを押すと、 デュアル電圧 「ファントム電源」 回路が起動します。 実電圧は、 使用 されるソケッ トによって異なります。 オンのとき、 スイッチLEDは赤く点灯します。 重要 : オンにする必要がない場合は、 オフのままにしておきます。 でなければ電流を無駄に 消費する可能性があります。 この INPUT に通常モノタイプの ¼” ジャッ クプラグを接続している場合、 このスイッチは決してオンに しないでく ださい。 これを使用するのは次の場合です: ➢ ソケッ トの XLR パートに 「コンデンサ」 型マイクを使用するとき。 その場合 +48V 「ファントム電 源」...
- Page 134 ➢ 次に、 SETTING エンコーダを操作し、 特定のパラメータの設定を調整します。 ➢ 各エンコーダの設定は、 各コントロールノブまわりの LEDのリングで示されます。 さらに… ➢ PARAMETER エンコーダを押してエフェク トをオン/オフします。 ➢ SETTING エンコーダを押すと、 ディレイエフェク トが使用されている場合は 「 タップテンポ 」 がセ ッ トされます。 ➢ これらの機能はいずれも、 AFC-6 フッ トコントローラからも制御できます。 エフェク トオフ: デフォルトモードは ‘Effects Off’ です。 ただし、 このモードでも、 リバーブの別々のレベルを各チャン ネルに割り当てることができます。 PARAMETER エンコーダは、...
- Page 135 最大ディレイ時間は 1100ms (1.1 秒) です。 保存設定: 個々のエフェク トに対する変更は、 本体がオフのときでも自動的に保存されます。 したがって、 ディレイ時間、 各ディレイの変調レート、 変調エフェク トをいくつかプリセッ トし、 演奏 中に呼び出すことができます。 出荷時のデフォルト設定に戻したい場合は、 電源を入れるときに SETTING エンコーダを押します。 エフェク ト A とエフェク ト B (TA400 のみ) (31) PARAMETER ロータリーエンコーダ&プッシュスイッチ (32) SETTING ロータリーエンコーダ&プッシュスイッチ これらは、 チャンネル1、 3の内部 DSP エフェク トを制御するものです。...
- Page 136 スライダ 全モデルでマスターグラフィ ックイコライザが採用されています。 TA100 / TA200 / TA300 はすべて 6 バンド EQ (100Hz, 200Hz, 500Hz, 1kHz, 3.5kHz, 10kHz) TA400 モデルは 8 バンド EQ (80Hz, 160Hz, 320Hz, 640Hz, 1.3kHz, 2.6kHz, 5kHz, 10kHz) これは、 トーンコントロール、 アンプのイコライズによるルーム特性の補正、 フィードバック制御補 助に使用できます。 コントロールがすべてその中間‘デテント’位置にセッ トされたとき、 信号に変化はありません。 スラ...
- Page 137 (38) MASTER ロータリーコン トロール PREAMP OUT ソケッ トとパワー出力ステージに送られる信号レベルを設定します。 アンプをオンに し、 目的の演奏ボリュームまで上げるときは“0” にセッ トします。 アンプから出力される実際のパワ ーレベルは、 入力信号と他のコントロールの設定に依存します。 したがって “5” は必ずしも‘半分の 出力’を意味しません。 一度パフォーマンス用の設定ができれば、 手間はかからず、 Mute 機能により曲間やセッ ト間で信 号をオフにできます。 MASTER コントロールは DI OUTPUTS からの信号レベルに影響を与えないので、 これを調整して もミキシングデスクに送られるレベルへの影響はありません。 セッション終わりに、 オフにする前に、 MASTER コントロールを “0” にセッ トすることをおすすめし ます。...
- Page 138 スイッチ これは、 どの信号が BALANCED DI OUTPUTSに送られるかを決めます。 (OUT) 位置で、 機器とマイクのチャンネルからの未処理のドライ信号が個別に送られま す。 TA400 のチャンネル1、 2 はミックスされ、 チャンネル3 は別です。 POST (IN) 位置では、 エフェク トの入った処理済み LEFT、 RIGHT 信号が送られます。 これは、 プリア ンプ、 コンプレッサ、 エフェク ト、 EQ の後で、 MASTER コントロールの前です。 したがって、 アンプ内 で適用されるサウンドシェイピングは、 DI OUTPUTS でも聞けます。...
- Page 139 用途によって使用する設定が決まります。 ピュアなアコースティックサウンドを求める場合、 あるい はチャンネルを独立させておく必要がある場合は、 PRE (OUT) 設定を使用します。 内部処理がすべ て必要な場合は POST (IN) LEFT、 RIGHT を使います。 疑問がある場合、 これを選択します。 音は基 本的にスピーカーから聞こえるものと同じです。 (43) BALANCED DI OUTPUTS XLR ソケッ ト XLR ソケッ トは、 ライブ、 スタジオユースのステージボックスやミキサーに直接接続する低インピー ダンス独立平衡出力です。 他の機器から影響を受けず、 強く クリーンな信号が得られます。 ソケッ トは標準配線です:ピン 1 = グランド、 ピン 2 = 信号 +、 ピン 3 = 信号 – (44) EARTH LIFT スイッチ...
- Page 140 ヘルプ Trace Acousticユニッ トに問題がある場合は、 Trace Elliot ディーラー、 ディストリビュータ、 または サービスセンターに問い合わせる前に、 次の項目を確認してください。 症状 チェック ユニッ トの電源が入らない: IEC 主電源コードが正しく接続されていますか?別の IEC 主電源コードを試してみてください。 ユニッ トの電源は入るが音がしない: リード接続をすべて確認します。 信号レベル LEDが点灯しない: 機器のリードとバッテリを確認します (ある場合) 。 信号レベル LEDは点灯するが音がしな MASTER は ‘1’ 以上ですか?Mute は選択されていま い: すか?RETURN / POWER AMP IN に接続されているも...
- Page 141 グランドループ 通常、 2つ以上の電気デバイスが接続されているときに生じる状 態。 結果的に可聴ハムが生じる。 インピーダンス アンプ入力については、 入力信号に現れる負荷。 また、 スピーカ ーによりパワーアンプの出力に生じる負荷。 発光ダイオード。 指示に使われる小さい電子光。 変調 オーディオエフェク トに関しては、 コーラス、 フランジャ、 フェー ザ、 トレモロなど、 一定のパルスを生じるピッチ、 ボリューム、 そ の他の音質の変化。 ノッチフィルタ かなり狭い周波数範囲をフィルタする回路。 パッシブ/受動 楽器に関しては、 オンボードプリアンプがなく 、 通常はバッテリを 内蔵していないため容易に判別できるもの。 ピエゾ 圧電センサ。 通常は楽器のピックアップに用いられるデバイス。 プリアンプがなく 、 受動的に使用される場合、 出力インピーダン スはかなり高くなります。...
- Page 144 Features and specifications are subject to change without notice. Trace Elliot • Hwy. 5022 Hwy. 493 North • Meridian, MS 39305 Tel: (601) 486-2255 • Fax: (601) 486-1156 • www.traceelliot.us...
Need help?
Do you have a question about the TA400 and is the answer not in the manual?
Questions and answers