Table of Contents
Advertisement
Advertisement
Table of Contents

Related Manuals for NCE NCE24SMTCOMBBT


Summary of Contents for NCE NCE24SMTCOMBBT
-
Page 2: Nce Smart Dtv Warranty Terms Conditions
Customer will be charged a service call-out fee. d. NCE / or its agent reserves the right to reject claim of service for any item is not packed in original box or equivalent. Customer will be charged a deliver fee based on no original box or equivalent packaging. - Page 3 NCE and/or its Agents will decide if there are any defects in the material and/or workmanship. This warranty is only applicable for repairs on declared equipment carried out within Mainland Australia. 6. What is NOT covered by this warranty.
- Page 4 12. NCE accepts no liability for items that are lost, damaged, or stolen as a result of freight, transport or storage. If you are required to transport the appliance to an authorized service centre, you must ensure that it is securely packed and insured.
-
Page 5: Table Of Contents
NCE Smart DTV warranty terms conditions Power Supply Installation Use and Maintenance Important Safety Instructions Names of each part/Accessories Names of each part/Back View Remote control TV Operation Select Input Source Initial Installation Main Menu Operation Picture Menu Sound Menu... -
Page 6: Power Supply
Power Supply... -
Page 7: Installation
Installation... -
Page 8: Use And Maintenance
Use and Maintenance... -
Page 9: Important Safety Instructions
Important Safety Instructions... - Page 10 Important Safety Instructions gently...
-
Page 11: Names Of Each Part/Accessories
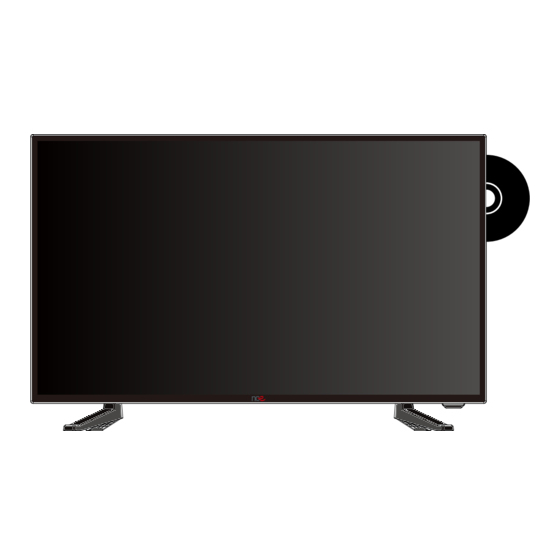
Names of each part Front View After you insert a disc in the disc tray, press the button to play, and press twice to pause. 2. Press the button when the power is on to eject the disc. Press the button again to re-load the disc. -
Page 12: Names Of Each Part/Back View
Names of each part Back View HDMI1 RF IN DC IN EARPHONE COAX CVBS OUT LINE OUT -R... -
Page 13: Remote Control
Remote Control Functions of remote control buttons The remote control uses Infra- Red (IR) technology. For best performance, point it directly at the front of the TV. The remote control may not work correctly if it is operated out of range or from an acute angle . 1, POWER: Press for turning the TV On/Off 2, MUTE: Press this button to mute or restore sound POWER... - Page 14 Remote Control POWER MUTE NICAM/A2 AUDIO HOME: Return to the home page MOUSE: turning on/off the mouse in your browser and applications T.SHIFT ANGLE LANG D.SETUP D.MENU HOME MOUSE A-B:Repeats various sections of a playback S.MENU: turning on/off the menu in your browser and applications S.MENU REPEAT RECODER...
-
Page 15: Select Input Source
SELECT INPUT SOURCE Press INPUT button to display the input source list, Press ▼ / ▲ button to select the desired input source you want to, Press ENTER button to enter the input source, Press EXIT button to quit. -
Page 16: Initial Installation
Initial Installation Connect a RF cable to the TV’s input called “RF-In”. Select Language Press ◄ / ► button to select the language to be used for menus and message. Select Country ress button to highlight country menu. Press ◄ / ► b utton to select. - Page 17 Auto Tuning ATV: Press MENU and then left arrow button to skip ATV tuning. DTV: Press MENU and then left arrow button to skip DTV tuning.
-
Page 18: Main Menu Operation
Main Menu Operation Channel Menu Press MENU button to display the main menu. Press ◄ / ► button to select CHANNEL. In DVT Source: 1. Press ▼ / ▲ button to select the option to adjust in the CHANNEL menu. 2. - Page 19 ATV Manual Tuning Current CH Set the channel number. Color System Select the color system (Available System: AUTO,PAL , SECAM ) Sound System elect the Sound system (Available System: DK, L, BG, I Fine-Tune Adjust the frequency of the channel. Search Start searching channel.
- Page 20 DVT Manual Tuning Press ▼ / ▲ button to select Manual Tuning, then press ENTER button to enter sub-menu. Press ◄ / ► button to select channel, then press ENTER button to search program. Program Edit Press ▼ / ▲ b utton to select Program Edit, then press ENTER button to enter sub-menu.
- Page 21 Schedule List Press ▼ / ▲ button to select Schedule List, then press ENTER button to enter sub-menu. NOTE: If a program conflicts with a scheduled program, Press the YELLOW button to enter the it will produce a warning message. interface below.
-
Page 22: Picture Menu
Press MENU button to display the main menu. Press button to select PICTURE in the main menu. 1. Press ▼ / ▲ button to select PICTURE menu. 2. Press Enter button to adjust. 3. After finishing your adjustment, Press MENU button to save and return back to the previous menu. Picture Mode button to select Picture Mode, then press Enter button to enter sub-menu. - Page 23 Colour Temp Change the overall color cast of the picture. Press button to select Colour Temperature, then press Enter button to enter Sub-Menu. ▼ / ▲ button to select. Press Enter button to confirm. Press ▼ / ▲ Cold Increase the blue tone. Normal No change in tone.
-
Page 24: Sound Menu
es MENU utt s la elec SOUND adjust t e SOUND ess Enter utt t adjust A te adjust e t ess Enter utt t sa e a d etu t t e Sound Mode elec es Enter utt elect Select Back Adjust... -
Page 25: Bluetooth
Bluetooth 1. Use the buttons to activate Bluetooth. 2. Make sure your Bluetooth device(such as Bluetooth headset) is ready for use. 3. Use the buttons to switch to "Bluetooth Pair" and confirm with Enter. 4. The following window will now search for compatible Bluetooth devices (this may take 1-2 minutes). -
Page 26: Time Menu
Press MENU button to display the main menu. Press ◄ / ► button to select TIME in the main menu. 1. Press ▼ / ▲ button to adjust in the TIME menu. 2. Press ENTER button to adjust. 3. After finishing adjustment, Press ENTER button to save and return to the previous menu. Time Zone ▼... - Page 27 Auto Standby Press ▼ / ▲ button to select Auto Standby, then press Enter button to enter sub-menu. Press ▼ / ▲ button to select. Tips: Using the remote control resets the timer. OSD Timer Press ▼ / ▲ button to select OSD Menu Time-Out, then press Enter button to enter sub-menu.
-
Page 28: Lock Menu
Press MENU button to display the main menu. Press ◄ / ► button to select Lock in the main menu. 1. Press button to adjust the LOCK menu. 2. Press E E n n t t e e r r / / ◄ / ► button to adjust. 3. - Page 29 Channel Lock Press button to select Channel Lock, then press Enter button to enter sub-menu to select. Press Green button to lock or unlock the channel. Parental Guidance Press button to select Parental Guidance, hen press Enter button to enter sub-menu to select the appropriate rating.
-
Page 30: Hotel Mode
Hotel Mode With Hotel Mode ON, settings cannot be adjusted 1. Press button on the remote control to select hotel mode in the Lock menu. 2. Press Enter button on the remote control to enter the sub-menu. 3. After finishing your adjustment, Press MENU button to save and return back to the previous menu. Hotel Mode button to select Hotel Mode, then press ◄... -
Page 31: Setup Menu
Press MENU button to display the main menu. Press ◄ / ► button to select SETUP in the main menu. 1. Press ▼ / ▲ button to adjust the SETUP menu. 2. Press Enter button to adjust. 3. After finishing adjustment, p ress Enter button to save and return to the previous menu. Language Select an OSD menu language to be displayed. - Page 32 Audio Languages ▼ / ▲ Press button to select Audio Languages, then press Enter button to enter sub-menu. Press ◄ / ► button to select the primary or secondary audio language. / ◄ / ► button to select the Audio Languages. ▼...
- Page 33 Aspect Ratio ▼ / ▲ Press utton to select Aspect Ratio, then press Enter button to enter sub-menu. ▼ / ▲ Press utton to select aspect ratio. (Available options are: Auto, 4:3,16:9, Zoom1, Zoom2). Blue Screen ▼ / ▲ Press button to select Blue Screen, then press Enter button to select On or Off.
- Page 34 Press EPG button on remote control to enter EPG menu page. Press UP/DOWN navigation button to select preferred program. Press LEFT/RIGHT navigation button to switch between left column and right column. When a program is highlighted (cursor moved to right column): Press button to record program.
-
Page 35: Screen Menu
Press MENU button to display the main menu. Press ◄ / ► button to select SCREEN in the main menu. 1. Press ▼ / ▲ button to adjust the SCREEN menu. 2. Press Enter button to adjust. 3. After finishing your adjustment, Press Enter button to save and return to the previous menu. Auto Adjust Press Enter button to start adjusting automatic... -
Page 36: Media Operation
Media OPERATION Note: Before operating Media menu, Plug in USB device, then press SOURCE button. ▼ / ▲ Press button to select Media in the Source menu, then press Enter button to enter. Press ◄ / ► button to select the type of media you wish to view in the Media menu, then press Enter button to enter. -
Page 37: Photo Menu
Photo Menu Press ◄ / ► button to select PHOTO in the main menu, then press button to enter. Enter button to return to the previous menu. Press Exit Press ◄ / ► button to select the desired file to watch in the file selecting menu, then press Enter to display the picture. -
Page 38: Music Menu
Music Menu Press ◄ / ► button to select MUSIC in the main menu, then press button to enter. Enter button to return to the previous menu. Press Exit Press ◄ / ► button to select drive disk you want to watch, then press button to enter. -
Page 39: Movie Menu
Movie Menu Press ◄ / ► button to select MOVIE in the main menu, then press Enter button to enter. button to return to the previous menu. Press Exit Press ◄ / ► button to select desired drive disk, then press Enter button to enter. -
Page 40: Text Menu
Text Menu Press ◄ / ► button to select TEXT in the main menu, then press button to enter. Enter button to return to the previous menu. Press Exit Press ◄ / ► button to select drive disk, then press button to enter. -
Page 41: Install Wizard
Auto Tuning Install Wizard ATV: Press MENU and then left arrow button to skip ATV tuning. DTV: Press MENU and then left arrow button to skip DTV tuning. WELCOME PAGE When the TV is first powered up, the Welcome Page will be shown. ▼... - Page 42 Install Wizard Initial Installation Connect a RF cable to the TV’s input called “RF-In”. Select Wireless Network (Wi-Fi) Select Language Press ◄ / ► button to select the language to be used for menus and message. +Reminder If you choose ‘Wi-FI’, select a Wi-Fi Select Country Access Point Select Ethernet network(LAN)
- Page 43 Auto Tuning Install Wizard ATV: Press MENU and then left arrow button to skip ATV tuning. DTV: Press MENU and then left arrow button to skip DTV tuning. Setup page S etup manually Date/Time 1.14. Con guration Adjust screen size, using the arrow buttons on remote control. When you are finished, press Exit button.
-
Page 44: Main Launcher
Main Launcher Initial Installation Main Launcher Connect a RF cable to the TV’s input called “RF-In”. Press the arrow buttons to select the icon and press “enter” to enter the sub-screen. Select Language Press ◄ / ► button to select the language to be used for menus and message. 1.16. -
Page 45: Network Settings
Main Launcher FUNCTION DESCRIPTION Add your favorite APPS to this directory. Add your media players to their directory. The Settings screen contains most of the customizing and configuration options, such as language, aspect ratio and network settings. Create APP shortcuts on the main launcher. - Page 46 Main Launcher SETTINGS Connect a Select Language RF cable to the TV’s input called “RF-In”. Press ◄ / ► button to select the language to be used for menus and message. Network Select Country ress button to highlight country menu. Press ◄...
-
Page 47: Display Settings
Main Launcher Display Settings Generation introduction Automatically selects the best resolution of the HDMI output. Set the screen display range. Set the screen saver time. -
Page 48: Advanced Settings
Main Launcher onnec Select Language Advanced Press ◄ / ► button to select the language to be used for menus and message. t a RF cable to the TV’s input called “RF-In”. Select Country ress button to highlight country menu. Press ◄... -
Page 49: Other Settings
Main Launcher onnec SETTINGS 1.21. Other Settings Generation introduction Restore factory default (Apps will be last). Update system via update.zip from USB flash drive. Enter advanced settings menu. Version Info Model number Android Version Kernel Version Build number... -
Page 50: Install New Apps
Main Launcher How to install new APPs Connect a 1.22. Select Language Install from USB Flash Drive Press ◄ / ► button to select the language to be used for menus and message. Select Country Open the "File Browser". ress button to highlight country menu. -
Page 51: Delete Apps
Main Launcher ATV tuning. p DTV tuning HOW TO DELETE AN APP 1.22. Remove Applications 1. Enter " " s 2. Enter " " s 3. Find the application you want to remove under the “All” tab 4. Press Enter, then select Uninstall 5. -
Page 52: Browser
Main Launcher ATV tuning. Initial Installation Browser 1.23. Connect a RF cable to the TV’s input called “RF-In”. Select Language Press ◄ / ► button to select the language to be used for menus and message. Select Country ress button to highlight country menu. Press ◄... -
Page 53: Dvd
Auto Tuning ATV: Press MENU and then left arrow button to skip ATV tuning. DTV: Press MENU and then left arrow button to skip DTV tuning. is accessed by pressing the D.Setup button. Press to navigate the OSD Menu. Press Enter to confirm the change. Press D.Setup to leave the OSD Menu. - Page 54 Initial Installation Connect a RF cable to the TV’s input called “RF-In”. Select Language Press ◄ / ► button to select the language to be used for menus and message. Select Country ress button to highlight country menu. Press ◄ / ► b utton to select.
- Page 55 NCE24SMTCOMBBT NCE28LEDSMTCOMB Model Number Description 24”FHD Smart TV DVD Combo 28”HD Smart TV DVD Combo TV System Mode DVB-T/PAL DVB-T/PAL Feature 23.6”/ 60cm 28”/ 70cm Diagonal 16:9 16:9 Screen Ratio 1920*1080(Full High Definition) 1366*768(High Definition) Resolution Brightness(app) 3,000:1 3,000:1 Real Contrast ratio...
- Page 56 NCE CUSTOMER SUPPORT HOTLINE 1300 - 366 - 024 sales@nce.com.au Monday to Friday - AEST 9AM - 5PM P/N:4.16.0001...
Need help?
Do you have a question about the NCE24SMTCOMBBT and is the answer not in the manual?
Questions and answers