Advertisement
Quick Links
Advertisement

Related Manuals for tucanourbano TERMOSCUD PRO Series


Summary of Contents for tucanourbano TERMOSCUD PRO Series
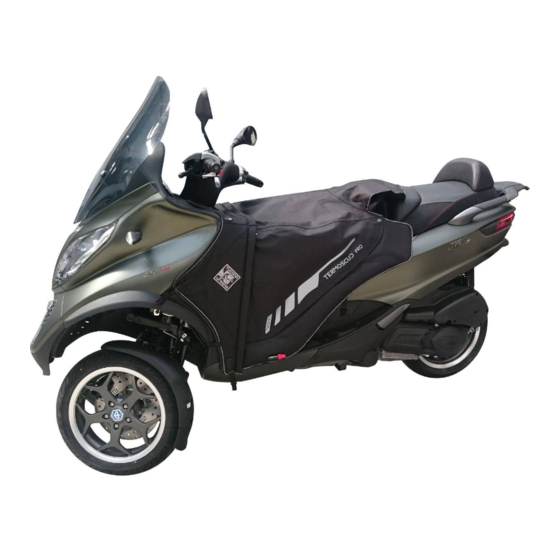
- Page 1 ISTRUZIONI DI MONTAGGIO Instruction manual PIAGGIO MP3 R062 PRO...
- Page 2 Le foto e i disegni sono puramente indicativi. Tucano Urbano si riserva il diritto di modificare o migliorare il prodotto in qualsiasi momento, senza preavviso e senza obblighi di dover applicare tali modifiche su prodotti già venduti. Photos and drawings are purely indicative. Tucano Urbano reserves the right to modify or improve the product at any time, without prior notification and with no obligation to apply such modifications to products already sold.
- Page 3 VISTA RIEPILOGATIVA Summary view KIT DI MONTAGGIO Assembly kit STEP A STEP B STEP C STEP D R062 PRO...
- Page 4 Stendere Termoscud® sulla sella con i nastri 2, 3 e 3bis in avanti. Unfold Termoscud® on the scooter’s seat with straps 2, 3 and 3bis forward. 3 bis 3 bis Fissare Termoscud® da entrambi i lati, utilizzando le viti in dotazione, facendole passare attraverso i fori nei punti 1 sul Termoscud®.
- Page 5 Fissare Termoscud® da entrambi i lati, utilizzando le stesse viti dello scooter (all’interno del vano ruota), facendole passare attraverso i fori sui nastri 3 e 3 bis. I nastri 3 vanno infilati, facendo una leggera pressione, tra parafanghi e carrozzeria come in figura. Fasten Termoscud®...
- Page 6 Agganciare i moschettoni dei nastri blu 2 al bordo inferiore della carrozzeria sotto la pedana. Attach the extension strap Y to the rear edge of the bodywork below the footplate. Attach the fastex connector on the right side. You can now adjust the length of the extension strap Y by Fasten the hooks of the blue straps 2 to the edge of the bodywork under the footboard.
- Page 7 R062 PRO...
- Page 8 Tucano Urbano S.r.l. Via Dell’Annunciata, 21 20121 Milano - Italy...
- Page 9 INSTRUCTIONS DE MONTAGE Manual de istrucciones PIAGGIO MP3 R062 PRO...
- Page 10 Les photos et les dessins sont purement indicatifs. Tucano Urbano se réserve le droit de modifier ou améliorer le produit à tout moment, sans préavis et sans obligation d’apporter telles modifications aux produits déjà vendus. Las fotos y los dibujos se muestran únicamente a modo de ejemplo. Tucano Urbano se reserva el derecho de modificar o mejorar el producto en cualquier momento, sin previo aviso y sin la obligación de tener que aplicar dichas modificaciones a los productos ya vendidos.
- Page 11 VUE SOMMAIRE Vista resumen KIT DE MONTAGE Kit de montaje STEP A STEP B STEP C STEP D R062 PRO...
- Page 12 Dérouler Termoscud® sur la selle en mettant les rubans 2, 3 et 3 bis en avant. Extienda el Termoscud® sobre el asiento del scooter, de manera que las cintas 2, 3 y 3bis queden hacia delante. 3 bis 3 bis Fixer Termoscud®...
- Page 13 Fixer Termoscud® sur les deux côtes, à l’aide des vis du scooter a l’intérieur du logement de la roué et les faire passer dans les trous pratiques sur les ruban 3 et 3bis. Introduire les rubans 3 entre les garde-boues et la carrosserie (forcer doucement) voir photo. Abroche el Termoscud®...
- Page 14 Accrocher les crochets des rubans 2 au bord inferieur de la carrosserie sous le repose-pied. Attach the extension strap Y to the rear edge of the bodywork below the footplate. Attach the fastex connector on the right side. You can now adjust the length of the extension strap Y by pulling on the two connecting straps (II).
- Page 15 R062 PRO...
- Page 16 Tucano Urbano S.r.l. Via Dell’Annunciata, 21 20121 Milano - Italy...
Need help?
Do you have a question about the TERMOSCUD PRO Series and is the answer not in the manual?
Questions and answers