Table of Contents
Advertisement
Quick Links
Advertisement
Table of Contents

Summary of Contents for Speedline Technologies ELECTROVERT Aquastorm
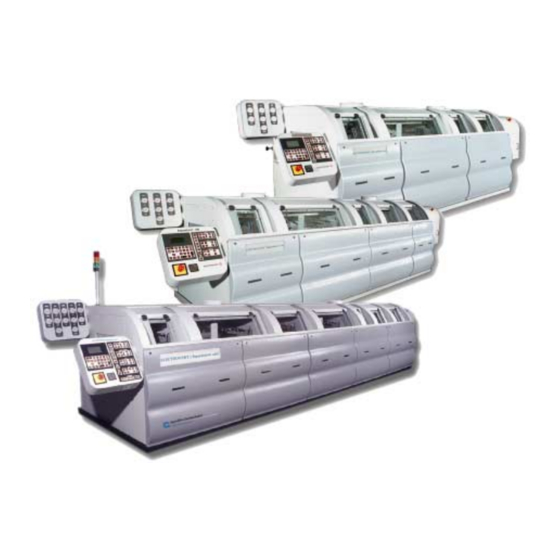
- Page 1 ELECTROVERT | Aquastorm AQUASTORM™ OPTIONS GUIDE Manual Part # 3-9317-600-00-0...
- Page 2 Manual Part #3-9317-600-00-0, Revision 1 Text Part #2-9317-600-00-0, Revision 1 Copyright© 2000 Speedline Technologies, Inc., All Rights Reserved This manual may not be reproduced, stored in a retrieval system, or transmitted in part or in whole. Photocopying, recording, or other forms of reproduction is prohibited without written permission of ®...
- Page 3 Preface ........Overview In this section This preface covers the following information: Topic See Page...
- Page 4 P R E F A C E To Our Customers To Our Customers This Guide The purpose of this guide is to help the customer obtain the greatest return on investment. Speedline suggests that operators, supervisors, and technicians responsible for operating and maintaining this equipment become familiar with the contents of these Guides prior to using the equipment.
-
Page 5: Preface
• Main Offices • Regional Service Centers (USA) • International Service Centers Main Offices Office Location Speedline Technologies, Inc. Technical Service Support Group P.O. Box 709, Hwy. 5 South Electrovert Main Sales and Camdenton, MO 65020-0709 Service Office Fax: 573-346-6878... - Page 6 P R E F A C E Customer Support Structure Regional Service The following Service Centers are located throughout the United States: Centers (USA) Office Location North East Regional Service 472 Amherst St. Suite 6 Center Nashua, NH 03063 Fax:603-880-8757 Phone: 603-883-2488 South East Regional Service 1055 Windward Ridge Pkwy., Suite 140...
- Page 7 Customer Support Structure International The following centers serve the international community: Service Centers Office Location Speedline Technologies, LTD Unit 1 Pincents Kiln Industrial Park Reading Bershire RG317SD Fax: 44 0 118 930 1401 Phone: 44 0 118 930 1400 Speedline Technologies, Gmbh...
-
Page 8: Before You Call
P R E F A C E Before You Call Before You Call Introduction To help Electrovert support your machine in a timely fashion, have the following specific information available when calling in: • System Software Version • Serial Tag Information System Software Check the software disk included in the documentation package press the Help Version... -
Page 9: Table Of Contents
Table of Contents ........Preface Overview ..............To Our Customers . - Page 10 T A B L E O F C O N T E N T S Section F. Conveyor Enhancements Overview..............25 Inlet and Exit Conveyor Extensions .
- Page 11 T A B L E O F C O N T E N T S Chapter 4. Password Protection Overview ..............Section A.
- Page 12 T A B L E O F C O N T E N T S Section B. CheckMate™ Hold Down Conveyor Overview..............92 Functional Description .
- Page 13 T A B L E O F C O N T E N T S Chapter 8. pH Monitor Overview ..............Section A.
- Page 14 T A B L E O F C O N T E N T S Section C. Preventive Maintenance Overview..............196 Section D.
- Page 15 T A B L E O F C O N T E N T S Chapter 13. Bag Filters Overview ..............Section A.
- Page 16 T A B L E O F C O N T E N T S Section A. CAT Overview..............274 Functional Description .
- Page 17 T A B L E O F C O N T E N T S Chapter 17. Sump Pump Overview ..............Section A.
- Page 18 T A B L E O F C O N T E N T S Aquastorm™ Series Options Guide Rev. 1...
-
Page 19: Safety Information
Safety Information ........Overview Introduction Operation of this equipment exposes personnel to potential health and safety hazards. -
Page 20: Section A. Potential Hazards
S A F E T Y I N F O R M A T I O N Overview Section A: Potential Hazards ........Overview Introduction This section describes various hazards the operator may encounter while... -
Page 21: Hot Surface Hazards
S A F E T Y I N F O R M A T I O N Hot Surface Hazards Hot Surface Hazards Introduction During normal operation this equipment and some of its components operate at temperatures up to 60–71 °C (140–160 °F). The operator must use extreme caution and wear the recommended safety garments prior to coming in contact with hot surfaces or components. -
Page 22: Electrical Hazards
S A F E T Y I N F O R M A T I O N Electrical Hazards Electrical Hazards Introduction Installation of this equipment involves exposure to situations which may result in electrical shock if procedures are not properly followed. Pay close attention to warnings of this nature throughout the context of this Guide. -
Page 23: Mechanical Hazards
S A F E T Y I N F O R M A T I O N Mechanical Hazards Mechanical Hazards Introduction Stop all moving parts when making adjustments or performing maintenance. When the system is running, avoid moving mechanisms. Use caution when working on or near moving parts and wear safety gear. -
Page 24: Breathing Hazards
S A F E T Y I N F O R M A T I O N Breathing Hazards Breathing Hazards Introduction Fumes can generate from certain saponifies, defoamers, descalers, cleaning solvents, or other chemicals used during operation. Take precautions to avoid accumulation of flammable vapors. -
Page 25: Other Hazards
S A F E T Y I N F O R M A T I O N Other Hazards Other Hazards Introduction Additional hazards include possible skin irritation, weight considerations when moving or adjusting the equipment, and potential environmental hazards with system discharge. -
Page 26: Section B. Safety Precautions
S A F E T Y I N F O R M A T I O N Recommended Precautions Section B: Safety Precautions ........Recommended Precautions Introduction Refer to the following general precautions and recommendations. - Page 27 S A F E T Y I N F O R M A T I O N Recommended Precautions Chemical Precautions Exercise caution when using strong cleaning agents, solvents, and other chemicals. MSDS guidelines contain specific uses and safety precautions which must be thoroughly understood and strictly followed.
-
Page 28: Section C. Lock-Out Tag-Out
S A F E T Y I N F O R M A T I O N Overview Section C: Lock-Out Tag-Out ........Overview Introduction Be sure to perform Lock-Out Tag-Out steps before beginning maintenance,... -
Page 29: Attach Facility Lock-Out Tag-Out Device
S A F E T Y I N F O R M A T I O N Attach Facility Lock-Out Tag-Out Device Attach Facility Lock-Out Tag-Out Device Introduction Refer to the following procedure to isolate and identify all facility energy sources. As soon as all energy sources are isolated and turned to the Off or Stop position, notify affected personnel and attach the lock-out tag-out device. -
Page 30: Attach Machine Lock-Out Tag-Out Device
S A F E T Y I N F O R M A T I O N Attach Machine Lock-Out Tag-Out Device Attach Machine Lock-Out Tag-Out Device Introduction Refer to the following procedure to isolate and identify all machine energy sources. - Page 31 S A F E T Y I N F O R M A T I O N Attach Machine Lock-Out Tag-Out Device Aquastorm 100 ELECTROVERT Figure 1–5 Procedure 1. Ensure there are no boards or other product in the system. 2.
- Page 32 S A F E T Y I N F O R M A T I O N Attach Machine Lock-Out Tag-Out Device Figure 1–6 shows the exit end of the Aquastorm™ system and identifies the power switch, incoming power wires, UL and Serial tag locations. Exit End of Machine UL and Serial Tags Main Power Disconnect...
-
Page 33: Perform Required Task
S A F E T Y I N F O R M A T I O N Perform Required Task Perform Required Task Introduction Proceed with the specific maintenance, installation, upgrade, or repair procedures required. Follow the directions in the Guides supplied with the system. Safety To ensure personal safety and avoid equipment damage, observe the following: Electrical Hazard... -
Page 34: Remove Lock-Out Tag Out Devices
S A F E T Y I N F O R M A T I O N Remove Lock-Out Tag Out Devices Remove Lock-Out Tag Out Devices Introduction Prior to removing the Lock Out device and resuming system operation, ensure the following is complete: •... -
Page 35: Chapter 2. Options And Technical Data
Options and Technical Data ........Overview Introduction This section lists all the information included in the Aquastorm™... -
Page 36: Section A. Safety Information
O P T I O N S A N D T E C H N I C A L D A T A Reference Information Section A: Safety Information ........Reference Information Introduction Operation of this equipment exposes personnel to potential health hazards. -
Page 37: Section B. Electrical Specifications
O P T I O N S A N D T E C H N I C A L D A T A Aquastorm 90™ Systems Section B: Electrical Specifications ........Aquastorm 90™... -
Page 38: Aquastorm 100™ Systems
O P T I O N S A N D T E C H N I C A L D A T A Aquastorm 100™ Systems Aquastorm 100™ Systems Introduction Refer to the electrical specifications provided to ensure adequate power is installed at the site where the system is installed. -
Page 39: Aquastorm 200™ Systems
O P T I O N S A N D T E C H N I C A L D A T A Aquastorm 200™ Systems Aquastorm 200™ Systems Introduction Refer to the electrical specifications provided to ensure adequate power is installed at the site where the system is installed. -
Page 40: Section C. Rear Emergency Stops
O P T I O N S A N D T E C H N I C A L D A T A E-Stops Section C: Rear Emergency Stops ........E-Stops Introduction As an added safety benefit, two (2) emergency stops (E-Stop) can be mounted on... -
Page 41: Section D. Password Protection
O P T I O N S A N D T E C H N I C A L D A T A Operation Control Section D: Password Protection ........Operation Control Introduction Password protection provides the ability to lock out certain functions through the... -
Page 42: Section E. Lighted Status Tower
O P T I O N S A N D T E C H N I C A L D A T A Visual Operating Status Section E: Lighted Status Tower ........Visual Operating Status Introduction The lighted status tower provides a visual signal indicating the operating status of... -
Page 43: Section F. Conveyor Enhancements
O P T I O N S A N D T E C H N I C A L D A T A Overview Section F: Conveyor Enhancements ........Overview Introduction This section describes conveyor enhancements available for all Aquastorm™... -
Page 44: Inlet And Exit Conveyor Extensions
O P T I O N S A N D T E C H N I C A L D A T A Inlet and Exit Conveyor Extensions Inlet and Exit Conveyor Extensions Introduction When operating an Aquastorm™ system in an in-line conveyor production configuration, the Angle Adjust Inlet Conveyor provides the ability to adjust inlet conveyor height to match the exit conveyor of the previous machine in the in-line production environment. -
Page 45: Checkmate™ Hold Down Conveyor
O P T I O N S A N D T E C H N I C A L D A T A CheckMate™ Hold Down Conveyor CheckMate™ Hold Down Conveyor Introduction When cleaning lightweight or small product that could become airborne due to water or air pressure, the CheckMate™... -
Page 46: Photocell Sensors
O P T I O N S A N D T E C H N I C A L D A T A Photocell Sensors Photocell Sensors Introduction The photocell provides an automatic stand by mode for PCB detection on the inlet conveyor extension or as a board jam alert on the CheckMate™... -
Page 47: Section G. Flow Meters
O P T I O N S A N D T E C H N I C A L D A T A Water Flow Section G: Flow Meters ........Water Flow Introduction Flow meters assist in maintaining a constant full level flow balance throughout... -
Page 48: Section H. Ph Monitor
O P T I O N S A N D T E C H N I C A L D A T A Water Balance Section H: pH Monitor ........Water Balance Introduction The Aquastorm™... -
Page 49: Section I. Detergent Injection
O P T I O N S A N D T E C H N I C A L D A T A Saponifiers Section I: Detergent Injection ........Saponifiers Introduction This option is only available for use on Aquastorm 200™... - Page 50 O P T I O N S A N D T E C H N I C A L D A T A Saponifiers Photograph Figure 2–10 displays a close up view of the detergent injector assembly: Figure 2–10 2-32 Aquastorm™...
-
Page 51: Section J. Resistivity Meter
O P T I O N S A N D T E C H N I C A L D A T A Final Rinse Water Section J: Resistivity Meter ........Final Rinse Water Introduction The resistivity meter displays an accurate digital readout of resistivity levels. -
Page 52: Section K. Hurricane Jet™ Nozzles And Pumps
O P T I O N S A N D T E C H N I C A L D A T A Enhanced Cleaning Section K: Hurricane Jet™ Nozzles and Pumps ........Enhanced Cleaning Introduction The wash module on all Aquastorm™... -
Page 53: Section L. Natural Gas Heating
O P T I O N S A N D T E C H N I C A L D A T A Natural Gas Section L: Natural Gas Heating ........Natural Gas Introduction In certain locations, heating water using natural gas represents a considerable... - Page 54 O P T I O N S A N D T E C H N I C A L D A T A Natural Gas Photograph Figure 2–13 displays one (1) natural gas water heater unit, the exit plumbing, and the water pump and plumbing connecting the water heater to the wash module: Figure 2–13 2-36...
-
Page 55: Section M. Bag Filters
O P T I O N S A N D T E C H N I C A L D A T A Water Filtration Section M: Bag Filters ........Water Filtration Introduction When particle contamination directly affects the cleaning process, bag filters... -
Page 56: Section N. Dryer Add-On Modules
O P T I O N S A N D T E C H N I C A L D A T A Additional Drying Units Section N: Dryer Add-On Modules ........Additional Drying Units Introduction The Aquastorm 100™... -
Page 57: Section O. Dryer Modifications
O P T I O N S A N D T E C H N I C A L D A T A Overview Section O: Dryer Modifications ........Overview Introduction This section describes dryer module enhancements available for all Aquastorm™... -
Page 58: Cat Package
O P T I O N S A N D T E C H N I C A L D A T A CAT Package CAT Package Introduction The Compressed Air Technology (CAT) option package mounts in all standard or add-on dryer modules and provides additional drying capabilities in product with deep cavities. -
Page 59: Scat Package
O P T I O N S A N D T E C H N I C A L D A T A SCAT Package SCAT Package Introduction The Side Connector Airknife Technology (SCAT) option package mounts only in dryer module #1 or add-on dryer module #3. The SCAT adjusts in two (2) directions and offers additional drying to the sides of a PCB (Printed Circuit Board) as it moves along the conveyor. -
Page 60: Ir Heater
O P T I O N S A N D T E C H N I C A L D A T A IR Heater IR Heater Introduction The radiant heater (IR) incorporates two (2) radiant heater panels, one (1) upper panel and one (1) lower panel. -
Page 61: Section P. Blower Enhancements
O P T I O N S A N D T E C H N I C A L D A T A Overview Section P: Blower Enhancements ........Overview Introduction This section describes dryer blower enhancements and blower upgrades available... -
Page 62: Air Intake Port
O P T I O N S A N D T E C H N I C A L D A T A Air Intake Port Air Intake Port Introduction The blowers used in the drying sections of Aquastorm™ systems generate heat. Standard system configuration mounts air fans on the rear bulkhead between the final rinse and blower dryer sections of the machine. -
Page 63: Electrosonic™ Airknives
O P T I O N S A N D T E C H N I C A L D A T A Electrosonic™ Airknives Electrosonic™ Airknives Introduction To enhance blower drying, replace the standard cylindrical airknives in any standard or add-on dryer module with Electrosonic™ airknives. The unique teardrop design maximizes air velocity as it blows through the slot and produces a sheet of air. -
Page 64: Blower Upgrades
O P T I O N S A N D T E C H N I C A L D A T A Blower Upgrades Blower Upgrades Introduction Dryer motor upgrades increase air flow and pressure to ensure maximum drying efficiency prior to PCB (Printed Circuit Board) assemblies exiting the system. -
Page 65: Blower Fail Detect
O P T I O N S A N D T E C H N I C A L D A T A Blower Fail Detect Blower Fail Detect Introduction The blower fail detect provides an electronic monitor of blower operation. When a blower motor fails, a blower belt does not work properly or fails, or airknives become clogged the blower fail detect system activates and initiates a hardware alarm that stops machine operation. -
Page 66: Section Q. Sump Pump
O P T I O N S A N D T E C H N I C A L D A T A Drain Options Section Q: Sump Pump ........Drain Options Introduction At the time of manufacture, Aquastorm™... -
Page 67: Chapter 3. Rear Emergency Stops
Rear Emergency Stops ........Overview Introduction This chapter provides the information needed to install and configure the Aquastorm™... -
Page 68: Section A. Functional Description
R E A R E M E R G E N C Y S T O P S Overview Section A: Functional Description ........Overview Introduction Emergency stops provide a means to stop machine operation when an emergency... -
Page 69: Section B. Operation
R E A R E M E R G E N C Y S T O P S E-Stop Operation Section B: Operation ........E-Stop Operation Introduction When pressed in an emergency situation, the large red push-pull Emergency Stop... -
Page 70: Section C. Preventive Maintenance
R E A R E M E R G E N C Y S T O P S Overview Section C: Preventive Maintenance ........Overview Introduction A strong preventive maintenance program is the best method to cut costs,... -
Page 71: Section D. Recommended Spares
R E A R E M E R G E N C Y S T O P S Spare Parts List Section D: Recommended Spares ........Spare Parts List Introduction It is recommended the customer maintain the following spare parts on-hand to... - Page 72 R E A R E M E R G E N C Y S T O P S Spare Parts List 3-54 Aquastorm™ Series Options Guide Rev. 1...
-
Page 73: Chapter 4. Password Protection
Password Protection ........Overview Introduction This chapter provides the information needed to install and configure the Aquastorm™... -
Page 74: Section A. Functional Description
P A S S W O R D P R O T E C T I O N Overview Section A: Functional Description ........Overview Introduction Password protection provides the ability to lock out certain functions through the... - Page 75 P A S S W O R D P R O T E C T I O N Overview Access Limits The following table describes and illustrates the keyswitch access limits and membrane keypad functions for all Aquastorm™ systems. Function Pos.
-
Page 76: Section B. Operation
P A S S W O R D P R O T E C T I O N Overview Section B: Operation ........Overview Introduction The Electrovert service person performing installation or the system administrator... - Page 77 P A S S W O R D P R O T E C T I O N Overview Configuration Configure the keyswitch as follows Procedure 1. Insert Key #3 into the keyswitch tumbler and turn it to position #3. 2.
-
Page 78: Section C. Preventive Maintenance
P A S S W O R D P R O T E C T I O N Overview Section C: Preventive Maintenance ........Overview Introduction A strong preventive maintenance program is the best method to cut costs,... -
Page 79: Section D. Recommended Spares
P A S S W O R D P R O T E C T I O N Spare Parts List Section D: Recommended Spares ........Spare Parts List Introduction It is recommended the customer maintain the following spare parts on-hand to... - Page 80 P A S S W O R D P R O T E C T I O N Spare Parts List 4-62 Aquastorm™ Series Options Guide Rev. 1...
-
Page 81: Chapter 5. Lighted Status Tower
Lighted Status Tower ........Overview Introduction This chapter provides the information needed to install and configure the Aquastorm™... -
Page 82: Section A. Functional Description
L I G H T E D S T A T U S T O W E R Overview Section A: Functional Description ........Overview Introduction The lighted status tower provides a visual signal indicating the operating status of... -
Page 83: Section B. Installation
L I G H T E D S T A T U S T O W E R Connect the Light Tower Section B: Installation ........Connect the Light Tower Introduction When the Aquastorm™... - Page 84 L I G H T E D S T A T U S T O W E R Connect the Light Tower Procedure Install the light tower shipped with the machine as follows: 1. Remove the tape and all packing materials securing the tower to the top of the machine.
-
Page 85: Section C. Operation
L I G H T E D S T A T U S T O W E R Overview Section C: Operation ........Overview Introduction List of procedures... -
Page 86: Software Configuration
L I G H T E D S T A T U S T O W E R Software Configuration Software Configuration Introduction The Electrovert service person performing installation or the system administrator should configure the machine. After installing a lighted status tower, the system software must be configured to recognize it. -
Page 87: Parts And Functions
L I G H T E D S T A T U S T O W E R Parts and Functions Parts and Functions Introduction The light tower lenses flash or illuminate to indicate the system operating status. Table The following table describes the lighted status tower major parts and their functions flashes when and illuminates when... -
Page 88: Section D. Preventive Maintenance
L I G H T E D S T A T U S T O W E R Overview Section D: Preventive Maintenance ........Overview Introduction A strong preventive maintenance program is the best method to cut costs,... -
Page 89: Section E. Repair
L I G H T E D S T A T U S T O W E R Overview Section E: Repair ........Overview Introduction This section covers the step required to replace a burned out light bulb or... -
Page 90: Replace Light Tower Bulb
L I G H T E D S T A T U S T O W E R Replace Light Tower Bulb Replace Light Tower Bulb Introduction Occasionally a light bulb will burn out. When one (1) lens of a status light tower fails to illuminate check the light bulb and replace if necessary. - Page 91 L I G H T E D S T A T U S T O W E R Replace Light Tower Bulb Shut Down/Start Up Use the following steps prepare for the procedure. Procedure 1. Shut down Aquastorm™ system operation. 2.
-
Page 92: Replace Light Tower Lens
L I G H T E D S T A T U S T O W E R Replace Light Tower Lens Replace Light Tower Lens Introduction In the unlikely event that a status light tower lens is damaged or broken, the lens can be replaced. - Page 93 L I G H T E D S T A T U S T O W E R Replace Light Tower Lens Procedure Use the following steps to replace a damaged lens: 1. Use a flat head screwdriver to loosen the light tower lens assembly top mounting screw and remove the black light tower assembly top.
-
Page 94: Section F. Recommended Spares
L I G H T E D S T A T U S T O W E R Spare Parts List Section F: Recommended Spares ........Spare Parts List Introduction It is recommended the customer maintain the following spare parts on-hand to... -
Page 95: Chapter 6. Conveyor Enhancements
Conveyor Enhancements ........Overview Introduction This chapter provides the information needed to install and configure the Aquastorm™... -
Page 96: Section A. Inlet And Exit Conveyor Extensions
C O N V E Y O R E N H A N C E M E N T S Overview Section A: Inlet and Exit Conveyor Extensions ........Overview Introduction This section describes the angle adjust inlet extension and the extended exit... -
Page 97: Functional Description
C O N V E Y O R E N H A N C E M E N T S Functional Description Functional Description Introduction When operating an Aquastorm™ system in an in-line conveyor production configuration, the Angle Adjust Inlet Conveyor allows in-line, direct feed capabilities immediately following automatic wave soldering or reflow soldering processes. -
Page 98: Inlet Conveyor Extension Installation
C O N V E Y O R E N H A N C E M E N T S Inlet Conveyor Extension Installation Inlet Conveyor Extension Installation Introduction Prior to shipment, the angle adjust inlet conveyor is removed and packed separately in the shipping container. - Page 99 C O N V E Y O R E N H A N C E M E N T S Inlet Conveyor Extension Installation Diagram Figure 6–3 shows the inlet conveyor extension installation drawing M8 SST Split Lock Washer M8 SST Flat Washer M8 x 40 SST Hex Head Bolt...
- Page 100 C O N V E Y O R E N H A N C E M E N T S Inlet Conveyor Extension Installation Procedure Refer to the following steps and Figure 6–3 on page 81 to complete the installation process. 1.
-
Page 101: Exit Conveyor Extension Installation
C O N V E Y O R E N H A N C E M E N T S Exit Conveyor Extension Installation Exit Conveyor Extension Installation Introduction Prior to shipment the exit conveyor extension is removed and packed separately in the shipping container. - Page 102 C O N V E Y O R E N H A N C E M E N T S Exit Conveyor Extension Installation Procedure Refer to the following steps to connect the electric wires to the jumper strip. 1. Shut down Aquastorm™ system operation. 2.
- Page 103 C O N V E Y O R E N H A N C E M E N T S Exit Conveyor Extension Installation Tools Use the following tools to install exit conveyor extension: • 10 mm Box Wrench • 5 mm Allen Wrench •...
-
Page 104: Conveyor Wire Belt Set Up
C O N V E Y O R E N H A N C E M E N T S Conveyor Wire Belt Set Up Conveyor Wire Belt Set Up Introduction Perform this procedure if the Aquastorm 200™ or Aquastorm 100™ system ordered includes the optional inlet conveyor extension. - Page 105 C O N V E Y O R E N H A N C E M E N T S Conveyor Wire Belt Set Up Diagram Figure 6–6 shows the wire belt feeding diagram: Feed the Wire Belt from the top of the conveyor at the entrance end toward the exit end of the system, then around the underside of the conveyor, toward the entrance end of the Optional Inlet Conveyor assembly.
- Page 106 C O N V E Y O R E N H A N C E M E N T S Conveyor Wire Belt Set Up Diagram Figure 6–7 shows the conveyor wire belt installation drawing: Feed the Wire Belt Feed the Wire Belt from the top of the conveyor toward the exit end of the system, then around the underside of the conveyor, toward the entrance end of the optional Inlet Conveyor assembly.
- Page 107 C O N V E Y O R E N H A N C E M E N T S Conveyor Wire Belt Set Up Procedure Refer to the following steps and Figure on page 88 for conveyor wire belt installation.
-
Page 108: Software Configuration
C O N V E Y O R E N H A N C E M E N T S Software Configuration Software Configuration Introduction The Electrovert service person performing installation or the system administrator should configure the machine. After installing an entrance angle adjust conveyor, the system software must be configured to recognize the conveyor pitch. - Page 109 C O N V E Y O R E N H A N C E M E N T S Software Configuration Configuration Configure the conveyor as follows Procedure 1. Press the menu key on the LCD interface keypad to access configuration screen #1.
-
Page 110: Section B. Checkmate™ Hold Down Conveyor
C O N V E Y O R E N H A N C E M E N T S Overview Section B: CheckMate™ Hold Down Conveyor ........Overview Introduction This section describes the CheckMate™... -
Page 111: Functional Description
C O N V E Y O R E N H A N C E M E N T S Functional Description Functional Description Introduction When cleaning lightweight or small product that could become airborne due to water or air pressure, the CheckMate™ hold down conveyor option is used to hold product in place. -
Page 112: Checkmate™ Hold Down Conveyor Installation
C O N V E Y O R E N H A N C E M E N T S Checkmate™ Hold Down Conveyor Installation Checkmate™ Hold Down Conveyor Installation Introduction At the entrance end an upper conveyor gently lays across the top of PCBs as they travel on the lower conveyor. - Page 113 C O N V E Y O R E N H A N C E M E N T S Checkmate™ Hold Down Conveyor Installation Diagram Figure 6–10 shows the CheckMate™ wire belt installation drawing: Feed the CheckMate™ Wire Belt Lay the wire belt, smooth side down, on top of the conveyor belt.
- Page 114 C O N V E Y O R E N H A N C E M E N T S Checkmate™ Hold Down Conveyor Installation Procedure Refer to the following steps and Figure 6–10 on page 95 for CheckMate™ wire belt installation.
-
Page 115: Software Configuration
C O N V E Y O R E N H A N C E M E N T S Software Configuration Software Configuration Introduction The Electrovert service person performing installation or the system administrator should configure the machine. After installing a CheckMate™ hold down conveyor, the system software must be configured to recognize it. - Page 116 C O N V E Y O R E N H A N C E M E N T S Software Configuration Configuration Configure the CheckMate™ as follows: Procedure 1. Press the menu key on the LCD interface keypad to access configuration screen #1.
-
Page 117: Hardware Configuration
C O N V E Y O R E N H A N C E M E N T S Hardware Configuration Hardware Configuration Introduction The Dart MicroDrive II located on the low voltage electrical panel provides electrical control of the CheckMate™ conveyor speed. For optimum performance the standard conveyor and CheckMate™... - Page 118 C O N V E Y O R E N H A N C E M E N T S Hardware Configuration Procedure Use the following steps to access the Dart MicroDrive II unit: 1. Shut down Aquastorm™ system operation. 2.
-
Page 119: Section C. Photocell
C O N V E Y O R E N H A N C E M E N T S Overview Section C: Photocell ........Overview Introduction This section describes the photocell option available with the angle adjust inlet... -
Page 120: Functional Description
C O N V E Y O R E N H A N C E M E N T S Functional Description Functional Description Introduction The entrance end photocell provides an automatic standby mode for PCB detection. The photo sensor and reflector mount on the entrance angle adjust inlet conveyor. -
Page 121: Photocell Adjustments
C O N V E Y O R E N H A N C E M E N T S Photocell Adjustments Photocell Adjustments Introduction Ensure the photocell sensor emitter and reflector are aligned to provide proper product detection when items enter the system for auto start mode or become entangled at the exit end of the system where the CheckMate™... - Page 122 C O N V E Y O R E N H A N C E M E N T S Photocell Adjustments Procedure Use the following steps to raise or lower the emitter and reflector: 1. Place product with the lowest components for processing in the path between the photocell emitter and reflector.
-
Page 123: Auto Start Configuration
C O N V E Y O R E N H A N C E M E N T S Auto Start Configuration Auto Start Configuration Introduction The Electrovert service person performing installation or the system administrator should configure the machine. After installing an entrance end photocell, the system software must be configured to recognize it. - Page 124 C O N V E Y O R E N H A N C E M E N T S Auto Start Configuration Configuration Configure the entrance end photocell as follows: Procedure 1. Press the menu key on the LCD interface keypad to access configuration screen #1.
-
Page 125: Board Jam Configuration
C O N V E Y O R E N H A N C E M E N T S Board Jam Configuration Board Jam Configuration Introduction The Electrovert service person performing installation or the system administrator should configure the machine. After installing an entrance end photocell, the system software must be configured to recognize it. - Page 126 C O N V E Y O R E N H A N C E M E N T S Board Jam Configuration Configuration Configure the exit end board jam photocell as follows: Procedure 1. Press the menu key on the LCD interface keypad to access configuration screen #1.
-
Page 127: Section D. Preventive Maintenance
C O N V E Y O R E N H A N C E M E N T S Maintenance Schedule Section D: Preventive Maintenance ........Maintenance Schedule Introduction A strong preventive maintenance program is the best method to cut costs,... -
Page 128: Inspect Standard Conveyor Belt
C O N V E Y O R E N H A N C E M E N T S Inspect Standard Conveyor Belt Inspect Standard Conveyor Belt Introduction During daily maintenance procedures, check the standard conveyor belt for bent links and verify proper belt tensioning. -
Page 129: Lubricate Conveyor Turn Shaft Bearing Blocks
C O N V E Y O R E N H A N C E M E N T S Lubricate Conveyor Turn Shaft Bearing Blocks Lubricate Conveyor Turn Shaft Bearing Blocks Introduction The standard conveyor turn shaft is located at the exit end of all Aquastorm™ systems.The conveyor turn shaft contains bearing blocks. - Page 130 C O N V E Y O R E N H A N C E M E N T S Lubricate Conveyor Turn Shaft Bearing Blocks Tools and Materials Use the following tools and materials: • Magna-Lube™ G high temperature lubricant •...
-
Page 131: Lubricate Conveyor Drive Shaft Bearing Blocks
C O N V E Y O R E N H A N C E M E N T S Lubricate Conveyor Drive Shaft Bearing Blocks Lubricate Conveyor Drive Shaft Bearing Blocks Introduction The standard conveyor drive shaft is located at the exit end of all Aquastorm™ systems.The conveyor drive shaft contains bearing blocks. - Page 132 C O N V E Y O R E N H A N C E M E N T S Lubricate Conveyor Drive Shaft Bearing Blocks Photograph Figure 6–23 shows the conveyor drive shaft rear view and indicates the grease point.
-
Page 133: Lubricate Conveyor Drive Chain
C O N V E Y O R E N H A N C E M E N T S Lubricate Conveyor Drive Chain Lubricate Conveyor Drive Chain Introduction The conveyor drive motor is located in the lower section of the sound enclosure at the exit end of all Aquastorm™... - Page 134 C O N V E Y O R E N H A N C E M E N T S Lubricate Conveyor Drive Chain Photographs Figure 6–25 shows the upper chain with the conveyor belt separated for easier access. Upper Chain From Drive Shaft to Turn Shaft Figure 6–25...
-
Page 135: Lubricate Checkmate™ Turn Shaft Bearing Blocks
C O N V E Y O R E N H A N C E M E N T S Lubricate CheckMate™ Turn Shaft Bearing Blocks Lubricate CheckMate™ Turn Shaft Bearing Blocks Introduction The CheckMate™ conveyor drive motor is located in the rear prewash section at the entrance end of all Aquastorm™... - Page 136 C O N V E Y O R E N H A N C E M E N T S Lubricate CheckMate™ Turn Shaft Bearing Blocks Tools and Materials Use the following tools and materials: • Magna-Lube™ G high temperature lubricant •...
-
Page 137: Lubricate Checkmate™ Drive Shaft Bearing Blocks
C O N V E Y O R E N H A N C E M E N T S Lubricate CheckMate™ Drive Shaft Bearing Blocks Lubricate CheckMate™ Drive Shaft Bearing Blocks Introduction The CheckMate™ conveyor drive motor is located in the rear prewash section at the entrance end of all Aquastorm™... - Page 138 C O N V E Y O R E N H A N C E M E N T S Lubricate CheckMate™ Drive Shaft Bearing Blocks Tools and Materials Use the following tools and materials: • Magna-Lube™ G high temperature lubricant •...
-
Page 139: Lubricate Checkmate™ Drive Chain
C O N V E Y O R E N H A N C E M E N T S Lubricate CheckMate™ Drive Chain Lubricate CheckMate™ Drive Chain Introduction The CheckMate™ drive motor is located in the rear prewash section of all Aquastorm™... -
Page 140: Clean Photocell
C O N V E Y O R E N H A N C E M E N T S Clean Photocell Clean Photocell Introduction The photocell provides an automatic standby mode for PCB detection. To ensure effective PCB detection, the sensor and reflector must remain clean. The optional photocell units mount on the adjustable inlet conveyor and the CheckMate™... - Page 141 C O N V E Y O R E N H A N C E M E N T S Clean Photocell Photograph Figure 6–32 shows the exit end of an Aquastorm™ system with the noise suppression hood raised for CheckMate™ exit conveyor and optional photocell access.
-
Page 142: Section E. Repair
C O N V E Y O R E N H A N C E M E N T S Overview Section E: Repair ........Overview Introduction This section describes the repair or replacement steps for the standard or... -
Page 143: Wire Belt Splicing Steps
C O N V E Y O R E N H A N C E M E N T S Wire Belt Splicing Steps Wire Belt Splicing Steps Introduction After installing the conveyor wire belt or Checkmate™ wire belt, connect the ends together to form a continuous loop using the following procedure. - Page 144 C O N V E Y O R E N H A N C E M E N T S Wire Belt Splicing Steps 2. Use several plastic wire ties to loosely hold the ends of the wire belt together after attaching the splicing links.
- Page 145 C O N V E Y O R E N H A N C E M E N T S Wire Belt Splicing Steps 5. Use a pair of needle nose pliers to grasp one (1) end of the splicing link. Insert the loop end over the belt link being spliced.
- Page 146 C O N V E Y O R E N H A N C E M E N T S Wire Belt Splicing Steps 11. To complete the splice, press the open end of the belt linking loop on the splicing link onto the wire belt link where the screwdriver was first inserted.
-
Page 147: Connect Wire Belt Links
C O N V E Y O R E N H A N C E M E N T S Connect Wire Belt Links Connect Wire Belt Links Introduction Install the wire belt so the flat portion runs in the direction indicated below. The closed end of the loop goes toward the direction of travel. - Page 148 C O N V E Y O R E N H A N C E M E N T S Connect Wire Belt Links Complete installation of one side of the splicing link before continuing on to the other side. 6-130 Aquastorm™...
- Page 149 C O N V E Y O R E N H A N C E M E N T S Connect Wire Belt Links 2-9317-600-00-0 Aquastorm™ Series Options Guide 6-131...
-
Page 150: Section F. Recommended Spares
C O N V E Y O R E N H A N C E M E N T S Spare Parts List Section F: Recommended Spares ........Spare Parts List Introduction It is recommended the customer maintain the following spare parts on-hand to... -
Page 151: Chapter 7. Flow Meters
Flow Meters ........Overview Introduction This chapter provides the information needed to install and configure the Aquastorm™... -
Page 152: Section A. Functional Description
F L O W M E T E R S Overview Section A: Functional Description ........Overview Introduction Flow meters assist in maintaining a constant full level flow balance throughout... - Page 153 F L O W M E T E R S Overview Photograph Figure 7–2 shows one (1) flow meter installed in the final rinse section of an Aquastorm™ system. Upper Spray Bar Flow Control Valve Full Open Position Lower Spray Bar Flow Control Valve Full Closed Position Final Rinse...
-
Page 154: Section B. Configuration
F L O W M E T E R S Overview Section B: Configuration ........Overview Introduction This section provides the steps necessary to configure the Aquastorm™... -
Page 155: Software Configuration
F L O W M E T E R S Software Configuration Software Configuration Introduction The Electrovert service person performing installation or the system administrator should configure the machine. After installing a flow meter, configure the system software to recognize it. The configuration screens interface with the system software. - Page 156 F L O W M E T E R S Software Configuration Configuration Use the following steps to configure flow meter operation: Procedure 1. Press the menu key on the LCD interface keypad to access configuration screen #1. 2. Press the page down key three times to display configuration screen #4. 3.
-
Page 157: Review Flow Meter View Menu
F L O W M E T E R S Review Flow Meter View Menu Review Flow Meter View Menu Introduction The flow meter ships from the factory with the necessary calibration functions preset. Meter calibration information is provided In the unlikely event the meter requires recalibration. - Page 158 F L O W M E T E R S Review Flow Meter View Menu Figure 7–5 displays the flow meter functions and View menu. Figure 7–5 Procedure Review the View menu as follows: 1. Access the flow meter functions. 2.
-
Page 159: Review Flow Meter Options Menu
F L O W M E T E R S Review Flow Meter Options Menu Review Flow Meter Options Menu Introduction The flow meter ships from the factory with the necessary calibration functions preset. Meter calibration information is provided In the unlikely event the meter requires recalibration. - Page 160 F L O W M E T E R S Review Flow Meter Options Menu Menu Functions Table The following table identifies flow meter options menu functions. Options Option Description Menu Function Selects totalizer reset options: Lock: on (enabled) Lock: off (disabled) Selects display averaging: off = 100 mslo low = τ...
-
Page 161: Review Flow Meter Calibrate Menu
F L O W M E T E R S Review Flow Meter Calibrate Menu Review Flow Meter Calibrate Menu Introduction The flow meter ships from the factory with the necessary calibration functions preset. Meter calibration information is provided In the unlikely event the meter requires recalibration. - Page 162 F L O W M E T E R S Review Flow Meter Calibrate Menu Menu Functions The following table identifies flow meter calibrate menu functions. Options Option Description Menu Function Selects display contrast [four (4) levels] Sets flow units label and time base [gallons per minute (gpm)] Sets flow K-factor (0.01 to 99999) Sets totalizer units (for label purposes only)
-
Page 163: Section C. Preventive Maintenance
F L O W M E T E R S Overview Section C: Preventive Maintenance ........Overview Introduction A strong preventive maintenance program is the best method to cut costs,... -
Page 164: Section D. Repair
F L O W M E T E R S Overview Section D: Repair ........Overview Introduction Replace flower meter pipe section in the unlikely event of a flow meter failure. -
Page 165: Remove/Replace Flow Meter
F L O W M E T E R S Remove/Replace Flow Meter Remove/Replace Flow Meter Introduction Replace flower meter pipe section in the unlikely event of a flow meter failure. Tools and materials Use the following tools and materials to complete this upgrade installation: •... - Page 166 F L O W M E T E R S Remove/Replace Flow Meter Procedure Use the following steps to stop machine operation: 1. Shut down Aquastorm system operation. 2. Ensure system power is Off. 3. Perform Lock Out/Tag Out steps. See Lock-Out Tag-Out on page 10. 4.
- Page 167 F L O W M E T E R S Remove/Replace Flow Meter Procedure Use the following to remove or replace the flow meter mounted pipe: 1. Ensure machine operation is shut down and upper and lower spray bar flow control ball valves are turned to the full closed position.
-
Page 168: Verify Flow Meter Connections
F L O W M E T E R S Verify Flow Meter Connections Verify Flow Meter Connections Introduction Once installed, it is necessary to ensure all plumbing connections are tight. Safety To ensure personal safety and avoid equipment damage observe the following: ATTENTION A qualified maintenance person with plumbing experience should install the flow meter. -
Page 169: Section E. Recommended Spares
F L O W M E T E R S Spare Parts List Section E: Recommended Spares ........Spare Parts List Introduction It is recommended the customer maintain the following spare parts on-hand to... - Page 170 F L O W M E T E R S Spare Parts List 7-152 Aquastorm™ Series Options Guide Rev. 1...
-
Page 171: Chapter 8. Ph Monitor
pH Monitor ........Overview Introduction This chapter provides the information needed to install and configure the Aquastorm™... -
Page 172: Section A. Functional Description
P H M O N I T O R Overview Section A: Functional Description ........Overview Introduction The Aquastorm™... -
Page 173: Section B. Installation
P H M O N I T O R Prepare the pH Monitor for Initial Operation Section B: Installation ........Prepare the pH Monitor for Initial Operation Introduction When the Aquastorm™... - Page 174 P H M O N I T O R Prepare the pH Monitor for Initial Operation Procedure Prepare the pH monitor for operation as follows 1. Ensure the Aquastorm™ system is connected and ready for initial start up. 2. Remove the rear panels to access the rear wash enclosure. 3.
-
Page 175: Section C. Configuration
P H M O N I T O R Overview Section C: Configuration ........Overview Introduction This section provides the steps necessary to configure the Aquastorm™... -
Page 176: Software Configuration
P H M O N I T O R Software Configuration Software Configuration Overview Introduction The Electrovert service person performing installation or the system administrator should configure the machine. After installing a pH monitor, the system software must be configured to recognize it. - Page 177 P H M O N I T O R Overview Configuration Configure the Aquastorm™ software to recognize the pH monitor as follows Procedure 1. Press the menu key on the LCD interface keypad to access configuration screen #1. 2. Press the enter key to toggle to YES and indicate the pH monitor is installed. 3.
-
Page 178: Ph Electrode Calibration
P H M O N I T O R pH Electrode Calibration pH Electrode Calibration Introduction To define proper electrode operation and maintain linearity during the electrode life-span review the offset, slope and response time/stability checks. Offset (STD) Check Offsets in a pH 7 buffer @ 25 °C (77 °F). Theoretical output is 0 mV. Any deviation is the pH electrode offset (i.e. - Page 179 P H M O N I T O R pH Electrode Calibration Response Time/ Response time and stability are affected by the glass surface of the pH electrode, Stability the reference junction, and reference solution. Rating is 95% response in ≤ three (3) seconds for glass bulb type electrodes and 95% response ≤...
-
Page 180: Orp Electrode Calibration
P H M O N I T O R ORP Electrode Calibration ORP Electrode Calibration Introduction To define proper electrode operation and maintain linearity during the electrode life-span review the offset, and slope checks. Offset (STD) Offsets occur when a reference junction is clogged or reference solution/wire is aged or contaminated. -
Page 181: Troubleshooting
P H M O N I T O R Troubleshooting Troubleshooting Introduction The preamplifier portion of the pH monitor controls and provides information regarding the pH levels. Refer to the following troubleshooting information as required. Troubleshooting table If any of these error conditions exist, contact Electrovert customer service to schedule repair/replacement of the pH monitor assembly: Error Condition Possible Cause... -
Page 182: Section D. Preventive Maintenance
P H M O N I T O R Overview Section D: Preventive Maintenance ........Overview Introduction A strong preventive maintenance program is the best method to cut costs,... - Page 183 P H M O N I T O R Overview Maintenance Schedule Refer to the following maintenance schedule to ensure proper machine and option operation. Weekly Maintenance — Every 40 hours of Operation Cleaning Procedure Reference Whenever water tank is emptied, ensure electrode tip is placed in pH 4.0 buffer solution to avoid drying out.
-
Page 184: Section E. Recommended Spares
P H M O N I T O R Spare Parts List Section E: Recommended Spares ........Spare Parts List Introduction It is recommended the customer maintain the following spare parts on-hand to... -
Page 185: Chapter 9. Detergent Injection
Detergent Injection ........Overview Introduction This chapter provides the information needed to install and configure the detergent injection system. -
Page 186: Section A. Functional Description
D E T E R G E N T I N J E C T I O N Overview Section A: Functional Description ........Overview Introduction The detergent injection option is only available for use on Aquastorm 200™... -
Page 187: Section B. Configuration
D E T E R G E N T I N J E C T I O N Overview Section B: Configuration ........Overview Introduction Configure software and detergent injection. -
Page 188: Software Configuration
D E T E R G E N T I N J E C T I O N Software Configuration Software Configuration Overview Introduction The Electrovert service person performing installation or the system administrator should configure the machine. After installing a lighted status tower, the system software must be configured to recognize it. - Page 189 D E T E R G E N T I N J E C T I O N Overview Procedure Configure for saponifier operation as follows: 1. Press the menu key on the LCD interface keypad to access configuration screen #1. 2.
- Page 190 D E T E R G E N T I N J E C T I O N Overview Procedure Configure the saponifier low level alarm as follows: 1. Press the menu key on the LCD interface keypad to access configuration screen #1.
-
Page 191: Configure Flow Rates
D E T E R G E N T I N J E C T I O N Configure Flow Rates Configure Flow Rates Introduction The viscosity of the detergent, input water pressure, and the injector nozzle used determine detergent injection flow rates. For concentrations greater than those available with standard nozzles, contact Electrovert for information and quotations. - Page 192 D E T E R G E N T I N J E C T I O N Configure Flow Rates T able 2: Injection Rates MAXIMUM MINIMUM INJECTION IMPERIAL INJECTION RATES RATES Viscosity (CPS) Injection Rate (GPM) 0.86 0.52 0.28 0.092 0.048...
-
Page 193: Saponifier Delivery Set Up
D E T E R G E N T I N J E C T I O N Saponifier Delivery Set Up Saponifier Delivery Set Up Introduction Printed Circuit Boards (PCB) processed using rosin based flux require a saponifier in the cleaning process. The ratio of saponifier to water in the wash module has a direct affect on the quality of PCB cleaning. - Page 194 D E T E R G E N T I N J E C T I O N Saponifier Delivery Set Up Photograph Figure 9–5 shows the detergent injector, tubing, strainer, and connections. Vinyl Tubing Injector Inlet Metering Screw Venturi Housing Stainless Steel Strainer Figure 9–5 Procedure...
-
Page 195: Cascade Set Up
D E T E R G E N T I N J E C T I O N Cascade Set Up Cascade Set Up Introduction When cleaning rosin flux applications using saponifiers, ensure chemicals are kept separated. Adjust the cascade pipe ball valve as described. There are several procedures required to complete cascade setup. - Page 196 D E T E R G E N T I N J E C T I O N Cascade Set Up Photograph Prewash Cascade Open Position Prewash Drain Closed Position Figure 9–7 Procedure Prepare system for cascade setup and configure the prewash section: 1.
- Page 197 D E T E R G E N T I N J E C T I O N Cascade Set Up Photograph Chemical Isolation 45 ° Slightly Open Position Recirculating Rinse to Recirculating Wash Closed Position Figure 9–8 Procedure Set up the recirculating wash and optional chemical isolation sections: 1.
-
Page 198: Section C. Preventive Maintenance
D E T E R G E N T I N J E C T I O N Overview Section C: Preventive Maintenance ........Overview Introduction A strong preventive maintenance program is the best method to cut costs,... -
Page 199: General Cleaning
D E T E R G E N T I N J E C T I O N General Cleaning General Cleaning Introduction The maintenance process is broken down into several procedures. Refer to the specific procedure for details on the required maintenance. Visual inspection of the saponifier unit should be part of the standard daily maintenance procedures. -
Page 200: Clean Vinyl Tubing And Strainer
D E T E R G E N T I N J E C T I O N Clean Vinyl Tubing and Strainer Clean Vinyl Tubing and Strainer Introduction The detergent injection system requires quarterly maintenance unless saponifier is changed or PCB cleaning quality declines. Safety To ensure personal safety and avoid equipment damage observe the following: ATTENTION... - Page 201 D E T E R G E N T I N J E C T I O N Clean Vinyl Tubing and Strainer Procedure Refer to the following steps to access the vinyl tubing: 1. Shut down Aquastorm™ system operation. 2.
-
Page 202: Drain Tank And Check Low Level Sensor
D E T E R G E N T I N J E C T I O N Drain Tank and Check Low Level Sensor Drain Tank and Check Low Level Sensor Introduction During routine quarterly maintenance drain the saponifier from the detergent injection storage tank and clean the tank and float switch. - Page 203 D E T E R G E N T I N J E C T I O N Drain Tank and Check Low Level Sensor Materials required Use the following materials for cleaning: • MSDS for saponifier used • Clean facility water Procedure Use the following steps to empty and clean the detergent storage tank: 1.
-
Page 204: Fill Tank And Resume System Operation
D E T E R G E N T I N J E C T I O N Fill Tank and Resume System Operation Fill Tank and Resume System Operation Introduction After performing quarterly maintenance on the detergent storage tank, return the tank to the prewash storage area and fill it with saponifier. -
Page 205: Chapter 10. Resistivity Monitor
Resistivity Monitor ........Overview Introduction This chapter provides the information needed to install and configure the Aquastorm™... -
Page 206: Section A. Functional Description
R E S I S T I V I T Y M O N I T O R Overview Section A: Functional Description ........Overview Introduction The Myron L 753 type resistivity meter displays an accurate digital readout of... - Page 207 R E S I S T I V I T Y M O N I T O R Overview Photograph Figure 10–2 shows the lower floor bulkhead and plumbing lines of the Aquastorm™ final rinse section, identifies the resistivity probe location, and shows a close-up view of the resistivity probe.
-
Page 208: Section B. Configuration
R E S I S T I V I T Y M O N I T O R Overview Section B: Configuration ........Overview Introduction This section provides the steps necessary to configure the Aquastorm™... -
Page 209: Software Configuration
R E S I S T I V I T Y M O N I T O R Software Configuration Software Configuration Introduction The Electrovert service person performing installation or the system administrator should configure the machine. After installing a resistivity monitor, the system software must be configured to recognize it. - Page 210 R E S I S T I V I T Y M O N I T O R Software Configuration Procedure Configure the Aquastorm™ software to recognize the resistivity monitor as follows 1. Press the menu key on the LCD interface keypad to access configuration screen #1.
- Page 211 R E S I S T I V I T Y M O N I T O R Software Configuration Procedure Configure the resistivity low level alarm as follows: 1. Press the menu key on the LCD interface keypad to access configuration screen #1.
-
Page 212: Calibrate Resistivity Monitor
R E S I S T I V I T Y M O N I T O R Calibrate Resistivity Monitor Calibrate Resistivity Monitor Introduction When purchased with a new system, the resistivity meter minimum and maximum resistivity readings between the meter and the Aquastorm™ control panel are set at the factory. - Page 213 R E S I S T I V I T Y M O N I T O R Calibrate Resistivity Monitor Procedure Use the following steps to prepare the system: 1. Turn Aquastorm™ system Off. 2. Remove front and rear access panels from the entrance end of the system and set aside.
-
Page 214: Section C. Preventive Maintenance
R E S I S T I V I T Y M O N I T O R Overview Section C: Preventive Maintenance ........Overview Introduction A strong preventive maintenance program is the best method to cut costs,... - Page 215 R E S I S T I V I T Y M O N I T O R Overview Photograph Figure 10–7 shows the rear final rinse bulkhead floor and identifies the resistivity probe location. Resistivity Probe Figure 10–7 Procedure Perform the following routine maintenance: 1.
-
Page 216: Section D. Recommended Spares
R E S I S T I V I T Y M O N I T O R Spare Parts List Section D: Recommended Spares ........Spare Parts List Introduction It is recommended the customer maintain the following spare parts on-hand to... -
Page 217: Chapter 11. Hurricane Jets™ And Pumps
Hurricane Jets™ and Pumps ........Overview Introduction This chapter provides information regarding the Aquastorm™... -
Page 218: Section A. Functional Description
H U R R I C A N E J E T S ™ A N D P U M P S Overview Section A: Functional Description ........Overview Introduction The wash module on all Aquastorm™... - Page 219 H U R R I C A N E J E T S ™ A N D P U M P S Overview Photographs Figure 11–3 shows the dual Hurricane Jet™ nozzle locations and operation. Upper Hurricane Jet™ Spray Action Upper Hurricane Jet™...
-
Page 220: Section B. Installation Overview
H U R R I C A N E J E T S ™ A N D P U M P S Overview Section B: Installation Overview ........Overview Introduction Wash module nozzle plumbing mounts in the rear wash section of the machine. - Page 221 H U R R I C A N E J E T S ™ A N D P U M P S Overview Installation Overview Installation of an upper, single Hurricane Jet™ nozzle or dual Hurricane Jet™ nozzles involves the addition, replacement, and adjustment of several items. Add the following items Replace the following items Single or dual Hurricane Jet™...
-
Page 222: Section C. Configuration
H U R R I C A N E J E T S ™ A N D P U M P S Overview Section C: Configuration ........Overview Introduction This section describes the configuration and theory of operation for the Hurricane... -
Page 223: Software Configuration
H U R R I C A N E J E T S ™ A N D P U M P S Software Configuration Software Configuration Introduction The Electrovert service person performing installation or the system administrator should configure the machine. After installing a single or dual Hurricane Jet™... - Page 224 H U R R I C A N E J E T S ™ A N D P U M P S Software Configuration Configuration Configure the Hurricane Jet™ nozzle as follows Procedure 1. Press the menu key on the LCD interface keypad to access configuration screen #1.
-
Page 225: Theory Of Operation
H U R R I C A N E J E T S ™ A N D P U M P S Theory of Operation Theory of Operation Introduction The single, upper Hurricane Jet™ provides a vertical sheet of high pressure water across the entire width of the conveyor toward the top of the Printed Circuit Board (PCB). - Page 226 H U R R I C A N E J E T S ™ A N D P U M P S Theory of Operation Photographs Figure 11–6 shows the rear prewash and wash section and close-up of a single Hurricane Jet™...
-
Page 227: Section D. Preventive Maintenance
H U R R I C A N E J E T S ™ A N D P U M P S Overview Section D: Preventive Maintenance ........Overview Introduction A strong preventive maintenance program is the best method to cut costs,... -
Page 228: General Cleaning
H U R R I C A N E J E T S ™ A N D P U M P S General Cleaning General Cleaning Introduction The maintenance process is broken down into several procedures. Refer to the specific procedure for details on the required maintenance. Visual inspection of nozzles and their operation should be part of the standard daily maintenance procedures. -
Page 229: Stop System Operation
H U R R I C A N E J E T S ™ A N D P U M P S Stop System Operation Stop System Operation Introduction Prior to beginning preventive maintenance shut down system operation and turn Off water inlet lines. -
Page 230: Remove Single/Upper Nozzle
H U R R I C A N E J E T S ™ A N D P U M P S Remove Single/Upper Nozzle Remove Single/Upper Nozzle Introduction The single or upper wash or rinse Hurricane Jet™ periodically becomes clogged with debris such as solder balls, polypropylene or CPVC particles, silicone and other foreign debris. - Page 231 H U R R I C A N E J E T S ™ A N D P U M P S Remove Single/Upper Nozzle Photograph Figure 11–11 shows the direction to turn the 10 x 32 cap screw to loosen it in preparation to remove the outer cover from the Hurricane Jet™...
-
Page 232: Reinstall Upper/Single Nozzle
H U R R I C A N E J E T S ™ A N D P U M P S Reinstall Upper/Single Nozzle Reinstall Upper/Single Nozzle Introduction After cleaning the nozzle and orifice, reinstall the upper Hurricane Jet™ nozzle. Safety To avoid equipment damage observe the following: ATTENTION... - Page 233 H U R R I C A N E J E T S ™ A N D P U M P S Reinstall Upper/Single Nozzle Photograph Figure 11–13 shows the direction to turn the 10 x 32 cap screw after replacing the outer cover onto the Hurricane Jet™...
-
Page 234: Remove Lower Nozzle
H U R R I C A N E J E T S ™ A N D P U M P S Remove Lower Nozzle Remove Lower Nozzle Introduction The lower wash or rinse Hurricane Jet™ periodically becomes clogged with debris such as solder balls, polypropylene or CPVC particles, silicone and other foreign debris. - Page 235 H U R R I C A N E J E T S ™ A N D P U M P S Remove Lower Nozzle Photograph Figure 11–16 shows the steps to loosen and remove a quick release clamp. Figure 11–17 shows the Hurricane Jet™ outer nozzle. Figure 11–16 Figure 11–17 2-9317-600-00-0...
- Page 236 H U R R I C A N E J E T S ™ A N D P U M P S Remove Lower Nozzle Procedure Refer to the following steps to remove a lower Hurricane Jet™ nozzle: 1. Refer to Figure 11–14 on page 216 as required. Unscrew and disconnect the small quick clamp connecting the nozzle and bulkhead.
-
Page 237: Reinstall Lower Nozzle
H U R R I C A N E J E T S ™ A N D P U M P S Reinstall Lower Nozzle Reinstall Lower Nozzle Introduction After cleaning the nozzle, orifice, manifold, and rear bulkhead reinstall the lower Hurricane Jet™... - Page 238 H U R R I C A N E J E T S ™ A N D P U M P S Reinstall Lower Nozzle Photographs Figure 11–20 shows the Hurricane Jet™ outer nozzle. Figure 11–21 shows the steps to replace and tighten a quick release clamp. Figure 11–20 Figure 11–21 11-220...
- Page 239 H U R R I C A N E J E T S ™ A N D P U M P S Reinstall Lower Nozzle Procedure Refer to Figure 11–19 on page 219 as necessary and perform the following steps to reinstall a lower Hurricane Jet™...
-
Page 240: Nozzle Orifice Cleaning
H U R R I C A N E J E T S ™ A N D P U M P S Nozzle Orifice Cleaning Nozzle Orifice Cleaning Introduction After removing the upper or lower nozzle clean the nozzle orifice. See Remove Single/Upper Nozzle on page 212. - Page 241 H U R R I C A N E J E T S ™ A N D P U M P S Nozzle Orifice Cleaning Procedure Use the following steps to clean the nozzle orifice: 1. Ensure the upper or lower nozzle has been removed for cleaning. See Remove Single/Upper Nozzle on page 212.
-
Page 242: Resume System Operation
H U R R I C A N E J E T S ™ A N D P U M P S Resume System Operation Resume System Operation Introduction After all maintenance procedures are complete, reassemble the machine and resume system operation. Photograph Figure 11–23 shows a ball valve handle in the full On position, parallel to the plumbing line. -
Page 243: Section E. Pumps
H U R R I C A N E J E T S ™ A N D P U M P S Functional Description Section E: Pumps ........Functional Description Introduction The water pump circulates water in the recirculating wash cycle on all systems... -
Page 244: Section F. Recommended Spares
H U R R I C A N E J E T S ™ A N D P U M P S Spare Parts List Section F: Recommended Spares ........Spare Parts List Introduction It is recommended the customer maintain the following spare parts on-hand to... -
Page 245: Chapter 12. Natural Gas Heating
Natural Gas Heating ........Overview Introduction This chapter provides the information needed to connect and configure the Aquastorm™... -
Page 246: Section A. Functional Description
N A T U R A L G A S H E A T I N G Overview Section A: Functional Description ........Overview This section details the gas heating option. -
Page 247: Description
N A T U R A L G A S H E A T I N G Description Description Introduction In certain locations, heating water using natural gas represents a considerable cost savings. To take advantage of this cost savings, Aquastorm™ systems can be configured to use natural gas rather than electricity to heat system water. -
Page 248: Operation
N A T U R A L G A S H E A T I N G Operation Operation Introduction Connect facility water to the natural gas water heater using standard plumbing connections and fittings. Heated water from one (1) natural gas water heater flows into the wash tank and cycles through normal Aquastorm™... -
Page 249: Section B. Safety
N A T U R A L G A S H E A T I N G Overview Section B: Safety ........Overview Introduction Natural gas is a volatile product. -
Page 250: Section C. Installation
N A T U R A L G A S H E A T I N G Plumbing Connections Section C: Installation ........Plumbing Connections Introduction The natural gas water heaters connect to separate wash or rinse water pump... - Page 251 N A T U R A L G A S H E A T I N G Plumbing Connections Photograph Figure 12–3 shows the exit end of an Aquastorm 200™ system connected to two (2) natural gas water heaters. Facility Power System Weir Drain...
-
Page 252: Section D. Configuration
N A T U R A L G A S H E A T I N G Software Configuration Section D: Configuration ........Software Configuration Introduction The Electrovert service person performing installation or the system administrator... - Page 253 N A T U R A L G A S H E A T I N G Software Configuration Configuration Configure the gas heat option as follows Procedure 1. Press the menu key on the LCD interface keypad to access configuration screen #1.
- Page 254 N A T U R A L G A S H E A T I N G Software Configuration 12-236 Aquastorm™ Series Options Guide Rev. 1...
-
Page 255: Chapter 13. Bag Filters
Bag Filters ........Overview Introduction This chapter provides information on the Aquastorm™ bag filter option. In this chapter This chapter consists of the following: Topic... -
Page 256: Section A. Functional Description
B A G F I L T E R S Description Section A: Functional Description ........Description Introduction When particle contamination directly affects the cleaning process, bag filters... -
Page 257: Section B. Safety
B A G F I L T E R S Safe Operation Section B: Safety ........Safe Operation Introduction To ensure personal safety and avoid equipment damage observe the following:... -
Page 258: Section C. Operation
B A G F I L T E R S Water Filtering Section C: Operation ........Water Filtering Introduction Wash section bag filter cylinders mount in the rear pre-wash section of any... -
Page 259: Section D. Preventive Maintenance
B A G F I L T E R S Overview Section D: Preventive Maintenance ........Overview Introduction This section identifies bag filter preventive maintenance requirements and details... -
Page 260: Maintenance Schedule
B A G F I L T E R S Maintenance Schedule Maintenance Schedule Introduction A strong preventive maintenance program is the best method to cut costs, increase system reliability, and enhance productivity. The time used for cleaning, inspecting, and servicing ensures consistent production quality and increases the extended service life of the machine. -
Page 261: Access Bag Filter
B A G F I L T E R S Access Bag Filter Access Bag Filter Introduction At the top of the Aquastorm™ system, open the bag filter access door. Release the bag filter lid to access the filter and mesh basket. Photograph Figure 13–2 displays the wash module bag filter cylinder and lid location. - Page 262 B A G F I L T E R S Access Bag Filter 6. Unscrew the ring lock nut to loosen the lid lock ring. 7. Unlatch the ring lock nut from the lid lock ring. Set it aside in a safe place. 8.
-
Page 263: Remove/Replace Bag Filter
B A G F I L T E R S Remove/Replace Bag Filter Remove/Replace Bag Filter Introduction The felt bag filter is not reusable. During routine preventive maintenance approximately 150 to 200 hours of machine operation, check the bag filter. Remove and replace the filter if it appears damaged or is excessively dirty. - Page 264 B A G F I L T E R S Remove/Replace Bag Filter Procedure Use the following steps to remove/replace the bag filter: 1. Squeeze the plastic handles of the felt bag filter together to remove it from the mesh basket. 2.
-
Page 265: Clean Mesh Basket
B A G F I L T E R S Clean Mesh Basket Clean Mesh Basket Introduction When removing the bag filter from the mesh basket, check the basket for debris. If necessary, remove the basket and flush it of debris. Safety To ensure personal safety and avoid equipment damage observe the following: CAUTION... - Page 266 B A G F I L T E R S Clean Mesh Basket Procedure Use the following steps to remove and clean the mesh filter: 1. Grab the mesh basket handle and slide the basket up and out of the bag filter cylinder through the top bulkhead of the Aquastorm™...
-
Page 267: Resume System Operation
B A G F I L T E R S Resume System Operation Resume System Operation Introduction When preventive maintenance procedures are complete, prepare the system to resume operation. Safety To ensure personal safety and avoid equipment damage observe the following: CAUTION Failure to properly latch and tighten the bag filter lid in place can result in damage to the equipment and excessive water leakage. -
Page 268: Section E. Recommended Spares
B A G F I L T E R S Spare Parts List Section E: Recommended Spares ........Spare Parts List Introduction It is recommended the customer maintain the following spare parts on-hand to... -
Page 269: Chapter 14. Dryer Add-On Modules
Dryer Add-On Modules ........Overview Introduction This chapter provides the information needed to install and configure the Aquastorm™... -
Page 270: Overview
D R Y E R A D D - O N M O D U L E S Overview Section A: Dryer Add-On Modules ........Overview Introduction This section describes the additional dryer modules available for Aquastorm™... -
Page 271: Add-On Dryer Specifications
D R Y E R A D D - O N M O D U L E S Add-On Dryer Specifications Add-On Dryer Specifications Introduction Aquastorm 100™ and Aquastorm 200™ systems can add a single drying module or a dual drying module to enhance drying capabilities.The single drying module is referred to as Dryer #3. - Page 272 D R Y E R A D D - O N M O D U L E S Add-On Dryer Specifications Photograph Figure 14–1 shows the front and back views of an Aquastorm 200™ with a single add-on dryer module installed. Figure 14–1 14-254 Aquastorm™...
- Page 273 D R Y E R A D D - O N M O D U L E S Add-On Dryer Specifications Photograph Figure 14–2 shows the front and rear views of a dual dryer Aquastorm™ system. Figure 14–2 2-9317-600-00-0 Aquastorm™ Series Options Guide 14-255...
-
Page 274: Dryer #3 Module
D R Y E R A D D - O N M O D U L E S Dryer #3 Module Dryer #3 Module Dryer #3 Dryer module #3 specifications: • Add-on width of 762 mm (30 in.) • One (1) 254 mm (10 in.) top bulkhead exhaust port •... -
Page 275: Dryer #4 Module
D R Y E R A D D - O N M O D U L E S Dryer #4 Module Dryer #4 Module Dryer #4 Dryer module #4 specifications: • Add-on width of 762 mm (60 in.) • One (1) 254 mm (10 in.) top bulkhead exhaust port •... -
Page 276: Section B. Safety
D R Y E R A D D - O N M O D U L E S Overview Section B: Safety ........Overview Introduction During additional dryer installation ensure the following safety practices are in... -
Page 277: Section C. Installation
D R Y E R A D D - O N M O D U L E S Overview Section C: Installation ........Overview Introduction This section describes the steps required to connect an additional dryer module to... -
Page 278: Installation Overview
D R Y E R A D D - O N M O D U L E S Installation Overview Installation Overview Introduction The sound enclosure and utility sink unit is welded on the exit end of the machine. In a field installation, prior to installing a single or dual add-on dryer module the field service representative must perform the following tasks: •... -
Page 279: Install Dryer Module
D R Y E R A D D - O N M O D U L E S Install Dryer Module Install Dryer Module Introduction Prior to installing a single or dual dryer module, remove the exit end sound enclosure and utility sink unit. Safety To ensure personal safety and avoid equipment damage observe the following: CAUTION... - Page 280 D R Y E R A D D - O N M O D U L E S Install Dryer Module Drawing Figure 14–5 shows the steps for bolting on a single add-on dryer to the end of an Aquastorm™ system. Rear Alignment Point Aluminum...
- Page 281 D R Y E R A D D - O N M O D U L E S Install Dryer Module Procedure Refer to the following steps to prepare the single or dual add-on dryer for installation: 1. Ensure the exit end sound enclosure and utility sink unit has been removed and set aside in a safe place.
-
Page 282: Install Sound Enclosure
D R Y E R A D D - O N M O D U L E S Install Sound Enclosure Install Sound Enclosure Introduction After installing a single or dual add-on dryer module the field service representative must perform the following tasks: •... - Page 283 D R Y E R A D D - O N M O D U L E S Install Sound Enclosure Tools and materials Use the following tools and materials to install the sound enclosure: • Forklift or rigging device •...
-
Page 284: Finish Installation
D R Y E R A D D - O N M O D U L E S Finish Installation Finish Installation Introduction After installing a single or dual add-on dryer module and replacing the sound enclosure and utility sink unit the field service representative must perform the following tasks: •... -
Page 285: Software Configuration
D R Y E R A D D - O N M O D U L E S Software Configuration Section D: Configuration ........Software Configuration Introduction The Electrovert service person performing installation or the system administrator... - Page 286 D R Y E R A D D - O N M O D U L E S Software Configuration Configuration Configure the additional dryer unit as follows: Procedure 1. Press the page down key once to display configuration screen #2. 2.
-
Page 287: Section E. Preventive Maintenance
D R Y E R A D D - O N M O D U L E S Maintenance Schedule Section E: Preventive Maintenance ........Maintenance Schedule Introduction A strong preventive maintenance program is the best method to cut costs,... -
Page 288: Blower Air Filters
D R Y E R A D D - O N M O D U L E S Blower Air Filters Blower Air Filters Introduction Blower air filters remove dirt and debris that passes through the air lines. Periodic blower air filter replacement ensures the dryer air remains clean and free of dirt and debris. - Page 289 D R Y E R A D D - O N M O D U L E S Blower Air Filters Procedure Perform the following steps to shut the system down and access the blower: 1. Shut down Aquastorm™ system operation. 2.
-
Page 290: Section F. Recommended Spares
D R Y E R A D D - O N M O D U L E S Spare Parts List Section F: Recommended Spares ........Spare Parts List Introduction It is recommended the customer maintain the following spare parts on-hand to... -
Page 291: Chapter 15. Dryer Modifications
Dryer Modifications ........Overview Introduction This chapter provides the information needed to connect and configure the CAT, SCAT, and IR Heater options. -
Page 292: Section A. Cat
D R Y E R M O D I F I C A T I O N S Overview Section A: ........Overview Introduction This section describes the Compressed Air Technology (CAT) option used to... -
Page 293: Functional Description
D R Y E R M O D I F I C A T I O N S Functional Description Functional Description Introduction The Compressed Air Technology (CAT) option package mounts in all standard or add-on dryer modules. The CAT option is compatible with systems where the optional CheckMate™... - Page 294 D R Y E R M O D I F I C A T I O N S Functional Description Control Box A control box mounts at the rear of the machine above the dryer section to house the solenoid valve, air pressure regulator valve, and air activation timers. Shop air connects to the solenoid valve then passes through the air pressure valve to the manifold where the CAT flexible tubing nozzles connect.
- Page 295 D R Y E R M O D I F I C A T I O N S Functional Description Photographs Figure 15–4 shows an angle adjust entrance end conveyor and identifies the standard photocell mounting location and the CAT photocell mounting location. CAT Photocell Mounting Location Standard Photocell...
-
Page 296: Timer Access
D R Y E R M O D I F I C A T I O N S Timer Access Timer Access Introduction The process engineer sets the compressed air On and Off timers to ensure the blast of air turns On and turns Off when needed during product processing. The following information is required to set the timers: •... -
Page 297: Timer Configuration
D R Y E R M O D I F I C A T I O N S Timer Configuration Timer Configuration Introduction Access the compressed air On and Off timers. See Timer Access on page 278. Tools Use the following tools to configure the compressed air timers. •... - Page 298 D R Y E R M O D I F I C A T I O N S Timer Configuration Diagram Figure 15–8 shows the system main screen. AQUASTORM 200 MODULE SETP ACTUAL CONVEYOR 7.7 F/min WASH 145F RINSE 150F DRYER_1 DRYER_2 PW_FLOW...
-
Page 299: Preventive Maintenance
D R Y E R M O D I F I C A T I O N S Preventive Maintenance Preventive Maintenance Introduction A strong preventive maintenance program is the best method to cut costs, increase system reliability, and enhance productivity. The time used for cleaning, inspecting, and servicing ensures consistent production quality and increases the extended service life of the machine. -
Page 300: Recommended Spares
D R Y E R M O D I F I C A T I O N S Recommended Spares Recommended Spares Introduction It is recommended the customer maintain the following spare parts on-hand to minimize down time. Table Refer to the following spare parts list: Part Spare Assembly Description... -
Page 301: Section B. Scat
D R Y E R M O D I F I C A T I O N S Overview Section B: SCAT ........Overview Introduction This section describes the Side Connector Air Technology (SCAT) option used to... -
Page 302: Functional Description
D R Y E R M O D I F I C A T I O N S Functional Description Functional Description Introduction The Side Connector Airknife Technology (SCAT) option package installs only in dryer module #1 or add-on dryer module #3. The SCAT adjusts horizontally and vertically to offer additional drying to the sides of a PCB (Printed Circuit Board) as it moves along the conveyor. -
Page 303: Configuration
D R Y E R M O D I F I C A T I O N S Configuration Configuration Introduction As required, the SCAT airknife adjusts vertically by sliding the airknife unit up or down the mounting bracket graduated scale. The direction the airknife blows is also adjustable. - Page 304 D R Y E R M O D I F I C A T I O N S Configuration Photograph Figure 15–11 shows the airknife direction adjustment bracket. SCAT Airknife M5 Flathead Bolt Airknife Direction Adjustment Bracket Quick Clamp Figure 15–11 Procedure Use the following steps to adjust the SCAT airknife direction: 1.
- Page 305 D R Y E R M O D I F I C A T I O N S Configuration Photograph Figure 15–12 shows the rear blower section and identifies the SCAT access door location. SCAT Access Door Figure 15–12 Procedure Use the following steps to access the rear SCAT airknife for vertical adjustment: 1.
-
Page 306: Preventive Maintenance
D R Y E R M O D I F I C A T I O N S Preventive Maintenance Preventive Maintenance Introduction A strong preventive maintenance program is the best method to cut costs, increase system reliability, and enhance productivity. The time used for cleaning, inspecting, and servicing ensures consistent production quality and increases the extended service life of the machine. -
Page 307: Section C. Ir Heater
D R Y E R M O D I F I C A T I O N S Overview Section C: IR Heater ........Overview Introduction This section describes the Infrared (IR) heater option used to the enhance printed... -
Page 308: Functional Description
D R Y E R M O D I F I C A T I O N S Functional Description Functional Description Introduction The radiant heater (IR) incorporates two (2) stainless steel radiant heater panels, one (1) upper panel and one (1) lower panel. A thermocouple sensor provides radiant heater control and digital temperature readout via the LCD keypad. -
Page 309: Safety
D R Y E R M O D I F I C A T I O N S Safety Safety Introduction During the heating process heat from the unit and the unit itself can cause burns. Product becomes hot as well. To avoid burns, use caution in and around the radiant heater unit and product that has just exited the dryer where the radiant heater is located. -
Page 310: Software Configuration
D R Y E R M O D I F I C A T I O N S Software Configuration Software Configuration Introduction The Electrovert service person performing installation or the system administrator should configure the machine. After installing an IR heater, the system software must be configured to recognize it. - Page 311 D R Y E R M O D I F I C A T I O N S Software Configuration Configuration Configure the radiant heater option as follows: Procedure 1. Press the page down key once to display configuration screen #2. 2.
- Page 312 D R Y E R M O D I F I C A T I O N S Software Configuration Procedure Configure the radiant heater high temperature alarm as follows: 1. Press the menu key on the LCD interface keypad to access configuration screen #1.
-
Page 313: Check Ir Heater Temperature
D R Y E R M O D I F I C A T I O N S Check IR Heater Temperature Check IR Heater Temperature Introduction The radiant heater heats the air around product as it moves along the conveyor through the Aquastorm™... -
Page 314: Preventive Maintenance
D R Y E R M O D I F I C A T I O N S Preventive Maintenance Preventive Maintenance Introduction A strong preventive maintenance program is the best method to cut costs, increase system reliability, and enhance productivity. The time used for cleaning, inspecting, and servicing ensures consistent production quality and increases the extended service life of the machine. - Page 315 D R Y E R M O D I F I C A T I O N S Preventive Maintenance Procedure Perform the following steps to shut the system down and access the blower: 1. Shut down Aquastorm™ system operation. 2.
-
Page 316: Repair
D R Y E R M O D I F I C A T I O N S Repair Repair Introduction In the unlikely event a radiant heater panel or thermocouple should fail to properly heat, use the following information to replace the damaged heat panel or thermocouple. - Page 317 D R Y E R M O D I F I C A T I O N S Repair Procedure Use the following steps to replace a radiant heater unit: 7. Use a Phillips screwdriver to remove the four (4) screws holding the radiant heater rear cover in place.
-
Page 318: Recommended Spares
D R Y E R M O D I F I C A T I O N S Recommended Spares Recommended Spares Introduction It is recommended the customer maintain the following spare parts on-hand to minimize down time. Table Refer to the following spare parts list: Part Spare Assembly Description... -
Page 319: Chapter 16. Blower Enhancements
Blower Enhancements ........Overview Introduction This chapter provides information regarding blower enhancements available for the drying sections of all Aquastorm™... -
Page 320: Section A. Air Intake Port
B L O W E R E N H A N C E M E N T S Overview Section A: Air Intake Port ........Overview Introduction This section describes the air intake port option available for the blower sections... -
Page 321: Functional Description
B L O W E R E N H A N C E M E N T S Functional Description Functional Description Introduction The blowers used in the drying sections of Aquastorm™ systems generate heat. Standard system configuration mounts air fans on the rear vertical bulkhead between the final rinse and blower dryer sections of the machine. - Page 322 B L O W E R E N H A N C E M E N T S Functional Description Figure 16–2 shows the top of an Aquastorm system and identifies the 304.8 mm (12 in.) air intake port and standard dryer section exhaust port locations. Standard Exhaust Port Air Intake Port Blower Dryer...
-
Page 323: Preventive Maintenance
B L O W E R E N H A N C E M E N T S Preventive Maintenance Preventive Maintenance Introduction A strong preventive maintenance program is the best method to cut costs, increase system reliability, and enhance productivity. The time used for cleaning, inspecting, and servicing ensures consistent production quality and increases the extended service life of the machine. -
Page 324: Section B. Electrosonic™ Airknives
B L O W E R E N H A N C E M E N T S Overview Section B: Electrosonic™ Airknives ........Overview Introduction Standard tubular airknives can be replaced with teardrop shaped Electrosonic™... -
Page 325: Functional Description
B L O W E R E N H A N C E M E N T S Functional Description Functional Description Introduction Dryer modules contain standard cylindrical airknives configured with two (2) airknives installed above the conveyor belt facing down toward the belt and one (1) airknife installed below the conveyor belt facing up toward the belt. -
Page 326: Preventive Maintenance
B L O W E R E N H A N C E M E N T S Preventive Maintenance Preventive Maintenance Introduction A strong preventive maintenance program is the best method to cut costs, increase system reliability, and enhance productivity. The time used for cleaning, inspecting, and servicing ensures consistent production quality and increases the extended service life of the machine. -
Page 327: Repair
B L O W E R E N H A N C E M E N T S Repair Repair Introduction Electrosonic™ airknife gaps are factory set and normally do not require adjustment. The air slot allows for optimal air delivery depending on blower configuration. - Page 328 B L O W E R E N H A N C E M E N T S Repair Photograph Figure 16–4 shows the front Electrosonic™ airknife torque adjust mounting screw locations. Torque Adjust Mounting Screws Figure 16–4 Procedure Use the following steps to access the Electrosonic™ airknives: 1.
- Page 329 B L O W E R E N H A N C E M E N T S Repair Photograph Figure 16–5 identifies the blower tube mounting Flat Head Screw and Hose Clamp Eight (8) Torque Adjust Mounting Screws Slide Plates Figure 16–5 Procedure 1.
-
Page 330: Section C. Dryer Blower Upgrades
B L O W E R E N H A N C E M E N T S Functional Description Section C: Dryer Blower Upgrades ........Functional Description Introduction Dryer blower motor upgrades increase air flow and pressure to ensure maximum... -
Page 331: Section D. Blower Fail Detect
B L O W E R E N H A N C E M E N T S Overview Section D: Blower Fail Detect ........Overview Introduction The blower fail detect provides an electronic monitor of blower operation. -
Page 332: Functional Description
B L O W E R E N H A N C E M E N T S Functional Description Functional Description Introduction The blower fail detect provides an electronic monitor of blower operation. When a blower motor fails, a blower belt does not work properly or is damaged, or airknives become clogged the blower fail detect activates and initiates a hardware alarm that stops machine operation. -
Page 333: Software Configuration
B L O W E R E N H A N C E M E N T S Software Configuration Software Configuration Introduction The Electrovert service person performing installation or the system administrator should configure the machine. After installing a blower fail detect unit, the system software must be configured to recognize it. - Page 334 B L O W E R E N H A N C E M E N T S Software Configuration Procedure Configure the blower fail detect as follows 1. Press the menu key on the LCD interface keypad to access configuration screen #1.
- Page 335 B L O W E R E N H A N C E M E N T S Software Configuration Procedure Configure the blower fail detect alarm as follows: 1. Press the menu key on the LCD interface keypad to access configuration screen #1.
-
Page 336: Set Point Configuration
B L O W E R E N H A N C E M E N T S Set Point Configuration Set Point Configuration Introduction The blower fail detect unit ships from the factory with the necessary configuration functions preset. Configuration information is provided In the unlikely event the unit requires reconfiguration. - Page 337 B L O W E R E N H A N C E M E N T S Set Point Configuration Shut Down/Start Up Use the following steps prepare for the procedure. Procedure 1. Shut down Aquastorm system operation. 2. Ensure system power is Off. 3.
-
Page 338: Repair
B L O W E R E N H A N C E M E N T S Repair Repair Introduction The operator responds to the blower fail detect alarm as described in the Aquastorm 100™ or Aquastorm 200™ Programming and Operations Guide. The machine maintenance staff checks the blower motor, the blower motor belt, and blower section airknives to locate the source of the blower fail detect alarm. -
Page 339: Access Blower Motor Belt
B L O W E R E N H A N C E M E N T S Access Blower Motor Belt Access Blower Motor Belt Introduction Use the following information to access and replace the blower motor belt. Safety To ensure personal safety and avoid equipment damage, observe the following: CAUTION A qualified electrician or Electrovert service person should perform motor rotation... - Page 340 B L O W E R E N H A N C E M E N T S Access Blower Motor Belt Photograph Figure 16–13 identifies the parts of the blower motor and shows how to remove the blower belt guard cover to access the belt. Motor Head Assembly Blower Belt...
-
Page 341: Remove/Replace The Blower Belt
B L O W E R E N H A N C E M E N T S Remove/Replace the Blower Belt Remove/Replace the Blower Belt Introduction A correctly installed blower belt has an average belt life of 5000 hours and no routine wear or rubbing is apparent on pulleys or other components. - Page 342 B L O W E R E N H A N C E M E N T S Remove/Replace the Blower Belt Photograph Figure 16–15 shows the belt looped around the large wheel and threaded between the pin and smaller wheel. Figure 16–15 Diagrams Figure 16–16 shows correct and incorrect belt installation configurations.
- Page 343 B L O W E R E N H A N C E M E N T S Remove/Replace the Blower Belt Procedure Refer to the previous figures and diagrams as necessary and use the following steps to remove/re-install the blower belt: 1.
-
Page 344: Resume System Operation
B L O W E R E N H A N C E M E N T S Resume System Operation Resume System Operation Introduction When repair procedures are complete, prepare the system to resume operation. Procedure Use the following steps to reconnect the blower motor housing and return the system to operation: 1. -
Page 345: Section E. Recommended Spares
B L O W E R E N H A N C E M E N T S Spare Parts List Section E: Recommended Spares ........Spare Parts List Introduction It is recommended the customer maintain the following spare parts on-hand to... - Page 346 B L O W E R E N H A N C E M E N T S Spare Parts List 16-328 Aquastorm™ Series Options Guide Rev. 1...
-
Page 347: Chapter 17. Sump Pump
Sump Pump ........Overview Introduction This chapter provides the information needed to install and configure the Aquastorm™... -
Page 348: Section A. Functional Description
S U M P P U M P Overview Section A: Functional Description ........Overview Introduction At the time of manufacture, Aquastorm™... -
Page 349: Section B. Installation
S U M P P U M P Sump Pump Installation Section B: Installation ........Sump Pump Installation Introduction When a single Sump Pump option is ordered the sump normally connects to the... - Page 350 S U M P P U M P Sump Pump Installation Diagram Figure 17–2 shows the sump pump installation reference drawing. Install a Union or coupling Here Connect Sump Inlet (1 in. NPTF) to Aquastorm System™ standard " NPTM drain at cabinet exit end in.
- Page 351 S U M P P U M P Sump Pump Installation Procedure Use the following steps to connect the sump pump to the Aquastorm™: 1. If your system has been configured with the sump pump, locate and remove the assembly from the shipment contents. 2.
-
Page 352: Section C. Configuration
S U M P P U M P Overview Section C: Configuration ........Overview Introduction This section provides the steps necessary to configure the Aquastorm™... -
Page 353: Software Configuration
S U M P P U M P Software Configuration Software Configuration Introduction The Electrovert service person performing installation or the system administrator should configure the machine. After installing a sump pump, the system software must be configured to recognize it. The configuration screens interface with the system software. System software may lock up if the operator attempts to configure items that do not exist on the system. - Page 354 S U M P P U M P Software Configuration Configuration Configure the Aquastorm™ software to recognize the sump pump as follows: Procedure 1. Press the menu key on the LCD interface keypad to access configuration screen #1. 2. Press the page down key once to display configuration screen #2. 3.
-
Page 355: Sump Operation Curves
S U M P P U M P Sump Operation Curves Sump Operation Curves Introduction The actual pumping speed of each sump pump is directly affected by the facility electrical rating and the distance between the sump pump and the facility drain. Refer to the following graphs to configure the installation site for optimum operation. - Page 356 S U M P P U M P Sump Operation Curves Figure 17–5 shows the operation graph for the optional 2 HP sump pump unit. 60 Hz Head (Ft.) % Efficiency Flow (US gpm) Figure 17–5 17-338 Aquastorm™ Series Options Guide Rev.
-
Page 357: Section D. Preventive Maintenance
S U M P P U M P Overview Section D: Preventive Maintenance ........Overview Introduction A strong preventive maintenance program is the best method to cut costs,... -
Page 358: General Cleaning
S U M P P U M P General Cleaning General Cleaning Introduction The maintenance process is broken down into several procedures. Refer to the specific procedure for details on the required maintenance. Visual inspection of level sensors, pump, plumbing, electrical connections, and their operation should be part of the standard daily maintenance procedures. -
Page 359: Drain Tank And Check Sensors
S U M P P U M P Drain Tank and Check Sensors Drain Tank and Check Sensors Introduction During routine quarterly maintenance drain the effluent from the sump pump tank and clean the tank and float switches. Safety To ensure personal safety and avoid equipment damage observe the following: ATTENTION If any damage is discovered or the sump pump fails to operate properly, discontinue use and contact Electrovert technical support. - Page 360 S U M P P U M P Drain Tank and Check Sensors Materials required Use the following materials for cleaning: • MSDS for any chemicals used • Clean facility water Procedure Use the following steps to empty and clean the sump pump tank: 1.
-
Page 361: Section E. Recommended Spares
S U M P P U M P Spare Parts List Section E: Recommended Spares ........Spare Parts List Introduction It is recommended the customer maintain the following spare parts on-hand to... - Page 362 S U M P P U M P Spare Parts List 17-344 Aquastorm™ Series Options Guide Rev. 1...
- Page 363 Index ........Remove Belt Guard Cover 322 Remove Blower Belt 323 Add-On Dryer Modules 38, 251 Blower Upgrades...
- Page 364 Lubricate Turn Shaft Bearing Blocks 111 Overview 25, 77 Electrical Photocell 101 Aquastorm 100™ Specifications 20 Preventive Maintenance 109 Aquastorm 200™ Specifications 21 Recommended Spares 132 Aquastorm 90™ Specifications 19 Repair 124 Lock-Out Tag-Out 12, 16 Wire Belt Set Up 86 Electrical Hazard 12, 15, 50, 65, 70, 72, Wire Belt Splicing 125 74, 83, 194, 318...
- Page 365 View Menu 139 Recommended Spares 132 Footprint Drawings Software Configuration 90, 105 Optional Sump Pump 332 Wire Belt Splicing 125 IR Heater Alarm Set Up 293 Functional Description 290 Good Housekeeping 9 Overview 42, 289 Preventive Maintenance 296 Recommended Spares 300 Hazards Repair 298 Breathing 6...
- Page 366 Main Power Switch 14 Dryer Blower Upgrades 301, 312 Maintenance Schedule Dryer Modifications 39, 273 Air Intake Port 305 Electrosonic™ Airknives 45, 301 Bag Filters 242 Exit Conveyor Extension 26, 78 CAT Package 281 Flow Meters 29, 133 CheckMate™ Conveyor 109 Hurricane Jet™...
- Page 367 Plumbing 8 Entanglement 5 Precautions 154, 239, 245, 247, 330 Fire Extinguisher 8 Preventive Maintenance Flammables 8 Air Intake Port 305 Good Housekeeping 9 Bag Filters 241 Hazard List 2 CAT Package 281 Heavy Object 7 CheckMate™ Conveyor 109 Hot Surface 3 Detergent Injection 180 Lock-Out Tag-Out 8, 10, 12, 16 Dryer Add-On Modules 269...
- Page 368 Spare Parts List Bag Filters 250 Technical Data CAT Package 282 Air Intake 44, 303 Conveyor Enhancements 132 Compressed Air Requirements 40, 275 Dryer Add-On Modules 272 Exhaust Requirements 38, 44 Flow Meters 151 Overview 17 Hurricane Jet™ Nozzles 226 Tools and Materials 65, 70, 72, 74, 81, 85, IR Heaters 300 88, 95, 112, 113, 118, 120, 122,...
Need help?
Do you have a question about the ELECTROVERT Aquastorm and is the answer not in the manual?
Questions and answers