
Subscribe to Our Youtube Channel
Summary of Contents for Vision Plus VP-8865KE
- Page 1 65-EUUB00-E135 TWBZ-01-1907-0204 LED COLOR TV Operating Instruction Model: VP-8865KE Please read these instructions before operating your set and retain them for future reference. EUUB00-E135...
- Page 2 LED COLOR TV Operating Instruction Model: VP-8865KE Please read these instructions before operating your set and retain them for future reference. EUUB00-E135...
- Page 3 PRECAUTION...
- Page 4 WARNING Never place a television set in an unstable location. A television set may fall, causing serious personal injury or death. Many injuries,particularly to children, can be avoided by taking simple precautions such as: Using cabinets or stands recommended by the manufacturer of the television set. Only using furniture that can safely support the television set.
- Page 5 CAUTION Danger of explosion if battery is incorrectly replaced. Replace only with the same or equivalent type. Batteries shall not be exposed to excessive heat such as sunshine, fire or the like. Used batteries should not be thrown into the garbage can, please leave them at an appropriate depot.
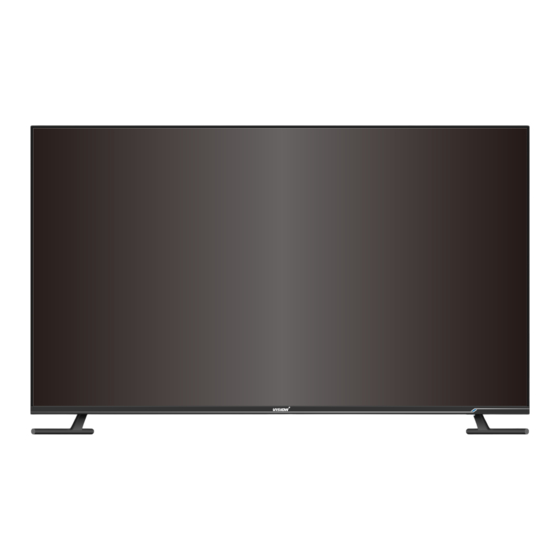
- Page 6 Place the TV on a firm and flat surface,leaving a space of at lease 10cm around the set and 30cm from the top of the set to the wall or cabinet.Ensure the TV is positioned close to the wall to avoid it falling when pushed. 10cm 30cm 10cm...
-
Page 7: Table Of Contents
LED COLOR TV CONTENTS 1. Connection and Preparation of TV..........1.1 Accessories ................1.2 Installation of Stand..............1.3 Keys and Interfaces..............1.4 Remote Control............... 1.5 Installation of Batteries............2. Basic Operation................2.1 Power ON/OFF(Optional) ............5 2.2 Setting of Standby Mode............2.3 Input Source ................. -
Page 8: Connection And Preparation Of Tv
LED COLOR TV 1.Connection and Preparation of TV 1.1 Accessories User Manual Remote Control Battery(UM-4/R03P/AAA) Wall Mount Kit (Pre-assembled)(Optional) 1.2 Installation of Stand (For the physical structure, please refer to the real object) 1 Place the TV with the front panel facing downwards on the soft cloth or soft pads on a desk. -
Page 9: Keys And Interfaces
LED COLOR TV 1.3 Keys and Interfaces The design and specification takes actual products as the standard 1. Remote sensor window 2. Power indicator Standby key 3. Speaker 4. Power plug input 5. USB2 6. USB1 7.RJ45 8.HDMI2 9.HDMI1 10.RF input 11.OPTICAL 12.MINI AUDIO input 13.MINI VIDEO input/YPBPR input... -
Page 10: Remote Control
LED COLOR TV 1.4 Remote Control (Here is only the sketch, please in kind prevail) 1. INPUT: This button is used to switch among different sources. Select a source and press OK button to confirm. 2. POWER: Press this button to switch to standby mode, and press it again to turn TV on. -
Page 11: Installation Of Batteries
LED COLOR TV 1.5 Installation of Batteries (Here is only the sketch, please in kind prevail) 1 Open the back lid of the remote control. 2 Install two 7#(AAA)1.5V batteries. Ensure the correct polarity of the batteries. 3 Cover the back lid. Please take out of the batteries from the remote control for long time of no use. - Page 12 2.3 Basic Operation Setup Wizard When first boot the TV, you will enter the TV guide system. OSD Language Setting Welcome English START 1. Press ▲/▼ key to select the language. 2. Press ► key then press “START” button to enter the home page. Country Setting Setup your country Algeria...
-
Page 13: Basic Operation
Basic Operation Setup Wizard Network Settings Setup your network Skip Wireless Wired NEXT STEP 1. Press ▲/▼ key to select the type of your network(Skip/wired/wireless). 2. Press ► key then press “NEXT STEP” button to enter the next step. Setup Wifi 1. - Page 14 Basic Operation Setup Wizard Setup Wired network Setup wired network DHCP STATIC NEXT STEP 1. Press ▲/▼ key to select the type of your set up the way(DHCP/STATIC). 2. Press ► key then press “NEXT STEP” button to enter the next step.
- Page 15 Basic Operation Setup Wizard MENU OPERATION Arrow buttons: Select an item on the menu. OK button: Enter the options which you've selected. 1. Google Search 2. Current Time 3. What's hot: Hot Video on Internet. 4. Featured app: featured apps on Internet for TV. 5.
- Page 16 Basic Operation Setup Wizard Quick Menu Quick Menu Image Sound Program Edit Audio Language Subtitle Language No Signal In TV source, there is a Quick Menu for some Options you may want to use. MENU button: Open the Quick menu or Exit the menu. BACK button: Exit the menu.
- Page 17 2.4 Menu system instruction Setting Preferences Network System sounds Manage apps Storage & reset Display Date & time: You can make the adjustment of the date and time; Language: You can change the language that you need; Keyboard: Configure of the keyboard; Search: Google search;...
-
Page 18: Menu System Instruction
Menu system instruction Image Backlight Adjust Backlight. 1. Press ▲/▼ key to select “Backlight” option. 2. Press ◄/► key to adjust Backlight value. Aspect Ratio You can select the picture size which best corresponds to your viewing requirement. 1. Press ▲/▼ key to select “Aspect Ratio” option. 2. - Page 19 Menu system instruction Menu system instruction Sound Equalizer 120HZ 500HZ 1.5KHZ 5KHZ 10KHZ No Signal BACK Back MENU Exit 1. Press ▲/▼ key to select an equalizer item. 2. Press OK key to enter the equalizer submenu. The sound settings can be adjusted to suit your user preferences. 1.
- Page 20 Menu system instruction Menu system instruction Sound HDMI Sound This option is only used in HDMI mode. 1. Press ▲/▼ key to select "HDMI Sound" option. 2. Press ◄/► key to select HDMI Sound mode, HDMI or VGA. Note: HDMI Sound is just enabled in source HDMI. This option is only used in DTV mode.
- Page 21 Menu system instruction Channel Auto Tuning Auto Tuning DTV+ATV Service Type Belgium France Italy Spain Turkey Algeria Egypt ATV: DTV: RADIO: DATA: Skip MENU BACK Exit No Signal Press ▲/▼ key to select "Auto Tuning" option. You can select country in the list view and set "Search Type"...
- Page 22 Menu system instruction Channel ATV Manual Tuning ATV Manual Tuning ATV Manual Tuning 62.25MHZ 62.25MHZ Fine Tune Start Search Color System Fine Tune Sound System Skip In the ATV/DTV source, you can choose "ATV Manual Tuning" to enter "ATV Manual uning" menu. Current CH: You can see the current channel number and you can press ◄/►button to choose the channel you want to modify.
- Page 23 Menu system instruction Menu system instruction Program Program Program Edit Program Edit No Signal Delete Skip Lock Move You can use ▲/▼ button to choose "Program Edit" and enter the menu, press the color button on the remote control to skip, delete and lock programs, or add programs to your favorite list. Delete: You can press RED button to delete the selected channel, then choose the channel you want to delete and press RED button again to delete.
- Page 24 Menu system instruction Program Signal Information (Used only in DTV) Signal Information Sof tware Version Channel Frequency Nine Melb Network Transport stream 1072 Service 1074 Modulation 64QAM Signal Strengh: Signal Quality: 1. Press ▲/▼ key to select "Signal Information" option. 2.
- Page 25 Menu system instruction Function Lock System PVR Option OSD Time 15 Seconds Screen Saver No signal standby No Signal BACK Back MENU Exit OSD Time: Set the preferred amount of time for the OSD to be displayed on the screen. Lock (Optional) Lock System Parental Control...
- Page 26 Menu system instruction Function Set Password Lock System Parental Control Input Password: Set Password Old Password New Password Comfirm Password No Signal BACK Back MENU Exit 1. Press “OK” key to select "Set Password" option. 2. Enter your 4-digit password to set the old password. Choose any 4-digits for your new password and enter them.
- Page 27 Menu system instruction Function Consumer Electronics Control (CEC) is an HDMI feature designed to allow the user to command and control up-to 15 CEC - enabled devices ,that are connected through HDMI, by using only one of their remote controls (for example by controlling a television set, set-top box, and DVD player using only the remote control of the TV).
- Page 28 Menu system instruction Function CEC Control Auto Standby Auto Power on CEC Control Power Root Menu CEC Control Setup Menu Device List Menu No Signal BACK Back MENU Exit This option enables the TV to control the device linked to it. 1.
- Page 29 Menu system instruction Function No Signal StandBy 1. Press ▲/▼ button to select “No Signal StandBy” option. 2. Press ◄/► button to choose “On” or “Off”. If set “On”, TV will auto standby after 10 minutes in “No Signal” states. (In VGA mode, if no any operation 15 seconds later, TV will enter standby mode.) HDMI Edid Mode (Optional) This option is only used in HDMI mode.
- Page 30 Menu system instruction Time Time On Timer Timers On timer On timer Timer 12:30 PM Inputs In "On Timer” item, press OK button to enter the submenu, set the time to turn on the TV set, when the TV set is in the standby mode. You can set a desired source to be displayed automatically when you start TV in "Source"...
- Page 31 Menu system instruction Time Time Sleep Timer Timers Sleep timer 10 minutes 20 minutes 30 minutes 60 minutes 1. Press ▲/▼key to select "Sleep Timer" option. 2. Press ◄/► key repeatedly until the desired time appears (Off, 10min, 20min, 30min, 60min, 90min, 120min, 180min, 240min).
- Page 32 Menu system instruction Select Disk: Press "OK" button to enter submenu and press "◄/►" to choose the disk for PVR. Time Shift Size: Press ◄/► to choose the size. Format Disk: Press "OK" button to enter format submenu. The disk must be formatted when first used for PVR.
- Page 33 Menu system instruction DTV EPG (Electronic Program Guide) Add record Channel CH 90 Nine Digital HD Minute Hour Period Month Date End time Minute Hour Period Month Date Repeat Once In DTV mode, press "GUIDE" button to enter the Electronic Program Guide. At Guide menu, press "RED"...
-
Page 34: Technical Specification
LED COLOR TV 3.Technical Specification VP-8865KE Product Model 65 diagonal Screen Size 16:9 Aspect Ratio AC 100-240V~,50/60Hz Power Supply 220W Power Consumption TV System PAL B/G D/K I,SECAM B/G D/K DVB-T/C/T2(T2 Optional) (There is no DVB-C signal in some Countries or Areas.) -
Page 35: Supported Signal Modes
LED COLOR TV 4. Supported Signal Modes A.YPbPr Mode Resolution Horizontal Frequency (Khz) Vertical Frequency (Hz) 480i 15.734 59.94 480p(720x480) 31.468 59.94 576i 15.625 50.00 576p(720x576) 31.25 50.00 720p(1280x720) 37.50 50.00 45.00 60.00 1080i 28.13 50.00 33.75 60.00 1080p(1920x1080) 67.50 60.00 56.25 50.00... -
Page 36: Simple Troubleshooting
LED COLOR TV 5. Simple Troubleshooting If the display fails or the performance changes dramatically, check the display in accordance with the following instructions. Remember to check the periphe rals to pinpoint the source of the failure. Symptom Solution Power cannot be turned -Check that both ends of the power cable are on.(Power indicator plugged into the socket appropriately and the wall...
Need help?
Do you have a question about the VP-8865KE and is the answer not in the manual?
Questions and answers