Table of Contents
Advertisement
Quick Links
Advertisement
Table of Contents

Related Manuals for 1byone 103NA-0001


Summary of Contents for 1byone 103NA-0001
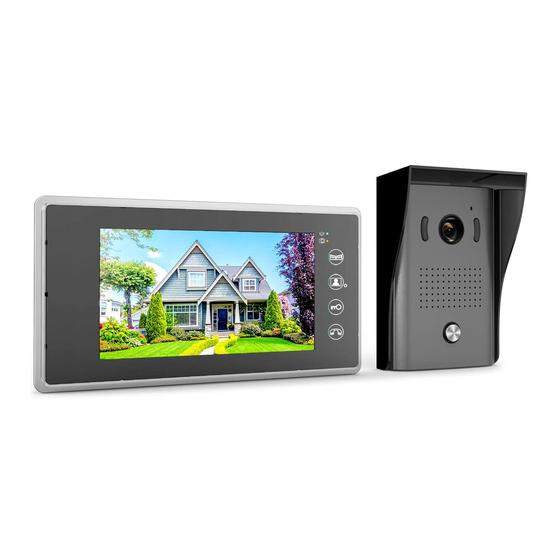
- Page 1 1byone Products Inc. www.1byone.com COLOR VIDEO DOORPHONE KIT SKU: 103NA-0001...
- Page 2 1 x Instruction Manual 2 x 49ft (15m) Cables 1 x Hex Wrench If any package contents are visibly damaged or missing, please immediately contact 1byone Support Center at https://www.1byone.com/support for assistance. 0.24in (6mm) Tools needed, but not included, for installation of the video doorbell:...
-
Page 3: Part Names
Part Names Power LED Monitoring LED Menu Quit Gate Door Open Down Monitor Unlock Talk Volume Button 7〞 TFT LCD Screen SD Card Slot Microphone Speaker Connectors Power Terminal Mircophone IR LED Camera Connectors Speaker Volume Adjuster Calling Button... - Page 4 Installing the Outdoor Video Doorbell 1.Mount the rain cover to the wall with screws. 3.15in (80mm) ø 0.24in (6mm) 2. Remove the screw at the bottom of the outdoor video doorbell using the supplied hex wrench and remove the front cover.
- Page 5 3. Connect the outdoor doorbell wires and adjusting doorbell talk volume. 1 2 3 4 5 6 Wiring instructions: Terminal 1 and Terminal 2 connect to Terminal 1 and 2 on the indoor monitor. Terminal 3 and Terminal 4 can connect to an Electric Lock with voltage ≤12V and current ≤1A.
- Page 6 4. Attach the main body of the outdoor video doorbell to the rain cover. Please do not install the camera facing directly into sunlight or in a location that gets very wet when raining. Reattach the front cover and insert the screw at the bottom of the outdoor video doorbell. Tighten the screw using the supplied hex wrench.
- Page 7 Wiring the Indoor Monitor Terminals 1 and 2 connect to outside doorbell Terminals 3 and 4 connect to additional indoor monitor (8-1) (8-2) (8-4) (8-3) Wiring instructions: Terminal 1 and Terminal 2 on first indoor monitor connect to Terminal 1 and Terminal 2 on the outside doorbell.
- Page 9 Wiring Diagrams and Recommended Cables Lock 1 2 3 4 5 6 Power Gate Lock Indoor Monitor A Outdoor Video Doorbell Indoor Monitor B...
- Page 10 Lock 1 2 3 4 5 6 Power Gate Lock Indoor Monitor A Outdoor Video Doorbell Indoor Monitor B Recommended cables based on wiring distances: • 3.2-164in (1-50m) - 0.03in2 (0.75mm2) • 164-328in (50-100m) - 0.06in2 (1.5mm2) • 100 meters is maximum recommended wiring distance...
- Page 11 Hot To Use 1. Adjusting ‘Talk’ volume: 2. Selecting melodies and adjusting melody volume: Melodies: Press and hold the “Monitor” button for 4 seconds until the ‘BEEP’ is heard. Then select tones by pressing the “Monitor” button. Press the “Door Open” button to confirm. Melody volume: Press and hold the “Monitor”...
- Page 12 The host can speak with the visitor by Press the “Unlock” button to open the pressing the “Talk” button on the indoor door for the visitor (using a monitor. Press “Talk” a second time to purchased Electric Lock). turn off the monitor. Press the “Gate Door Open”...
- Page 13 5. OSD Settings and Operation 5.1 Setting monitor language: Select from English, Italian, Spanish, Portuguese, French, Dutch, Greek, and Polish. Setup Setup Brightness Language English Contrast Mode Photo + Video Date YYYY - MM - DD Time 00 : 19 OK = 5.2 Photos and video settings: The outdoor doorbell’s camera will automatically take a photo when a visitor...
- Page 14 Browsing Photos Photo Photos View View Delete Delete Copy Copy YYYY/MM/DD HH:MM:SS Deleting Photos Photo Photos View View Delete Delete Copy Copy Delete ? For photos stored in internal memory, the oldest previous photos will be automatically deleted if memory space is limited. If you wish to permanently save photos, please copy them to an SD card.
- Page 15 Browsing Videos Video Video Play Play Delete Delete Time Time YYYY/MM/DD HH:MM:SS Deleting Videos Video Video Play Play Delete Delete Time Time Delete ? 5.3 Setting Video Duration Video duration times of 10s, 20s, and 30s can be set. Photo Video View Play...
- Page 16 5.4 Adjusting Monitor Brightness and Contrast Setup Brightness Setup Brightness Contrast Contrast Date YYYY - MM - DD Date YYYY - MM - DD Time 00 : 19 Time 00 : 19 OK = Setup Brightness Setup Brightness Contrast Contrast Date YYYY - MM - DD Date...
-
Page 17: Technical Specifications
Technical Specifications Indoor Video Monitor Power Input: AC110-240V, 60-50Hz Output: DC15V, 1200mA Display 7’’ TFT- LCD Transmission Method 2 wires Ring Tone 16 different polyphonic melodies Operating Distance 100 meters maximum from doorbell to farthest monitor Operating Temperature -10ºC to 40ºC (14ºF to 104ºF) Operating Humidity Less than 90% Dimensions (W/H/D) - Page 18 Disposal Disposal of the appliance Under no circumstances should you dispose of the appliance in normal domestic waste. This product is subject to the provisions of European Directive 2012/19/EU. Dispose of the appliance via an approved disposal company or your municipal waste facility.
- Page 19 1byone Products Inc. 1byone Products Inc. 1230 E Belmont Street, Ontario, CA 91761 Customer Service: +1 909-391-3888 www.1byone.com...
Need help?
Do you have a question about the 103NA-0001 and is the answer not in the manual?
Questions and answers