Table of Contents
Advertisement
DSP 1.8
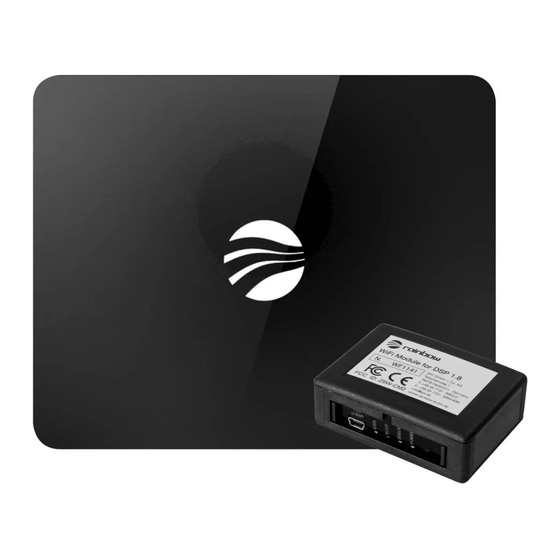
DSP 1.8 + WiFi
Please read this manual carefully before beginning installation!
rainbow audio GmbH Kreuzenstrasse 94 74076 Heilbronn Germany
Installation Manual for
rainbow DSP 1.8
Digital Sound Processor
Digital Sound Processor
Phone +49 7131 / 3958 180 - Fax +49 7131 / 3958 182
info@rainbow-audio.de
http://www.rainbow-audio.de
Part-No. RAC271014
Part-No. RAC271016
Advertisement
Table of Contents

Related Manuals for Rainbow DSP 1.8

Summary of Contents for Rainbow DSP 1.8
- Page 1 DSP 1.8 + WiFi Digital Sound Processor Part-No. RAC271016 Please read this manual carefully before beginning installation! rainbow audio GmbH Kreuzenstrasse 94 74076 Heilbronn Germany Phone +49 7131 / 3958 180 - Fax +49 7131 / 3958 182 info@rainbow-audio.de http://www.rainbow-audio.de...
- Page 2 Use of musical devices can interfere with your ability to hear important traffic noises, and therebyincrease the risk of an accident while driving. Rainbow® assumes no responsibility for hearing impairment, injury, or damage to property arising from the use or misuse of its products.
-
Page 3: Table Of Contents
We congratulate you on your purchase of this superior product and thank you for placing your trust in Rainbow. We have developed this installation manual with consideration of variations in the mechanical and acoustical characteristics of automobiles. Nevertheless, mistakes can still occur. We would greatly appreciate your bringing any problems you encounter to our attention. -
Page 4: Dsp 1.8
Before Beginning DSP 1.8 Notice The installation and setup of the DSP should be carried out only by qualified personnel. Read this operating manual carefully and follow the advice contained in it for the connection and setup of the DSP. - Page 5 Connecting Cables DSP 1.8 Warning Only use electrical cable with a sufficient diameter. In doing so, pay attention to the technical details in the appendix. A larger diameter is always recommended. The diameter of the grounding cable must be at least as large as that of the positive cable.
- Page 6 Installation DSP 1.8 Fasten the DSP at a suitable, well-ventilated position in the vehicle, preferably on the chassis panel, with the enclosed or similar sheet metal screws and using the insulating washers. The heatsink of the DSP can attain a high surface temperature. Sufficient distance from temperature- sensitive parts is absolutely essential.
-
Page 7: Power Supply Indications
Power Supply Indications DSP 1.8 In order to prevent variations in voltage and ground loops, the same cable diameter must be used for the negative conductor (-) as for the positive conductor (+). Because of the large differences in potential, the auto body is not suitable as the negative pole for this application. - Page 8 If the distortion persists, proceed as follows: Disconnect the negative conductor (–) of the sound system from the battery and connect it to the engine block. Check whether the distortion has been fixed. Should the engine block fail to fix the distortion, the auto body must be swept with the negative conductor of the system while the engine is running, until a clear distortion minimum arises.
- Page 9 Main fuse Connection if required Generator housing Regulator Battery Potential equalization conductor...
-
Page 10: Technical Specifications
Technical Specifications DSP 1.8 DSP Chip from Analog Devices (56bit) Microprocessor from NXP Audio encoder, OPAs, and differential amplifier from Burr Brown (24bit) 6 RCA inputs 6 High-level inputs (Molex, No Auto On/Off functionality! Use AIV #630115 or #640004) 1 Stereo AUX input (jack) -
Page 11: Device Connections
Device Connections DSP 1.8 1) RCA inputs 2) 6 high-level inputs (no Auto On/Off functionality) 3) S/PDIF input (Toslink, optical) 4) MOST Bus input (optional) 5) Mini USB (MOST Bus firmware updates) 6) USB input (WiFi module, optional) 7) RJ-11 input (remote control, optional) -
Page 12: Connection Wifi-Module Or Pc
Ensure that just one device is connected. Parallel operation is not possible! Connection signal Input / source device DSP 1.8 The rainbow DSP 1.8 can handle 4 different sources. The following inputs are internally connected: RCA (Cinch) with High-Level (Molex) AUX (3.5mm jack) with Tel/Nav... -
Page 13: Software/App - Windows Driver Installation
„DSP 1.8“ - App for iPad (Full version for professionals to setup DSP) „DSP 1.8 RC“ - App for iPhone (RC Version for end users with iPhone. No setup possible) „DSP 1.8 RC HD“ - App for iPad (RC Version for end users with iPad. No setup possible) Android:... - Page 14 Software – Windows Driver Installation DSP 1.8 Important: Do not yet connect the USB cable at this point in time! The USB cable is first connected after the driver installation. Windows XP (SP3 and later) • Double-click on the setup file “rainbow_DSP_1.8_driver” and confirm installation by clicking on “Yes”.
- Page 15 • Select the option “Install the software automatically (Recommended)” and click on “Next”. • On the following warning message click on “Continue Anyway”. • Click on “Finish”. Ready! Windows will now complete the driver installation (overall it detects 3 devices) and the DSP will soon be ready to use.
- Page 16 Important: Do not yet connect the USB cable at this point in time! The USB cable is first connected after the driver installation. Windows 7 • Double-click on the setup file “rainbow_DSP_1.8_driver” and confirm installation by clicking on “Yes”. • On the following warning message click on “Install this driver software anyway”.
- Page 17 Important: Do not yet connect the USB cable at this point in time! The Do not yet connect the USB cable at this point in time! The Do not yet connect the USB cable at this point in time! The USB cable is first connected after the driver installation.
-
Page 18: Software/App - Connecting To Dsp
Software/App – Connecting to the DSP DSP 1.8 A data link via cable or WiFi module must be active (yellow LED on the DSP device is on). To connect the software/app with the DSP, click the “connect” symbol (above left) and then confirm the desired connection to be established. -
Page 19: Software/App - Operation
Software/App - Operation DSP 1.8 Operation of the software/app using Apple iPad: Windows PC:... -
Page 20: Software/App - Driver Page
Software/App - Driver Page Driver Page DSP 1.8 Basic functions, for simple day-to-day operation. day operation. Figure 1: Driver Page - Input Submenu Figure 2: Driver Page - Input Submenu - Leveling Leveling Master Volume Total volume of all outputs... -
Page 21: Software/App - In-Out Matrix
Selection of a pre-set. Programming, see “Config Page” Software/app - In-Out Matrix DSP 1.8 The inputs and outputs can be connected with each other in different ways according to predefined patterns. Example, “Stereo”: Signal at Ch1 input is output at Ch1, Ch3, Ch5 and Ch7 output. -
Page 22: Software/App - Config Page
Software/App – Config Page Config Page DSP 1.8 Setting and changing of all functions Setting and changing of all functions Figure 4: Config Page – Channel Submenu Figure 5: Config Page – Equalizer Submenu Volume Set master/sub volume. Sub Sub can only be changed when at least one channel (Ch7 and/or Ch8) has been defined as the subwoofer (SUB). -
Page 23: Software/App - Overview Page
Volume (Gain), center frequency (Fc) and Volume (Gain), center frequency (Fc) and Q factor (Q) can be set here. Software/App – Overview Page Overview Page DSP 1.8 Quick and simple overview of all settings Quick and simple overview of all settings Figure 6: Overview Page –... -
Page 24: Wifi Module - Configuration
2) Choose Apple „Airplay „ function and select „rainbow DSP“ as target device 3) Open rainbow DSP 1.8 App and connect App with DSP 4) Select „Stream“ as input 5) Open iOS music player and select desired title or disc and press play WiFi –... -
Page 25: Wifi - Faq
WiFi – FAQs DSP 1.8 Problem Possibilities to solve the problem 1) Out of WiFi module coverage (~5m) No WiFi network available 2) WiFi signal will be shielded. Use another module location 3) Restart WiFi module by restarting the 4) Reset module (to factory defaults): short cut the two metal pins inside the WiFi module until all LEDs are off. -
Page 26: Starting Process Timings
A warranty claim does not exist if defects resulted from inappropriate assembly, transport damage, mechanical damage, or foreign interference. Accidents, forces of nature or other causes for which Rainbow® cannot assume responsibility, in particular water and fire, are not subject to warranty.
Need help?
Do you have a question about the DSP 1.8 and is the answer not in the manual?
Questions and answers