Advertisement
Quick Links
Advertisement

Summary of Contents for OnReal M1
- Page 1 User Manual...
-
Page 3: Table Of Contents
Product Manual Content Guide 1.Product IIIustration..........2-3 2.How to install............4-5 3.Keys and Functions..........6-7 4.Specifications............8 5.Menu Setting Instruction........9-16 6.Using the APP:DashCamPlayer....17-20... -
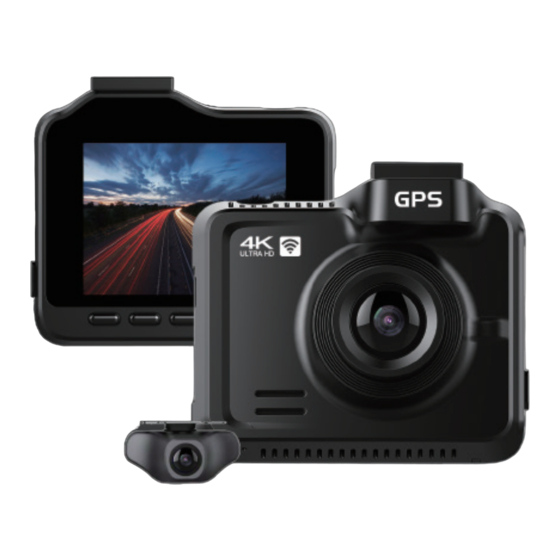
Page 4: Product Iiiustration
1.Product Illustration... - Page 5 ①Menu / Mode ②Up ③SOS / WIFI switch ④Down ⑤OK / Confirm ⑥Power ⑧HDMI port ⑦TF slot ⑨USB port ⑩MIC ⑫Speaker ⑪Reset ⑬Lens ⑭Holder ⑮AV IN port ⑯IPS screen...
-
Page 6: How To Install
2.How to Install... -
Page 7: How To Install
4.Insert car adapter to cigar lighter socket 5.Insert memory card to device 6.Insert holder to device The text description cannot explain the installation diagram in detail. Please search for "How to install dash cam" on YouTube or watch the video on the OnReal Listing page. -
Page 8: Keys And Functions
3.Keys and Functions Short press Power to turn on and Turn on indicator lighted Long press Power to turn off and Power Turn off indicator off Enter the setup menu interface, Short press short press in the setup submenu interface to return to the previous menu. Menu Enter play-back, you can view the video and picture, short press to return to the previous menu. - Page 9 Playback mode Press the button to select down Down Taking Picture Short press during recording Short press Emergency button for lock current video during recording. ! Short press Emergency button for record 20 seconds of video and lock video during video mode. Emergency Long press Emergency button to open wifi , and long press to close wifi.
-
Page 10: Specifications
4.Specifications Chipsets HI3559V200 Sensor OS08A10 Image Resolution 8 Mega Pixels Lens 6-layer glass lens Screen F1.8 Video Resolution 1-ch:4K 3840*2160P@30fps, 2K 1440P@30fps, 1296P@30fps,1080P@30fps,720P@30fps 2-chs:4K+1080P Codec H.264 File Type Language English, French, Spanish, Portuguese, German, Italian, Simplified Chinese, Traditional Chinese, Russian, Japanese, Polish. The defaults is English. Storage Support max 128GB TF card, Class 10(Not include) Power Supply... -
Page 11: Menu Setting Instruction
5.Menu Setting Instruction Press the M key in the recording mode to enter the system setup menu interface. 1.Lens switching Set “Before”: the video front screen is enlarged in front of the road and the rear channel is zoomed out. Set “Back”: The video front screen is enlarged after the road, and the front road is zoomed out. - Page 12 4.WDR: The default is "On". 5.Watermark: The default is "On". Turn off all watermark information after setting "Off". 3.Media 1 .Audio, can be adjust to ON or OFF, the default audio is “ON”. 2.Volume, can be adjust to: mute, low, medium, high. The default is "medium".
- Page 13 1.Luminaire frequency Can be adjust to 50Hz, 60Hz with your local source frequency. The default is 60Hz. 2.Time zone setting You can set the time zone of the current location manually. The defaults to UTC/GMT+8. 3.Speed Unit can be set to: KM/H, MPH. The default is KM/H. 4.Screen Domant can be adjust to: OFF, 1min, 3min, 5min.
- Page 14 5.Auto Power Off can be adjust to: OFF, 3min, 5min, 10min. The default is "OFF". 6.USB Mode can be set to: Charge, UVC, and Storage. The default is "Charge". 1.When set to "Charge", the machine plugged into the USB cable can only be used for charging.
- Page 15 7.G-Sensor can be set to: OFF, Low, Middle and High. The default is "Middle". If set to “OFF”, the device will not activate the emergency recording function when it encounters a collision. 8.Parking monitor can be set to: OFF, Low, Middle and High. The default is "OFF". 1.When the recorder is in the off state, if there is a collision, the recorder automatically starts and turns on the emergency recording.
- Page 16 10.Picture in Picture can be adjust to ON or OFF, the default is “OFF” 1.Set to "ON", the recording interface can display the front and back camera pictures. 2.Set to "OFF", the screen only displays the single-channel camera picture. 3.When connect front camera only, the default is“OFF” 4.When the front and the rear are connected, the default is "ON".
- Page 17 13.GPS Info With the GPS module connected, the OnReal M1 will release several additional functions: Track Logger/ Speed Display/Time Sync. Note: The GPS playback needs customized player, for windows operating system only.Please mail us to get GPS software. Official mailbox:usa@onreal.cn 14.Plate Number...
- Page 18 3.Regular formatting can increase the life of the SD card and ensure the normal operation of the dash cam. 17.Reset System 1.Select “Cancel”to exit the interface. 2.Select “Confirm” to restore all modified settings to the factory default settings, and the device will restart automatically. 18.WiFi can be set to ON or OFF, the default audio is “OFF”.
-
Page 19: Using The App:dashcamplayer
6.Using the APP:DashCamPlayer 1.Download and install the app “DashCamPlayer”---Step 1 2.Long press the emergency button or select the WiFi option in the dash cam menu to open WiFi. 3.Go to the WIFI settings page of the phone, select the WiFi name of the dash cam (backview_xxxxxx), and enter the default password: 88889999 to connect.(you can view the wifi name and password in the last item in the menu settings)---Step 2... - Page 22 Snap photo function Zoom in or out of a video or image Photo/video view playback Switched the front and rear camera preview (Note: when the recorder is in the dual state). Audio switch Stops recording, and there is REC in the upper left corner to indicate that recording is in progress.
- Page 23 usa@onreal.cn...
- Page 24 DashCam Player APP...
Need help?
Do you have a question about the M1 and is the answer not in the manual?
Questions and answers