Advertisement
Table of Contents
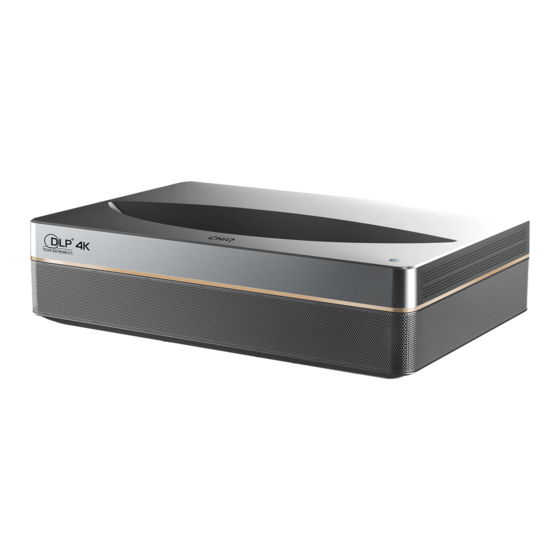
Laser Theatre
F o r E d u c a t i o n / C o r p o r a t i o n I n s t a l l a t i o n
Sichuan Changhong Electric Co., Ltd.
Add: 35 Mianxing East Road, High-tech Zone, Mianyang City, Sichuan Province,China
Unified national customer service hotline: 4008-111-666 4006-111-666
Changhong community forum: http://bbs.changhoung.com
P l e a s e r e a d c a r e f u l l y b e f o r e u s i n g
Changhong official website: Http://cn.changhong.com
J U N 0 . 0 1 8 . 2 6 1 4 V 1 . 0
Advertisement
Table of Contents

Subscribe to Our Youtube Channel
Related Manuals for Changhong Electric ChiQ B5U


Summary of Contents for Changhong Electric ChiQ B5U
- Page 1 F o r E d u c a t i o n / C o r p o r a t i o n I n s t a l l a t i o n Sichuan Changhong Electric Co., Ltd.
-
Page 2: Packaging Overview
1.Packaging Overview The packing box of this machine contains the following items. Please check carefully whether the following items are complete. If there are any missing items, please contact your local distributor. Main unit ×1 Product user manual ×1 (with AAA battery 1 pair) Remote control×1 Lifting screws×4 Power cord×1... -
Page 3: Product Introduction
2.Product Introduction 2.1 Product Specification Parameters Product Specification Parameters Product Model Movement System Android Intelligent Movement Laser light source +DLP technology Display Technology Network connection Wired network + wireless network Bluetooth Resolution Method of remote 3840×2160 Built-in speakers 100'' 10W×2 Best Visible Picture Size AC 220V,50Hz Q20541230-8.154-2018... - Page 4 2.2 Appearance 2.2.1 Main Unit Structure Main Unit Structure Figs. 1 to 4 below show the structure of the unit Name ① Ventilation mesh Voice emitting hole of built-in ② speaker ③ Infrared protective sensor ④ Light emitting hole ⑤ Power key and indicator Fig.
- Page 5 2.2.2 Ports Port Name Function ① Network For wired network connections The "coaxial output" mainly provides the Digital audio ② transmission of digital audio signals and can output be connected to an external sound system ③ Audio output Provide output of analog audio signal (L/R) For connection with output of analog audio in VGA audio ④...
-
Page 6: Remote Control
2.2.3 Remote Control Keys and Functions Name Function ① Power key Standby state switch ② Microphone Microphone hole of remote control (Note: do not block this hole) ③ Shortcut key Press this key to enter the shortcut menu Short press this key to call up the main scene; long press this key to call up the ④... - Page 7 Pairing of remote control Bluetooth remote control is adopted in this device, the remote control can be used after being paired with the device.When start up the device for the first time and the main unit is not paired with the remote control, please make the pairing by following the steps as below. a....
-
Page 8: Installation And Commissioning
3.Installation and Commissioning 3.1 Installation According to different application scenarios, the machine supports four installation methods: desktop front projection, desktop back projection, lifting front projection and lifting back projection. 3.1.1 Installation Method When changing the installation mode, the display mode (front desktop, rear lifting, front lifting and rear desktop) needs to be changed and set from the OSD menu. - Page 9 3.1.2 Screen Size and Installation Distance The distance between the main unit and the screen is proportional to the image size. The closer the main unit is to the screen, the smaller the image size will be; vice versa. The following is a brief description of the relationship between screen size and installation distance, with the desktop front projection as an example.
-
Page 10: Focus Adjustment
Picture Adjustment Adjust Image Position 3.2.1 c. Afterwards, use the Left arrow and Right arrow to make fine adjustment: Use the “Left/Right” key in the remote control to select This section takes the installation method of desktop front the “Left/Right” arrow→press the “OK”key time after time to adjust projection as an example to explain the picture adjustment for the image definition into the optimum;... -
Page 11: Basic Settings Menu
4.Operating Instructions 4.1 Basic Settings Menu Prompt Information a. Under the program source and local media, press the "Menu" key to open the "Settings" menu, and press the "Up/Down" key to cycle Some options in the user's operation interface are not selectable, through the adjustment items of the first-level menu, and press the ①... -
Page 12: Safety Precautions
5.Safety Precautions This machine contains a laser module. For your safety, please follow the following tips. Precautions Do not look directly at the bright light emitted by this machine, ① otherwise it may cause eye injury Do not open or disassemble the machine, which may cause damage ②... - Page 13 Precautions ① Do not place the machine near heat sources such as direct sunlight, radiator, fire or stove When the machine is moved from a low temperature environment to a high temperature environment, condensation may occur inside the machine. ② Please do not use it immediately In case of any abnormality or malfunction, such as no image, no sound, smoking or unusual odor, please disconnect the power supply immediately, ③...
- Page 14 Note: The reason why the content of toxic and harmful substances or elements in the above-mentioned product components exceeds the limit specified in the standard is that there is no fully mature substitute for the time being due to the limitation of current industry technology and technological level It indicates that packaging materials can be recycled, please do not discard them at will It indicates that the environmental protection service life of the product is 10 years under normal working and using...
-
Page 15: Warranty Service
7.Warranty Service Please paste the purchase invoice here Dear user, c. Please properly keep the service warranty card and the purchase Thank you for your favor to Changhong products! Please fill in the warranty invoice as the warranty certificate. card timely and accurately to ensure that you can get better service after d. -
Page 16: Warranty Card
Warranty Card Warranty Card Date of Installation: MM/DD/YY Date of Installation: MM/DD/YY User name User name Address Address Machine model Shopping mall Machine model Shopping mall Invoicing date Invoice No. Invoicing date Invoice No. Body barcode Body barcode Service Status: □ Screen Installation and Commissioning □ Mount Installation and Service Status: □...
Need help?
Do you have a question about the ChiQ B5U and is the answer not in the manual?
Questions and answers