
Related Manuals for Green Bike USA GB5


Summary of Contents for Green Bike USA GB5
- Page 1 Green Bike USA 6601 Lyons RD Suite G7 Coconut Creek, FL 33073 Tel: 954-725-7887 Email: info@greenbikeusa.com GB5/GB500/GB500 FAT TIRE MANUAL...
- Page 2 Congratulations on your new electric bike. Welcome to Green Bike USA family. Up to now electric bikes have been far too expensive, Green Bike USA electric bikes has changed that. Now everyone can afford to own an electric bike, no license, registration or insurance required.
- Page 3 3. Bring the rod (B) to straight position and lift the quick release handle (D) to lock the handle bar. The loop in the quick release handle must be secured by the black round clip (E). To fold the handle bar you just need to reverse this steps. Final Position...
- Page 4 Unfold the bike to a straight position than lock the metal bar (F) than turn down the plastic lock (G) to secure the metal bar. OPEN CLOSE To fold the bike, you just need to reverse this steps. 5. Unfold the pedals. You can easily fold them when you want to store the bike or put them in your trunk.
- Page 5 6. Insert the seat into the seat bar, make sure it's inserted to at least the minimum length (H), which is marked on the seat bar. Make sure that the seat is tight and at the right height for you. 7.
-
Page 6: Disc Brakes
Disc Brakes Disc brakes are considered to perform better than standard v-brakes, especially in wet conditions, our new GB500 model comes with front and rear disc brakes. Please note that brand new disc brakes need “braking in”. This means it may take a few weeks until they perform optimally. Ride your bike very carefully and allow plenty of time for braking. - Page 7 UNLOCK - battery can be removed. You can charge the battery also when it’s not connecting to the bike (push in and turn all the way counterclockwise). OFF - battery locked into the frame. Power is off. ON - battery locked into the frame (turn all the way clockwise). You can turn on the bike. Only at OFF position you can take out the key from the battery.
-
Page 8: Charging The Battery
Charging the Battery Green Bike USA Electric Bikes are equipped with quality Lithium batteries. Lithium batteries are a modern technology which is not suffering from memory effects like some older battery types, which means that Lithium batteries can be charged anytime, this will not reduce the battery life. To charge... - Page 9 Another way to check how much power left in the battery is by turning on the LCD display (battery assembled and turned ON) by pressing on Mode (O), the battery picture (P) will indicate how much you have left (don't use the throttle when you check your battery, if you do it will not give you the right reading).
- Page 10 Throttle Twist and go throttle (Q). Twist down to accelerate, release to stop acceleration. Motor Assistance There are 9 levels of motor assistance. Press + or - to change motor output power. The power ranges from level 1 to level 9. Level 1 is the minimum power and level 9 is the maximum power. If you put it on 0 you can use the bike as regular bike without the electric motor, however if you push down the throttle you will get power from the electric engine, the more you push the more power you get.
- Page 11 Derailleur Follow below link for an excellent YouTube video about rear derailleur adjustment http://www.youtube.com/watch?v=wQncKmddahk You can use the Shimano regular 6 levels gear anytime you ride the bike. You can control the effort that you want to put by choosing the motor assist level that you want. Lights, Right and Left signal, Brakes Light &...
-
Page 12: Lcd Display
LCD Display 3.5’ big screen for easy view Phone USB charging port Easy buttons, easy control Water prove LED light Function summery: 1. ON/OFF 2. Full view area 3. Riding mode 4. Distance display 5. Riding time 6. - Page 13 9. Error instruction 10. 6KM push button 11. Button operation 12. Auto sleep after 5mins 13. Mobile phone charging indicator 1. ON/OFF Press ON/OFF and start the display. With display on more than 3 seconds, press ON/OFF to turn off power supply of the e-bicycle.
- Page 14 5. Riding time A single riding time will shut down without saving 6. Battery indicator 7. Speed indicator 8. PAS level (pedal assist) Press +/- to change the PAS level. The higher the level, the more power you get from the motor. To get the power from the motor you just need to pedal, to use the throttle or do both.
- Page 15 11. Button Operation Once the display is ON press it again to turn on’/off display light. Press the SET for 3 seconds to get to setting mode. Set 0: press +/- to change the riding mode Set 1: press ‘-‘ the TRIP go back to 0 Set 2: Setting speed limit 11.2 MPH to 31.2 MPH (set to 31.2 MPH for the most power from the bike) Set 3: for setting wheel size, make sure it’s on 20 in.
- Page 16 Display Warranty Warranty term is 18 months. Beyond warranty: 1. Opened display 2. Connector gets damaged 3. Damage on housing after delivery. 4. Wires gets scratched or broken 5. Irresistible accident such as fire or any other natural hazard. 6. Over 18 months. Servicing the Bike Very important to check your tires pressure once a week, we recommend 50 psi.
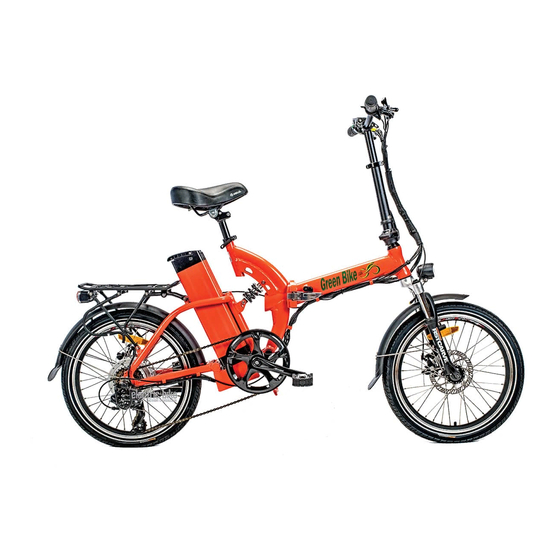
- Page 17 Weight: 59 Lbs Minimum chair height from the floor: 33 inch (look at pg 4 as for minimum length of the chair bar that need to be in the frame). Maximum height from the floor 36.5 inch.
Need help?
Do you have a question about the GB5 and is the answer not in the manual?
Questions and answers