Advertisement
INSTALLATION INSTRUCTIONS
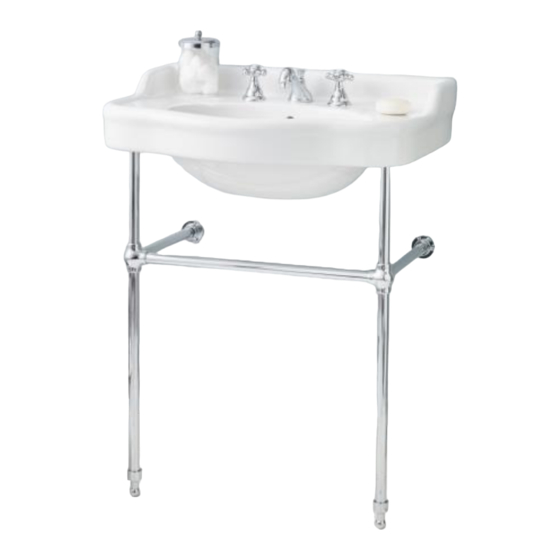
575 | Solid Brass Console Stand
What's included in the box:
2 x Rod A – 31"
1 x Rod B – 22"
2 x Rod C – 17"
2 x 4-way Connectors with Set Screws
2 x Console Feet
2 x Wall Mounting Brackets
2 x Console Feet Screws
4 x Wall Mounting Bracket Screws
4 x Drywall Anchors
1 x Allen Key
Notes:
1. Two people are required to install the console.
Installation:
1. Use a pipe cutter to cut the console rods to the desired lengths according to the
Cheviot Products sink you will be using in the table below.
Sink Model
350/22 | ANTIQUE
350/28 | ANTIQUE
511/25 | MAYFAIR
553 | ESSEX
1230/19 | NUOVELLA
1230/23 | NUOVELLA
1232 | NUO
1234 | NUO
*Rod A may be left at 31" or may be shortened according to the desired final height of
the console lavatory.
2. Assemble the console by threading Rod A through the 4-way connector. Repeat
for the opposite leg. Connect Rod B to the 4-way connectors on both ends. This
forms the horizontal bar across the front of the console. Connect Rod C to the
Wall Mounting Bracket on one end and to the remaining opening in the 4-way
Rod A
31"*
31"*
31"*
31"*
31"*
31"*
31"*
31"*
Rod B
18"
22"
20"
20"
16 ¾"
20 ¼"
16"
19 ¾"
Rod C
13"
14"
17"
15 ½"
17"
17"
15"
15"
Advertisement
Table of Contents

Subscribe to Our Youtube Channel
Summary of Contents for Cheviot 575
- Page 1 1. Two people are required to install the console. Installation: 1. Use a pipe cutter to cut the console rods to the desired lengths according to the Cheviot Products sink you will be using in the table below. Sink Model Rod A...
- Page 2 connector on the other end. Repeat for the opposite leg. This will form the horizontal bars on the sides of the sink leading to the wall. Mount the Console Feet to the ends of Rod A that do not have plastic stoppers. Secure all connections with the Set Screws and Allen Key provided.
Need help?
Do you have a question about the 575 and is the answer not in the manual?
Questions and answers