
Subscribe to Our Youtube Channel
Summary of Contents for Gram TCamel S Series
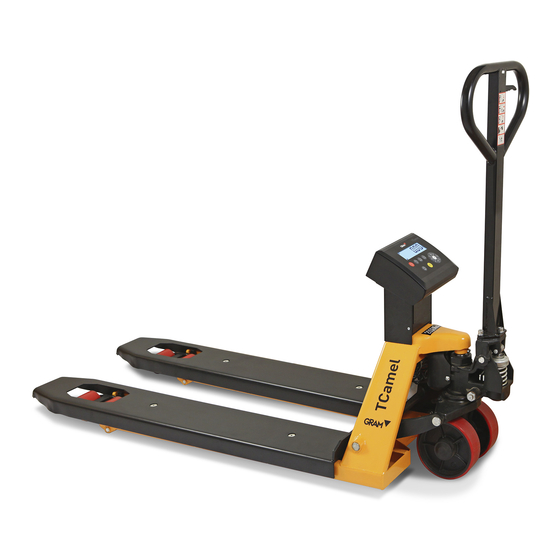
- Page 1 SERIES / SERIE / SÉRIE TCamel S OPERATION MANUAL MANUAL DE UTILIZACION MANUEL D´UTILISATION...
-
Page 2: Table Of Contents
INDEX English Handle assembly Regulation of the fingerlike Maintenance and repair Refueling Routine maintenance and overhaul Lubricants Safety Guide Debugging method of the forklift scale Standard specifications Troubleshooting Instruction for use Preparing to use the scale Features and specification of indicator Features Specifications Display description... - Page 3 Division setup Time & Date setting Calibration Division Setting Decimal point setting Maximum capacity setting Zero point calibration Second point calibration Guarantee...
- Page 4 ÍNDICE Español Montaje del conjunto del timón Palanca de regulación Reparación y mantenimiento Comprobación nivel del aceite hidráulico Rutina de mantenimiento y revision Lubricantes Guia de seguridad Método de ajuste del transpalet Especificaciones del transpalet Solución de problemas Instrucciones de utilización Preparación del transpalet para su utilización Especificaciones del indicador Conectores...
- Page 5 Configuración de la fecha y hora Calibración (manual Técnico) Configuración de la división Configuración del punto decimal Configuración de la capacidad máxima Calibración del punto de cero Garantía...
- Page 6 SOMMAIRE Français Montage de la barre de direction Levier de régulation Réparation et maintenance Vérification du niveau d’huile hydraulique Fréquence de maintenance et révision Lubrifiants Guide de sécurité Méthode de réglage du transpalette Specificités du transpalette Resolution de problémes Instructions d’utilisation Preparation du transpalette pour utilisation Spécificités de l’indicateur Connexions...
- Page 7 Configuration de la date et de l’heure Calibration Configuration de la résolution Configuration de l’emplacement de la virgule Configuration de la capacité maximale Calibration du point zéro Calibration du Deuxième point Garantie...
-
Page 8: Handle Assembly
ENGLISH HANDLE ASSEMbLy ... -
Page 9: Regulation Of The Fingerlike
REgULATION Of THE fINgERLIkE Regulation of the fingerlike handle’s three positions (ascend, middle, descend). On the pallet truck, you will see the fingerlike handle, which can be operated on three positions: Ascend Middle Descend When the operation has been completed, the handle should be put on the middle position. -
Page 10: Maintenance And Repair
MAINTENANCE AND REPAIR Refueling Check oil every six months. Recommend using hydraulic oil: ISO VG32, at 400C its kinematic viscosity is 32 cSt, the total 0.3 liters. Because of the transport or inversion, the air is likely to enter the hydraulic pump, which will result in the fork not rising on the ascend position. -
Page 11: Debugging Method Of The Forklift Scale
3. When pulling the truck, please keep the handle on the middle position. So it is easy to move and reduce the rebound from the piston to handle. Moreover it protects the liquid seal and piston components and extends the service life of truck. 4. - Page 12 pen, respectively, to “E-” of A, B, C, D. At last, with eight multimeter debugged, disconnect multimeter. 3. Insert monitor’s plug then begin to demarcate. 4. After the demarcation, put “the weight on the front”, middle, and back of the fork respectively to see whether the show value is the same, if not, adjust slightly Group C and Group D on the wiring board, do as follows: If the value is wrong when put on the front of the fork, adjust “D +”...
-
Page 13: Standard Specifications
STANDARD SPECIfICATIONS Load 2000kg fork length 1150mm fork width 550mm/685mm ≤ 80mm fork height Weight 95-105kg TROUbLESHOOTINg Malfunction Cause Approach Fork can’t ascend to -Inadequate hydraulic oil. - Refueling. the maximum height. - No hydraulic oil. - Refueling. - Impure oil. - Change oil. - Page 14 - Placing of the goods Replacement the one side or overloading pistons with big ones or makes the Pistons or of the pump. the body of the pump damaged. - Fork keep the ascend - Please lower the fork to Fork cannot descend.
-
Page 15: Instruction For Use
When weighing the - Open the board to - A phenomena of plate show value on the check the collision, if collision near the sensor front is big and the necessary, polish or at the back of the fork. back small fork. boost the sensor. -
Page 16: Preparing To Use The Scale
PREPARINg TO USE THE SCALE 1. Avoid operating the scale in direct sunlight or drafts of any kind. 2. If possible avoid connecting the scale to ac power outlet sockets which are adjacent to ther appliances to minimize the possibility of interference affecting the performance of the scale. -
Page 17: Specifications
• Low power indication and auto power off. Options: • Serial printer Specifications Minimum 350 ohm load cells Load Cells Maximum 1000 ohm (Up to 4 load cells of 350 ohm) Readability Selectable, 0.0 Tare function Full Units of measure Kg , lb Power supply Rechargeable battery or Charger DC 7.2V 1A... -
Page 18: Display Description
2. RS-232 connection: 5 2 2- pin. Data output (TXD) 5- pin. Ground (GND) 3. Printer connection: Printer pin 1. Connects with +5V Printer pin 2. Connects with GND Printer pin 4. Connects with TXD Printer pin 5. -
Page 19: Keypad Description
1. Zero status indication, Displayed when the scale is at the centre of its zero band. 2. Tare status indication, Displayed when the weight has been tare. 3. Simple counting indication, Displayed when the scale is in simple counting mode. 4. -
Page 20: Operating The Scale
OPERATINg THE SCALE Simple Counting Mode key once, the display will show “PCS 10”. 1. Press 2. Press key to choose sample numbers from 10, 20, 50 to 100 pcs, then place the number of samples on the weighing pan. The number should match the options for parts counting. -
Page 21: Accumulation Mode
Accumulation Mode key four times, the display will show “A C C“. 1. Press 2. Press key to confirm. Manual Accumulation When choose this mode, user needs to press key after the objects are put on pan and the scale is stable to accumulate the data; take off the object and wait until zero, then put other object to continue accumulate data. -
Page 22: Charging The Battery
CHARgINg THE bATTERy • When the low battery symbol is on, it means the power of scale is low needs to change the battery or plug-in the adaptor to recharge the battery. • To the right of the display is a LED to indicate the status of battery charging. - Page 23 DIvISION SETUP When scale is on and at zero and stable, long press key enter the division setup, use key to select the divisions, then press key to confirm and back to weighing mode. TIME & DATE SETTINg Long pressing keys together enter time checking mode, then press key (Down) to check Year, Month, Date, Hour, Minute, Second etc.
- Page 24 The largest number is 12. Press key once, the decimal digit adds by “1”. Press key once, the other digit adds by “1”. 5. Dte 00: (date ) Input number for the accordingly date. “15” for the 15th day of a month. The largest number is 31. Press key once, the decimal digit adds by “1”.
- Page 25 Division Setting LCD shows [d x]. Then press key to select 1, 2, 5, 10, 20, 50, and then press key to confirm and enter the decimal point setting. Ex. When display shows [d 5]. Press key, the division set as 5, then enter the decimal point setting.
- Page 26 Second point calibration (unit is in kg) LCD shows [00.000]. The decimal point was set as 3 digits. (this depends on what user sets in the last moves). Put on the weights on the pan which will be calibrate as second point, then use key to move the flashing digits to the right in circle to select the digits that will increase the number.
- Page 27 This balance is guaranteed for one year from the delivery date. The guarantee covers any fabrication defect of the material. During this period, gRAM PRECISION, SL, covers the manpower and the spare parts costs necessary for the reparation of the scale.
- Page 28 ESPAÑOL MONTAjE DEL CONjUNTO DEL TIMóN Palanca Una v ez a travesado e l e je, colocar e l p asador d e 0 5mm dentro d el a gujero Cadena ...
- Page 29 PALANCA DE REgULACIóN La palanca de regulación tiene tres posiciones (subir –reposo-bajar). Subir Reposo Bajar Cuando no se utilice la transpaleta, el timón debe ser colocado en posición reposo. La posición de la palanca de regulación ha sido ajustada en fábrica, si se precisa cambiarla, seguir los siguientes pasos: •...
- Page 30 REPARACIóN y MANTENIMIENTO Comprobación nivel del aceite hidráulico Comprobar el aceite cada 6 meses. Recomendamos utilizar aceite hidráulico: ISO VG32, a 400C su viscosidad cinemática es de 32 cSt, Capacidad total, 0.3 litros. Debido al transporte, es probable que entre aire en la bomba hidráulica, lo cual puede provocar que las horquillas no se eleven en la posición de ascenso.
- Page 31 2. Tener en cuenta que antes de desplazar el transpalet, se deberá levantar un poco las horquillas. 3. Al desplazar el transpalet, por favor, mantener la palanca en posición media. De esta manera, resultará más fácil de mover y se reducirán los rebotes del pistón de la palanca.
- Page 32 resistencia de cada grupo a “10 Ω”. Método de ajuste: 1. Conectar una punta del multímetro a “E+” y con la otra punta comprobar cada grupo del “E +” A, B, C y D ajustar todos los grupos a “10 Ω”. Ahora conectar una punta del multímetro a “E-“...
- Page 33 ESPECIfICACIONES DEL TRANSPALET Capacidad máxima 2000kg Longitud de la horquilla 1150mm Ancho de la horquilla 550mm/685mm ≤ 80mm Altura de la horquilla Peso 95-105kg...
- Page 34 SOLUCIóN DE PRObLEMAS Problema Causa Acción La horquilla no - Aceite hidráulico - Revisar nivel de puede elevarse hasta inadecuado. aceite. la altura máxima. - Falta de aceite - Revisar nivel de hidráulico. aceite. - Aceite sucio. - Cambiar el aceite. - Mantener los pernos - Ajustar los pernos o demasiado cerca o...
- Page 35 - Envejecimiento o - Actualizar. desperfectos en los Derrame de aceite. precintos. - Algunas piezas rotas. - Actualizar. - El aceite sucio - Cambiar el aceite. provoca que la válvula no pueda cerrarse herméticamente. - Alguna pieza del - Revisar y reemplazar sistema hidráulico está...
- Page 36 bolsita desecante se puede incluir para prevenir cualquier acumulación de humedad. PREPARACIóN DEL TRANSPALET PARA SU UTILIZACIóN 1. Evitar los rayos directos del sol y cualquier tipo de corriente de aire. 2. Si es posible, evitar conectar el transpalet a una toma de corriente alterna adyacente, para reducir al máximo interferencias alejarlo de otros aparatos eléctricos.
- Page 37 ESPECIfICACIONES DEL INDICADOR • Gran display de LED (altura del dígito 30mm x 13mm). • Unidades de pesada: Kilogram (kg) y libras (lb). • Funciones: cuentapiezas, hold y acumulación de pesadas. • Indicador de batería baja. • Autodesconexión. Opciones: • Impresora CONECTORES ...
- Page 38 2. Conector RS-232 5 2 2- pin. Salida de datos (TXD) 5- pin. Ground (GND) 3. Conector impresora Pin 1. conecta con +5V Pin 2. conecta con GND Pin 3. conecta con TXD Pin 4. conecta con GND DESCRIPCIóN DEL DISPLAy...
- Page 39 1. Indicador de cero. 2. Indicador de tara. 3. Indicador de cuentapiezas. 4. Indicador de lb 5. Indicador de Kg. DESCRIPCIóN DE LAS TECLAS Tecla CERO, en el menu de programación utilizar para desplazarse hacia arriba. Cuando en la horquilla no haya peso y la lectura del display no sea de cero, pulsar esta tecla para corregir dicha desviación (rango: 2% de la capacidad máxima).
- Page 40 UTILIZACIóN DEL TRANSPALET función cuentapiezas , el display mostrará “PCS 10”. 1. Pulsar la tecla 2. Pulsar la tecla para seleccionar el número de la muestra 10, 20, 50 a 100 pcs, colocar sobre la horquilla el número de piezas seleccionado. 3.
- Page 41 Acumulación de pesadas cuatro veces, el display mostrará “A C C “. 1. Pulsar la tecla 2. Pulsar la tecla para confirmar. Acumulación manual Colocar el objeto sobre la horquilla, cuando el peso quede estable pulsar la tecla para memorizar su peso, retirar el objeto y esperar a que la lectura del display quede a cero, colocar otro objeto para continuar con la acumulación de pesadas.
- Page 42 CARgA DE LA bATERíA • Cuando aparece el símbolo de batería baja en el display, significa que la batería necesita ser cargada, conectar el alimentador a la red para efectuar la recarga. • En la parte derecha del display aparecerá un LED indicando el estado de la carga.
- Page 43 CONfIgURACIóN DE LA DIvISIóN (manual técnico) Con el display a cero, mantener pulsada la tecla para acceder al parámetro, pulsar la tecla para seleccionar las divisiones. Pulsar la tecla para confirmar y volver al modo normal de pesaje. CONfIgURACIóN DE LA fECHA y HORA Mantener pulsadas al mismo tiempo las teclas para acceder al parámetro.
- Page 44 4. Mon 00: (mes) Introducir el mes, “4” para Abril. El número mayor es 12. , el dígito decimal se añade por “1”. Pulsar la tecla Pulsar la tecla , el otro dígito se añade por “1”. 5. Dte 00: (día) Introducir el número del día. El número mayor es 31. Pulsar , el dígito decimal se añade por “1”.
- Page 45 Configuración de la división El display muestra [d x], pulsar la tecla para seleccionar 1, 2, 5, 10, 20, 50. Pulsar la tecla para confirmar y pasar al siguiente parámetro (configuración del punto decimal). Configuración del punto decimal El display muestra [p x], pulsar la tecla para seleccionar 0, 0.0, 0.00, 0.000, 0.0000, P.00000.
- Page 46 Calibración del Segundo punto (unidad de pesada kg) El display muestra [00.000] (el punto decimal se configuró a 3 dígitos). Colocar la(s) pesa(s) de calibración sobre la horquilla, pulsar la tecla para desplazarse de un dígito a otro y pulsar la tecla para incrementar el valor de cada dígito.
- Page 47 Esta balanza está garantizada contra todo defecto de fabricación y de material, por un periodo de 1 año a partir de la fecha de entrega. Durante este periodo, gRAM PRECISION, SL, se hará cargo de la reparación de la balanza.
- Page 48 FRANÇAIS MONTAgE DE LA bARRE DE DIRECTION Levier Une f ois l ’axe p ercé, p lacer l a broche d e 5 mm d ans l e t rou. Chaîne ...
- Page 49 LEvIER DE RégULATION Le levier de régulation peut occuper trois positions (Elévation – repos – descente). Elévation Repos Descente Quand le transpalette n’est pas utilisé, la barre de direction doit être placée en position repos. La position du levier de régulation a été réglée à l’usine, si une modification est nécessaire, suivez les étapes suivantes: •...
- Page 50 RéPARATION ET MAINTENANCE vérification du niveau d’huile hydraulique Vérifier l’huile tous les 6 mois. Nous vous recommandons d’utiliser de l’huile hydraulique : ISO VG32, à 400C sa viscosité cinématique est de 32 cSt, Capacité totale, 0.3 litres. En raison du transport, il est possible que de l’air entre dans la pompe hydraulique, ce qui peut entrainer que les fourches ne se soulèvent pas dans la position d’élévation.
- Page 51 guide de sécurité 1. Avant d’utiliser le transpalette, lire attentivement ce manuel d’instructions. 2. Prendre en compte qu’avant de déplacer le transpalette, il vous faudra soulever un peu les fourches. 3. En déplaçant le transpalette, maintenir le levier en position repos. De cette manière, ce sera plus facile pour le déplacer et cela permettra aussi de réduire les rebonds du piston du levier.
- Page 52 Méthode de réglage du transpalette 1. Débrancher la prise de l’indicateur. 2. Ajuster le multimètre digital à “200 Ω” pour mesurer la résistance de chaque groupe à “10 Ω”. Méthode de réglage: Connecter une pointe du multimètre à “E+” et avec l’autre pointe vérifier chaque groupe de “E +”...
- Page 53 fourches ne frottent pas. De plus, quand la valeur n’est pas exacte, ajuster seulement les groupes C et D de carte ou les groupes A et B du potentiomètre, dans le cas contraire, le transpalette ne pourra pas être ajusté correctement. ...
- Page 54 RESOLUTION DE PRObLéMES Probléme Cause Action Les fourches ne se - Huile hydraulique - Vérifier le niveau lèvent pas jusqu’à la inadaptée. d’huile. hauteur maximale. - Manque d’huile - Vérifier le niveau hydraulique. d’huile. - Huile sale. - Changer l’huile. - Les boulons ont été...
- Page 55 - Vieillissement ou - Mettre à jour. endommagement des Déversements d’huile. joints. - Certaines pièces - Mettre à jour. endommagées. - L’huile sale empêche - Changer l’huile. la vanne de se fermer hermétiquement. - Une pièce du système - Contrôler et La soupape de hydraulique est cassée remplacer les pièces...
- Page 56 PREPARATION DU TRANSPALETTE POUR UTILISATION 1. Éviter les rayons directs du soleil et les courants d’air. 2. Dans la mesure du possible, éviter de connecter le transpalette à une prise de courant adjacente pour réduire au maximum les interférences des autres appareils électriques. 3.
- Page 57 • Indicateur de batterie faible. • Déconnexion automatique. Options: • Imprimante CONNExIONS 1. Connexion capteurs de pesées Pin 1. connecté avec EXC+ Pin 2. connecté avec EXC- Pin 3. connecté avec SIG+ Pin 4. connecté avec SIG- 2. Connexion RS-232 5 ...
- Page 58 3. Connexion imprimante Pin 1. connecté avec +5V Pin 2. connecté avec GND Pin 3. connecté avec TXD Pin 4. connecté avec GND DESCRIPTION DE L’éCRAN 1. Indicateur du zéro. 2. Indicateur de tare. 3. Indicateur de compte-pièces. 4. Indicateur de livres (lb). 5.
- Page 59 DESCRIPTION DES TOUCHES Touche ZéRO. Dans le menu de programmation, utiliser cette touche pour se déplacer jusqu’en haut. Quand il n’y a pas de poids sur les fourches et que l’écran n’affiche pas zéro, appuyer sur cette touche pour corriger cette erreur (rang : 2% de la capacité maximale). Touche TARE.
- Page 60 UTILISATION DU TRANSPALETTE fonction Compte-pièces , l’écran affichera “PCS 10”. 1. Appuyer sur la touche 2. Appuyer sur la touche pour sélectionner le numéro de l’échantillon 10, 20, 50 à 100 pièces, placer sur les fourches le numéro de pièces sélectionné.
- Page 61 Accumulation de pesées quatre fois, l’écran affichera “A C C“. 1. Appuyer sur la touche 2. Appuyer sur la touche pour confirmer. Accumulation manuelle Placer l’objet sur les fourches, et lorsque le poids est stable, appuyer sur la touche pour mémoriser son poids. Ensuite, retirer l’objet et attendre que l’écran affiche zéro, placer un nouvel objet pour continuer l’accumulation des pesées.
- Page 62 RECHARgE DE LA bATTERIE • Lorsque le symbole de la batterie faible apparait sur l’écran, cela signifie que la batterie a besoin d’être chargée. Il faut alors connecter le chargeur sur une prise de courant (110V ou 220V). • Sur la partie droite de l’écran, une LED apparaitra pour indiquer l’état de la recharge.
- Page 63 CONfIgURATION DE LA RESOLUTION (manuel technique) Lorsque l’écran est à zéro, maintenir la touche appuyée pour accéder au paramètre. Ensuite, appuyer sur la touche pour sélectionner les résolutions. Appuyer sur la touche pour confirmer et retourner au mode normal de pesée. CONfIgURATION DE LA DATE ET DE L’HEURE Maintenir appuyées les touches en même temps pour accéder...
- Page 64 Appuyer sur la touche , le chiffre décimal s’ajoutera en utilisant la touche “1”. Appuyer sur la touche , un autre chiffre s’ajoutera en utilisant “1”. 4. Mon 00: (mois) Inscrire le chiffre du mois correspondant. Par exemple, inscrire “4” pour Avril. Le numéro maximal est 12. Appuyer sur la touche , le chiffre décimal s’ajoutera en utilisant la touche “1”.
- Page 65 CALIbRATION (Manuel Technique) Ajustement de la résolution, du point décimal, capacité maximale et calibration. Lorsque l’indicateur est éteint, maintenir la touche appuyée et sans la lâcher, appuyer sur la touche “On” pour allumer l’appareil et entrer dans le mode Résolution. Configuration de la résolution Lorsque l’écran affichera [d x], appuyer sur la touche pour sélectionner...
- Page 66 Configuration de la capacité maximale L’écran affichera [ fULL ] pendant 2-3 secondes puis affichera le message [000.000], (emplacement de la virgule était configuré à 3 points). Appuyer ensuite sur la touche pour déplacer les chiffres clignotants vers la droite. Utiliser la touche pour augmenter le numéro jusqu’à...
- Page 67 Cette balance est garantie contre les défauts de fabrication ou de pièce, pendant une année, à partir de la date de livraison. Durant cette période, gRAM PRECISON, SL, se chargera de la réparation de la balance. Cette garantie n’inclut pas les dommages causés par une utilisation impropre, surcharge, ou par faute de ne pas avoir suivi les recommandations écrites dans ce manuel (particulièrement de l’aparté...
- Page 68 001/08072016 gram Precision S.L. Travesía Industrial, 11 · 08907 Hospitalet de Llobregat · Barcelona (Spain) Tel. +34 902 206 000 · +34 93 300 33 32 Fax +34 93 300 66 98 gram.es comercial www.gram.es...
Need help?
Do you have a question about the TCamel S Series and is the answer not in the manual?
Questions and answers