Table of Contents
Advertisement
V 1.4
8839615
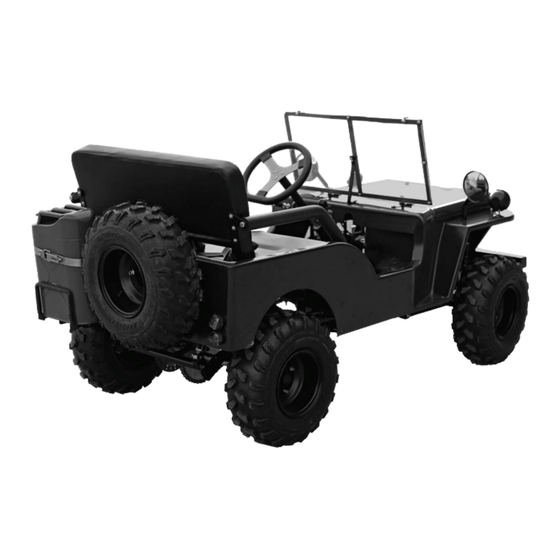
Mini Utility Vehicle
Owners Manual
Model : MQ38990 / PAZ125-1
This vehicle is an All-Terrain Vehicle (ATV) and is NOT intended for use on
public roads or highways.
Operation of this ATV by children under the age of 16 increases the risk of
SEVERE INJURY or DEATH. Never permit children under age 16 to operate
this ATV.
Always using an approved helmet and protective gear COULD SAVE YOUR
LIFE!
Provincial / Municipal governments have different regulations pertaining to
owning and operating an off-road vehicle, learn and follow the regulations in
your area.
Please read and understand all instructions before use.
Retain this manual for future reference.
Copyright © 2019 Star Asia, LLC
Advertisement
Table of Contents

Summary of Contents for Star Asia PAZ125-1
- Page 1 8839615 Mini Utility Vehicle Owners Manual Model : MQ38990 / PAZ125-1 This vehicle is an All-Terrain Vehicle (ATV) and is NOT intended for use on public roads or highways. Operation of this ATV by children under the age of 16 increases the risk of SEVERE INJURY or DEATH.
-
Page 2: Specifications
8839615 V 1.4 Mini Utility Vehicle SPECIFICATIONS Length 2000 mm Model PAZ125-1 Fuel Tank Width 900 mm 4 Liters Capacity Height 740 mm 4-Stroke, Forced Air Engine Type Ground Clearance 100 mm Cooled, Single Cyl. Wheel Base 1240 mm Max Power 6.8kW/7500 rpm... -
Page 3: Important Rules For Safe Operation
V 1.4 8839615 In addition to the safety information in this manual, you will find safety labels on the product. FOLLOW ALL WARNINGS BOTH IN THIS MANUAL AND ON THE PRODUCT. SAFETY WARNING! Read and understand all instructions before using this device. The operator must follow basic precautions to reduce the risk of personal injury and/or damage to the equipment. - Page 4 8839615 V 1.4 7. This vehicle is not designed or intended for racing, or any other form of competition. 8. The operator’s ability to operate this off-road vehicle safely is largely dependent upon the operator’s ability to exercise proper judgment. An operator also must not be too small or too large for controlled operation. The operator must be of sufficient age, understanding, mental capacity, and physical capability to safely operate this vehicle.
- Page 5 V 1.4 8839615 17. If the vehicle should start making unusual noise or vibrating abnormally, the engine should be stopped and the spark plug wire disconnected. The vehicle should then be checked for damage. Excessive noise or vibration is generally a warning of loose or worn parts. 18.
-
Page 6: Basic Features
8839615 V 1.4 BASIC FEATURES 8. Seat 1. Engine Cover 9. Spare Tire 2. Rearview Mirror 10. Shifter 3. Headlight 4. Front Turn Indicator 5. Front Bumper 6. Front Wheel Hub 7. Front Tire 11. Rear Tire Fig. 1 12. Steering Column 15. - Page 7 V 1.4 8839615 BASIC FEATURES 24. Choke Lever 25. Reverse Indicator 26. Neutral Indicator 27. Speedometer 20. Keyed Ignition Switch 21. Horn Button 22. L/R Turn Signal Switch 23. Headlight Switch Fig. 3 28. Steering Column 30. Parking Break 29. Accelerator 31.
-
Page 8: Unpacking And Assembly
8839615 V 1.4 UNPACKING AND ASSEMBLY • Unpacking and assembly should be done on a clean, well-lighted, and LEVEL surface. • Allow sufficient workspace so the packaging and other parts may be easily organized. • Assembly should only be performed by a competent adult who is familiar with basic safety and tools required for assembly. - Page 9 V 1.4 8839615 UNPACKING AND ASSEMBLY Fig. 9 Fig. 8 Fig. 10 Step Description Lower the front end and chock the front wheels in the front to prevent the vehicle from rolling forward. Use a jack and jack stands to raise the rear of the vehicle to a height which will allow the tires to be mounted to the hub (Fig.
- Page 10 8839615 V 1.4 UNPACKING AND ASSEMBLY Fig.14 Fig. 13 Fig.15 Fig.16 Step Description Attach the windshield by placing it onto the brackets and fasten it with the two M6 x 25mm button head screws and M6 wing nuts (Fig.14). Attach the windshield bracket (Fig. 15) by using a Philips screwdriver and a 8mm socket and socket wrench to attach the windshield bracket as shown in Fig.
- Page 11 V 1.4 8839615 UNPACKING AND ASSEMBLY Step Description Install the rearview mirrors. Locate the rearview mirrors, and remove the M10 nuts (Fig. 17). With the flat washer on top side of the wheel well, place the driver’s side mirror (Fig. 17, Bottom) into the hole in the wheel well on the drivers side.
- Page 12 8839615 V 1.4 UNPACKING AND ASSEMBLY Step Description Mount the spare tire onto the spare tire bracket as shown in Fig. 25 by removing the two M10 self locking nuts, placing the spare tire onto the studs, and tightening the M10 self locking nuts using a 14mm socket and socket wrench.
- Page 13 V 1.4 8839615 UNPACKING AND ASSEMBLY Step Description Install the brake lights and rear turn indicators to the vehicle as shown in Fig. 30 (Red light on bottom) by removing the two M6 self locking nuts shown in Fig. 29, inserting the studs through the holes on the body, and tightening the M6 self locking nuts using an 8mm socket and socket wrench.
-
Page 14: Battery Installation And Charging
8839615 V 1.4 BATTERY INSTALLATION AND CHARGING POISON - CAUSES SEVERE BURNS The electrolyte contains sulfuric acid. Avoid contact with skin, eyes, or clothing. To prevent accidents, neutralize excess acid with baking soda and rinse empty container with water. In case of: SKIN CONTACT: rinse with water, remove and wash wetted clothing. - Page 15 V 1.4 8839615 Charging the battery • To avoid possibility of an EXPLOSION, always connect battery cable in the order specified: RED first; BLACK last. • Charging the battery while it is in the vehicle is NOT RECOMMENDED. • Do NOT charge a battery if its temperature is below 3°C as the electrolyte may have frozen. •...
- Page 16 8839615 V 1.4 Installing the battery • When INSTALLING the battery, always connect the POSITIVE (+) TERMINAL FIRST, and the NEGATIVE (-) TERMINAL LAST. • When DISCONNECTING the battery, terminals should be disconnected in the REVERSE ORDER, negative terminal first, then positive. •...
-
Page 17: Fuel And Oil
V 1.4 8839615 FUEL AND OIL • Gasoline is extremely FLAMMABLE and can be EXPLOSIVE under certain conditions, creating the potential for serious burns. Always keep gasoline out of the reach of children. • Turn the ignition switch to “OFF”. The fuel tank should never be filled while the engine is running or while the engine is hot. -
Page 18: Engine Oil Capacity
8839615 V 1.4 Failure to use the correct oil could harm the engine. Be sure to use the oil specified in this section. • Running the engine without an adequate amount of engine oil could cause engine overheating and severe engine damage. -
Page 19: Air Filter Cleaning
V 1.4 8839615 AIR FILTER NEVER RUN THE ENGINE WITHOUT THE AIR FILTER in place. • Operating the engine without the air filter in place will allow dust and debris to enter the engine resulting in severe engine damage. AVOID getting the air filter wet when in operation or while washing the vehicle. DO NOT use pressurized air to clean the air filter. -
Page 20: Spark Plug
8839615 V 1.4 SPARK PLUG Improper installation of the spark plug could damage the engine. • An overly tight or cross threaded spark plug will damage the threads of the cylinder head. • Carefully turn the spark plug by hand into the threads. If the spark plug is new, tighten it with a wrench about ½... - Page 21 V 1.4 8839615 TIRES Tires affect your vehicle handling, ride, braking, and safety. For optimum performance, tires must have the correct air pressure, and be free from damage. • Keep the air pressure of the tire at the Maximum PSI recommended on the sidewall. •...
- Page 22 8839615 V 1.4 BRAKES Failing to properly inspect and maintain the vehicle brake system may lead to loss of vehicle control which can result in DEATH or INJURY. • Avoid aggressive use of the brakes. Apply only moderate braking force for the first 50 stops to allow a break- in period for the system.
-
Page 23: Break-In Period
V 1.4 8839615 BREAK-IN Failure to perform the break-in procedure will void any and all warranties. Careful treatment of your new engine and drive components will result in more efficient performance and longer life for these components. Perform break-in by carefully following the procedures in this manual. DO NOT OPERATE AT FULL THROTTLE or high speeds during the first five hours of use. -
Page 24: Pre-Ride Inspection
8839615 V 1.4 PRE-RIDE INSPECTION ALWAYS INSPECT THE VEHICLE BEFORE EACH USE to ensure its safe operating condition and to reduce the risk of accident or damage. REGULARLY INSPECT AND MAINTAIN the vehicle to result in extended life and safe operation. NEVER exceed the load capacity. -
Page 25: Starting The Engine
V 1.4 8839615 OPERATING Read and understand all WARNINGS, CAUTIONS, and INSTRUCTIONS prior to operating the vehicle. AVOID DRIVING AT NIGHT if possible. Be sure to drive slowly and cautiously with the headlights ON if driving in low light conditions. NEVER OPERATE THE VEHICLE WHILE UNDER THE INFLUENCE OF DRUGS OR ALCOHOL. -
Page 26: Stopping The Engine
8839615 V 1.4 OPERATING NOTE: Refer to the BASIC FEATURES section and familiarize yourself with the vehicle features and their locations while reading these operating instructions. STOPPING THE ENGINE To stop the engine: 1. Completely release the Accelerator Pedal (Fig.4, Item 29) and apply the brake so the vehicle comes to a complete stop. - Page 27 V 1.4 8839615 OPERATING FIRST TIME OPERATORS: Although you may have driven other ATVs, take time to learn and practice in a safe area until you build your skills and get accustomed to this vehicle’s size, weight, and handling. Read and understand all WARNINGS, CAUTIONS, and INSTRUCTIONS prior to operating the vehicle.
-
Page 28: First-Time Operation
8839615 V 1.4 OPERATING Read and understand all WARNINGS, CAUTIONS, and INSTRUCTIONS prior to operating the vehicle. Although you may have driven other ATVs, take time to learn and practice in a safe area until you build your skills and get accustomed to this vehicle’s size, weight, and handling. FIRST TIME OPERATION 1. -
Page 29: Driving On Slippery Surfaces
V 1.4 8839615 OPERATING 7. Never go over the crest of a hill at a high speed. An obstacle, a sharp drop, or another vehicle or When driving on slippery surfaces such as wet trails, person could be on the other side of hill. loose gravel, sand or ice, be alert for the possibility 8. -
Page 30: Driving Over Obstacles
8839615 V 1.4 OPERATING DRIVING IN REVERSE Follow these precautions when driving in reverse: Always check for obstacles before operating in a 1. Make sure the vehicle is at a full stop. new area. 2. With the brake applied, move the shifter (Fig. 1, Never attempt to operate over large obstacles, such Item 10) into the reverse position and verify the as large rocks, or fallen trees. -
Page 31: Maintenance Schedule
V 1.4 8839615 MAINTENANCE SCHEDULE Improper maintenance or failing to perform recommended maintenance could be hazardous and may result in an accident. Keep your vehicle in good condition. Maintenance must only be performed by a competent adult who is familiar with the safe use of tools and equipment used to perform maintenance. Ask your service center or a qualified mechanic to do the maintenance items marked with an asterisk (*). -
Page 32: Parts List
8839615 V 1.4 PARTS LIST SEAT GROUP Item No. Part No. Description Quantity PAZ125-1-A-1 Seat PAZ125-1-A-2 Seat Slide ENGINE COVER GROUP Item No. Part No. Description Quantity PAZ125-1-B-1 Enigne Cover PAZ125-1-B-2 Engine Cover Hinge PAZ125-1-B-3 Engine Cover Latch Catch PAZ125-1-B-4... - Page 33 V 1.4 8839615 PARTS LIST FRONT GRILL GROUP Item No. Part No. Description Quantity PAZ125-1-C-1 Front Grill PAZ125-1-C-2 Front Right Turn Lamp PAZ125-1-C-3 Front Left Turn Lamp PAZ125-1-C-4 Enigine Cover Latch BODY GROUP Item No. Part No. Description Quantity PAZ125-1-D-1...
-
Page 34: Frame Assembly
8839615 V 1.4 PARTS LIST FRAME ASSEMBLY Item No. Part No. Description Quantity PAZ125-1-E-1 Frame DASHBOARD ELECTRICS GROUP Item No. Part No. Description Quantity PAZ125-1-F-1 Gear Indicator PAZ125-1-F-2 Rear Left Turn Lamp PAZ125-1-F-3 Left Brake Lamp PAZ125-1-F-4 Right Brake Lamp... - Page 35 V 1.4 8839615 PARTS LIST WINDSHIELD GROUP Item No. Part No. Description Quantity PAZ125-1-G-1 Windshield Plexiglass PAZ125-1-G-2 Windshield Frame PAZ125-1-G-3 Windshield Bumpers PAZ125-1-G-4 Windshield Bracket HANDRAIL AND SEATBELT GROUP Item No. Part No. Description Quantity PAZ125-1-H-1 Handrail (Some Models) PAZ125-1-H-2...
-
Page 36: Steering Group
8839615 V 1.4 PARTS LIST FLOORBOARD GROUP Item No. Part No. Description Quantity PAZ125-1-I-1 Footboard PAZ125-1-I-2 Cover board STEERING GROUP Item No. Part No. Description Quantity PAZ125-1-J-1 Steering Wheel PAZ125-1-J-2 Column Cover PAZ125-1-J-3 Universal Joint PAZ125-1-J-4 Upper Steering Column PAZ125-1-J-5... - Page 37 V 1.4 8839615 PARTS LIST BRACKETS GROUP Item No. Part No. Description Quantity PAZ125-1-K-1 SpareTire Bracket PAZ125-1-K-2 utility container Support PAZ125-1-K-3 utility container Bracket PAZ125-1-K-4 utility container Body Brace PAZ125-1-K-5 Quick Release Band PAZ125-1-K-6 Quick Release Hasp PAZ125-1-K-7 Utility Container PAZ125-1-K-8 Bushing, 16x16x8.5...
-
Page 38: Front Suspension Group
8839615 V 1.4 PARTS LIST FRONT SUSPENSION GROUP Item No. Part No. Description Quantity PAZ125-1-L-1 Front Swing Arm PAZ125-1-L-2 Pivot Shaft PAZ125-1-L-3 Bushing, 18x63x12.5 PAZ125-1-L-4 Grease Zerk PAZ125-1-L-5 Brass Sleeve PAZ125-1-L-6 Front Fork Bushing PAZ125-1-L-7 Front Shock Absorber PAZ125-1-L-8 S Bracket... - Page 39 V 1.4 8839615 PARTS LIST REAR SUSPENSION GROUP Item No. Part No. Description Quantity PAZ125-1-M-1 Rear Shock Absorber PAZ125-1-M-2 Rear Fork Bushing PAZ125-1-M-3 Rear Swing Arm Visit www.princessauto.com for more information...
- Page 40 8839615 V 1.4 PARTS LIST MIRROR AND HEADLIGHT GROUP Item No. Part No. Description Quantity PAZ125-1-N-1 Review Mirror PAZ125-1-N-2 Headlight Bracket PAZ125-1-N-3 Headlight PAZ125-1-N-4 Mirror Bracket PAZ125-1-N-5 Headlight Support PAZ125-1-N-6 Front Cover Support For technical questions call: 1-800-665-8685...
- Page 41 V 1.4 8839615 PARTS LIST ELECTRICAL HARNESS AND COMPONENTS GROUP Item No. Part No. Description Quantity PAZ125-1-O-1 Horn PAZ125-1-O-2 Blinker Relay PAZ125-1-O-3 CDI Unit PAZ125-1-O-4 Connecting Line PAZ125-1-O-5 Sensor PAZ125-1-O-6 Rectifier PAZ125-1-O-7 Start Relay PAZ125-1-O-8 Ignition Coil PAZ125-1-O-9 Main Wire Harness Visit www.princessauto.com...
- Page 42 8839615 V 1.4 PARTS LIST DRIVETRAIN GROUP Item No. Part No. Description Quantity PAZ125-1-P-1 Chain PAZ125-1-P-2 Bushing, 25x87x12 PAZ125-1-P-3 PAZ125-1-P-4 Shaft, 12x120 PAZ125-1-P-5 Chain Tensioning Spring PAZ125-1-P-6 PAZ125-1-P-7 Shaft, 10x100 PAZ125-1-P-8 Circlip PAZ125-1-P-9 Bearing, 6200 PAZ125-1-P-10 Bushing, 18x16.6x10.5 PAZ125-1-P-11 Bushing, 18x20.3x10.5 PAZ125-1-P-12 Bushing, 18x36.6x10.5...
- Page 43 8839615 V 1.4 PARTS LIST TIE-ROD GROUP Item No. Part No. Description Quantity PAZ125-1-Q-1 Steering Rack and Pinion PAZ125-1-Q-2 Steering Arm PAZ125-1-Q-3 U-Bolt PAZ125-1-Q-4 Flatwasher PAZ125-1-Q-5 Springwasher PAZ125-1-Q-6 Locknut PAZ125-1-Q-7 Bolt PAZ125-1-Q-8 Bolt PAZ125-1-Q-9 Bushing, 14x21x10.5 PAZ125-1-Q-10 Bushing, 30x6x10.5 PAZ125-1-Q-11...
-
Page 44: Axle Group
8839615 V 1.4 PARTS LIST AXLE GROUP Item No. Part No. Description Quantity PAZ125-1-R-1 Hub Cover PAZ125-1-R-2 Front Axle Spindle PAZ125-1-R-3 Rear Axle PAZ125-1-R-4 Castle Nut PAZ125-1-R-5 Castle Nut, Large PAZ125-1-R-6 Spacer Ring PAZ125-1-R-7 Spacer Ring, Brass PAZ125-1-R-8 Disc, Front Brake... -
Page 45: Engine Group
V 1.4 8839615 PARTS LIST ENGINE GROUP Item No. Part No. Description Quantity PAZ125-1-S-1 Engine 125CC PAZ125-1-S-2 Carburetor PAZ125-1-S-3 Rebreather Unit PAZ125-1-S-4 Muffler PAZ125-1-S-5 Exhaust Elbow PAZ125-1-S-6 Throttle Cable Assembly PAZ125-1-S-7 Clamp PAZ125-1-S-8 Elbow Washer PAZ125-1-S-9 Bushing PAZ125-1-S-10 Exhaust Gasket... - Page 46 8839615 V 1.4 PARTS LIST LINKAGE GROUP Item No. Part No. Description Quantity PAZ125-1-T-1 Shifter Lever PAZ125-1-T-2 Bushing, 15x50x10.5 PAZ125-1-T-3 Locknut PAZ125-1-T-4 Shaft, 10x75 PAZ125-1-T-5 Linkage End PAZ125-1-T-6 Dowel Pin PAZ125-1-T-7 Flatwasher PAZ125-1-T-8 Cotter Pin PAZ125-1-T-9 PAZ125-1-T-10 Linkage Rod PAZ125-1-T-11...
- Page 47 V 1.4 8839615 PARTS LIST LINKAGE GROUP (Continued) Item No. Part No. Description Quantity PAZ125-1-T-16 Bolt PAZ125-1-T-17 Bolt PAZ125-1-T-18 Parking Brake Mounting Plate PAZ125-1-T-19 Parking Brake Handle PAZ125-1-T-20 Lockwasher PAZ125-1-T-21 PAZ125-1-T-22 PAZ125-1-T-23 Tube, Leather PAZ125-1-T-24 Parking Brake Lever PAZ125-1-T-25 PAZ125-1-T-26...
- Page 48 8839615 V 1.4 PARTS LIST MASTER CYLINDER GROUP Item No. Part No. Description Quantity PAZ125-1-U-1 Rear Brake Extension Spring PAZ125-1-U-2 Bolt PAZ125-1-U-3 Locknut PAZ125-1-U-4 Rear Disc Brake Mounting Plate PAZ125-1-U-5 Brake Pedal Extension Spring PAZ125-1-U-6 Brake Pedal Extension Spring PAZ125-1-U-7...
-
Page 49: Battery Group
V 1.4 8839615 PARTS LIST BATTERY GROUP Item No. Part No. Description Quantity PAZ125-1-U-1 Electrolyte PAZ125-1-U-2 Battery PAZ125-1-U-3 PAZ125-1-U-4 Bolt PAZ125-1-U-5 Rubber Battery Strap TIRE GROUP Item No. Part No. Description Quantity PAZ125-1-W-1 Tire PAZ125-1-W-2 Visit www.princessauto.com for more information... - Page 50 8839615 V 1.4 PARTS LIST PETROL GROUP Item No. Part No. Description Quantity PAZ125-1-X-1 Fuel Tank PAZ125-1-X-2 Fuel Tank Cap PAZ125-1-X-3 Fuel Pump PAZ125-1-X-4 Fuel Tank Valve PAZ125-1-X-5 Wye Tube Connector PAZ125-1-X-6 PAZ125-1-X-7 Flatwasher PAZ125-1-X-8 Bolt PAZ125-1-X-9 PAZ125-1-X-10 Bolt PAZ125-1-X-11...
Need help?
Do you have a question about the PAZ125-1 and is the answer not in the manual?
Questions and answers
Where do I order the parts from?