Table of Contents
Advertisement
Quick Links
Advertisement
Table of Contents

Subscribe to Our Youtube Channel
Related Manuals for Jay-tech 818

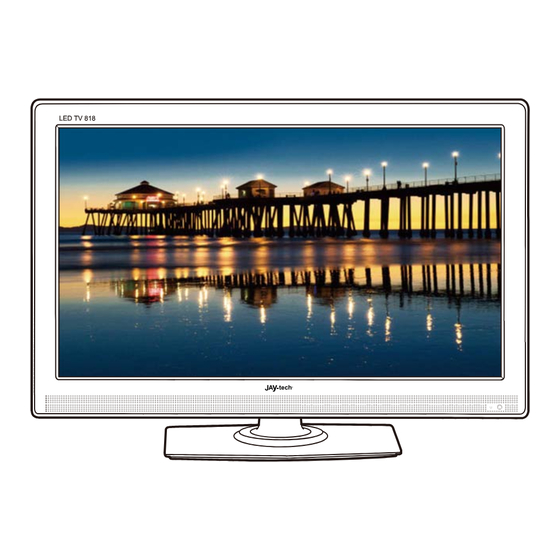
Summary of Contents for Jay-tech 818
-
Page 2: Important Instructions
IMPORTANT INSTRUCTIONS SAFETY INSTRUCTIONS WARNING! TO REDUCE THE RISK OF FIRE, ELECTRIC SHOCK, OR SERIOUS PERSONAL INJURY: This product shall not be exposed to dripping or splashing and that no objects filled with liquids, such as vases, shall be placed on the apparatus. Situate this product away from heat sources such as radiators, heat registers, stoves, or other appliances (including amplifiers) that produce heat. -
Page 3: Accessories
CAUTION! TO REDUCE THE RISK OR PERSONAL INJURY OR PRODUCT/PROPERTY DAMAGE: This product is intended solely for non-commercial, non-industrial, personal use as a television. Do not use this product for any other purpose. Do not subject the product to violent shocks, extreme temperatures, or lengthy periods or direct sunlight. -
Page 4: Table Of Contents
TABLE OF CONTENTS GETTING STARTED IMPORTANT INSTRUCTIONS ..................1 ACCESSORIES......................2 FEATURES........................4 GENERAL PARTS ......................5 REMOTE CONTROL....................6 REMOTE CONTROL PREPARATION................7 BASIC CONNECTION..................... 8-11 OPERATIONS BASIC OPERATIONS.................... 12-16 MAIN MENU ......................17-27 DTV MODE ......................18-24 TV MODE......................25-26 HDMI/AV/SCART/MEDIA MODE ................ -
Page 5: Features
FEATURES 47 cm (18.5") TFT DISPLAY This player has a built-in 47 cm (18.5”) TFT display window to provide clear vision and low radiation. AUTO TV SCANNING DIGITAL BROADCASTING RECEPTION EPG (Electric Program Guide) FUNCTION TELETEXT (EUROPE) FUNCTION USB MULTIMEDIA PLAYBACK MULTI-LANGUAGES ON SCREEN DISPLAY FULL FUNCTION REMOTE CONTROL HDMI, YPbPr, AV, CI, VGA, PC AUDIO, AND SCART INPUT... -
Page 6: General Parts
GENERAL PARTS MAIN UNIT 1. TFT display screen 10. VOL+: To increase the volume level or 2. Remote control sensor move right. 3. Power indicator: In standby mode the 11. POWER: To switch ON/OFF the TV. indicator light will display red color; when 12. -
Page 7: Remote Control
REMOTE CONTROL POWER: To set the unit in standby mode; press it again to switch it on. MUTE: To mute the sound. AUTO: To adjust the screen automatically (in PC/VGA mode). NUMBERIC BUTTONS (0-9): To input the number information, such as channel number and so on. -/--: To select one digit, two digits and three digits. -
Page 8: Remote Control Preparation
REMOTE CONTROL PREPARATION BATTERY INSTALLATION Install the batteries as the following pictures. Be sure + and – terminals are positioned as indicated in the battery compartment (Fig1). SERVICE LIFE OF BATTERIES The batteries normally last for one year although this depends on how often the remote control is used. -
Page 9: Basic Connection
BASIC CONNECTION Ensure all the cables are disconnected from the main unit before connecting to AC power source by AC power adaptor. Read through the instructions before connecting other equipments. CONNECTING TO AC POWER SOURCE Main unit To power outlet To DC 12V jack AC Adaptor CONNECT EXTERNAL ANTENNA TO UNIT... -
Page 10: Basic Connection
YPbPr CONNECTION Audio cable YPbPr cable Back of DVD/VCR INSERT A CI CARD CI slot COMPOSITE AV CONNECTION AV cable For basic connection, use the composite Audio L/R (white/red) and CVBS (yellow) cable to connect the unit with other devices. Back of DVD/VCR... - Page 11 CONNECT USB DEVICE TO THE UNIT Insert a USB memory device into USB slot for multimedia files playback. USB slot CONNECT EARPHONE TO THE UNIT EARPHONE cable HDMI CONNECTION Use HDMI cable to connect the HDMI cable unit with other devices to receive high-definition multimedia signal.
- Page 12 PC/VGA CONNECTION Audio cable VGA cable Back of PC Use VGA cable and Audio cable to connect the unit with TV or PC, and use this product as a monitor. SCART CONNECTION SCART cable Back of DVD/VCR...
-
Page 13: Basic Operations
MAKE SURE ALL THE EQUIPMENTS AND AC ADAPTOR ARE CONNECTED PROPERLY AND THE UNIT IS SET IN CORRECT MODE EFORE KINDS OF OPERATIONS. BASIC OPERATIONS Press POWER button on unit top or remote control to power ON the unit (indicator will glow blue); press it again to power OFF (standby mode) the unit (indicator will glow red). - Page 14 SLEEP TIME SETTING Press SLEEP button on remote control repeatedly to select SLEEP TIME directly. Available options: OFF, 15 MIN, 30 MIN, 45 MIN, 60 MIN, 75MIN, 90MIN, 105MIN, 120MIN. VIDEO SIZE SETTING Press ASPECT button on remote control repeatedly to select VIDEO SIZE directly. Available options: AUTO, 4:3, FULL.
- Page 15 When viewing analog programs: - Press FAV button on remote control to enter FAV LIST menu page directly. - Press UP or DOWN navigation button to select wanted channel. - Press OK button to confirm selection. NOTE: During normal playing, press FAV+/FAV- button to play next or previous favorite channel directly.
- Page 16 TELETEXT - Press TEXT button on remote control to enter Teletext menu page. - Press OK button to confirm selection and view available teletext information. TV/RADIO (FOR DTV MODE ONLY) - Press TV/RAIDO button on remote control to switch the unit between TV and radio mode. SUBTITLE - Press SUBTITLE button on remote control to open or close the subtitle.
- Page 17 1. MOVIE - Press navigation buttons to select the option that wants to play. - Press OK button to play the selected movie. - Press button on remote control to play or pause playing. - Press button on remote control to stop playing. - Press button on remote control to move fast backward.
-
Page 18: Main Menu
MAIN MENU The unit contains different setting menus. Once the initial programming is entered, it will be remain in the memory until change, and the unit can always be operated under the same conditions. The settings will be remained in the memory until the settings are changed ever after setting the player to standby mode. -
Page 19: Dtv Mode
DTV MODE - Press SOURCE button on unit top or remote control to set the unit in DTV mode. 1. PICTURE 1.1 PICTURE MODE Available options: PERSONAL - To adjust the BRIGHTNESS, CONTRAST, COLOR, SHARPNESS to desired value. STANDARD - This mode is usually used in an unchangeable light environment. - Page 20 2. SOUND 2.1 SOUND MODE Available options: PERSONAL, VOICE, MUSIC, STANDARD, THERTRE. 2.2 BASS This item is used to adjust the level of lower-pitched sounds from 0-100. 2.3 TREBLE This item is used to adjust the level of higher-pitched sounds from 0-100. NOTE: The value of BASS and TREBLE is adjustable only in PERSONAL sound mode.
- Page 21 3.5 OSD TIMER This item is used to set the OSD (on screen display) time. Available options: OFF, 5 SECONDS, 10 SECONDS, 30 SECONDS and 60 SECONDS. 3.6 BLUE SCREEN This item is used to set the blue background ON or OFF. The screen background will turn blue at very weak or no signal condition, if BLUE SCREEN is ON.
- Page 22 - Select NO in the menu to enter below menu page and use LEFT or RIGHT navigation button to select wanted option. 4. DTV 4.1 CH.MANAGE Available options: CH.ORGN / CH.SORT / CH.GROUP / DEL TV CH. / DEL RADIO CH. 4.1.1 CH.ORGN Select CH.ORGN item and press OK button to enter Channel Organizer menu.
- Page 23 4.1.2 CH.SORT Select CH.SORT and press OK button to enter Channel Sorting menu. - Press LEFT or RIGHT navigation button to select a certain language as First Option. - Press UP or DOWN navigation button to select All/FTA or Scramble as Second Option.
- Page 24 4.3 AUTO TUNING - Select AUTO TUNING and press OK button to enter it. - Select YES or NO to start channel searching or not. 4.4 MANUAL TUNING - Select MANUAL TUNING and press OK button to enter it, - Select YES or NO to start manual channel searching or not. Then use LEFT or RIGHT button to select channel and start the manual tuning.
- Page 25 4.5.2 SUBTITLE This item is used to set the subtitle language. Available options: OFF, ENGLISH, FRENCH, GERMAN, ITALIAN, SPANISH, PORTUGUESE, DANISH, CZECH, DUTCH, FINNISH, SWEDISH, GREEK, RUSSIAN, WELSH, GAELIC. 4.5.3 RATING - Input password to enter SYSTEM SETUP menu. - Press RIGHT navigation button to enter PARENTAL RATING. - Press UP or DOWN navigation button to select PARENTAL RATING.
-
Page 26: Tv Mode
TV MODE - For PICTURE, SOUND and FUNCTION menus, please refer to the menu operations of DTV mode. 1. COUNTRY Available options: OTHER, PORTUGAL, UK, ITALY, SPAIN, FRANCE, GERMANY. 2. AUTO TUNING - Select AUTO TUNING item, and press OK button to enter below page: - Press LEFT or RIGHT navigation button to decide whether do automatic searching or not. - Page 27 3.3 COLOUR SYSTEM - Press LEFT or RIGHT navigation button to select desired color system. 3.4 AFT - Press LEFT or RIGHT navigation button to set the AFT function ON or OFF. 3.5 MAUAL TUNING - Press LEFT or RIGHT navigation button to fine tune the frequency. 4.
-
Page 28: Hdmi/Av/Scart/Media Mode
HDMI/AV/SCART/MEDIA MODE - Press SOURCE button on unit top or remote control to select desired input source. - For PICTURE, SOUND and FUNCTION menus, please refer to the menu operations of DTV mode. PC MODE - For PICTURE, SOUND and FUNCTION menus, please refer to the menu operations of DTV mode. -
Page 29: Maintenance
MAINTENANCE Be sure to press POWER button to set the player to the standby mode and disconnect the AC adaptor before maintaining the player. Wipe the player with a dry, soft cloth. If the surface is extremely dirty, wipe clean with a cloth which has been dipped in a weak soap-water solution and wrung out thoroughly, and then wipe again with a dry cloth. -
Page 30: Troubleshooting
GENERAL TROUBLESHOOTING Check the following points before assuming malfunctions of this unit: Symptom Remedy No power. Insert the AC adaptor securely into the power outlet. No picture. Ensure that the equipment is connected properly. Ensure that the equipment is connected properly. ●... - Page 31 The product complies with the protective requirements of European Directives 2004/108/EC. The conformity declaration for this product is available under www.jay-tech.de. Directive 2002/96/EC on Waste Electrical and Electronic Equipment (WEEE) This symbol on the product or in the instructions means that your electrical and electronic equipment should be disposed at the end of its life separately from your household waste.
Need help?
Do you have a question about the 818 and is the answer not in the manual?
Questions and answers