Table of Contents
Advertisement
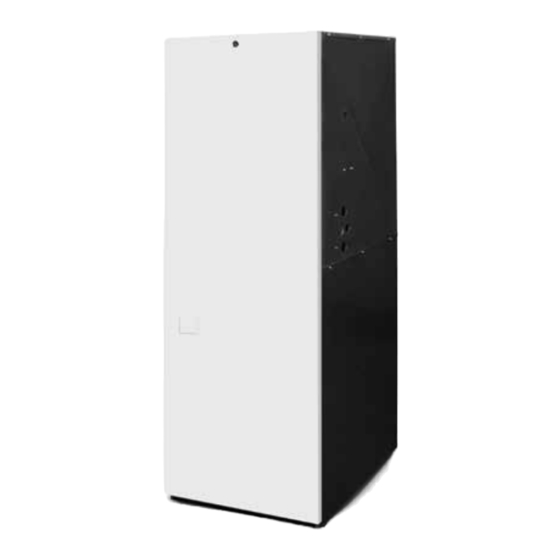
E7 Series Electric Furnace
INSTALLATION INSTRUCTIONS
Downflow & Upflow Models
E7EM MULTI-POISE
WARNING
ELECTRICAL SHOCK, FIRE OR
EXPLOSION HAZARD
Failure to follow safety warnings exactly could
result in serious injury or property damage.
Improper servicing could result in dangerous
operation, serious injury, death or property
damage.
• Before servicing, disconnect all electrical
power to furnace.
• When servicing controls, label all wires prior
to disconnecting. Reconnect wires correctly.
• Verify proper operation after servicing.
DO NOT DESTROY. PLEASE READ CAREFULLY &
KEEP IN A SAFE PLACE FOR FUTURE REFERENCE.
E7EU UPFLOW
It is your responsibility to know this product better than your customer.
This includes being able to install the product according to strict safety
guidelines and instructing the customer on how to operate and maintain
the equipment for the life of the product. Safety should always be the
deciding factor when installing this product and using common sense
plays an important role as well. Pay attention to all safety warnings and
any other special notes highlighted in the manual. Improper installation
of the furnace or failure to follow safety warnings could result in serious
injury, death, or property damage.
These instructions are primarily intended to assist qualified individuals
experienced in the proper installation of this appliance. Some local
codes require licensed installation/service personnel for this type of
equipment. Please read all instructions carefully before starting the
installation. Return these instructions to the customer's package for
future reference.
E7ED DOWNFLOW
ATTENTION INSTALLERS:
Advertisement
Table of Contents

Related Manuals for Revolv E7 Series


Summary of Contents for Revolv E7 Series
- Page 1 E7 Series Electric Furnace INSTALLATION INSTRUCTIONS Downflow & Upflow Models E7EM MULTI-POISE E7EU UPFLOW E7ED DOWNFLOW ATTENTION INSTALLERS: WARNING It is your responsibility to know this product better than your customer. This includes being able to install the product according to strict safety...
-
Page 2: Table Of Contents
TABLE OF CONTENTS IMPORTANT SAFETY INFORMATION ....3 ELECTRICAL WIRING ..........10 Line Voltage Wiring ............10 REQUIREMENTS & CODES ........3 Connecting Supply Service Wires ........10 Minimum Installation Clearances ........3 Grounding ................11 Minimum Unobstructed Airflow ........3 Thermostat / Low Voltage Connections ......11 Clearances to Combustible Materials ......3 Humidifier .................11 Dehumidification Options ..........11... -
Page 3: Important Safety Information
IMPORTANT SAFETY INFORMATION ALL MODELS CLOSET ALCOVE INSTALLER: Please read all instructions before servicing Front ** 6" 24" this equipment. Pay attention to all safety warnings and Back 0" 0" any other special notes highlighted in the manual. Safety Sides* 0"... -
Page 4: Circulating Air Requirements
CIRCULATING AIR REQUIREMENTS • Duct system must be designed so that no supply registers are located in duct system directly below the furnace. WARNING: Filtering Methods - Downflow Furnaces All return ducts must be secured to the furnace Non-Ducted Return Air with sheet metal screws. -
Page 5: Optional Equipment
when modifying this appliance. Refer to local authorities having jurisdiction for further information. 24 3/4” (628 mm) Before You Install this Furnace √ This equipment is securely packaged at the time of shipment and upon arrival should be carefully inspected for damage prior to installing the equipment at the job site. -
Page 6: Standard Duct Connector Installation
REAR WALL OF CLOSET OR ALCOVE REAR WALL OF CLOSET OR ALCOVE 1 3/4" MIN. 2 3/8" MIN. FLOOR CUT-OUT FLOOR CUT-OUT 14 1/2” X 14 1/2” 17 1/2” X 14” FOR DOWNFLOW FOR UPFLOW FURNACES WITH FURNACES WITH STD. DUCT STD. -
Page 7: Narrow Duct Connectors
DUCT CONNECTOR IF FLOOR CAVITY TYPE & PART NUMBER “X” IS: STANDARD DUCT SCREW DOWN DUCT CONNECTOR 7/8” / (22) 901987A 904008 SUPPLY AIR DUCT 2” / (51) 901988A 904009 4-1/4” / (108) 901989A 904010 BEND TABS TIGHTLY 6-1/4” / (159) 901990A 904011 AGAINST SUPPLY AIR DUCT... -
Page 8: Closet Installation
STAPLES OR SHEET METAL SCREWS DUCT CONNECTOR TABS Wall Return Air Grille Coil Air NARROW DUCT NARROW Filters DUCT DUCT FLAP 27" (686 mm) DUCT 56" (1423 mm) CONNECTOR SHEET METAL A/C or H/P SCREWS Coil NARROW DUCT 29" Furnace ( 737 mm) 24 3/4"... -
Page 9: Through-The-Floor Return Air System (Ducted)
7. Install return air grille in closet preferably at same level Provide min. 235 as upflow stand or below mounting platform. See Figure sq. in. (1516 cm ) open free area in front or side wall Through-the-Floor Return Air System (Ducted) or in top of 1. -
Page 10: Electrical Wiring
ELECTRICAL WIRING Connecting Supply Service Wires Power entrance for all models may be through the right WARNING: side or through the bottom of the unit. 1. Remove right-hand control panel (when viewing in downflow position). ELECTRICAL SHOCK, FIRE OR 2. Locate power supply knockouts in side of unit and in EXPLOSION HAZARD bottom of unit. -
Page 11: Grounding
Grounding DISPLAY CURRENT MODE CODE WARNING: Standby is a Rotating Segment Cooling Mode (Y input active) To minimize personal injury, the furnace cabinet Heating Mode (W input active) Circulate Fan Mode (G input active) must have an uninterrupted or unbroken electrical Dehum Cooling Mode (DEHUM input active along with Y) ground. -
Page 12: Figures & Tables
FIGURES & TABLES Blower Wheel Motor Assembly Blower Assembly Filter Filter Door Retainer Panel Circuit Breaker Transformer Jumper for Right Circuit Control Breaker DC Relay Door Limit Left Ground Lug Control Control Door Board Bracket Control Board Figure 16. E7 Furnace Components (Multi-Poise Shown) -
Page 13: Figure 17. E7Em Physical Dimensions
13 1/2” 17” VIEW VentilAire Knockout VentilAire Knockout (1 1/2” X 5”) (1 1/8” X 4 1/2”) T-Stat (Ø 5/8”) 20” 24 1/2” T-Stat RIGHT LEFT FRONT (Ø 5/8”) SIDE SIDE VIEW Electric Ø 1 1/8” 29” Ø 2” Ø 7/8” 2 1/4”... -
Page 14: Figure 19. E7 Furnace Upflow Stand Dimensions
13 1/2” 17” VIEW 24 3/4” 6” 19 7/8” 4 3/8” FRONT 16 1/2” LEFT 14 7/8” RIGHT 20” VIEW SIDE SIDE 17 3/8” 2” 3 3/4” 16 1/2” BOTTOM VIEW Figure 19. E7 Furnace Upflow Stand Dimensions... -
Page 15: Airflow Data
Airflow Data AIRFLOW (CFM) EXTERNAL STATIC PRESSURE (IN. W.C.) MOTOR SWITCH SETTINGS MODEL (0=OFF, 1=ON) NUMBER 1,012 1,084 1,047 1,011 1,157 1,119 1,084 1,047 1,009 1,197 1,166 1,130 1,093 1,056 1,017 E7E*-0**H1 1,245 1,215 1,178 1,143 1,105 1,066 1,293 1,263 1,225 1,192 1,154... -
Page 16: Electrical Data & Diagrams
Electrical Data & Diagrams 5-WIRE THERMOSTAT 4-WIRE THERMOSTAT WIRE WIRE NUTS NUTS TO FURNACE CONTROL WIRING TO FURNACE CONTROL WIRING HEAT PUMP THERMOSTAT WIRE NUTS VIOLET TO FURNACE CONTROL WIRING NOTE: For optional dehumidifcation violet wire connection, refer to the Dehumidication Options section. Figure 20. -
Page 17: Table 7. E7 Electrical Specifications
MAXIMUM MODEL MINIMUM SUPPLY TOTAL OVER- NUMBER CIRCUIT CIRCUIT AMPERES CURRENT E7E*- AMPACITY RATING 010H1 Single 45.3 Single 51.6 012H1 Dual "A" 27.8 Dual "B" 24.2 Single 66.1 015H1 Dual "A" 45.3 Dual "B" 20.8 Single 71.1 017H1 Dual "A" 45.0 Dual "B"... -
Page 18: Figure 22. E7Eb-010H Models
Figure 22. E7EB-010H Models... -
Page 19: Figure 23. E7Eb-012H Models
Figure 23. E7EB-012H Models... -
Page 20: Figure 24. E7Eb-015H Models
Figure 24. E7EB-015H Models... -
Page 21: Figure 25. E7Eb-017H Models
Figure 25. E7EB-017H Models... -
Page 22: Figure 26. E7Eb-020H & E7Eb-023H Models
Figure 26. E7EB-020H & E7EB-023H Models... -
Page 23: Table 8. Control Board Operation
CONTROL SIGNAL & OPERATION TOTAL KW BOARD ACTION MODE Stage 1 Heat on immediately HEAT Blower on after 3 second delay Stage 2 heat on after 10 second delay Stage 1 Heat on immediately HEAT Blower on after 3 second delay Stage 2 heat on after 10 second delay Stage 1 Heat on immediately HEAT Blower on after 3 second delay... -
Page 24: Installation Checklist
CONTROL SIGNAL & OPERATION TOTAL KW BOARD ACTION MODE W & Y Heat stages off immediately AUX HEAT (Continued) Blower turns off after 15 second delay Blower on immediately (35% of COOL) Blower off immediately COOL blower on immediately HEAT PUMP AND COOL COOL blower off after 40 second delay 70% COOL blower on immediately Y &...
Need help?
Do you have a question about the E7 Series and is the answer not in the manual?
Questions and answers
locked thermno statr