Table of Contents
Advertisement
Quick Links
Advertisement
Table of Contents

Summary of Contents for Teseq NSG 5500
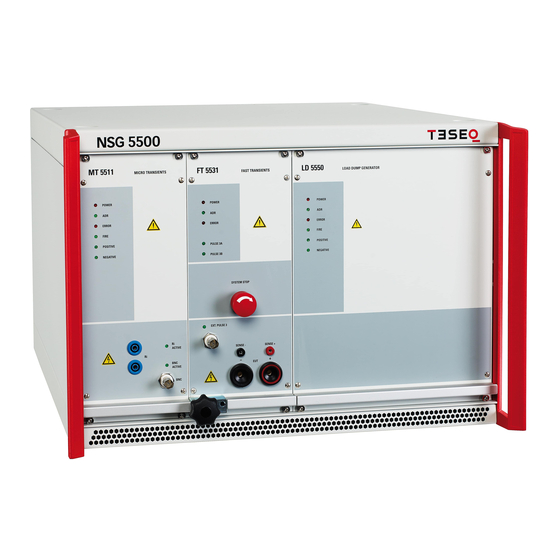
- Page 1 NSG 5500 AUTOMOTIVE TRAN- SIENT IMMUNITY GENERATOR HARDWARE GUIDE 601-302E...
- Page 2 NSG 5500 AUTOMOTIVE TRAN- SIENT IMMUNITY GENERATOR HARDWARE GUIDE...
-
Page 3: Table Of Contents
Checking the shipment Delivery contents Operating position Line voltage connection and grounding 2.4.1 Mains voltage selector Installation / set-up NSG 5500 Installation / set-up FT 5531 2.6.1 Test set-up 2.6.2 Parameter references Installation / set-up LD 5505 and LD 5550 2.7.1... - Page 4 Declaration of conformity CE Technical Data Technical specifications 5.1.1 NSG 5500 5.1.2 MT 5511 5.1.3 LD 5505 5.1.4 LD 5550 5.1.5 FT 5530 5.1.6 FT 5531 5.1.7 ARB 5500 Measures and weight Environmental Conditions Addresses NSG 5500 Automotive transient immunity generator...
-
Page 5: Safety Instructions
1 SAFETY INSTRUCTIONS DANGER! It is imperative that you read the following safety instructions and all safety ins- tructions in the manuals of connected peripheral systems before installing and starting this test system for the first time. DANGER! The electrical and mechanical safety equipment must not be removed, put out of operation or bypassed. -
Page 6: Classification Of Dangers
Warning of a danger spot (refer to the documentation) CAUTION! Caution symbol Definition Warning of voltages that might involve the risk of electric shock Warning of a danger spot (refer to the documentation) NSG 5500 Automotive transient immunity generator... -
Page 7: Excess Voltage Category
1.3 Excess voltage category The test system NSG 5500, as described in this manual, is related to the excess voltage category II according IEC 60664. 1.4 Range of validity These instructions are valid for the complete installation. Further safety regulations for components installed in this test system or additional installed devices are not suspended by these instructions. -
Page 8: Safety Of Operation
During operating the generator always observe the relevant rules of ESD (Electro Static Discharge) protection. To guarantee the EMC features of the NSG 5500, the control computer must meet the requirements of the EN 50082, 55011, 61000 standard. The operation of radio equipment or other high frequency emitting devices near the DUT or adaptation cables, may possibly lead to wrong test results (while HF energy is emitted). -
Page 9: Reduction Of Operational Safety
All mains driven types of generators are equipped for high voltage working safety in accordance with VDE 0104. The EMC compatibility has been tested with EN 61326 version 03/2002. 1.10 Reduction of operational safety If you have any reasons to suppose that the test equipment is not completely safe, you must shut it down and put it out of operation. -
Page 10: Installation
Besides the mains supply itself, certain instruments also operate at high voltages which are not provided with any internal form of extra protection against being touched. Ensure that all unused slots are blanked off before powering up. NSG 5500 Automotive transient immunity generator... -
Page 11: Test Execution
1.14 Test execution The test area must be so organised that no unauthorised persons have access during execution of a test. DUTs, together with their accessories and cables, are to be considered as being live during a test. The test generator must be stopped and the DUT supply interrupted before any work is carried out on the DUT. -
Page 12: Dangers Concerning The Dut
Explosion of electronic components with fire or fragmentation as a result of the energy dissipated, e.g. from the resultant supply current or ignition of vaporised plastics materials. CAUTION! Faulty behaviour by the DUT, e.g. robot device strikes out, temperature controller fails, etc. NSG 5500 Automotive transient immunity generator... -
Page 13: Installation
The power input of the tester is located on the rear side of the NSG 5500 (see picture 3-4). The power input is secured by two 3.15 A time-lag fuses (220–240 V range) or two 6.3 A time-lag fuses (110–120 V range). For details, refer to chapter 4.3 Protection. -
Page 14: Mains Voltage Selector
The selected voltage range is marked by the small arrow on the module that points to the white mark at the input connector assembly. The small bar indicates the voltage range selected (220–240 V selection shown) Picture 2-1: Mains voltage selector (220–240 V range selected in the picture). NSG 5500 Automotive transient immunity generator... - Page 15 To select the other voltage range, procceed as follows: DANGER! The NSG 5500 must be disconnected from the mains before working on the mains voltage selector by disconnecting the power cord! Carefully loosen the drawer from the input connector assembly using a screwdriver and turning it slightly in both directions as shown in the picture below.
- Page 16 Turn the drawer until the text of the desired voltage range and its arrow is on the bottom of the drawer. Picture 2–4: Turn the drawer Push the drawer back in ... Picture 2–5: Push the drawer back in. NSG 5500 Automotive transient immunity generator...
-
Page 17: Installation / Set-Up Nsg 5500
This section outlines a brief checklist of items that should be done before the unit is powered up and put into service. The NSG 5500 may be set up by qualified personnel only. It is imperative to observe the safety instructions at the beginning of this manual. -
Page 18: Installation / Set-Up Ft 5531
Differences are noted where necessary Ensure that the power is turned off on the NSG 5500 mainframe and that the battery input is disconnected. Insert the cassette in the second slot from left and push in fully. Screw in the four retaining screws fully. -
Page 19: Parameter References
2.6.2 Parameter references The following diagram shows the reference points used for parameter specifications on the FT 5531. Picture 2–8: Reference points of the FT 5531... -
Page 20: Installation / Set-Up Ld 5505 And Ld 5550
Insert the cassette in the right most slot and push in fully. Screw in the four retaining screws fully. If using the battery switch, ensure this module is present and inserted fully in the rear of the NSG 5500 mainframe. -
Page 21: Parameter References
2.7.2 Parameter references The following diagrams show the reference points for parameter specifications on the module. Picture 2–10: Reference points for pulse 5 (upper diagram) and pulse 7 (lower diagram). -
Page 22: Installation / Set-Up Mt 5511
Insert the cassette in the most left slot and push in fully. Screw in the four retaining screws fully. The battery switch is required, ensure that this module is present and inserted fully in the rear of the NSG 5500 main- frame. -
Page 23: Parameter References
2.8.2 Parameter references The following diagrams show the reference points that are used for parameter specifications on the MT 5511. 10 % Pulse 1 90 % 90 % Pulse 2a 10 % Pulse 6 Picture 2–12: Reference points for pulses 1, 2 and 6. -
Page 24: Installation / Set-Up Control Unit (Ctr)
AutoStar comm setup screen corresponds with the IEEE 488 address set on the control unit. A DIP switch array on the front panel of the control unit is used to set the NSG 5500 IEEE address. There may be five or six switches on this DIP switch, depending on the hardware version. Only the first five switches are used. -
Page 25: Ieee Address Setting Ctr 5501
2.9.2 Updating NSG 5500 firmware CAUTION! Updating the firmware should only be done with direct assistance of your local support organization. Incorrectly performed firmware downloads will result in an NSG 5500 that no longer boots and must be sent back for service! -
Page 26: Updating The Firmware Ctr 5500
CAUTION! You should only perform this step with the assistance of one of our worldwide service representatives. Incorrectly performed firmware downloads will result in an NSG 5500 that no longer boots and must be sent back for service! 2.9.2.3 Installation No specific installation procedure is required. - Page 27 Picture 2–15: Starting the flash loader The Flash Loader automatically retrieves basic configuration information from the connected controller and displays them in the first three text fields. Picture 2–16: The flash loader tool...
-
Page 28: Startup Error
Click „Config COM Port…“ at the bottom of the main window to select the working COM port. Picture 2–18: Choose the COM port (USB) In this dialog, only select „Port“, the other parameters are not relevant. The new COM port is now stored in an INI file. NSG 5500 Automotive transient immunity generator... -
Page 29: Download Operation
You will find two different types of .MOTX files: LSI (legacy system interface): Interface For updating communications like the USB and GPIB features NSI (new system interface): Main Controller The main firmware for updating firmware that determines how the NSG 5500 operates... -
Page 30: Downloading
This involves two steps: a) Reading the complete firmware file and converting it into an appropriate format for downloading to the controller This is performed automatically on load by the tool. Picture 2–22: Reading the firmware file NSG 5500 Automotive transient immunity generator... -
Page 31: Recovery
After a successful download, a brief sound is played and a message is shown. Picture 2–24: Download complete It is now required to restart the controller by switching off the NSG 5500. 2.9.2.8 Recovery If a communication error occurs or the download procedure is aborted for any reason, the firmware will not be successfully loaded. - Page 32 When a controller who’s update has failed, or contains corrupted firmware, the following dialog is brought up. Picture 2–26: Fialsafe recovery You will then be guided through the recovery process identical to the update process and may continue to use the system as normal after restarting. NSG 5500 Automotive transient immunity generator...
-
Page 33: Operation
150 ns pulse widths built-in 100 A coupler. Single output for all pulses High quality earth contact NOTE! The NSG 5500-1 can contain one large and two small modules. The NSG 5500-2 can contain two large and four small transient modules. -
Page 34: Nsg 5500 Operation
ISO standard and in many cases to a higher specification than that specified in the standard. The NSG 5500 is a modular instrument where the pulse generators are designed as plug- in modules that fit into the NSG 5500 mainframe. -
Page 35: Powering Up The System
Due to the modular structure of the NSG 5500 you may configure a test system that provides only the pulse requirements that are required for your application by installing additional modules as needed. NOTE! Pulses of similar specification and energy requirements are usually housed in the same plug-in unit. -
Page 36: Nsg 5500 System Overview
3.2.3 NSG 5500 System overview The NSG 5500 mainframe is designed to take the pulse plug in units from the front. The system support electronics are plugged in from the rear. Picture 3-3: NSG 5500 Rear view. These rear plug in units are not generally removed by the user. These units have a modular construction to facilitate easy maintenance and to allow for future upgrades to the NSG 5500 system. -
Page 37: Cdn 5500 - Power Entry And Battery Switch
3.2.3.1 CDN 5500 - Power entry and battery switch This unit is used to bring mains input into the system and to connect the battery input to the system power bus. Bus expansion connector Remote interface Battery terminals (sense) Thermal circuit Mains input breaker with fuses... - Page 38 This indicator determines voltage selected Picture 3-5: Power entry module of the NSG 5500 (located in the CDN 5500). The battery switch unit is an electronic solid state switch that allows flexible control of the power bus output during the generation of interference pulses - for example pulse 1. (ref. ISO standard 7637-2).
- Page 39 Upon detailed analysis of this pulse requirement it becomes clear that there is a requirement for the battery power to switch “ON“ and “OFF“ during pulse generation. A general block diagram of the CDN 5500 and CDN 5501 unit for the NSG 5500 system could be represented as follows.
-
Page 40: Control Unit
3.2.3.2 Control unit The control unit houses the processor board which controls the complete NSG 5500 system. The remote control interfaces are also mounted on this unit. The USB or RS 232 and IEEE 488 interfaces are supplied as standard on all NSG 5500 systems. -
Page 41: Ctr 5502 Containing Arb 5500 Modules
3.2.3.3 CTR 5502 Containing ARB 5500 Modules CH 1 (In +ARB Option incl.) CH 2 CH 3 +ARB Option CH 4 CH 5 CH 6 CH 7 CH 7 The CTR 5502 can contain up to eight arbitrary waveform generators. The ARB 5500 supports: Up to eight synchronized channels 64 k segments... -
Page 42: Hv-Supply
Use of the IEEE 488 interface requires an interface to be fitted to the PC and the NSG 5500 chassis. IEEE IEEE Interface(s) Picture 3-10: IEEE remote control of the NSG 5500 NOTE! The Windows based application program «AutoStar» allows full remote control and test sequences to be developed within the graphical Windows environment. -
Page 43: System Block Diagram
(DUT+) BAT++ BAT-- (DUT-) Remote MT 5511 BAT- RS 232 CONTROL UNIT IEEE LD 5505 / other modules, etc. DC power train Connections to possible expansion chassis Signal / pulse line Picture 3-12: System block diagram of the NSG 5500. -
Page 44: External Trigger And Control Signals
3.2.4 External trigger and control signals There are four input/output signals available on the rear of the NSG 5500 mainframe that can be used for syncronization with external equipment. The logic levels on these signals are as follows. Fail signal... - Page 45 3.2.4.2 DUT FAIL signal This is an input signal. It can be used to indicate that a DUT failure has occured. Once this signal input is pulled low the present pulse generation pattern will be aborted and testing will end. The AutoStar software can automatically detect the state of the DUT FAIL signal input and will stop the program execution automatically if it detects a low signal.
-
Page 46: Ft 5531 Operation
3.3 FT 5531 Operation 3.3.1 Introduction The FT 5531 (FT = Fast Transients) is a plug-in burst generator designed for use with the NSG 5500 mainframe system. This generator is designed primarily to meet the specification requirements for the ISO 7637 standard for pulses 3a and 3b. -
Page 47: Block Diagram
3.3.2 Block diagram HV - Supply + Reservoir Overvoltage capacitor detect HV - Supply - Pulse Polarity Coupling generator Measure control circuit Battery + DUT + Battery - DUT - Picture 3-21: Block diagram of the FT 5531... -
Page 48: Tests With A Coupling Clamp
12. Test pulse generator A standard-conforming coupling clamp is available from Teseq under the type number CDN 500. The clamp has a 50 Ω BNC connector at both sides. The test circuit must be terminated with 50 Ω on the side opposite to the generator. -
Page 49: Introduction
The module is designed using state of the art active pulse-shaping technology. This means repeatable perfor- mance and maintenance free operation. It also means that test results can be repeated accurately. The output pulses of the generator are available on two 6 mm sockets on the front of the NSG 5500 instrument. NOTE! -
Page 50: Mt 5511 Operation
This allows flexible test patterns to be generated, which can facilitate rapid analysis of susceptibility limits of a device under test. The output pulses of the generator are available on two 6 mm sockets on the front of the NSG 5500 main- frame. -
Page 51: System Requirement
System requirement Min. version no NSG 5500 Auto Star V 1.0 Firmware 9.01 Table 3-1: Minimum system requirements for use with the MT 5511. Indicates power ”ON” Flashes when unit addressed Error indicator Positive pulses indicator Flashes when pulse Negative pulse indicator... -
Page 52: Block Diagram
Overvoltage Pulse width protect capacitor Meas & Pulse shaping Coupling Polarity control network Ri Jack Picture 3-29: Block diagram of the MT 5511. 3.5.3 Transient diagram Picture 3-30: Block diagram of the MT 5511. NSG 5500 Automotive transient immunity generator... -
Page 53: Arb 5500 Arbitrary Waveform Generator
A CTR 5502 can be equipped with up to eight ARB 5500 arbitrary waveform generators. Each ARB 5500 contains the necessary +/- 10V control signal for driving a source like Teseq’s PA 5840 or PA 5740. The ARB 5500 also provides a 0-10V control signal is provided for Teseq sources with a programmable current limit. -
Page 54: The Hardware
3.6.1 The Hardware The NSG 5500 can contain up to eight ARB 5500 modules, but it must be prepared to hold the modules. An NSG 5500 +ARB already contains one ARB 5500, and some necessary electronics. Once the +ARB Option is included, up to seven additional ARB 5500 modules may be added to control up to eight sources. -
Page 55: Maintenance
4 MAINTENANCE Under normal conditions, it does not take much effort to keep your test equipment in good working order. CAUTION! Protect the equipment against moisture, heat and dust. 4.1 Cleaning the equipment To clean the equipment, use a dry, clean cloth. Never use water, any other liquid or detergent. 4.2 Moving and storing the device The device must be installed/uninstalled only by qualified personnel. -
Page 56: Protection
4.3 Protection 4.3.1 Magnetic circuit breaker The NSG 5500 Main battery source Input is protected with a magnetic circuit breaker. The element is a slow breaker to allow high inrush currents. The specifications of the magnetic circuit breaker are as follows:... -
Page 57: Fuses
The fuses are placed in the mains voltage selector. To exchange a fuse, proceed as follows: DANGER! The NSG 5500 must be disconnected from the mains by disconnecting the power cord before working on the mains voltage selector! Carefully loosen the drawer from the input connector assembly using a screwdriver and turning it slightly in both directions as shown in the picture below. - Page 58 Remove the defect fuse(s)... The defect fuse on the side of the drawer Picture 4-4: The Fuses are placed on the sides of the drawer..probably carefully using a small screwdriver Picture 4-5: Remove defect fuses. NSG 5500 Automotive transient immunity generator...
- Page 59 Picture 4-6: Push the drawer back in..until it is fixed to the input connector assembly again Picture 4-7: Fix the drawer to the input connector assembly. Now reconnect the NSG 5500 to the mains.
-
Page 60: Declaration Of Conformity Ce
4.4 Declaration of conformity CE NSG 5500 Automotive transient immunity generator... -
Page 61: Technical Data
5 TECHNICAL DATA 5.1 Technical specifications 5.1.1 NSG 5500 Instrument power supply: 100 to 120 VAC ±10%, 47 - 63 Hz 220 to 240 VAC ±10%, 47 - 63 Hz DUT supply: From an external source, e.g. battery or PA 5840 power amplifier / battery... -
Page 62: Ld 5505
Pulse Modes Single, continuous, programmed *Lower voltage also programmable System Requirements: NSG 5500 with the new CTR 5501, AutoStar 6.2. Package Upgrades Available on Request. CAUTION! The FT 5531 is only compatible with AutoStar 6.2 and above. Failure to use AutoStar 6.2 and above may result in severe damage to the system! -
Page 63: Arb 5500
Synchronization: Up to 8 channels 5.2 Measures and weight Dimensions: NSG 5500-1: 19” desktop housing (rack mountable), height 330 mm (13”), depth 510 mm (20”) NSG 5500-2: 9” desktop housing (rack mountable), height 640 mm (25.2”), depth 510 mm (20”) Weight (incl. - Page 64 T + 1 732 417 0501 F + 1 732 417 0511 Toll free +1 888 417 0501 usasales @ teseq.com To find your local partner within Teseq ’s global Specifications subject to change without notice. ® network, please go to www.teseq.com Teseq is an ISO-registered company.
Need help?
Do you have a question about the NSG 5500 and is the answer not in the manual?
Questions and answers