Advertisement
Advertisement
Table of Contents
Troubleshooting

Related Manuals for Living & Co LQ-2501


Summary of Contents for Living & Co LQ-2501
- Page 1 AIR FRYER INSTRUCTION MANUAL MODEL: LQ-2501 AFTER SALES SUPPORT 0800 422 274...
-
Page 3: Table Of Contents
CONTENT IMPORTANT SAFEGUARDS ........1-3 PARTS DESCRIPTION ..........4 GETTING STARTED ..........5 OPERATING INSTRUCTIONS ........ 6-8 CLEANING ............... 8-9 STORAGE ..............9 APPLIANCE SPECIFICATION ........9 ............. 10 COOKING GUIDE TROUBLE SHOOTING ........11-12 AFTER SALES SUPPORT 0800 422 274... -
Page 4: Important Safeguards
IMPORTANT SAFEGUARDS Caution Please read this manual carefully before using the appliance as danger may occur under incorrect operations. Do not immerse the housing in water or rinse under the tap due to the electronic and heating components. Avoid any liquid entering the appliance to prevent electric shock or short-circuit. - Page 5 IMPORTANT SAFEGUARDS Caution Do not place anything on top of the appliance. Do not use the appliance for any other purpose than described in this manual. Do not operate the appliance unattended. During hot air frying, hot steam is released through the air outlet openings.
-
Page 6: Important Safeguards
IMPORTANT SAFEGUARDS Caution knowledge, unless they have been given supervision or instruction concerning use of the appliance by a person responsible for their safety. If the supply cord is damaged, it must be replaced by the manufacturer, its service agent or a similarly qualified person in order to avoid a hazard. -
Page 7: Parts Description
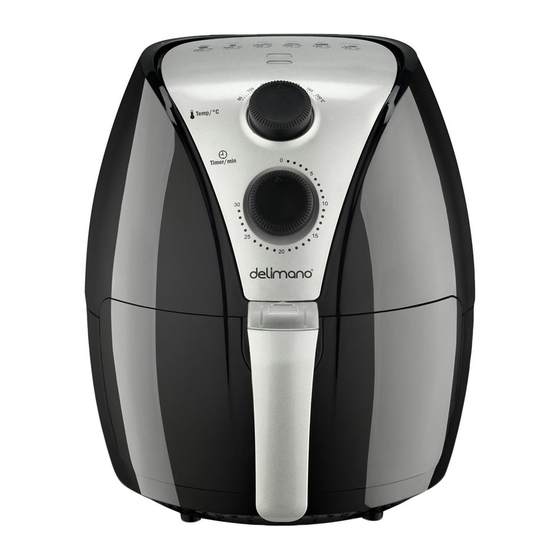
PARTS DESCRIPTION G. Power indicator light A: Basket H. Heating indicator light B: Basket release button C. Basket handle I: Timer knobs D. Tray J: Vent windows E. Air inlet K: Power cord storage box F. Temperature control knob L: Power cord AFTER SALES SUPPORT 0800 422 274... -
Page 8: Getting Started
GETTING STARTED Before first use Remove all packaging materials and stickers or labels. Clean the basket and pan with in warm, soapy water, then rinse and dry thoroughly. Do not immerse the main unit in water or any other liquid. Never use harsh or abrasive cleaning detergents or scourers to clean air fryer or its accessories, as this could cause damage. -
Page 9: Operating Instructions
OPERATING INSTRUCTIONS • Plug in and switch on the air fryer at the mains power supply. • Preheat the air fryer for 3-5 minutes by use the timer control and temperature control dials. The power indicator light and the heating-up light go on, once it has reached the required temperature, the heat indicator light will automatically switch off. - Page 10 OPERATING INSTRUCTIONS • The timer starts counting down the set cooking time. During the air frying process, the heating-up indicator • light switches on and off. This indicates that the heating element is regulated and cycling on and off to maintain the set temperature.
-
Page 11: Cleaning
OPERATING INSTRUCTIONS • To remove small ingredients (e.g. fries), press the basket release button and lift the basket out of the pan. Don’t turn over the pan, otherwise, the oil collected on the bottom of the pan will leak onto the ingredients. The pan and the ingredients are hot after hot air frying. -
Page 12: Storage
CLEANING • Make sure your appliance has cooled down completely before cleaning. • Wipe the outside of the appliance with a moist cloth. • Clean the basket and pan with warm, soapy water, then rinse and dry thoroughly. CAUTION: Do not immerse the main unit in water or any other liquid. -
Page 13: Cooking Guide
COOKING GUIDE Min-max Time Temperature Shake Extra Amount (min) (°C) information Potatoes & fries Thin frozen fries 300-700 9-16 shake shake Thick frozen fries 300-700 11-20 300-800 shake Add 1/2 tbsp of oil Home-made fries (8×8mm) 16-10 Home-made potato wedges 300-800 18-22 shake... -
Page 14: Trouble Shooting
TROUBLE SHOOTING Problem Possible cause Solution The AIR FRYER The appliance is not Put the mains plug in an earthed does not work. plugged in. wall socket. Turn the timer knob to the required You have not set the Timer. cooking time to switch on the appliance Put smaller batches of food in the... -
Page 15: Trouble Shooting
TROUBLE SHOOTING Problem Possible cause Solution White smoke is caused by grease White smoke The pan still contains grease heating up in the pan. Make sure you Comes out from the residues from previous use. clean the pan correctly after each use. Appliance. - Page 16 Warranty We pride ourselves on producing a range of quality home appliances that are both packed with features and completely reliable. We are so confident in our products, we back them up with a 1 year warranty. Now you too can relax knowing that you are covered. Customer Helpline NZ: 0800 422 274 This Product is covered by 1 year warranty when accompanied by proof of purchase...
Need help?
Do you have a question about the LQ-2501 and is the answer not in the manual?
Questions and answers