Advertisement
THE QUALITY BRAND IN FANS
CAUTION!
READ ALL SAFETY PRECAUTIONS AND INSTRUCTIONS CAREFULLY
BEFORE INSTALLATION AND OPERATION.
Minor design changes or otherwise may result in slight variations between the product illustrated and that which is
contained within this package
INSTALLATION AND OPERATION INSTRUCTION BOOK, REV 2.0
DOMINO SERIES
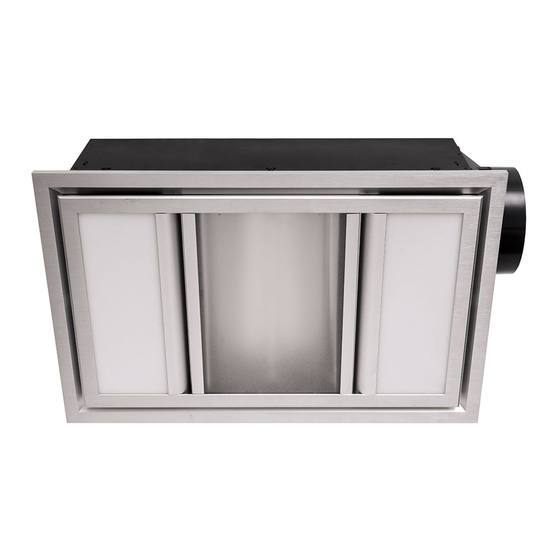
MODELS: BH151ESWWH, BH151ESWSL
BATHROOM HEATER WITH EXHAUST FAN AND LED LIGHT
Advertisement

Subscribe to Our Youtube Channel
Summary of Contents for MERCATOR DOMINO Series
- Page 1 Minor design changes or otherwise may result in slight variations between the product illustrated and that which is contained within this package INSTALLATION AND OPERATION INSTRUCTION BOOK, REV 2.0 DOMINO SERIES MODELS: BH151ESWWH, BH151ESWSL BATHROOM HEATER WITH EXHAUST FAN AND LED LIGHT...
-
Page 2: Table Of Contents
INTRODUCTION & SPECIFICATIONS ..........................1 SAFETY PRECAUTIONS ................................ 2 UNPACKING YOUR HEATER .............................. 3 CHOOSING A PROPER LOCATION ............................ 4 INSTALLATION INSTRUCTIONS ............................6 WIRING DIAGRAM ................................11 CARE AND MAINTENANCE ............................. 12 Rev 2.0 Mercator Pty Ltd. All Rights Reserved. -
Page 3: Introduction & Specifications
INTRODUCTION & SPECIFICATIONS CONGRATULATIONS ON YOUR CHOICE Thank you and we are delighted you have chosen a MERCATOR bathroom heater for your home. Please read all instructions carefully before assembly and use. SAFETY NOTICES WARNING / CAUTION A WARNING / CAUTION notice denotes a hazard. It calls attention to an installation procedure, operating procedure, maintenance procedure, or the like, that if not correctly performed or adhered to, could result in damage to this product, personal injury or death. -
Page 4: Safety Precautions
21. Use only heat lamps and lighting lamps approved by MERCATOR. 22. Use only wall controllers approved by MERCATOR. Do not use electronic or solid state wall controllers. 23. Do not install or use the product outdoor where it could be exposed to water or moisture (indoor use only). -
Page 5: Unpacking Your Heater
1 x warranty card Use of an unapproved wall controller voids the warranty. Therefore do not control the operation of this product from any wall controller that is not approved by Mercator for use with this product. Do not use solid state controllers. -
Page 6: Choosing A Proper Location
12. Ensure the ceiling is strong enough to support the weight of at least 10 kg. Domino Fascia size 560 mm x 360 mm Cut out size 540 mm x 320 mm Product height without fascia 207 mm Product height including fascia 222 mm Rev 2.0 Mercator Pty Ltd. All Rights Reserved. - Page 7 5. Do not use ducting with a diameter smaller than the diameter of the outlet, or the collar of the grille to which the duct is connected. 6. Secure ducting connection properly using clamp, cable tie or tape. Rev 2.0 Mercator Pty Ltd. All Rights Reserved.
-
Page 8: Installation Instructions
INSTALLING BATHROOM HEATER 4. Use a pencil and trace around the template supplied the package. Rev 2.0 Mercator Pty Ltd. All Rights Reserved. - Page 9 7. Remove wiring box cover to access terminal block by loosening four screws. Check the air outlet and remove any adhesive tape holding draft stopper in place to allow free movement in operation. Rev 2.0 Mercator Pty Ltd. All Rights Reserved.
- Page 10 Make sure side clamps are pulled inwards so that the rest of housing can pass through the hole without damaging plaster board. Tips: Do not overtighten clamp when securing ducting to air outlet to allow draft stopper fully open in operation. Rev 2.0 Mercator Pty Ltd. All Rights Reserved.
- Page 11 INSTALLATION INSTRUCTIONS 10. Ensure the unit is held securely in place by the pushing side clips outwards and tighten the screws until main unit rests flush to the ceiling Rev 2.0 Mercator Pty Ltd. All Rights Reserved.
- Page 12 11. Reconnect lamp wire and re-install fascia to main unit, ensuring fascia has clicked into place and is secure. Before first use, turn on heat lamp and exhaust fan for at least 5 minutes to eliminate any lingering odour. Rev 2.0 Mercator Pty Ltd. All Rights Reserved.
-
Page 13: Wiring Diagram
1. Disconnect the power and remove the existing wall plate and switch (if any). 2. Tighten screws on the terminal blocks and make sure wire connections are secure. 3. Secure the wall controller to the wall with two screws provided. Rev 2.0 Mercator Pty Ltd. All Rights Reserved. -
Page 14: Care And Maintenance
Avoid touching heat lamp with hand as grease from skin shorten life span of lamp. Reverse the steps outlined to re-install heat lamp Rev 2.0 Mercator Pty Ltd. All Rights Reserved. - Page 15 HOW TO REPLACE LED LIGHT The integrated fascia assembly can be replaced when operation lifetime of LED lamp is reached. 1. The following fascia is recommended for replacement. Mercator Model no. XBH1511WH: Domino fascia, White Mercator Model no. XBH1511SL: Domino fascia, Silver ...
Need help?
Do you have a question about the DOMINO Series and is the answer not in the manual?
Questions and answers
how to clean the domino heater/fan
To clean the MERCATOR DOMINO Series heater/fan:
1. Do not use any cleaner that is corrosive to plastic.
2. Dry the product completely before re-use.
These steps help maintain the product's condition and ensure safe operation.
This answer is automatically generated