Advertisement
Quick Links
Installation Instructions
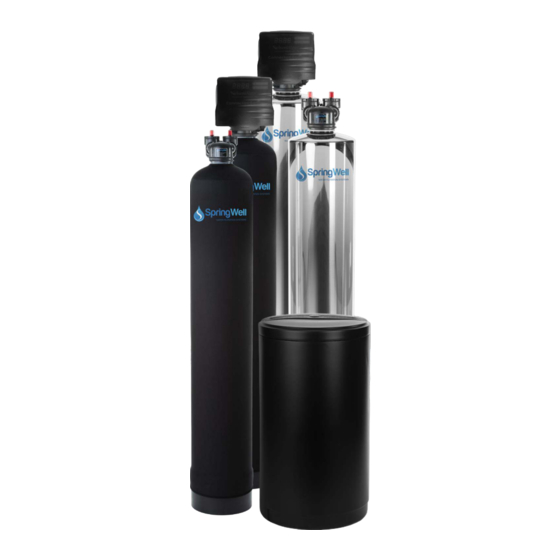
WHOLE HOUSE FILTER &
SALT-BASED WATER SOFTENER
MODELS: CSS1, CSS4, CSS+
You get the best of both worlds when you combine the
benefits of our traditional salt-based water softener and
our whole house water filter, which uses the highest
quality coconut shell catalytic carbon that targets the
contaminants that we find in our water supplies today!
CUSTOMER SERVICE IS AVAILABLE MON-FRI 9AM-6PM EST
800-589-5592
WWW.SPRINGWELLWATER.COM
1
Advertisement

Related Manuals for Spring Well CSS1

Summary of Contents for Spring Well CSS1
- Page 1 Installation Instructions WHOLE HOUSE FILTER & SALT-BASED WATER SOFTENER MODELS: CSS1, CSS4, CSS+ You get the best of both worlds when you combine the benefits of our traditional salt-based water softener and our whole house water filter, which uses the highest...
-
Page 2: System Contents
Whole House Filter and Water Softener Setup And Installation System Contents Tank Tank 50’ Drain Line Tank Head Spanner Bypass MNPT Fittings Pre-Filter Sediment for (CF) Wrench (x4) Valve (x2) Filter Hose Electronic Softener Gasket and Carbon Brine Power Mounting Hose Bib Head for (SS) Clamp... - Page 3 Whole House Filter and Water Softener PLEASE READ INSTRUCTIONS FULLY PRIOR TO ATTEMPTING INSTALLATION. Be sure to follow all applicable plumbing codes. The system must be installed on a main water supply line Caution: Do not install on well water unless you have spoken to a customer service representative first.
-
Page 4: System Specifications
Whole House Filter and Water Softener System Specifications 9” 10” Tank Width Tank Width 48” 54” (57” with Head) (63” with Head) Tank Height Tank Height Flow Rate 11 GPM Service Flow Rate 13 GPM Service 3/4” 3/4” Connection Size Connection Size Backwash Rate 2 GPM... - Page 5 Whole House Filter and Water Softener Installing the Head on the CF (Carbon Filter) Tank This step will require the materials listed below Carbon Filter Tank Head Tank 1) Unscrew the cap on top of the carbon filter tank. 3) Locate the tank head and 4) Align the opening on the 2) Discard the cap as it is no remove the shipping label.
- Page 6 Whole House Filter and Water Softener IMPORTANT! The carbon media inside the filter system MUST soak in water for a minimum of 48 hours prior to installation Carbon Soak Instructions (48 Hours Prior) Bypass Operation This step will require the materials listed below Tank Bypass on, water does not flow through tank...
- Page 7 Whole House Filter and Water Softener IMPORTANT! The carbon media must be flushed on both tanks prior to install Carbon Flush Instructions Bypass Operation This step will require the materials listed below Tank Bypass on, water does not flow through tank Bypass off, water Carbon Filter Hose Bib...
- Page 8 Whole House Filter and Water Softener Prepping the Pre-Filter This step will require the materials listed below Pre-Filter Housing Sediment Filter O-Ring w/Lube 21) Unscrew the lid from the 22) The O-ring will now be laid 23) Squeeze lubricant onto the pre-filter Housing.
- Page 9 Whole House Filter and Water Softener Installing the Pre-Filter This step will require the materials listed below Wrench and Pliers Drill with 3/16” drill bit 1-Inch PVC Shut Off 1-inch (3-inch long) PVC Nipples (x3)* Valve* Prepped Pre-Filter Mounting 1-inch (24-inch Long) Corrugated Spanner Plumbers Tape Housing...
- Page 10 Whole House Filter and Water Softener Installing the Pre-Filter (cont.) IMPORTANT! Be sure to turn off the water main to your home before proceeding to the next steps! 35) Install a 1” threaded adapter 33) Use the remaining 4 bolts to 34) Expose the pre-plumb and on the incoming water supply and secure the pre-filter to the...
- Page 11 Whole House Filter and Water Softener Installing the Softener Electronic Head This step will require the materials listed below Tank Electronic Head Softener Tank 41) Unscrew the cap on top of 42) There is a blue cap inside 43) Locate the opening at the bottom of the electronic head.
- Page 12 Whole House Filter and Water Softener Installing the Softener Electronic Head 49) Fully tighten the fasteners on both 47) Install the blue bypass valves 48) Insert the rubberized valve connections securing the bypass onto the connections on the connections into the electronic valves.
- Page 13 Whole House Filter and Water Softener Installing the Tanks This step will require the materials listed below Tank Tank Plumbers Tape 52) Apply plumbers' tape to the inlet and outlet connections on the carbon filter tank. Wrench 1-inch (24-inch Long) Corrugated Carbon Filter Softener Water Connectors (x3)
- Page 14 Whole House Filter and Water Softener Installing the Tanks 61) Connect the other end to the 59) Connect the other end of the 60) Connect another outlet on the softener tank. corrugated pipe to the inlet on corrugated pipe to the other the softener tank end of the pre-plumb.
- Page 15 Whole House Filter and Water Softener Additional Softener Head Steps This step will require the materials listed below Tank 50’ Drain Line Zip Ties 62) Locate the drain on the left side of the electronic tank head on the softener tank, 9V Battery Softener Tank Power...
- Page 16 Whole House Filter and Water Softener Additional Softener Head Steps 70) To ensure the drain line doesn’t 71) Pushing the zip ties inwards will 69) Before turning the water create a loop. back on to the home, use the come out from the drain a pair of provided spanner wrench to zip ties are recommended.
- Page 17 Whole House Filter and Water Softener Installing the Brine Tank This step will require the materials listed below Tank 78) Position the brine tank next to the softener tank with the drain 50’ Drain Line valve pointing towards the Zip Ties softener.
- Page 18 Whole House Filter and Water Softener Installing the Brine Tank 87) Replace the lid to the brine 85) Insert the regen line into the 86) The regen line will be well. brine tank through the opening inserted to the connection just above the drain line you inside the brine well.
-
Page 19: Testing The System
Whole House Filter and Water Softener Testing the System 93) Before turning on the water to 91) Before turning the water 92) While the water is still off, the home ensure the shut off valve back on to the home, use the open a cold bathtub faucet all to the system is in the off position. - Page 20 Whole House Filter and Water Softener Setting Softener Values This step will require the materials listed below Tank Note: The electronic tank head must be powered and installed prior to setting the tank values. Softener Tank Mobile Device (Already Installed) 102) Tap “Time of 103) Select “OK”...
- Page 21 Whole House Filter and Water Softener Setting Softener Values 109) Select “Advanced 108) Select the 110) Tap 111) Change the Settings.” “Regeneration Day menu icon in the value to 14 days. Override.” upper left-hand corner. Next Steps 114 to 118 are for SS1 Systems.
- Page 22 Whole House Filter and Water Softener Setting Softener Values Next Steps 119 to 123 are for SS4 Systems. Refer to step 114 for SS1 systems. 121) Select “Brine 119) Tap “Resin 120) Enter 48 for Refill.” Grains Capacity.” 48,000. Steps from here apply to both...
- Page 23 Whole House Filter and Water Softener Water Leak from Tank Head Disconnect the carbon filter tank from Water leaking from the tank Turn the shut off valve to the the system head collar indicates the head is off position. either not tight enough, or that the O-ring became bunched.
Need help?
Do you have a question about the CSS1 and is the answer not in the manual?
Questions and answers
Installer didn't treat the water filter or softener for the 48 hours. I noticed the water wasn't looking right after install, so I watched the install video. The plumber is very sharp and definitely did a great job on the installation, but appears he did not see to treat and submerged the tank with water for 48 hours prior to install. What should I do? Does this void my warranty? I'm so bummed right now and hope this is fixable.