Table of Contents
Advertisement
Quick Links
Advertisement
Table of Contents

Summary of Contents for Degritter Automatic Record Cleaning Machine
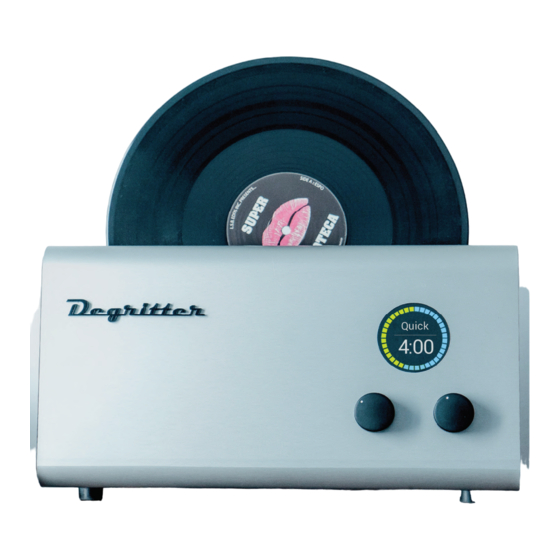
- Page 1 USER GUIDE for the automatic record cleaning machine. USER GUIDE VERSION 2.1-ENG...
-
Page 2: Table Of Contents
Warning Getting started Read before use Select proper AC voltage Place on level surface Cleaning effect Turn Degritter on Put water into the tank Insert the record into the machine Ultrasonic cleaning Press start The principle Cleaning records Machine overview... - Page 3 Using the machine Software updates Menu navigation Copy software onto the SD card Adjusting drying time Insert the SD card Running programs Wait for the upgrade to finish Washing programs Remove the card Cooling water Check the software version Drying Degas Troubleshooting Fan power...
-
Page 4: Read Before Use
2 Warning WARNING Read before use Make sure that you have selected the correct AC voltage range on the back of the machine before plugging it into your wall outlet. Failing to do so will cause serious harm to the machine. The machine must be properly grounded. - Page 5 3 Warning When washing the removable water tank in a dishwasher, do not exceed 60 °C or 140 °F. It is not recommended to wash the tank together with foodware. Do not cover the vertical ventilation slots on the sides of the machine. Free airflow is needed to guarantee proper functioning of the machine.
-
Page 6: Cleaning Effect
4 Cleaning effect 1 ) U LT R A S O N I C C L E A N I N G Ultrasonic cleaning has a unique ability to remove dirt that is not easily Cleaning accessible using other traditional means. Ultrasonic cleaners are used to clean many different types of objects, including jewelry, optical parts, effect dental and surgical instruments and electronic equipment. - Page 7 3 ) C L E A N I N G R E C O R D S Ultrasonic cleaning works by agitating the cleaning medium with high Ultrasonic cleaning as used in Degritter removes contaminants frequency acoustic pressure waves. This creates a large number of from records layer by layer.
-
Page 8: Machine Overview
1 ) C O N T E N T S O F Ultrasonic cleaning frequency: 120 kHz with fine-band frequency sweep T H E PA C K A G E Degritter machine Removable water tank with lid AC power cable... -
Page 9: Machine Rear Panel
4 ) M A C H I N E R E A R PA N E L On the right side of the rear panel are the AC cable input and the AC Degritter is operated with two multifunctional buttons and a screen on the on-off switch. The AC cable input socket contains the fuse drawer. -
Page 10: Buttons And Screen
8 Machine overview 5 ) B U T T O N S A N D S C R E E N Degritter is operated with two buttons on its front panel. They are multifunctional and can both be pushed and rotated. -
Page 11: Removable Water Tank
9 Machine overview 6 ) R E M O VA B L E W A T E R T A N K The removable water tank is located at the back of the machine. There are two markings on the outside of the tank, “Min” and “Max”. When filling the tank, the “Max”... -
Page 12: Getting Started
2 ) P L A C E O N L E V E L S U R FA C E Insert the record into the machine Degritter must be placed on a level surface for it to function properly. Press start... - Page 13 11 Getting started 3 ) T U R N D E G R I T T E R O N 5 ) I N S E R T T H E R E C O R D I N T O T H E M A C H I N E Plug one end of the power cable into the machine and the other end Insert the 12”...
-
Page 14: Turning On/Off
This is the best option if you are not planning Turning to use Degritter for a long time or for transportation. on/off 2 ) P O W E R I N G O N... - Page 15 For a soft shutdown, hold down the left button for 2 seconds. Press any front panel button to start the machine up again. This is the recommended method for turning off Degritter. It cuts all power to the machine except for a small current to the processor and its power supply.
-
Page 16: Using The Machine
PROGRAM Heavy Cooling water The Degritter menu will appear when the right button is turned. Turn the button to move between menu items. The machine will automatically Degas enter the highlighted menu item in 1 second or you can push the right Fan power button to enter it promptly. - Page 17 15 Using the machine MENU ITEM DESCRIPTION You can run record cleaning programs without the drying Quick Quick program for record cleaning cycle. To do so, you can set the drying time to zero. Medium Medium program for record cleaning Heavy Heavy program for record cleaning Program for drying the record without wash...
- Page 18 4:00 Heavy 6 minutes 45 seconds Degritter has three washing programs with fixed pre-defined washing cycle lengths. The program washing durations above do not include drying time that can be configured as needed. Washing programs move the record back and forth.
- Page 19 17 Using the machine 7 ) H E AV Y Use the heavy program when the quick or medium programs have not been sufficient to clean the record. Heavy program features an extra long Water cooling cycles can lengthen the washing program, but they will cleaning period.
- Page 20 18 Using the machine 1 1 ) FA N P O W E R 1 2 ) W A T E R L E V E L The fan power setting allows you to adjust the the drying fan The water level setting allows you to change the water level in the speed.
-
Page 21: Water Level
F O L D The current software version Version Degritter comes packaged with a color coded measurement strip. With it you on the machine can measure the distance from the edge of your record to the desired water How many washing cycles the... -
Page 22: Water, Fluid, Filter
How to change and 2 ) A D D I N G C L E A N I N G F L U I D maintain Degritter water filter Add cleaning fluid to distilled water to improve the cleaning process. -
Page 23: Maintaining The Filter
If used in prescribed concentrations, the Degritter cleaning fluids do not need to be rinsed. 3 ) M A I N T A I N I N G T H E F I LT E R To access the water filter, unscrew the cap found on the bottom half of the right side panel of the machine. -
Page 24: Software Updates
Start with an empty SD card (FAT32 file system). Download the latest compatible software from updates https://degritter.com/support. Copy “degrittr.bin” file to SD card. File name must be exactly the same. Safely remove SD card from PC by ejecting it first. - Page 25 23 Software updates 3 ) W A I T F O R T H E U P G R A D E T O F I N I S H 5 ) C H E C K T H E S O F T W A R E V E R S I O N After you have turned the machine on with the SD card inserted, Navigate to the Info screen and see whether the displayed version number matches the downloaded software version.
-
Page 26: Troubleshooting
Check your water level height setting. Use the water level measurement strip packaged with Degritter if needed. M Y M A C H I N E I S M A K I N G S T R A N G E S O U N D S... - Page 27 25 Troubleshooting guide I A C C I D E N T A L LY P O U R E D W A T E R O N T O T H E M A C H I N E Switch off the machine from the AC switch and disconnect the power cable from the wall.
-
Page 28: Error Codes
26 Solving error codes 1 ) E R R S E N S 1 - E R R S E N S 6 Solving Explanation: trouble with measuring the error water level. Solution 1: turn the machine off from the ERR Sens1 codes back panel AC switch, wait 10 s, and then... - Page 29 27 Solving error codes 5 ) N O W A T E R 3 ) N O T A N K Explanation: there is no water tank in Explanation: no water is detected in the the machine or it is not sensed. machine.
- Page 30 28 Solving error codes 7 ) D R A I N FA I L Explanation: draining the ultrasonic tank has failed. Solution 1: turn the machine off from the Drain Fail back panel AC switch, wait 10 s, and then turn the machine on again.
- Page 31 29 Solving error codes 1 1 ) E R R V 1 S R T - E R R V 2 S R T 9 ) E R R P 1 S R T - E R R P 2 S R T Explanation: there is a problem with the Explanation: there is a problem with the valve system.
-
Page 32: Frequently Asked Questions
S H E L L A C R E C O R D ? We have not conclusively tested cleaning shellac records with Degritter. If you decide to clean a shellac, then do so on your own responsibility. H O W O F T E N D O I H AV E T O C L E A N T H E... - Page 33 D E G R I T T E R W O R K ? Yes, Degritter will work with AC voltages from 100 V to 240 V. You have to make sure that the AC selection switch is in the same value range, eg. 230 V switch position for 210-240 V wall outputs and 115 V switch...
-
Page 34: Limited Warranty Disclaimer
ATTACHMENT NOT PROVIDED WITH THE PRODUCT, OR LOSS OF PARTS . Use of unauthorised chemical cleaning agents or liquids will void this warranty. Degritter will not pay for warranty service performed by a non-authorized repair or diagnostic service and will not reimburse the consumer for damage resulting from warranty service performed by a non-authorized repair service. -
Page 35: Disclaimer
No other warranty, written or oral, is authorized by Degritter. D I S C L A I M E R In no event shall Degritter OÜ, or its employees, agents, suppliers, manufacturers, or contractors be liable for any damages of any kind or character, including without limitation any compensatory,... - Page 36 Also provide us with your machine’s serial number and software version found in the Info menu. support@degritter.com +372 5884 8839 Monday to Friday, 8:00-16:00 UTC Customer support language is English. Degritter user guide: 2.1-ENG © Degritter all rights reserved, 2019 www.degritter.com Printed in Estonia 2019.
Need help?
Do you have a question about the Automatic Record Cleaning Machine and is the answer not in the manual?
Questions and answers