
Related Manuals for NavAtlas DXP1000DVR

Summary of Contents for NavAtlas DXP1000DVR
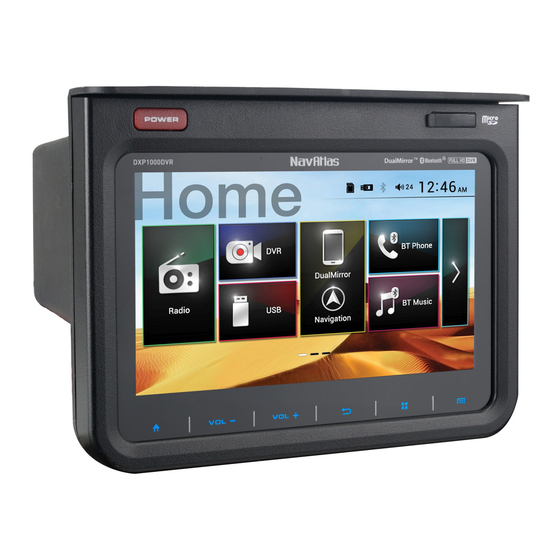
- Page 1 DXP1000DVR INSTALLATION/OWNER’S MANUAL ® Receiver with Bluetooth featuring a 6.2" Touch Screen Display...
- Page 2 Copyright Notes This product incorporates copyright protection technology that is protected by method claims of certain U.S. patents and other intellectual property rights owned by Macrovision Corporation and other rights owners. Use of this copyright protection technology must be authorized by Macrovision Corporation, and is intended for home and other limited viewing uses only unless otherwise authorized by Macrovision Corporation.
-
Page 3: Table Of Contents
DXP1000DVR Table of Contents Page Warning Statement .......... - Page 4 DXP1000DVR WARNING Upon installation of this Monitor (“unit”) into a vehicle, the driver of the vehicle must not operate this unit by watching videos or playing video games while driving. Failure to follow this instruction could lead to driver distraction which could result in serious injury or death to the vehicle’s occupants or persons outside the vehicle and/or property...
-
Page 5: Safety Information/Precautions
Please read all instructions carefully before attempting to install or operate. Due to its technical nature, it is highly recommended that your DXP1000DVR is installed by a professional installer or an authorized dealer. This product is only for use in vehicles with 12VDC negative ground only. -
Page 6: Preparation/Mounting
2. Unscrew torx to remove dash panel. 4. Unscrew torx screw, and pull out pocket. (Factory bracket not included with DXP1000DVR unit) Note: Remove screw anchor from factory pocket and attach to DXP1000DVR for mounting. After installation, use screws to support unit. -
Page 7: Wiring Diagram
DXP1000DVR Wiring Diagram - Inputs/Outputs ANBX1/DMH25) Universal antenna required (sold separately) Note: Ampli er (RCA) cables not included (must purchase separately) (Optional RBX4) 12V @ 1A AUX Switches (External lighting, etc.) Universal antenna required (sold separately) Note: Please connect cameras before powering the unit. -
Page 8: Audio Wiring Connections
DXP1000DVR Audio Wiring Configuration... - Page 9 DXP1000DVR Audio Wiring Configuration...
-
Page 10: Control Locations
DXP1000DVR Control Locations Power / Mode Go Back (for DualMirror control via Android only) Home Home (for DualMirror control via Android only) Volume Down Menu (for DualMirror control via Android only) Volume Up microSD slot (for DVR only) -
Page 11: General Operation
DXP1000DVR General Operation Power On/Off Momentarily press to turn the unit on. Press and hold to turn the unit off. Press to step through all available input modes: Radio, DVR, USB, Mode DualMirror, Bluetooth Phone, Bluetooth Music, DualMirror,Music, Video, Picture, Switch, QR Code, AV In and Settings. Modes of operation are indicated on the display and/or the monitor. - Page 12 DXP1000DVR General Operation Setup Menu From the Main Menu screen, press SETTINGS to access the Settings menu and select from six categories across the bottom: General, Clock, Audio, Video, Bluetooth and Language. General: • Key Beep - Select On or Off.
-
Page 13: General Operation
DXP1000DVR General Operation Setup Menu Clock: • Format - Select between a 12HR or 24HR clock display. • Go to DVR Settings to set the clock time. Audio: • Bass - Adjust the bass (-7 to 7). • Middle - Adjust the mid (-7 to 7). -
Page 14: Am/Fm Tuner Operation
DXP1000DVR AM/FM Tuner Operation Radio Operation Select the Radio icon from the Main Menu screen. Press to return to Main Menu screen. Main Menu Displays current mode of operation. Current Mode Indicator DVR Recording This icon will flash when the DVR is recording in the background. - Page 15 DXP1000DVR AM/FM/RDS Tuner Operation Local / Distance Press to toggle between LOCAL and DX (distance) tuning. Loudness Press to adjust Loudness levels Low, High or Off. Subwoofer Press to access Subwoofer adjustment menu. Program Type (PTY) Press to select Program Type / Genre.
-
Page 16: Usb Operation
DXP1000DVR USB Operation or MP3 files from a USB device, insert the device and USB/microSD Operation To play audio files playback will begin automatically. To return USB playback from another mode of operation, select the corresponding icon from the Main Menu. - Page 17 DXP1000DVR USB Operation Previous Options Press to see the previous screen of options. Press to fast reverse the current track at various speeds: FRx2, Rewind FRx4, FRx8 or FRx16. Press to fast forward the current track at various speeds: FRx2, Fast Forward FRx4, FRx8 or FRx16.
-
Page 18: Dvr Operation
DXP1000DVR DVR Operation DVR Operation The unit's DVR feature allows for recording and playback of video. Main Menu Press to return to Main Menu screen. Current Mode Indicator Displays current mode of operation. Screen Options Press either DVR1 or DVR2 to display a full-screen view of the selected view. - Page 19 DXP1000DVR DVR Operation From the main video screen, press the scroll arrows up or down to Scroll scroll through and view all recorded videos. Select file to playback/delete. Select From the main video screen, press to delete the selected video(s).
-
Page 20: Dualmirror Operation
DXP1000DVR 2-Way DualMirror™ Operation The DualMirror technology allows you to mirror the screen of select Android smartphones as well as iPhone, iPod and IPad devices onto the receiver’s screen and to charge your mobile device through the front USB port. Simply plug in your device to the front HDMI and USB inputs, and you are ready to view your favorite navigation or music apps directly on the receiver’s screen. - Page 21 DXP1000DVR 2-Way DualMirror™ Operation...
-
Page 22: Bluetooth Operation
Complete the pairing sequence from your Bluetooth device. Refer to the owner's manual for your device for more details. The device name is "NavAtlas-****". The Bluetooth passcode "0000". The unit can be in any mode of operation when pairing is performed. -
Page 23: Bluetooth Operation
DXP1000DVR Bluetooth Operation Contacts Press to display contacts. Use the icons on the right to search for a specific contact or scroll through the list. View Connections Press to view active and available Bluetooth connections. Use the icons on the right to search for a specific contact or scroll through the list. -
Page 24: Auxiliary Inputs/Rear Camera Operation
DXP1000DVR Front 3.5mm Aux Input & Rear RCA A/V Input Auxiliary Input Connect an optional audio source into the 3.5mm input. Select auxiliary input from the Main Menu to listen to audio. Adjust volume on the external audio source as needed (if connected to the headphone output of the device). -
Page 25: Specifications
DXP1000DVR Specifications FM Tuner Tuning range: 87.5MHz-107.9MHz Usable sensitivity: 10dBf 50dB quieting sensitivity: 20dBf Stereo separation @ 1kHz: 38dB Frequency response: 30Hz-13kHz AM Tuner Tuning range: 530kHz-1710kHz Usable sensitivity: 24uV Frequency response: 30Hz-2.3kHz Compatibility: High Speed USB 2.0 USB Class:... -
Page 26: Warranty
Who is covered? This warranty is extended to the original retail purchaser for products 4. For more information and for the purchased from an authorized NavAtlas location of the nearest authorized dealer and used in the U.S.A service center please contact us by one... - Page 27 DXP1000DVR Notes...
- Page 28 Support Line: 1-562-946-7471 Monday-Friday, 9AM-5PM EST www.navatlas.com All rights reserved. NSA0818-V01 Printed in China...
Need help?
Do you have a question about the DXP1000DVR and is the answer not in the manual?
Questions and answers