
Subscribe to Our Youtube Channel
Summary of Contents for Fiori 8000
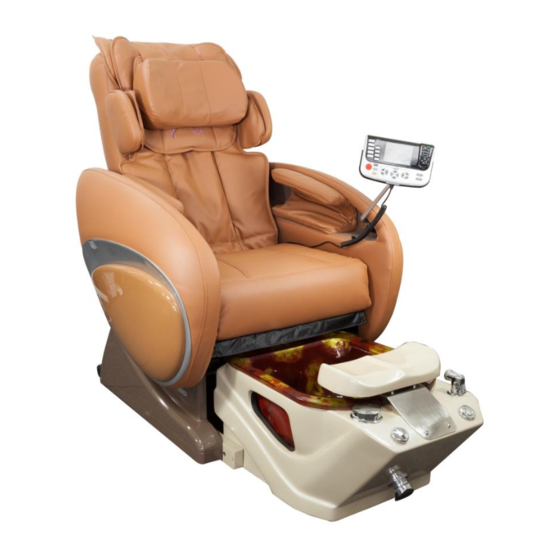
- Page 1 FIORI 8000 Pedicure Spa Base Manual PLEASE KEEP MANUAL IN A SAFE PLACE PLEASE READ AND FOLLOW ENTIRE MANUAL PRIOR TO USE...
-
Page 2: Table Of Contents
Table of Contents Receipt and Inspection .................. 3 Warnings and Precautions ................3 Safety Information ..................4 Specifications ....................5 Dimension Diagrams ..................6 Unboxing and Wall Clearance ............... 8 Installation Instructions .................. 9 Basin assembly – Diamond Base..................... 9 Preparing Drain Pipe Assembly .................. -
Page 3: Receipt And Inspection
Receipt and Inspection Please Note! It is the responsibility of the buyer to carefully inspect all shipments upon arrival. If damages are apparent, have delivering driver note this on the bill of lading prior to signing for goods. Failure to note damages at receipt will waive any damage claims. -
Page 4: Safety Information
Safety Information - Do not operate this unit without a properly grounded electrical outlet with a proper GCFI installed. - Do not attempt to operate unit if the power cord has become damaged - This unit is not designed for use outdoors or in extreme temperatures(below 40, above 100) - Do not operate massage chair on any part of the body that is swollen, inflamed, or wounded. -
Page 5: Specifications
Specifications Shipping Weight: Chair – 160lbs Basin – 100lbs Arms – 50lbs(pair) Dimensions: Upright and Retracted: 51in X 34in X 54in Upright and Basin Extended: 68in X 34in X 54in Reclined and Basin Extended: 81in X 34in X 40in Electrical requirements: 120V AC, 15 amp, 60 Hz: Separate and Dedicated 15 amp GFCI Weight Capacity: 300lbs Basin Capacity:... -
Page 6: Dimension Diagrams
Dimension Diagrams... -
Page 8: Unboxing And Wall Clearance
Remove the rest of the packing foam and cardboard. Please see 8000 chair manual for arm and chair back installation instructions. Wall Clearance Please place spas with at least 20 inches away from the wall at during its most upright... -
Page 9: Installation Instructions
Installation Instructions Basin assembly – Diamond Base Preparing Drain Pipe Assembly - Place threaded cap portion of the drain coupler onto the telescopic drain pipe, apply PVC Glue to the outside of the pipe and inside edge of flange(see picture). Please allow glue to fully set prior to use. (See directions on glue bottle) Mounting the brackets - The shorter flanged motor bracket is to be mounted in the... -
Page 10: Installing Basin
Installing Basin - Mount the motor to the bracket using the large clevis pin and clip. Connect the 2 wiring harnesses (1 black and 1 white) to the spa chair, Turn on spa chair and push and hold the left arrow button to send the push rod forward until it stops. Install Bearing Block Guide using the 4 longer 1 ½”... - Page 11 Push basin under chair and align the push rod assembly to the rear of the basin, attach using large clevis pin and clip. Run the hot and cold supply lines underneath control box, and fasten the teloscopic drain pipe to the threaded drain on the rear of the spa. Mount the rear of the drain pipe to the drain mounting bracket using the smaller clevis pin and clip.
-
Page 12: Basin Assembly - Crystal Base
Basin Assembly – Crystal Base Preparing Drain Pipe Assembly - Place threaded cap portion of the drain coupler onto the telescopic drain pipe, apply PVC Glue to the outside of the pipe and inside edge of flange(see picture). Please allow glue to fully set prior to use. (See directions on glue bottle) Mounting the brackets - The shorter flanged motor bracket is to be mounted in the... -
Page 13: Installing Basin
Installing Basin - Mount the motor to the bracket using the large clevis pin and clip. Connect the 2 wiring harnesses (black and white) to the spa chair, Turn on spa chair and push and hold the left arrow button to send the push rod forward until it stops. Push basin under chair and align the push rod assembly to the rear of the basin, attach using large clevis pin and clip. -
Page 14: Care And Maintenance
Care and maintenance After each use: - Make sure that the Jet motor is turned off, wait for impeller to come to a complete stop - Remove Impeller housing from magnetic motor and disassemble - Sanitize Impeller assembly(Jet Cover, Impeller, and Motor base/shaft) & basin bowl with Anti-Bacterial Solution(DO NOT USE ACETONE) - Rinse Impeller assembly and basin bowl with cool water - Massage Chair upholstery can be cleaned with a clean damp cloth, clean off any... -
Page 15: Limited Warranty
Limited Warranty All Fiori 8000 purchases includes a limited warranty for the original purchaser. This warranty covers the Massage Chair, Spa bases, and their components to be free of Material, Workmanship, Manufacturing defects for up to one year from the original purchase date.
Need help?
Do you have a question about the 8000 and is the answer not in the manual?
Questions and answers