
Subscribe to Our Youtube Channel
Summary of Contents for SwiftCam M3s
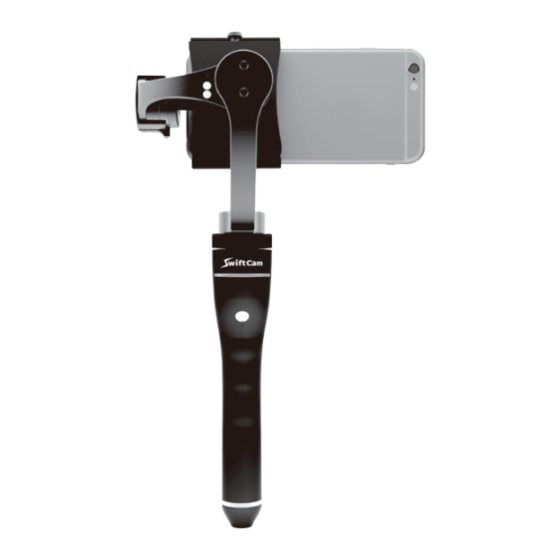
- Page 1 SAVOUR THE MOVING MOMENT winner winner STARTUP GUIDE 3-axis handheld stabilizer for smartphone...
-
Page 2: Table Of Contents
Contents 1.Overview 1.1.Speci cations 1.2.Package contents 2.Basics 2.1.Set up 2.2.Switch shooting modes 2.3.Power indicator & shooting mode indicator 2.4.Operating angles 2.5.Vibration 2.6.Calibration 3.Battery & Charger 3.1.Overview 3.2.Safety precautions 3.3.Batteries 3.4.Charging cycle 3.5.Start charging 3.6.Charging indicator 3.7.Maintenance, care and cleaning 4.App 4.1.Download 4.2.Connect 4.3.Camera... -
Page 3: Overview
3-axis handheld stabilizer for smartphone 1.Overview 1.1.Speci cations Handheld Gimbal Name Model SC-HG-M3S Operating Angles Pan axis: 360° Pitch axis: 0 - 270° Roll axis: +/- 60° Weight (Battery 500g Included) 316H x 107W x 44D (mm) Folded Dimensions Expanded Dimensions... -
Page 4: Package Contents
1.2.Package contents Balance plugin USB cable port *For manufacturer only. Power indicator Power button Includes: 1.M3s x 1 2.Battery x 3 3.Charger x 1 4.Mini USB Cable x 1 Bottom cap 5.Balance Plugin x 1 6.Sponge (Thin) x 2 7.Sponge (Thick) x 2 8.Flannel bag x 1... - Page 5 3-axis handheld stabilizer for smartphone Auto-pressure clip Shooting mode indicator Clip button Sponge (Thin: 2mm) Magnet Magnetic Position Locking System The arm structure can be magnetically held in its desirable position when unused to ensure convenience in storage and travel. Joystick Battery Sponge...
-
Page 6: Basics
2.1.2.Clip smartphones 1.Turn the holding arm up so the M3s logo is facing the front. 2.Rotate the auto-pressure clip clockwise until the clip is facing outward. 3.Press the clip button to open the clip. Do not hold on the clip to obstruct its opening. -
Page 7: Switch Shooting Modes
Smartphone locks on all axis including tilting up/down and panning left/right. Important note Do not switch shooting mode when M3s is not in upright position. (SwiftCam M3s - How to switch the shooting modes?) 2.3.Power indicator & shooting mode indicator... -
Page 8: Operating Angles
1. Hold M3s in upright position and adjust the smartphone Watch more on YouTube: facing to yourself by hand. 2. Continue to use when the vibration stops. Important note Do not adjust M3s by hand when it is not in upright position. (SwiftCam M3s - Proper Usage) -
Page 9: Calibration
4. All shooting mode indicators light on. Release the joystick. 5. Rotate the joystick along the bound for 3 rounds. 6. Turn the holding arm up so the M3s logo is facing the front. Watch more on YouTube: Rotate the auto-pressure clip clockwise until the camera is facing outwards. -
Page 10: Safety Precautions
5. Unplug the charger AND remove batteries before maintenance or cleaning. 6. Remove all batteries from M3s and put them in the package box while not in use. 7. Do not put any metal materials (e.g. coins) near the batteries for storage. -
Page 11: Charging Cycle
3-axis handheld stabilizer for smartphone 3.4.Charging cycle Charging cycle is determined by the power sources. Duration 6 hours 4 hours Power sources Standard USB USB Power adapter port (Android/iPhone/ iPad) Indication when connecting Blinks once Blinks twice – 4 times to the power sources For safety reasons, charging will stop automatically when the batteries are prolonged in place after charging cycle completes. -
Page 12: Charging Indicator
Important notes - Do not remove batteries before fully charged. - Do not use third party, unauthorized battery/USB cable made by other manufacturers. - Do not reverse polarity. - Do not cover the vents when charging. - Do not charge malfunctioned/damaged/dead battery. - If the temperature of the operating charger is abnormally high, please stop charging immediately and replace new original batteries. -
Page 13: App
3. Turn on M3s. 4. Select “SwiftCam M3s”. If more than one “SwiftCam M3s” is show, it means more than one M3s is power on nearby. They are listed according to the distance and represented by the Bluetooth signal. 5. M3s is connected with the app. “... -
Page 14: Setting
Optimize the balancing for the selected smartphone. Adjust the moving speed of joystick. 4.5. Free rmware update via app 1. Connect M3s with the app. 2. Select “Setting” -> “Firmware” 3. Select “Update now” if there is newly updated version 4. -
Page 15: Warranty Information
5.Warranty information SwiftCam warrants to the original purchaser (“Buyer”) for 1-year full warranty (e ective starting from the date of purchase) that this SwiftCam product will be free from defects in materials and workmanship under normal operations. 5.1.How to obtain warranty service Buyer may obtain warranty service by contacting SwiftCam/dealers. - Page 16 SAVOUR THE MOVING MOMENT W. www.swiftcam.com T. +852 9010 8575 E. enquiry@swiftcam.com SM3S201506V5...
Need help?
Do you have a question about the M3s and is the answer not in the manual?
Questions and answers