Table of Contents
Advertisement
Quick Links
Aero-Flex® Glider
UPDATES: www.aero-flex.com
INSTALLATION, METHODS, & USE
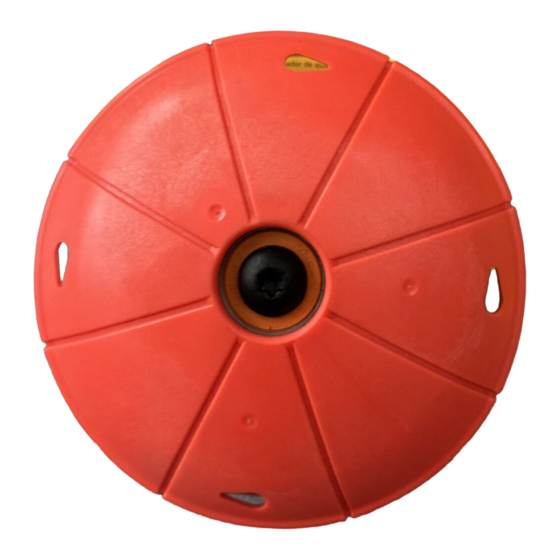
INSTALL THE GLIDER TO YOUR 3.5" AERO-FLEX® UNIVERSAL TRIMMING SYSTEM
To use Glider assembly, remove the Universal cap (press finger tabs
to open or use a screwdriver and disengage). Install four line blades
(alternate colors). Make sure lines are properly installed over posts and
onto slots. Connect the Glider cap. Be sure Glider cap and tabs are
fully snapped in place.
INSTALL THE GLIDER TO YOUR 5" AERO-FLEX® CONVERTIBLE TRIMMING SYSTEM
Glider assembly cap must be removed. Use hex allen wrench to un-
screw the glider clockwise. Remove button from 5" convertible cap.
With bearing and bolt, install Glider to 5" cap with hex allen wrench.
Hand tighten to 40"# counter-clockwise. Install lines; install assembly
to 5" head receiver. Make sure tabs are securely in place.
WARNINGS
Read/follow
instructions
To minimize the risk of injury from thrown objects, ensure safe shield alignment, and run the
trimmer at lower speeds. Be sure to wear proper eye and body protection.
GLIDER TECHNIQUES
VARY CUTTING HEIGHT
Level Cut: rest on the
ground
Corte Nivel: reposo en el
suelo
WHEN TO REMOVE THE GLIDER
The Glider is for ground-supported trimming, which is not a
recommended technique for trimming heavy vegetation.
Do not use the glider for slashing heavy weeds or vines. Remove the
glider and reinstall the stock cap before trimming very tall grass.
MINIMIZE WRAPPING
When trimming tall vegetation, start from the top and work your way
down to avoid long strands wrapping in the mechanism.
Protect
Flying debris
50'
bystanders
Low Cut: tilt on the
ground
Corte Bajo: incline sobre
el terreno
1
1
2
6
Vibration
& blade
contact
1
3.5"
fits both
2
3
3
4
7
8
Do not use
without a
High Cut: lift off the ground
(manual control)
Corte Alto: levantarse del
suelo (control manual)
1
3.5"
1
5"
2
1
5"
4
5
9
shield
2
2
Advertisement
Table of Contents

Subscribe to Our Youtube Channel
Summary of Contents for Aeroflex Glider
- Page 1 Install four line blades (alternate colors). Make sure lines are properly installed over posts and onto slots. Connect the Glider cap. Be sure Glider cap and tabs are fully snapped in place.
- Page 2 See aero-flex.com for video instructions If the Glider unthreads from the cap, add 1 drop of Loctite 222 to bolt, make sure bearing is attached, and tighten to 40”# (reverse thread) onto cap.
Need help?
Do you have a question about the Glider and is the answer not in the manual?
Questions and answers