Table of Contents
Advertisement
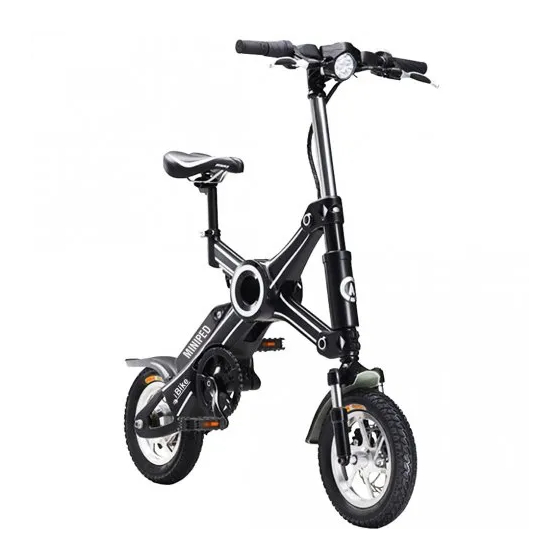
Art.-no. 14500
iBike Miniped
Content
1.
2.
3.
3.1
3.2
3.3
3.4
3.5
3.6
3.7
4.
4.1
4.2
4.3
5.
5.1
5.1.1
5.1.2
5.1.3
5.1.4
5.1.4
5.2
5.2.1
5.2.2
5.2.3
5.2.4
5.2.5
5.2.6
5.3
5.3.1
5.3.2
5.3.3
5.3.4
5.3.5
6.
6.1
6.1.1
6.1.2
6.1.3
6.1.4
6.1.5
6.2
6.3
7.
8.
2
2
2
2
2
2
3
3
3
4
4
4
5
5
6
6
6
6
6
6
7
7
7
8
8
8
8
9
9
9
9
10
11
11
12
12
12
12
12
12
12
13
13
14
14
Page 1 / 16
Advertisement
Table of Contents

Summary of Contents for EUFAB iBike Miniped
-
Page 1: Table Of Contents
Art.-no. 14500 iBike Miniped Content Proper usage Scope of supply Specifications Miniped Motor Battery Charging unit Controls Electrical wiring diagram, general Electrical wiring diagram, controls Safety notes General Charging unit Battery Operating instructions Assembly 5.1.1 Handlebar assembly 5.1.2 Pedal assembly 5.1.3... -
Page 2: Proper Usage
WARNING Read through all operating instructions carefully before operating and observe all safety information! Non-compliance can lead to personal injury, damage to the device or to your property! Keep the original packaging, the purchase receipt as well as these instructions for future reference! When transferring this product pass on these instructions as well. -
Page 3: Charging Unit
Charging time: 4 hours Charging unit Input voltage: 230 V Output voltage: 42 V Output current: Controls Model: Sine wave Maximum current: 14 A Minimum voltage 29 V Electrical wiring diagram, general bold, red Battery + Battery bold, black Battery - bold, blue Charging bold green... -
Page 4: Electrical Wiring Diagram, Controls
Electrical wiring diagram, controls Battery + bold, red Battery Battery - bold, black bold, blue bold green bold yellow thin red thin yellow Reverb black thin blue yellow green blue thin green thin black thin red Energy thin blue Measuring signal speed LCD measuring device thin green Signal throttle valve... -
Page 5: Charging Unit
Charging unit • Do not use the charging unit in a moist or wet environment. • Be sure to prevent water from penetrating the device. If liquid should get inside, immediately separate the charging unit from the power supply and have it checked by an authorised dealer. -
Page 6: Operating Instructions
Operating Instructions Assembly 5.1.1 Handlebar assembly The handlebars of the Miniped are pre-assembled and just need to be attached to the head tube. Do to so, loosen the screw (A) and remove the protective cap (C), see Image 1. Place the handlebars onto the head tube. -
Page 7: Front Light Assembly
Now put the battery into the mount as depicted in the following images, Image 5 to 7. Image 5: Inserting the battery Image 6: Pressing the battery Image 7: Battery assembled Press the battery firmly into the mount at the top end. -
Page 8: Handlebars
5.2.2 Handlebars 15 Brake handle, back wheel 16 Adjusting screw, back wheel brake 17 Adjusting screw, front wheel brake 18 Brake handle right, front wheel 19 Bell 20 Light switch 21 Digital instrument Image 10: Handlebars overview 5.2.3 Digital instrument 22 Speed display 23 Mileage 24 Battery display... -
Page 9: Battery
5.2.6 Battery 37 Lock 38 Charging socket with protective cap 39 Rear light 40 Connections 41 Locking mechanism Image 14: Battery overview Operation 5.3.1 Charging the battery The battery can be charged in an installed and uninstalled state. Switch the Miniped off (see Section 5.3.2) when charging the battery that is not installed. -
Page 10: Folding Mechanism
is activated. The Miniped is now ready to be ridden. Turn the Miniped off by pressing the off switch once. Activating/Deactivating the anti-theft alarm system First, switch the Miniped off. Press the on switch once to activate the anti-theft alarm system. An acoustic signal will sound. -
Page 11: Adjusting The Seat Height
Folding the pedals You can still fold the Miniped's pedals. This can be helpful when you want to take the Miniped onto public transportation. Proceed as depicted in Images 21 and 22. Image 22: Folding the pedal Image 21: Releasing the locking mechanism Put the pedal back into riding position by lifting the outer end until the pedal clicks into place. -
Page 12: Maintenance And Care
Ensure that the stand is completely folded up and clicked in place before riding away in the Miniped. A folded-down stand can lead to serious falls while riding. Maintenance and care Do not park the MIniped outdoors unprotected. Avoid direct sunlight or rain. Rainwater permeating the interior of the Miniped can lead to short circuits thereby destroying the electronics. -
Page 13: Inspection And Service Plan
Assembly is performed in reverse sequence. Inspection and service plan Inspection and service intervals Runtime in km 2000 4000 6000 electr. system, lighting Tyre pressure, tread depth at least 1 mm Suspension fork, shock absorption impermeability Battery charging voltage Check battery for impermeability Check brake cables for damage Brake disk, brake pad front Brake disk, brake pad back... -
Page 14: Environmental Protection Notes
Notes about environmental protection Never dispose of electrical devices in household waste! Electrical and electronic devices must be collected and brought in for environmentally compatible recycling. Ask your municipality or city administration for disposal options for electrical and electronic devices. At the end of their service lives, old batteries cannot be disposed of in household waste - or carelessly in the environment. - Page 15 Page 15 / 16...
- Page 16 EAL GmbH • Otto-Hausmann-Ring 107 • D – 42115 Wuppertal © EAL 14500 Ma17 Page 16 / 16...
Need help?
Do you have a question about the iBike Miniped and is the answer not in the manual?
Questions and answers