Table of Contents
Advertisement
Advertisement
Table of Contents

Summary of Contents for Hillrom Welch Allyn RetinaVue 700
- Page 1 Directions for use Software version 1.00.XX...
- Page 2 © 2019 Welch Allyn. All rights are reserved. To support the intended use of the product described in this publication, the purchaser of the product is permitted to copy this publication, for internal distribution only, from the media provided by Welch Allyn. No other use, reproduction, or distribution of this publication, or any part of it, is permitted without written permission from Welch Allyn.
-
Page 3: Table Of Contents
Contents Symbols ..............1 Introduction ............... 5 Intended use ................5 About warnings and cautions ........... 5 General warnings, cautions, and notes ........6 Controls and connectors ............12 First time set up of the RetinaVue 700 Imager ..15 Unpack the system .............. -
Page 4: Table Of Contents
iv Contents Review of submitted exams ..........62 Update the RetinaVue 700 Imager software (firmware) ..63 Controls ..............67 RetinaVue 700 Imager main Patient screen ......67 Practice mode ................ 71 Select or change a clinic on the RetinaVue 700 Imager (wireless only) ................ -
Page 5: Symbols
Symbols Documentation symbols For information on the origin of these symbols, visit http:// www.welchallyn.com/symbolsglossary for the Welch Allyn symbols glossary. WARNING The warning statements in this manual identify conditions or practices that could lead to illness, injury, or death. Warning symbols will appear with a grey background in a black and white document. - Page 6 2 Symbols Rechargeable battery Connectivity symbols Wireless Wireless radio symbols Non-ionizing electromagnetic radiation Wireless signal strength • Best (4 bars) • Good (3 bars) • Fair (2 bars) • Weak (1 bar) • No signal (no bars) FCC ID The identification number assigned by the Federal Communication Commission Shipping, storing, and environment symbols Temperature limit...
- Page 7 Directions for use Symbols 3 Humidity limitation Atmospheric pressure limitation This way up Stacking limit by number Recyclable Miscellaneous symbols Product Identifier Reorder Number Global Trade Item Number For indoor use only Type BF applied part Class II equipment Prescription only or "For Use by or on the order of a licensed medical professional"...
- Page 8 4 Symbols Process indicator for activities like connecting to network or connecting to computer Battery charge level indicators Device is running on battery and charge is between 75 and 100 percent. Device is running on battery and charge is below 75 percent. Device is running on battery and charge is below 50 percent.
-
Page 9: Introduction
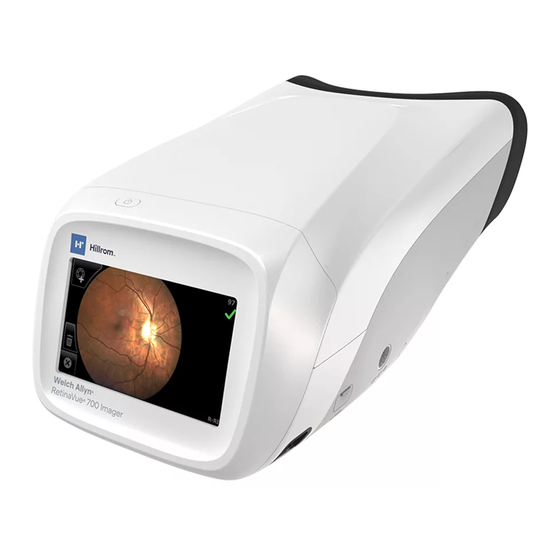
Introduction Intended use The Welch Allyn RetinaVue 700 Imager (RV700) is a high-resolution ophthalmic camera used to acquire, save and transmit digital images of the human eye. Anterior and posterior ocular structures such as the surface of the eye, cornea, and fundus including retina, macula and optic disc can be imaged. -
Page 10: General Warnings, Cautions, And Notes
6 Introduction General warnings, cautions, and notes WARNING When manually entering patient information, do not use the same patient identifier for multiple patients. This may result in inaccurate data association. WARNING Operating the device in the presence of a flammable anesthetic mixture with air, oxygen, or nitrous oxide;... - Page 11 Directions for use Introduction 7 CAUTION All servicing of this equipment is to be performed by Welch Allyn, Inc. or by a center approved by Welch Allyn, Inc. CAUTION This device needs to be installed and put into service according to the EMC information provided herein.
- Page 12 8 Introduction CAUTION Do not use the device adjacent to or stacked with other equipment. If the device is used adjacent or stacked with other equipment, the device should be observed to verify normal operation in the configuration in which it will be used. CAUTION Do not submerge the device in liquid or allow liquid to enter the interior of the device.
- Page 13 Directions for use Introduction 9 Warnings related to RetinaVue 700 Imager applied parts components Warnings related to the face cup WARNING Clean and disinfect the face cup after each patient to avoid the risk of cross-contamination. WARNING Patient injury risk. The face cup of the RetinaVue 700 Imager uses magnets to attach to the device.
- Page 14 10 Introduction CAUTION Failure to install the Anterior Imaging Spacer before an Anterior image exam may result in unacceptable image quality or failure to capture an image. Warnings, cautions, and notes related to the battery charger WARNING The battery charger (non-medical electrical equipment) shall be situated outside the patient environment (reference IEC 60601-1-1).
- Page 15 Directions for use Introduction 11 Caution related to the EMR test server CAUTION Incorrectly setting up the RetinaVue 700 Imager to connect to a Wi-Fi test server may result in loss of exam data. The test server is NOT intended to be used for patient exams and is only intended for use by a software integrator on an EMR integration team.
-
Page 16: Controls And Connectors
12 Introduction Controls and connectors Feature Description Power button • Push button to turn the device on and off. • Push button to bring the device out of Sleep mode. • Push button to launch a dialogue box with three options: Power down ○... - Page 17 Directions for use Introduction 13 Bottom Feature Description Face cup Helps align the patient's eyes to the camera and blocks ambient light during testing Pedestal mounting Pedestal mounting well (¼-20 thread) and locator ridge Battery cover Covers the battery compartment Note The two service ports under the battery cover are for factory use only and are not for customer use.
- Page 18 14 Introduction...
-
Page 19: First Time Set Up Of The Retinavue 700 Imager
First time set up of the RetinaVue 700 Imager Refer to the following topics when setting up the RetinaVue 700 Imager for the first time. View images saved to the RetinaVue 700 Imager on the LCD touchscreen. The images saved on the RetinaVue 700 Imager are encrypted. To view the images on the computer, install the RetinaVue Network software application. - Page 20 16 First time set up of the RetinaVue 700 Imager Number Item Description human eye and anterior and posterior ocular structures such as the cornea, lens and fundus including retina, macula and optic disc. Connects the device to a computer or laptop to USB cable transfer data.
- Page 21 Directions for use First time set up of the RetinaVue 700 Imager 17 hold onto the RetinaVue 700 Imager. Pull the neoprene strap all the way through to secure the strap to the mounting bracket. Click the Uni-Loop system connector to the neoprene strap to finish assembly. Slip the strap over your wrist and tighten the security slide to keep the strap firmly in place.
- Page 22 18 First time set up of the RetinaVue 700 Imager WARNING Use only Welch Allyn approved accessories, and use them according to the manufacturer’s directions for use. Using unapproved accessories with the camera can affect patient and operator safety and can compromise product performance and accuracy,and void the product warranty.
- Page 23 Directions for use First time set up of the RetinaVue 700 Imager 19 Do not over-tighten the screw. Note Connect the power supply to the RetinaVue 700 Imager Locate the power connector charging port on the RetinaVue 700 Imager and plug the power supply connector plug into the RetinaVue 700 Imager.
-
Page 24: Startup
20 First time set up of the RetinaVue 700 Imager For first time use, the device needs to be charged for 5 hours Note before use. Note The removal of the plug from the socket provides the means of isolation from the mains power supply. The user is reminded to keep this means of disconnection easily accessible in case of emergency. - Page 25 Directions for use First time set up of the RetinaVue 700 Imager 21 As the device is powering up, the RetinaVue 700 Imager displays the startup screen. If this is the first time set up, select your preferred language from the drop- down list and then touch Next.
-
Page 26: First Time Selection Of Practice Mode
22 First time set up of the RetinaVue 700 Imager If you want to use the camera in practice mode before registering the camera, touch Yes - I want to practice. If you want to proceed to registering the camera, touch No - take me to registration and then touch Next. - Page 27 Directions for use First time set up of the RetinaVue 700 Imager 23 The Practice mode screen appears. For instructions about using Practice mode see the topic Practice mode. Exiting Practice mode Touch and then touch Exit. Touch OK at the prompt: "Exit practice mode and return to camera registration?"...
- Page 28 24 First time set up of the RetinaVue 700 Imager...
-
Page 29: Camera Registration
Camera registration The RetinaVue 700 Imager needs to be registered and your clinic needs to have an account set up with RetinaVue Network to send exams for overread. There are two types of camera registration. Depending on your needs, select the USB registration or the Wi-Fi registration: •... - Page 30 26 Camera registration For the USB workflow, the RetinaVue 700 Imager must be Note connected to a computer running the RetinaVue Network software application (requires additional software) to transfer exams. Note If needed, the USB camera registration settings can be reset after the initial set up.
-
Page 31: Wi-Fi Camera Registration
Directions for use Camera registration 27 Wi-Fi camera registration The Wi-Fi camera registration only needs to be Note completed at the initial set up. See the Reset factory defaults instructions at the end of this section if a change to the camera registration is needed. Touch RetinaVue Network - Wi-Fi to select the wireless workflow and touch Next. - Page 32 28 Camera registration During Wi-Fi communication, the RetinaVue 700 Imager Note supports the use of the following secure authentication types: WPA2-PSK and WPA2 Enterprise. If you don't see the network name in your list it might be a hidden network. Select "Other" and enter the network name.
- Page 33 Directions for use Camera registration 29 Note If prompted, click I agree to accept the End User License Agreement on the RetinaVue Network Customer Portal. On the RetinaVue Network Customer Portal, select Manage Devices and click Next. Click Add Device.
- Page 34 30 Camera registration On your RetinaVue 700 Imager, touch Next to generate a Device Registration Code. 10. On the RetinaVue Network Customer Portal, enter the Device Registration Code from the RetinaVue 700 Imager and then click Enter. Note *The Device Registration Code shown here is an example. Note The Next button is greyed out until the Device Registration Code is received by the RetinaVue 700 Imager from the...
- Page 35 Directions for use Camera registration 31 (Optional) EMR integrators may use the EMR Test functionality to test WiFi and EMR connections by sending images to a test server. CAUTION This mode is NOT intended to be used for patient exams and is only intended for use by a software integrator on an EMR integration team.
- Page 36 32 Camera registration 13. (Optional) If a Device Access Code was selected at the RetinaVue Network Customer Portal, touch OK at the prompt: A new device access code has been downloaded. The camera will require this code on next encounter. 14.
-
Page 37: Using The Retinavue 700 Imager
Using the RetinaVue 700 Imager The following topics describe the RetinaVue 700 Imager Tutorial and how to use the RetinaVue 700 Imager for preforming exams, creating new patients, searching for patients, capturing additional images, deleting exams, and reviewing exams. Additional information about image quality scores and exam protocols, the Auto exam mode, accessing exam protocols, and installing the face cup is also provided. - Page 38 34 Using the RetinaVue 700 Imager • Automatic image capture (touch START) • Navigation to the Image Inspection screen • One touch exit...
-
Page 39: About Image Quality Scores
Directions for use Using the RetinaVue 700 Imager 35 About image quality scores Good quality Good quality green green If the image is of good quality, it is very (Inspection screen) (Exam summary likely to be read. screen) (Scores of 40 +) Acceptable quality Acceptable quality yellow... - Page 40 36 Using the RetinaVue 700 Imager Residual risk of magnets WARNING Patient injury risk - magnetic fields. Exercise caution when using the RetinaVue 700 Imager in close proximity to implanted devices such as, but not limited to, cranial implants, adjustable CSF shunts, and pacemakers.
-
Page 41: About Exam Protocols
Directions for use Using the RetinaVue 700 Imager 37 About Exam protocols Available Exam protocols include: • Retina (RET) • Anterior (ANT) Retina (RET) R-RET Captured images appear on the Inspection screen with a quality score and with a label R-RET (Right Retina- shown in the example). L-RET Or, captured images appear on the Inspection screen with a quality score and with a label L-RET (Left Retina). - Page 42 38 Using the RetinaVue 700 Imager Evaluate and document anterior ocular structures like lids, lashes, and Anterior imaging cornea. Captured images appear on the Inspection screen with a label R-ANT R-ANT (Right Anterior- shown in the example). Or, captured images appear on the Inspection screen with a label L- L-ANT ANT (Left Anterior).
-
Page 43: Tutorial
Directions for use Using the RetinaVue 700 Imager 39 The currently selected Exam protocol appears shaded Note and becomes the default protocol for future exams on the RetinaVue 700 Imager until another protocol is selected. Tutorial The tutorial includes the following information: •... -
Page 44: Before Starting An Eye Exam
40 Using the RetinaVue 700 Imager To stop the tutorial, touch the screen. To resume, touch Continue tutorial. To proceed to an exam, touch the screen and then touch START EXAM. Before starting an eye exam If the RetinaVue 700 Imager is not already on, press the power button. Note To conserve power, the RetinaVue 700 Imager enters Sleep mode if it remains idle for the time set during set up. - Page 45 Directions for use Using the RetinaVue 700 Imager 41 The RetinaVue 700 Imager can be used on patients with Note eye implants and intraocular lenses. While the RetinaVue 700 Imager can be used on patients with cataracts and other eye opacities, images will likely be blurry or unreadable because of the refractive nature of the opacities.
- Page 46 42 Using the RetinaVue 700 Imager CAUTION Failure to remove the Anterior Imaging Spacer before a Retina exam may result in unacceptable image quality or failure to capture an image. From the Pre Acquisition screen, touch (Settings) to select the Retina Exam protocol.
-
Page 47: Perform A Retina Eye Exam
Directions for use Using the RetinaVue 700 Imager 43 Perform a Retina eye exam WARNING Clean and disinfect the face cup after each patient to avoid the risk of cross-contamination. From the Patients screen, touch on the Patient's name or ID (MRN). Any scheduled patients appear on the Patients screen. - Page 48 44 Using the RetinaVue 700 Imager Position the RetinaVue 700 Imager about 4 inches directly in front of the your patient. Keep the RetinaVue 700 Imager level and in line with your patient’s eyes. Brace your arms against your body to help keep the RetinaVue 700 Imager steady.
- Page 49 Directions for use Using the RetinaVue 700 Imager 45 If needed, touch < or > to align the yellow circle to the pupil. Ask the patient “Can you see the entire plus sign?”. Inform the patient that the plus sign will transition into a green dot. Ask the patient to follow the green dot.
- Page 50 46 Using the RetinaVue 700 Imager 11. Hold steady until the image is captured. 12. If the audio volume is set to an audible level, a camera shutter tone alerts you once the right eye image has been captured. 13. The RetinaVue 700 Imager will automatically move to the left eye and the message: "Lens moving to the next eye."...
- Page 51 Directions for use Using the RetinaVue 700 Imager 47 If the image is of good quality (scores of 40 +) , it is very • likely to be read. If the image is of good enough quality (range of 20 — 39) •...
- Page 52 48 Using the RetinaVue 700 Imager 17. From the Post Acquisition screen, touch (Next) after all images are captured. If no images are captured the prompt message appears that: Note "You must capture at least one image before continuing." See the topic: Capture additional images using the same protocol for information about adding an image.
-
Page 53: Create A Patient On The Camera
Directions for use Using the RetinaVue 700 Imager 49 Create a patient on the camera From the Patients screen, touch to create a new patient. (Wireless workflow images shown) Touch within the Patient's Last name, First name, or Middle initial entry box to launch the on-screen keyboard. -
Page 54: Search For A Patient In The Scheduled Patients List
50 Using the RetinaVue 700 Imager Once all the required fields are complete, touch Exam to open a new exam. Note To edit patient data, touch within the desired field to launch the on-screen keyboard, touch the backspace key to delete information, retype the correction using the on-screen keyboard, and then touch OK. - Page 55 Directions for use Using the RetinaVue 700 Imager 51 Touch OK to launch the on-screen keyboard and begin typing the patient's last name, first name, or Patient ID (MRN #) into the entry field box and then touch OK on the on-screen keyboard. The list of patients appears on the Patient list search screen based on search parameters.
-
Page 56: Search For A Patient In The Saved Exams List
52 Using the RetinaVue 700 Imager Patient information is not editable for patients created on the Note RetinaVue Network Customer Portal or from the RetinaVue Network software application (USB). Refer to Perform a Retina eye exam or Perform an Anterior Image eye exam for instructions on performing exams and acquiring images. - Page 57 Directions for use Using the RetinaVue 700 Imager 53 Patients in the Saved Exams list already have completed or Note partially completed exams. Begin typing the patient's last name, first name, or Patient ID (MRN #) into the Search entry field and then touch OK on the on-screen keyboard. The Saved/Submitted list of patients appears on the Review screen based on search parameters.
- Page 58 54 Using the RetinaVue 700 Imager From the Exam summary screen, exams can be deleted or submitted.
-
Page 59: Delete An Image During An Eye Exam
Directions for use Using the RetinaVue 700 Imager 55 Delete an image during an eye exam CAUTION Data deleted on the device cannot be recovered. From the Post Acquisition screen, touch to review the current image on the Inspection mode screen. (Right eye Image Inspection screen shown). - Page 60 56 Using the RetinaVue 700 Imager Touch OK at the dialog prompt: "Do you want to discard this image?". From the Post Acquisition screen, touch (Add image) to capture an additional image using the existing protocol. Capture the remaining images and touch (Next) to complete the exam.
-
Page 61: Delete A Patient
Directions for use Using the RetinaVue 700 Imager 57 Touch to submit the exam to the RetinaVue Network • Submit Customer Portal. Note In the Wireless mode, the "Exam is queued up to be submitted." message appears. Delete a patient CAUTION Data deleted on the device cannot be recovered. -
Page 62: Delete A Patient And Exam
58 Using the RetinaVue 700 Imager Delete a patient and exam CAUTION Data deleted on the device cannot be recovered. From the main Patients screen, touch to search for a patient. (Wireless workflow images shown) Search for patients in either the Scheduled patients or Saved exams list of patients already contained on the RetinaVue 700 Imager. - Page 63 Directions for use Using the RetinaVue 700 Imager 59 The Saved/Submitted list screen appears. For Saved exams, touch on a patient's name or ID to select that patient. The Exam summary screen appears. Touch (delete) to remove the patient and the exam from the RetinaVue 700 Imager.
-
Page 64: Capture Additional Images Using The Same Protocol
60 Using the RetinaVue 700 Imager Capture additional images using the same protocol From the Post Acquisition screen, touch (Add image) to capture an additional image using the existing protocol. If the image has a yellow or blue information message, •... -
Page 65: Review Of Saved Exams
Directions for use Using the RetinaVue 700 Imager 61 of the image capture icon. Touch (Next) after all images are captured. Touch to save the exam to the device or touch • Save Submit send the exam to the RetinaVue Network for a reading. Review of saved exams From the main Patients screen, touch... -
Page 66: Review Of Submitted Exams
62 Using the RetinaVue 700 Imager Any exams which have not been sent for overread appear on the Exam summary screen (touch on a patient's name or ID to select that patient.) For Saved exams, touch on the image quality icon of the right or left eye to view the images associated with a patient. -
Page 67: Update The Retinavue 700 Imager Software (Firmware)
Directions for use Using the RetinaVue 700 Imager 63 The patient's Submitted/Review screen appears. From the patient's Submitted/Review screen, touch one the following icons for additional status messages: - Waiting to upload - Submitted - Report available The status icons are only available in Wireless mode. Once an Note exam has been viewed on the RetinaVue Network Customer Portal it will be deleted from the device. - Page 68 64 Using the RetinaVue 700 Imager From the main Patients screen, touch Touch Settings. Touch About to view the software version. (You may need to scroll down to see the About menu.) Touch (Back) to return to the Settings screen. Before you begin, you will need the following : •...
- Page 69 Directions for use Using the RetinaVue 700 Imager 65 Use a safe eject method when ejecting the RetinaVue 700 Note Imager to ensure a complete software transfer to the RetinaVue 700 Imager . (Options include right-clicking on the Start Menu > Open File Explorer> right-click on DATA , click Eject.
- Page 70 66 Using the RetinaVue 700 Imager...
-
Page 71: Controls
Controls RetinaVue 700 Imager main Patient screen The RetinaVue 700 Imager main Patients screen includes the following areas: Item Area Device status Patients list or Content Area Navigation 1. Device Status Area The Device Status Area, located at the top of the main Patients screen, displays the: •... - Page 72 68 Controls • Clinic Name (if in Wi-Fi workflow and the clinic is selected at the RetinaVue Network Customer Portal). The clinic text indicates which clinic is selected. • Time. Displayed in an HH:MM format. • Connection status. The icons indicate which connection type, if any, is currently active.
- Page 73 Directions for use Controls 69 • Patients: Presents a list of patients created on the RetinaVue 700 Imager or transferred from the RetinaVue Network (requires Wi-Fi connection to the RetinaVue Network or an additional software application). • Review: Presents images and exams from a list of patients contained on the RetinaVue 700 Imager.
- Page 74 70 Controls Advanced settings code ○ Firmware update ○ Reset factory defaults ○ Export log ○ • About Software version ○ • Regulatory Information • Network Information • Open source software information • Practice mode: Provides interactive training help to practice the steps necessary to master the RetinaVue 700 Imager.
-
Page 75: Practice Mode
Directions for use Controls 71 the Practice menu. (See Content Area or Patients list for further details). Touch to return to main Patients screen. • Create new patient. Create a new patient on the RetinaVue 700 Imager. Touch to navigate to the Patient summary screen. Device Status Area in Practice mode The Device Status Area in Practice mode is located at the top of the main Patients screen and is colored blue. - Page 76 72 Controls touch Touch Practice mode to enter Practice mode. Touch OK at the prompt: "Active Practice mode. Not intended for patient exams." The Practice mode screen appears. Practice mode prominently displays the text "Practice mode" and a blue banner also appears at the top of the screen.
- Page 77 Directions for use Controls 73 Touch Exam. Touch START EXAM. Position the RetinaVue 700 Imager about 4 inches directly in front of a practice patient, or a colleague. Keep the RetinaVue 700 Imager level and in line with your patient’s eyes. Brace your arms against your body to help keep the RetinaVue 700 Imager steady.
- Page 78 74 Controls Place the face cup firmly on the patient’s face. Do not hover near the face with the RetinaVue 700 Imager. Keep the RetinaVue 700 Imager level. After placing the face cup firmly on the patient’s face, the right Note pupil should be visible within the screen.
- Page 79 Directions for use Controls 75 10. If needed, touch < or > to align the yellow circle to the pupil. 11. Ask the patient “Can you see the entire plus sign?”. Inform the patient that the plus sign will transition into a green dot. Ask the patient to follow the green dot.
- Page 80 76 Controls 13. Hold steady until the image is captured. 14. If the audio volume is set to an audible level, a camera shutter tone alerts you once the right eye image has been captured. 15. The RetinaVue 700 Imager will automatically move to the left eye and the message: "Lens moving to the next eye."...
- Page 81 Directions for use Controls 77 18. Touch Save. The exam appears as "Exam, Practice" on the Review screen. 19. Touch on the Patient's name ("Exam, Practice") or ID ("12345678") to return to the Review screen and to view images associated with your practice patient. CAUTION No data is preserved in practice mode.
- Page 82 78 Controls Touch (Navigation Menu). Touch Settings. Touch Clinic/States. With saved exams on the camera, switching a clinic is not Note permitted. Either save or delete the exam to switch clinics. If the "Wi-Fi connection not available." , or the "No RetinaVue Note Network connection.
-
Page 83: Select Or Change A Multi-State Clinic On The Retinavue
Directions for use Controls 79 Touch (Back) to return to the Settings screen. Touch and then touch Patients to return to the main Patients screen. Select or change a Multi-State clinic on the RetinaVue 700 Imager (wireless only) From the main Patients screen, touch (Navigation Menu). - Page 84 80 Controls Touch Clinic/States. If multiple clinics are set up, use the drop-down menu to select the clinic you would like to set up for Multi-State use. Touch Multi-State. The switch changes from Off to On. Touch States to select between 2 and 6 States for the clinic. Touch More to see additional States and to proceed to OK when the desired number of States are selected.
-
Page 85: View Or Change The Retinavue 700 Imager Settings
Directions for use Controls 81 Touch and then touch Patients to return to the main Patients screen. Note For each exam performed in multi-state use, select the state where the exam was performed. Touch OK to confirm. View or change the RetinaVue 700 Imager settings From the main Patients screen, touch... - Page 86 82 Controls Touch > to view or modify the wireless network settings from the list of available wireless networks in range. Touch Info to view network information. The Network Information screen appears: MAC address 00:17:23:e5:d5:a5 IP address 10.20.200.70 Subnet mask 244.244.244.1 Gateway 10.20.244.1 Version 2.00.02 SSID (Your Network)
- Page 87 Directions for use Controls 83 • Advanced settings code. Set the Advanced settings numeric code, retype the code to confirm, and touch OK to return to the Advanced settings screen. • Firmware update. Touch Load firmware and touch OK at the prompt to load the software from a computer.
- Page 88 84 Controls Touch (down) to adjust the device sleep time. Use the ○ scroll bar to select 5 minutes, 7 minutes, 10 minutes, or Never. Touch (Back) to return to the Settings screen. Touch ○ Date & time Touch (up) or (down) to adjust the Day, Month, Year, ○...
- Page 89 Directions for use Controls 85 ○ Touch to view the software version. Touch (Back) to About return to the Settings screen. Regulatory Information. Touch ○ Regulatory Information view Regulatory Information. Touch (Back) to return to the Settings screen. Open Source information. Touch ○...
- Page 90 86 Controls Enter Sleep mode Press A dialogue box appears with three options: Power down • Sleep • Cancel • Touch Sleep. The RetinaVue 700 enters Sleep mode. Exit sleep mode Press or touch the LCD touchscreen. Note Lifting or moving the RetinaVue 700 Imager also brings the RetinaVue 700 Imager out of Sleep mode.
- Page 91 Directions for use Controls 87 Touch Date and time. Touch (up) or (down) to adjust the day, month, and year in the DD/ MM/YY format. Touch (up) or (down) to adjust the hour, minute, and use the drop- down menu and scroll bar to view or change the Continent and location.
- Page 92 88 Controls Touch (Back) to return to the Settings screen. Touch (Navigation menu) and Patients to return to the Patients home screen. Reset the Device access code (USB only) If you are not already logged in, enter the existing access code for the RetinaVue 700 Imager.
- Page 93 Directions for use Controls 89 Touch Settings. Touch Advanced settings. Touch Advanced settings code. Use the touchscreen numeric keypad to enter a code into the Advanced settings code field and then retype the same code into the Advanced settings code (retype) field and touch OK on the keypad. Note The Advanced settings code password can contain a minimum of 1-digit and a maximum of 18-digits.
- Page 94 90 Controls Touch (Back) to return to the Settings screen. Touch (Navigation menu) and Patients to return to the Patients home screen.
-
Page 95: Advanced Features
Advanced features Manual Exam mode Manual Mode Use the RetinaVue 700 Imager in manual mode to acquire images in those instances when automatic capture mode is not suitable. Manual operation of the RetinaVue 700 Imager allows control of the lens barrel movement, focus, brightness, and image acquisition. - Page 96 92 Advanced features Left Manual mode contains advanced image capture options. Note A manual touch of the capture button is required to obtain an image. Available manual features include: Focus adjustment (values range from -1 to +1) Flash brightness adjustment (values range from -2 to +2) Image capture X-axis control (horizontal movement)
- Page 97 Directions for use Advanced features 93 Y-axis control (vertical movement) Zoom in/Zoom out One touch exit One touch advancement to next screen An additional available manual feature is the Sequential image capture order of the right and left eye. Perform a manual image capture WARNING Clean and disinfect the face cup after each patient to avoid the risk of cross-contamination.
- Page 98 94 Advanced features From the Pre Acquisition screen, touch on the default protocol Retina to launch the Exam protocol selection. From the Exam protocol selection screen, touch Manual. To adjust settings before capturing an image, see the topic Note Manual Exam mode for additional information about using advanced image capture options (such as Focus adjustment, Flash brightness adjustment, or X-axis and Y-axis adjustment).
- Page 99 Directions for use Advanced features 95 Move the RetinaVue 700 Imager toward the patient and align the yellow circle to the patient’s right pupil. Hold the RetinaVue 700 Imager steady and in line and use the touchscreen X- axis control for horizontal movement , or the Y-axis control for vertical movement to align the patient's right pupil in the oval.
- Page 100 96 Advanced features 13. Repeat steps 7 through 11 as needed for the left eye and touch (image capture) to manually capture an image of the left eye once the yellow circle is aligned to the patient’s left pupil. (Left eye manual capture shown.) The acquired images appear on the Post Acquisition screen after a few seconds.
-
Page 101: Use The Anterior Imaging Spacer For A Patient Anterior Image Exam
Directions for use Advanced features 97 Touch Save to save the exam to the device for further review or editing. Touch Submit to submit the exam to the RetinaVue Network Customer Portal. Use the Anterior Imaging Spacer for a patient Anterior image exam When performing Anterior imaging of the ocular structures (lids, lashes, and cornea) using the Anterior protocol, remove the face cup from the RetinaVue 700 Imager,... - Page 102 98 Advanced features CAUTION Failure to install the Anterior Imaging Spacer before an Anterior image exam may result in unacceptable image quality or failure to capture an image. From the Pre Acquisition screen, touch (Settings) to select the Anterior protocol. Touch Anterior and touch OK.
-
Page 103: Perform A Anterior Image Eye Exam
Directions for use Advanced features 99 Perform a Anterior image eye exam WARNING Clean and disinfect the face cup after each patient to avoid the risk of cross-contamination. WARNING Patient injury risk. The Anterior Imaging Spacer of the RetinaVue 700 Imager uses magnets to attach to the device and to the face cup. - Page 104 100 Advanced features Touch OK at the prompt: "Before continuing with selected exam: insert the anterior imaging spacer between camera and face cup". From the Pre Acquisition screen, touch START EXAM. Position the RetinaVue 700 Imager about 4 inches directly in front of the your patient.
- Page 105 Directions for use Advanced features 101 10. Ask the patient “Can you see the entire plus sign?”. 11. Press the face cup firmly against the patient’s face and then touch START. 12. Hold steady until the image is captured. 13. If the audio volume is set to an audible level, a camera shutter tone alerts you once the right eye image has been captured.
- Page 106 102 Advanced features 16. Once both images have been captured, the acquired images are available to view on the Post Acquisition screen. 17. Touch to review the displayed image. The Inspection mode screen appears. the Anterior image for the right eye contains the R-ANT label •...
- Page 107 Directions for use Advanced features 103 Touch Save to save the exam to the device for further review or editing. Touch Submit to submit the exam to the RetinaVue Network Customer Portal.
-
Page 108: Wireless Certificate Support Overview For The It Department
104 Advanced features Wireless certificate support overview for the IT department The scope of this instruction is to provide information on the support of wireless client certificates, including the wireless client support of server certificate authentication. This instruction does not point to a specific authentication server, nor does it apply a specific mechanism (e.g., OpenSSL, Windows makecert) to create the certificates. - Page 109 Directions for use Advanced features 105 Select the network name from the displayed list, or select ‘Other…’ to enter the network name. Touch within the Network name field to launch the onscreen keyboard. Type your network name and touch OK. Choose the WPA2 Enterprise security type and touch Next.
- Page 110 106 Advanced features...
-
Page 111: Troubleshooting
Troubleshooting CAUTION A defective device should not be used. A device with parts which may be broken or missing, visibly worn, distorted, or contaminated should be replaced immediately. To correct an error, follow these instructions or contact Welch Allyn Technical Support: www.welchallyn.com/service. Troubleshooting image quality Good quality image... - Page 112 108 Troubleshooting Problem Solution Partial blink Ask the patient to keep his or her eye open. Dirty lens Clean the lens with a clean micro fiber cloth or a dry, non-abrasive wipe (e.g. Kim Tech wipe). Washed out image Have the patient slightly tilt their head back during the image capture.
- Page 113 Directions for use Troubleshooting 109 Problem Solution automatic capture mode may not start promptly. Pull the RetinaVue 700 Imager slightly away from the patient and realign the yellow circle to the pupil. Information messages Information message/problem Solution Dirty lens Clean the camera lens with a clean Clean the camera lens with a non-abrasive micro fiber cloth or a dry, non- wipe.
- Page 114 110 Troubleshooting Information message/problem Solution Unable to locate patient eye. Restart exam. Please restart exam or capture from exam summary. No image Restart exam. To add an image touch (Add image) to capture an image. You must capture at least one image before Take an image.
- Page 115 Directions for use Troubleshooting 111 Error message/problem Solution Temperature warning: CPU is overheating. Power down, reboot, if problem Power down, reboot, if problem persists persists contact tech support. contact tech support. Invalid start position. Please restart exam or Restart exam or capture image from capture image from exam summary.
-
Page 116: Wireless Radio Messages
112 Troubleshooting Problem Solution message once the camera USB cable is the camera is connected to a laptop removed from the laptop or PC. or PC by the USB cable. By default, the AutoPlay notification ® The Windows operating system may display is displayed when a USB storage the Autoplay notification prompt each time the device is connected to the laptop or... - Page 117 Directions for use Troubleshooting 113 Message Suggested action See Wireless connectivity. Invalid configuration. Error connecting to See Wireless connectivity. the network. Error connecting to the network using the Re-enter the network name, username supplied credentials. and password. Failed to connect to the RetinaVue Re-enter the network name, username Network Portal.
- Page 118 114 Troubleshooting Wireless connectivity Problem Solution Cannot connect to the network. Possible invalid username or password. Connection drops. Missing wireless certificate. Ensure that the signal strength is sufficient. The signal strength appears in the top right corner of the device status bar. Wireless signal strength - Best (4 bars) - Good (3 bars)
- Page 119 Directions for use Troubleshooting 115 Problem Solution Ensure that IP address is populated and shows a valid IP address other than 00:00:00:00:00:00. Settings Touch Info Touch . The Network Information screen appears. MAC address 00:17:23:e5:d5:a5 IP address 10.20.200.70 Subnet mask 255.255.255.1 Gateway 10.20.244.1 Version 2.00.02 SSID Your Network...
- Page 120 116 Troubleshooting Problem Solution the Wi-Fi certificate(s) onto the camera. If certificates are already installed, Skip touch Hidden SSID networks Manually enter the network name. Settings Touch Wi-Fi Touch Scroll to the bottom of the list. Touch Other and launch the keyboard to enter the network name, followed by password, and then select security type.
- Page 121 Directions for use Troubleshooting 117 Problem Solution Settings Wi-Fi Touch . Touch . Select a network name from the list, enter your Username and Password, and check the "Remember this connection" checkbox. Every time you reboot the camera, it will connect to the network automatically.
- Page 122 118 Troubleshooting Problem Solution - report available Note After an exam has been over- read and downloaded, the exam will be removed from submitted column of the RetinaVue Network Customer Portal and from the camera "Submitted" exams Review screen. Check your network connection. If your saved exam does not appear in the Review list, then it was successfully submitted to the...
-
Page 123: Maintenance
Maintenance Cleaning and Disinfection To help prevent injury and/or equipment damage, obey these warnings: WARNING To avoid the risk of cross-contamination, do not reuse wiping materials for multiple steps or on multiple products. WARNING Cleaning and disinfecting solutions may cause skin rash and/or irritation upon contact. Follow the manufacturer’s instructions found on the product label and Safety Data Sheet (SDS). - Page 124 120 Maintenance CAUTION Consult the cleaning and disinfection agent manufacturer instructions for proper use and germicidal efficacy, prior to use. Hill-Rom recommends cleaning and disinfecting the face cup before first patient use, in between patient uses, and whenever the face cup is visibly soiled.
- Page 125 Directions for use Maintenance 121 If the face cup is attached to the Anterior Imaging Spacer, remove the Anterior Imaging Spacer. STEP 1. Cleaning Visible soil: As necessary, first remove visible soil from the RetinaVue 700 Imager using an approved cleaner/disinfectant wipe. (See the Approved Cleaners/ Disinfectants table.) •...
- Page 126 122 Maintenance • Pedestal (optional accessory) • Camera barrel* • Camera lens* • Dust shield* *do not apply force while cleaning or wiping the camera barrel, camera lens, dust shield, and touchscreen as this may cause damage. Ensure each individual baffle of the dust shield is wiped Note clean.
- Page 127 Directions for use Maintenance 123 Only use the disinfectant process on the lens if a known Note contamination occurs. Do not routinely use the disinfectant process on the lens or touchscreen as damage may occur over time. Prepare the RetinaVue 700 Imager for use: Examine the entire RetinaVue 700 Imager for damage.
- Page 128 124 Maintenance...
-
Page 129: Specifications
Specifications Technical Specifications Field of View 60 degrees ±5% horizontal 45 degrees ±5% vertical 2.5 mm and greater Pupil Size Working distance 19 - 21 mm from objective lens to cornea Dimensions Width: 6.6 inches (167 mm) Height: 4.2 inches (106 mm) Length without adapter spacer: 11.4 inches (290.2 mm) Length with adapter spacer: 12 inches (305.4 mm) Weight... - Page 130 126 Specifications LCD Monitor 4.3 inch Full Color TFT-LCD Image Format DICOM compliant Interface Micro USB File Transfer Wired USB to PC by micro USB cable to PC running RetinaVue Network (requires additional software) Wireless WPA2, FIPS certification to Welch Allyn server File Storage Integrated storage Ability to save a minimum of 2000 images (500 standard...
- Page 131 Directions for use Specifications 127 battery via 3A@12V DC adapter in power off. 5 hours to fully charge the empty high capacity (4-cell) battery via 3A@12V DC adapter in power off. Optical capabilities defined according to the ISO 10940 standard. Image quality will vary with patient physiology, including pupil size.
- Page 132 128 Specifications Welch Allyn will service RetinaVue 700 Imager devices that are within their lifetime. Firmware updates and support may require an annual subscription service after the initial one (1) year warranty period. The expected battery life is at least one (1) year. If the RetinaVue 700 Imager device fails to hold a charge, a new battery can be ordered.
-
Page 133: Device Radio
Device radio The RetinaVue 700 Imager's radio operates on 802. 11 networks. Feature Descritption FCC (Americas, Parts of Asia, and Middle East) Regulatory Domain Support 2.4 GHz Frequency FCC: 2.4 GHz to 2.483 GHz Bands FCC: 11 (3 non-overlapping) 2.4 GHz Operating Channels FCC: 5.15 GHz to 5.35 GHz 5 GHz Frequency... - Page 134 130 Device radio Feature Descritption Modulation BPSK @ 1, 6, 6.5, 7.2 and 9 Mbps QPSK @ 2, 12, 13, 14.4,18, 19.5 and 21.7 Mbps CCK @ 5.5 and 11 Mbps 16-QAM @ 24, 26, 28.9, 36, 39 and 43.3 Mbps 64-QAM @ 48, 52, 54, 57.8, 58.5, 65, and 72.2 Mbps Host interface USB 2.0...
-
Page 135: General Compliance And Standards
General compliance and standards The RetinaVue 700 Imager complies with the following standards: IEC 60601-1:2005/A1:2012 (EN 60601-1:2006/A1:2013) IEC 60601-1-2 : 2014 (EN 60601-1-2 : 2015) ISO 15004-1:2006 ISO 15004-2:2007 ISO 10940:2009 ISO 10993-1 : 2009 ISO/EN 14971 IEC/EN 62304+AC IEC 62366 EN 1041 Directive 2002/96/EC-WEEE: Disposal of noncontaminated electrical and electronic equipment... -
Page 136: General Radio Compliance
132 General compliance and standards For more specific disposal or compliance information, see www.welchallyn.com/weee, or contact Welch Allyn Customer Service at +44 207 365 6780. General radio compliance The wireless features of this device must be used in strict accordance with the manufacturer’s instructions as described in the user documentation that comes with the product. - Page 137 Directions for use General compliance and standards 133 EMC compliance Special precautions concerning electromagnetic compatibility (EMC) must be taken for all medical electrical equipment. This device complies with IEC 60601-1-2 : 2014 (EN 60601-1-2 : 2015). • All medical electrical equipment must be installed and put into service in accordance with the EMC information provided in this Directions for use.
- Page 138 134 General compliance and standards Electromagnetic emissions Emissions test Compliance Electromagnetic environment - guidance RF emissions Group 1 The device uses RF energy only for its internal function. Therefore, its RF emissions are very low and are not likely CISPR 11 to cause any interference in nearby electronic equipment.
- Page 139 Directions for use General compliance and standards 135 Electromagnetic immunity Voltage dips, short Mains power quality should be 0 % U ; 0.5 cycle 0 % U ; 0.5 cycle interruptions and that of a typical professional voltage variations on healthcare facility environment.
- Page 140 136 General compliance and standards Electromagnetic immunity The device is intended for use in the electromagnetic environment specified below. The customer or the user of the device should assure that it is used in such an environment. Immunity test IEC 60601 test Compliance Electromagnetic environment - guidance level...
- Page 141 Directions for use General compliance and standards 137 Electromagnetic immunity normal operation. If abnormal performance is observed, additional measures may be necessary, such as reorienting or relocating the device. Over the frequency range 150 kHz to 80 MHz, field strengths should be less than 3 V/m. Recommended separation distances between portable and mobile RF communications equipment and the device The device is intended for use in an electromagnetic environment in which radiated RF disturbances are...
- Page 142 138 General compliance and standards Test specifications for enclosure port immunity to RF wireless communications equipment 430 - 470 GMRS 460, ±5 kHz deviation FRS 460 1 kHz sine 704 - 787 LTE band 13, 17 Pulse modulation 217 Hz 800 - 960 GSM 800/900, Pulse...
-
Page 143: Retinavue 700 Imager Accessories
RetinaVue 700 Imager Accessories Pedestal stand Part number Description 107145 RetinaVue 700 Imager Pedestal stand Miscellaneous items Part number Description RV700-B RetinaVue 700 Imager with lithium-ion battery and US plug 106145 RetinaVue 700 Imager neck strap 106146 RetinaVue 700 Imager wrist strap 107142 33.0143250001 Battery (standard capacity) for RetinaVue 700 Imager;... - Page 144 140 RetinaVue 700 Imager Accessories Part number Description 107181 Replacement USB Cable for RetinaVue 700 Imager 728139 RetinaVue 700 Battery cover 723481 Laptop for RetinaVue Network 723671 Lens cloth 729097 Anterior Imaging Spacer for RetinaVue 700 Imager Applied parts Part number Description 107146 Reusable Face Cup for RetinaVue 700 Imager: Qty.
- Page 145 Directions for use RetinaVue 700 Imager Accessories Part number Description 729298 RetinaVue 700 Imager Pedestal stand assembly instructions Carry Case Part number Description 107200 RetinaVue 700 Imager Premium carry case with shoulder strap...
- Page 146 142 RetinaVue 700 Imager Accessories...
-
Page 147: Warranty
Warranty Welch Allyn warrants the product to be free of defects in material and workmanship and to perform in accordance with manufacturer's specifications for the period of one year from the date of purchase from Welch Allyn or its authorized distributors or agents. The warranty period shall start on the date of purchase. - Page 148 Material No. 729216...
Need help?
Do you have a question about the Welch Allyn RetinaVue 700 and is the answer not in the manual?
Questions and answers