Table of Contents
Advertisement
Quick Links
Advertisement
Table of Contents

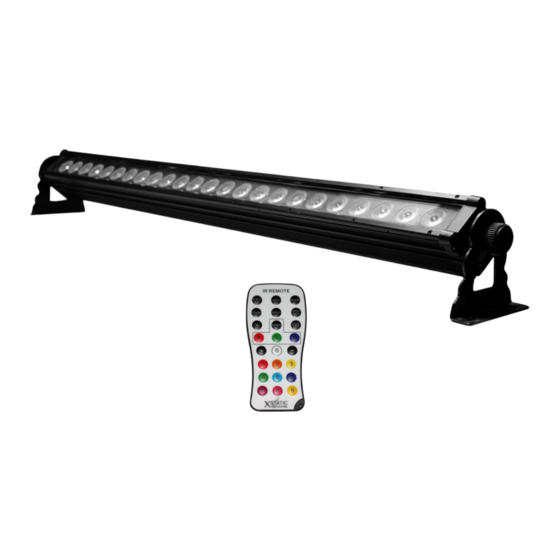
Summary of Contents for Xstatic Pro Lighting X-BTRI3W24 IRC
- Page 2 High Power Outdoor Bar Washer, 24 RGB 3Watt LED Fixture User Manual...
-
Page 3: Safety Instructions
SAFETY INSTRUCTIONS: CAUTION! READ BEFORE USE! The IP Code (or International Protection Rating) consists of the letters IP followed by two digits and an optional letter. As defined in international standard IEC 60529, it classifies the degrees of protection provided against the intrusion of solid objects (including body parts like hands and fingers), dust, accidental contact, and water in electrical enclosures. - Page 4 FEATURES: Please Note: Specifications and improvements in the design of this unit and this manual are subject to change without any prior written notice.
-
Page 5: Technical Specifications
TECHNICAL SPECIFICATIONS: ● Voltage: 100V~240V, 50Hz~60Hz ● LEDs: 24 Tri-Color RGB @3W ea. ● Power Consumption: 80W ● Weight: 14.3 lbs / 6.5Kgs ● Dimensions: 45” x 4.5” x 4.5” / 114cm x 12cm x 12cm ● DMX In and Out ●... - Page 6 POWER INSTRUCTIONS: POWER and DMX Connections The fixture utilizes IP66 rated connectors to ensure proper operation under various outdoor weather conditions. When connecting to the unit from your source control, make sure your output connections are also in a secure and controlled environment. Based on standard 3-pin DMX connections, and using the DMX to IP connector adaptor cable, you can link control and/or slave your lights into a single, large array.
- Page 7 POWER INSTRUCTIONS: LINKING / DAISY CHAIN DMX and Power Out Ports found on the Power and DMX Out Ports opposite end of the housing allow for connecting more than one fixture. For Power linking, you can connect up to 20 units with using 110volts, and up to 38 units using 240volts.
-
Page 8: Menu Controls
MENU / CONTROLS: SETUP MENU: You can easily setup and control your CHAMELEON LED Bar from the on-board LCD screen. Using the MENU, SETUP, UP and DOWN buttons, you will find the following options to select and modify: The Control Screen with MENU (A), UP (B), and DOWN (C) Navigation buttons. -
Page 9: Auto Mode
MENU OPTIONS CONT’D: 2. AUTO MODE Press and hold the MENU, or A button, until the next Menu selection ap- pears. Repeat until displays on the Menu screen. Tapping the A button again allows you to enter the Program Operation Speed settings. - Page 10 DMX SETUP CHARTS 6. DMX SETUP MODE OPTIONS These charts detail DMX setting options to access preset programs and channel control assignments. DMX Setup Mode 1: 3 Channel (DP1 / dp 1 0-255 Light 0-255 Light 0-255 Light (0 = OFF) (0 = OFF) (0 = OFF) DMX Setup Mode 2: 14 Channel (DP2 /...
- Page 11 DMX SETUP CONTINUED: DMX Setup Mode 3 (continued): 7 Channel (DP3 / Function Speed Flash Master Value 80-89 Program 01 90-99 Program 02 100-109 Program 03 110-119 Program 04 120-129 Program 05 130-139 Program 06 140-149 Program 07 0-255 0-255 0-255 150-159 Program 08...
-
Page 12: Ir Remote Control
IR REMOTE CONTROL: 7. INFRARED REMOTE OPTIONS Your fixture comes with an Infrared Remote Control. This requires aim- ing the remote forward and at the face of the light in order to send it your selections. The remote has two sections of control, settings and colors. Each has the associated selection the light will enter upon pressing. -
Page 13: Restore Factory Settings
IR REMOTE CONTROL: On Buttons 0-9, the LEDs will display the associated colors when select- White Amber Yellow1 Green Cyan Blue Purple Pink Yellow2 DIMMING MODE By selecting MANUAL and then a Color Button labeled with either R, G, or B, you can create your own color mix by increasing or decreasing the value of that single color. - Page 14 (NO DIRECT SALES, DEALERS AND DISTRIBUTORS ONLY) Please Register your product warranty on ProXDirect.com, submit your testimonials and setup photos to our website, & Tag us on your social media websites. #proxdirect...


Need help?
Do you have a question about the X-BTRI3W24 IRC and is the answer not in the manual?
Questions and answers