Table of Contents

Related Manuals for ero electronic LDE


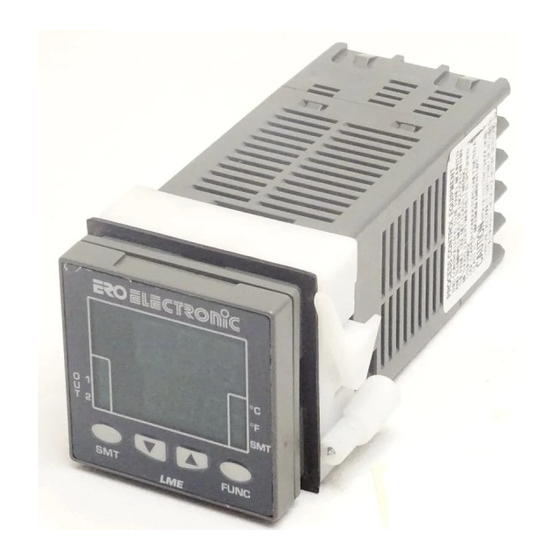
Summary of Contents for ero electronic LDE
- Page 1 170.IU0.LXE.0D0 USER MANUAL USER MANUAL USER MANUAL USER MANUAL USER MANUAL ISTRUZIONI D'USO ISTRUZIONI D'USO ISTRUZIONI D'USO ISTRUZIONI D'USO ISTRUZIONI D'USO Lxe-0-C00-B.pmd 28/01/2004, 14:59...
-
Page 2: Table Of Contents
5.3 Inibizione del segnale di uscita ..16 5.4 Displaying the set point set 5.4 Visualizzazione del set point (model LDE) ......... 16 impostato (modello LDE) ..... 16 5.5 SP/SP" selection ........ 16 5.5 Selezione SP/SP2 ....... 16 5.6 Direct modification of the set point ..16 5.6 Modifica diretta del set point .... -
Page 3: Dimensioni E Foratura
DIMENSIONI E FORATURA A. 3 Ixe-0-B00.p65 10/18/02, 3:43 PM... - Page 4 A. 6 Ixe-0-B00.p65 10/18/02, 3:43 PM...
-
Page 5: Mounting
1. MOUNTING screws Select a mounting location where there is bracket minimum vibration and the ambient temperature gasket ranges between 0 and 50°C (32 and 122°F). panel The instrument can be mounted on a panel up to 15 mm thick with a square cutout of 45 x 45 mm. For outline and cutout dimensions refer to page A.4. -
Page 6: Electrical Connections
MEASURING INPUTS 2. ELECTRICAL CONNECTIONS NOTE: Any external components (like zener barriers etc.) connected between sensor and input Connections are to be made with the instrument terminals may cause errors in measurement due housing installed in its proper location. to excessive and/or not balanced line resistance or possible leakage currents. - Page 7 RTD INPUT LOGIC INPUT Safety note: 1) The "OUT 3" and the "logic input" options are mutually exclusive. 2) Do not run logic input wiring together with power cables. 3) Use an external dry contact capable of switching 8 mA, 8 V DC. 4) The instrument needs 300 ms to recognize a contact status variation.
- Page 8 RELAY OUTS Use copper conductors only. Do not run input wires together with power line cables. The "OUT 3" and the "logic input" options are OUT 1 mutually exclusive. The following recommendations avoid serious problems which may occur it when using relay output to drive inductive loads.
- Page 9 POWER LINE WIRING LOAD OPERATING (mA) (mF) VOLTAGE Power Line <40 0.047 260 V AC 100 V to 240 V AC (50/60Hz) <150 mA 260 V AC or 24 V AC/DC <0.5 0.33 260 V AC R (S,T) In every case the cable connected to the relay Fig.
-
Page 10: Preliminary Hardware Settings
3. PRELIMINARY HARDWARE 4. CONFIGURATION SETTINGS 4.1 PUSHBUTTON FUNCTION These instruments can detect the opening of the FUNC This saves the new value of the input circuit (TC or RTD). This failure is displayed selected parameter and goes to the as an overrange condition. -
Page 11: Access To The Configuration Procedure
(SP, SP2 and t can always be numerical value (or the selection code). In the modified). model LDE, the display shows the parameter code If the modification of the parameters has been and the numerical value alternatively. enabled, the passage in configuration is free. - Page 12 NOTE: When P1 has been changed, the P2 and Reverse Direct P10 parametrer will be forced to the minimum Input Input value of the selected range while the P3 parameter will be forced to the maximum value of the selected range . P2 = Initial scale value Initial scale value for input from thermocouple/ Resistance Temperature Detector.
- Page 13 P6 = Out 2 configuration P8 = Stand-by of the alarm 1 P6 is skipped when P5 = 0. Only available when P5 is 1, 2 or 3. OFF = stand-by disabled If P5 = 1, 3 or 4; H. A . H.
- Page 14 LME: between P17 or P18 and 99.9% NOTE: at a successive visualization of the P11 model LDE: between P17 or P18 and 100.0% parameter, the instrument shows the value 2 for any set of P11 between 2 and 999.
- Page 15 LME: between 0.1 (10 seconds) and 2.0 (2 Note: minutes) 1) Select P22 value in accordance with the model LDE: between 00.01 (1 second) and 2.00 installed hardware. 2) Setting P22 equal to 1, 2 or 3, if AL2 AL2 parameter (2 minutes).
- Page 16 Timer mode 1 [P22=5] Timer mode 3 [P22=7] If the logic input remains in open condition for When the contact is closed, the instrument more than a programmed time the instrument controls using SP as operative set point. goes automatically at a stand by temperature When the contact has been opened the instrument (SP2).
- Page 17 Timer mode 5 [P22=9] When the time count is equal to 0 the instrument The instrument start in "Power OFF" mode and it comes back to the "Power OFF" mode and the remains in "Power OFF" mode until the contact is output 2 will be reset.
- Page 18 P23 = Alarm 2 configuration P26 = treshould of the guarantee soak function P23 is skipped when P22 ≠ 1, 2 or 3. P26 is available when P22 is greater than 5. If P22 = 1 or 3 This function stop automatically the time count H.
-
Page 19: Operative Mode
(below and allows parameter modification. this condition is defined as “Normal display”). - Model LDE displays the value measured (below NOTES: this condition is defined as “Normal display”) or, 1) During operation of the SMART function, the... -
Page 20: Inhibition Of The Out Signal
5.4 DISPLAYING THE SET POINT SET OFF” instead of The instrument will display “OFF (model LDE) To display the set point set, press the t indicating the set point; the out signal will switch OFF and the instrument will work as a simple pushbutton. -
Page 21: Timer Mode Description
LDE display management LDE display management LDE display management: the display shows the LDE display management LDE display management measured value. Pushing s pushbutton it is possible to display the operative set point. - Page 22 LME display management: when the instrument shows time count down. starts the time count down, the upper display LDE display management: when the instrument shows the measured value while the lower display starts the time count down, the display shows the shows time count down.
- Page 23 LDE display management: when the instrument LDE display management: when the instrument starts the time count down, the display shows the starts the time count down, the display shows the time count down.
-
Page 24: Manual Reset Of The Alarm
LDE display management: when the instrument starts the time count down, the display shows the time count down. Pushing pushbutton, it is possible to display the measured value. -
Page 25: Soft Start Ffunction
°F Lit up if the temperature is displayed in °F. state is called LAMP TEST). (LDE only) Lit when the display shows the No time out is applied to the LAMP TEST. operative set point. To return to the normal display mode, press pushbuttons t + FUNC again. -
Page 26: Operative Parameters
Param. Description 5.10 OPERATIVE PARAMETERS Set point (in eng. units). The following is a list of all the available control Span: from rL to rH. parameters. n. r S n. r S n. r S n. r S n. r S Manual reset of the alarms. - Page 27 Note: If the hysteresis of a band alarm is mm.ss (minutes and seconds) larger than the alarm band, the Span model LDE: from 0.00 to 10.00 instrument will use an hysteresis value mm.ss (minutes and seconds). equal to the alarm band minus 1 digit.
- Page 28 - from -100 to 100% for two control Duration of the out power limiter (in outputs. minutes). C C C C C Out 1 cycle time (in seconds). Available only if Pb is not 0. This parameter is only available when Span: from 1 to 540 min.
-
Page 29: Error Messages
The example shows the display of model LME. 1) Check the input signal source and the Model LDE displays 4 digits. connecting line. 2) Make sure that the input signal is in The sensor break can be signalled as: accordance with the instrument configuration. -
Page 30: Error Messages
LME: “Err which identifies the type of error in the upper display. LDE: “E E E E E ” and the error code. The complete list of all the possible errors follows in numerical order. Some errors automatically reset the instrument: if the error persists, send the instrument to your supplier to be checked. -
Page 31: Technical Characteristics
AWG 22 to AWG 14 ) with connection diagrams < 500 ppm/°C for RTD input with 1/10°C resolution and safety terminal block cover. (model LDE). Dimensions: according to DIN43700 48 x 48 mm, Operating temperature: from 0 to 50°C (from 32 depth 105 mm. -
Page 32: Control Actions
Integral time: from 0.1” to 20’ (LME): from 1” to - error <+1% of the input span when P1 = 5. 20’ (LDE). If a value of more than 20 minutes is - not measurable error for the other spans. -
Page 33: Outs
7.4 OUTS By means of the software, the configuration can be managed directly from the PC. OUT 1 (Heating): In this case the instrument display and keypad are not operative. Relay out with SPDT contact; a) Out contact 3A / 250 V AC on resistive load. b) Logic voltage for solid state relay command. -
Page 34: Montaggio
1. MONTAGGIO viti Scegliere una posizione di montaggio pulita, bretella facilmente accessibile anche sul retro e possibil- guarnizione mente esente da vibrazioni. pannello La temperatura ambiente deve essere compresa tra 0 e 50 °C (32 e 122°F). Lo strumento può essere montato su un pannello di spessore fino a 15 mm dopo aver eseguito un foro da 45 x 45 mm. -
Page 35: Collegamenti Elettrici
INGRESSI DI MISURA 2. COLLEGAMENTI ELETTRICI NOTA: Componenti esterni (es. barriere zener) collegati tra il sensore e i terminali di ingresso I collegamenti devono essere effettuati dopo che dello strumento, possono causare errori di misura la custodia dello strumento è stata regolarmente dovuti ad una impedenza troppo elevata o non montata sul pannello. - Page 36 INGRESSO PER TERMORESISTENZA INGRESSI LOGICI NOTE: 1) Le opzioni "Uscita 3" e "ingresso logico" sono mutuamente esclusive. 2) Non posare i cavi dei segnali parallelamente o vicino a cavi di potenza o a sorgenti di disturbi. 3) Utilizzare un contatto esterno adatto per una portata di 8 mA, 8 V c.c.
- Page 37 USCITE A RELE 3) Usare solo cavi di rame. 4) Non posare cavi di segnale parallelamente o vicino a cavi di potenza. 5) Le opzioni "Uscita 3" e "ingresso logico" sono OUT 1 mutuamente esclusive. Le raccomandazioni che seguono possono evitare seri problemi causati dall'utilizzo delle uscite a relè...
- Page 38 ALIMENTAZIONE CARICO Tensione di (mA) (mF) lavoro Rete <40 0.047 260 V AC da 100 V a 240 V c.a. (50/60Hz) <150 mA 260 V AC oppure 24 V c.c./c.a. <0.5 A 0.33 260 V AC R (S,T) I cavi collegati con le uscite a relè devono in ogni caso rimanere il più...
-
Page 39: Impostazioni Hardware Preliminari
NOTA: un singolo interruttore o disgiuntore può 4. CONFIGURAZIONE comandare più apparecchi. 4.1 OPERATIVITÀ DEI PULSANTI 3. IMPOSTAZIONI HARDWARE FUNC Consente di memorizzare il nuovo valore del parametro selezionato e PRELIMINARI passare al parametro successivo Questi strumenti sono in grado di rilevare (ordine crescente). -
Page 40: Accesso Alla Configurazione
è libero. In caso con- valore numerico (o il codice di selezione). trario, sarà consentito inserendo, al momento della Nel modello LDE, il display mostra alternativamen- richiesta, lo stesso valore numerico programmato te il codice del parametro e il valore numerico. - Page 41 12 RTD tipo Pt 100 -199 / 999 °F (LME) P4 = Azione uscita 1 (LDE) -328 / 1472 °F Questo parametro non è modificabile se P5=5 rEU = inversa (Riscaldamento) 13 TC tipo 0 / 752 °F dir = diretta (Raffreddamento)
- Page 42 P6 = Configurazione uscita 2 P8 = Mascheratura dell’ allarme1 P6 non viene visualizzato quando P5 = 0. Disponibile solo se P5 è uguale a 1, 2 o 3. OFF = mascheratura disabilitata Se P5 = 1, 3 o 4: H.
- Page 43 NOTA: Ad una successiva visualizzazione del modello LME : tra P17 o P18 e 99,9% modello LDE : tra P17 o P18 e 100.0%. parametro P11, lo strumento visualizza il valore 2 per qualsiasi valore di P11 compreso tra 2 e 999.
- Page 44 0. Puo assumere i seguenti valori: modello LME : tra 0.1 (10 secondi) e 2.0 (2 minuti) Note: modello LDE : tra 00.01 (1 secondo) e 02.00 (2 1) Selezionare il valore di P22 in funzione minuti) dell'hardware installato.
- Page 45 sempre essere modificata ma il nuovo valore Timer modo 3 [P22=7] sarà operativo solo per i successivi conteggi del Quando il contatto è chiuso, lo strumento regola tempo. utilizzando SP come set point operativo. Quando il contatto viene aperto lo strumento opera come segue: Timer modo 1 [P22=5] - seleziona SP2 come set point operativo;...
- Page 46 Timer modo 5 [P22=9] 2) L'uscita dalla modalità "Power OFF" abilita la Lo strumento parte in modo "Power OFF" e resta funzione "Soft start" e la mascheratura degli in questa modalità fino a quanbo il contatto resta allarmi (se programmate). chiuso.
- Page 47 P23 = Configurazione Allarme 2 P26 = Soglia della funzione "guarantee soak" Disponibile solo se P22 =1, 2 o 3. P26 è disponibile quando P22 è maggiore di 5. Se P22 = 1 o 3 Questa funzione ferma automaticamente il H.
-
Page 48: Modo Operativo
(questa condizione viene definita in seguito ne abiliterà la modifica. come "Visualizzazione normale"). NOTE : - Il modello LDE visualizza il valore misurato (que- 1) Quando la funzione SMART è operativa, il sta condizione viene definita in seguito come guadagno relativo di raffreddamento (se "Visualizzazione normale") o, in alternativa, il set... -
Page 49: Inibizione Del Segnale Di Uscita
5.4 VISUALIZZAZIONE DEL SET POINT Per inibire il segnale di uscita premere il tasto s IMPOSTATO (modello LDE) e, mantenendolo premuto, premere il tasto FUNC Per visualizzare il set point impostato, premere il tasto s. Il led SP si illuminerà. -
Page 50: Descrizione Dei Modi Timer
LDE - Gestione del display: LDE - Gestione del display: LDE - Gestione del display: LDE - Gestione del display: LDE - Gestione del display: quando lo 2 come set point operativo (temperatura di stand- strumento fa partire il conteggio del tempo, il bay). - Page 51 LDE - Gestione del display: quando lo strumento LDE - Gestione del display: quando lo strumento fa partire il conteggio del tempo, il display fa partire il conteggio del tempo, il display visualizza conteggio a ritroso del tempo.
- Page 52 - inizia a regolare usando SP come set point LDE - Gestione del display: quando lo strumento fa operativo; partire il conteggio del tempo, il display visualizza - inizia il conto alla rovescia del tempo;...
-
Page 53: Riarmo Manuale Dell'allarme
LDE - Gestione del display: quando lo strumento fa Quando il conteggio del tempo arriva a 0, lo partire il conteggio del tempo, il display visualizza strumento torna in modo "Power OFF". conteggio a ritroso del tempo. Premendo il tasto è... -
Page 54: Funzione "Soft Start
Quando si desidera tornare al modo normale di °F acceso se la temperatura è visualizzata in °F visualizzazione, premere nuovamente i tasti t e (solo LDE) acceso quando lo strumento FUNC. visualizza il set point di regolazione. Durante il LAMP TEST non sono disponibili altre Inoltre: funzioni. -
Page 55: Parametri Operativi
5.13 PARAMETRI OPERATIVI Param.Descrizione Segue la lista completa dei parametri di controllo. Set point (in unità ingegneristiche) Si noti che alcuni parametri potrebbero non essere Campo: da rL a rH. n. r S n. r S n. r S n. r S n. - Page 56 Campo modello LME: da 0.1 a 20.0 mm.s - da -199 a 500 unità per allarme di (minuti e decine di secondi). deviazione (P5=3). Campo modello LDE: da 00.01 a 20.00 Isteresi dell'allarme 2 mm.ss (minuti e secondi) Disponibile solo se P22 = 1, 2 o 3 Oltre il valore massimo il display si oscura Campo: da 0.1 a 10.0 (in % del campo di...
- Page 57 Campo: da 1 a 200 s. in qualsiasi momento, ma il nuovo valore Guadagno relativo di raffreddamento. diventerà operativo solo alla successiva ac- Disponibile solo quando Pb ≠ 0 e P5 = 5. censione dello strumento, a meno che il nuovo valore non sia Inf Inf.
-
Page 58: Messaggi Di Errore
L'esempio mostra la visualizzazione del modello valore misurabile. LME. Il modello LDE visualizza 4 digit. Per eliminare l'indicazione di fuori campo, La rottura del sensore viene segnalata come procedere come segue:... -
Page 59: Messaggi Di Errore
Contattare il fornitore. codice che identifica il tipo di errore nel display superiore. LDE : la scritta "E E E E E " + il codice relativo al tipo di errore. Segue la lista completa di tutti i possibili errori in ordine numerico. -
Page 60: Caratteristiche Tecniche
< 500 ppm/°C per ingresso RTD con 1/10°C di * le verifiche sono state eseguite in accordo gli risoluzione (modello LDE) standard CEI 70-1 e NEMA 250-1991. Temperatura di funzionamento: da 0 a 50 °C Installazione: Montaggio a pannello (da 32 a 122 °F). -
Page 61: Azioni Di Controllo
Tempo di campionamento: 300 ms. Campo di misura Portata contatto: 8 mA, 8 V DC. di TC NOTE: Tra parentesi i dati del modello LDE 1) Le opzioni "OUT 3" e "ingresso logico" sono mutuamente esclusive. 0 / +999 (1652) °F 0 / +900°C 2) L'ingresso logico NON è... -
Page 62: Uscite
7.4 USCITE Tramite il software è possibile gestire la configura- zione del dispositivo direttamente da PC. In USCITA 1 (Riscaldamento) questo caso, il display e la tastiera dello strumento Uscita a relè con contatto SPDT ; non sono operativi. a) portata contatto 3A / 250 V c.a. su carico resistivo. -
Page 63: Default Parameters
In normal display mode, held down t = 4.0 % pushbutton and press s pushbutton; the = 0.5 % display will show: = LME: 04.0 LDE: 04.00 (4 minutes) dl. f dl. f dl. f dl. f dl. f = LME: 1.00 LDE: 01.00 (1 minute) - Page 64 LDE (alternatively): Off f f f f f) Press s pushbutton to select between table 1 (european) or table 2 (american) default parameter set. The display will show: b) Push the t or s pushbutton; display will dL.
- Page 65 h) Press SMT and FUNC pushbutton for more than 3 secs. The following is a list of the default parameters loaded during the above procedure: PRODUCT PARAMETER TABLE 1 TABLE 2 TABLE 1 TABLE 2 0 °C 0 °F 0 °C 0 °F 400 °C 1000 °F...
- Page 66 If it is desired to keep the codes secret, cut this page along the run time security codes of the instrument. dotted line. Run time security code Tag name LDE - LME Tag number Configuration security code Master key (Passe-partout code) B. 4 lxe-a-B00.p65...
- Page 67 B. 5 lxe-a-B00.p65 10/18/02, 3:45 PM...
- Page 68 via E. Mattei, 21 28100 Novara Italy Tel. +39 0321 481111 Fax. +39 0321 481112 E-mail eroelectronic@ero.eurotherm.co.uk Http://www.eroelectronic.com lxe-a-B00.p65 10/18/02, 3:45 PM...
Need help?
Do you have a question about the LDE and is the answer not in the manual?
Questions and answers
NON RIESCO A SBLOCCARE I PARAMETRI
To unlock the settings on the ERO Electronic LDE:
1. Check parameter P11:
- If P11 = 0: All operating parameters can be viewed and modified. No code is needed.
- If P11 = 1: Access may be restricted depending on P14.
2. Check parameter P14:
- If P14 = ON: Only SP, SP2, and t can be modified. Other parameters are view-only. Access to configuration requires entering the passcode.
- If P14 = OFF: Only SP, SP2, and t can be viewed and modified. Access to configuration requires entering the passcode.
3. To switch from LOCK to UNLOCK:
- Set the software key (lock parameter) to the same value as P11.
4. To switch from UNLOCK to LOCK:
- Set the software key to a value different from P11.
This answer is automatically generated