Table of Contents
Advertisement
Quick Links
Download this manual
See also:
Manual
Welcome:
Much investment in time and effort has gone into its development, and it is our hope
Safety Notice:
1. Do not drop, puncture or disassemble the device; otherwise the warranty will be voided.
2. Avoid all contact with water, and dry hands before using.
3. Do not expose the device to high temperature or leave it in direct sunlight. Doing so may
damage the device.
4. Use the device with care. Avoid pressing hard on the device body.
5. For your own safety, avoid using the device when there is a storm or lightning.
FCC Compliance Statement:
This device complies with Part 15 of the FCC Rules. Operation is
subjected to the following two conditions: (1) this device may not cause
harmful interference, and (2) this device must accept any interference
received, including interference that may cause undesired operation.
This equipment has been tested and found to comply with limits for a
Class B digital device, pursuant to Part 15 of the FCC rules. These limits
are designed to provide reasonable protection against harmful interference in residential
installations. This equipment generates, uses, and can radiate radio frequency energy, and if
not installed and used in accordance with the instructions, may cause harmful interference to
radio communications.
However, there is no guarantee that interference will not occur in a particular installation. If this
equipment does cause interference to radio or television equipment reception, which can be
determined by turning the equipment off and on, the user is encouraged to try to correct the
interference by one or more of the following measures:
-Reorient or relocate the receiving antenna.
-Move the equipment away from the receiver.
-Plug the equipment into an outlet on a circuit different from that to which the receiver is
connected.
-Consult the dealer or an experienced radio/television technician for additional suggestions.
by the party responsible for compliance could void Your authority to operate such equipment.
If the time arises to throw away your product,
please recycle all the components possible.
Batteries and rechargeable batteries are
not to be disposed in your domestic waste!
Please recycle them at your local recycling
point.
Together we can help to protect the environ-
ment.
1
Advertisement
Table of Contents

Subscribe to Our Youtube Channel
Related Manuals for AIPTEK T20


Summary of Contents for AIPTEK T20
- Page 1 Welcome: Much investment in time and effort has gone into its development, and it is our hope Safety Notice: 1. Do not drop, puncture or disassemble the device; otherwise the warranty will be voided. 2. Avoid all contact with water, and dry hands before using. 3.
-
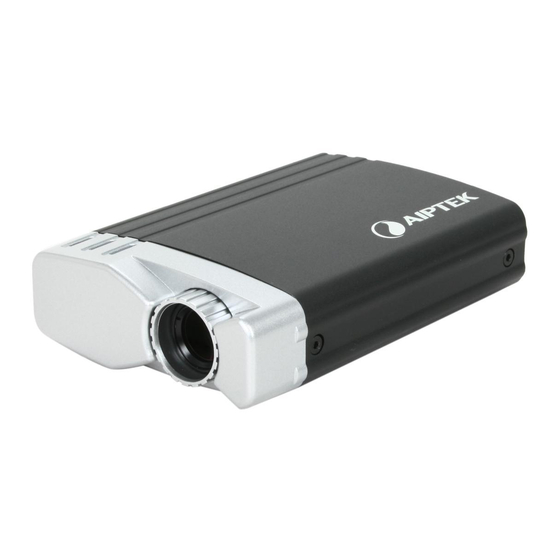
Page 2: Package Content
Introduction This USB projector is to be powered and project Notebook screen via USB port. It is an ideal projector for mobile Notebook users doing small group below to install your USB projector. Package Content Following items are inclueded: - USB projector - USB cable - Tri-pod - User’s guide... -
Page 3: Hardware Installation
Installation Hardware Installation 1. Please make sure the Mode switch is set to “Auto Installation” mode. 2. Connect the mini USB connector of the USB cable to the USB port of the projector. 3. Connect the other end of the USB cable (marked logo) to a powered PC. - Page 4 2. Check Accept and click Next to continue. 3. Installing driver. 4. Click Continue Anyway to continue the installation. (*The actual screen may vary depending on the operating system you use.)
- Page 5 5. Please re-start your PC when driver installation is completed, and then turn Mode switch to “Projection” mode.
- Page 6 6. After your PC is re-started completely, please unplug the USB cable for a second and re-plug the USB cable to activate the projector driver. 7. W ) on the function bar of your PC. Note 1: In projection mode the resolution of your notebook screen will be reduced to an equal resolution 640 x 480, same as the resolution of notebook projector.
-
Page 7: Device Driver Un-Installation
Note: Next time you connect the USB projector to a different USB port of a powered PC, the driver installation will be installed again. It’s normal since the USB port didn’t recognize the USB projector in the beginning. The following procedure allows you to verify the device driver installation. Please right click “My Computer”... - Page 8 Step 2: Unplug the device and click “OK” to continue. Step 3: Select “Yes, I want to restart my computer now” and click “Finish” to reboot. After reboot, you will complete the driver un-installation. Setup your USB projector After installation please plug both USB connectors to your Notebook/Netbook ) shown on the function bar of your PC.
- Page 9 Select your preference keys as the Hotkey of the different display modes on the dialog. - USB Projector (Primary) mode: This mode is to set USB projector screen as the primary monitor. (1): primary screen (2): no screen Note: Please be advised that some display utility and drivers that be shipped with certain and built-in display adapters may prevent this option from working on some systems.
- Page 10 - USB Projector (Extended) mode: This mode is to set USB projector screen as the second monitor. You can drag the application program to the right direction and it will display on the USB projector screen. (1): primary screen (2): secondary screen - USB Projector (Mirror) mode: This mode is to project the same screen on LCD panel of Notebook PC to USB projector.
- Page 11 Optical Technology LCoS Light Source White LED Aspect Ration Resolution Zoom & Focus Manual Display mode Primary, Extended, Mirror and Off modes Projection Source Power Supply From Notebook or Notebook PC USB port(s) Driver installation Auto installation from projector Weight 117g Dimension...
- Page 12 Application Notes or Application Q & A Q: Why can’t we make this USB Projector primary display? A: Some video cards ship their product with a utility that prevents other video cards from being set as the primary card. Check the bottom right hand corner taskbar for the utility.
-
Page 13: Troubleshooting Tips
Troubleshooting Tips The following trouble shooting tips may help if you are experiencing the Check to make sure that all connectors are plugged in correctly. Make sure the USB port is USB 2.0. Try a different USB 2.0 port or another computer. Check the power led indicator is ON.
Need help?
Do you have a question about the T20 and is the answer not in the manual?
Questions and answers